Previously on … Network Namespaces - Part Two we provided internet access to the namespace, enabled a different DNS than our system and run a graphical application (xterm/firefox) from within.
The scope of this article is to run vpn service from this namespace. We will run a vpn-client and try to enable firewall rules inside.
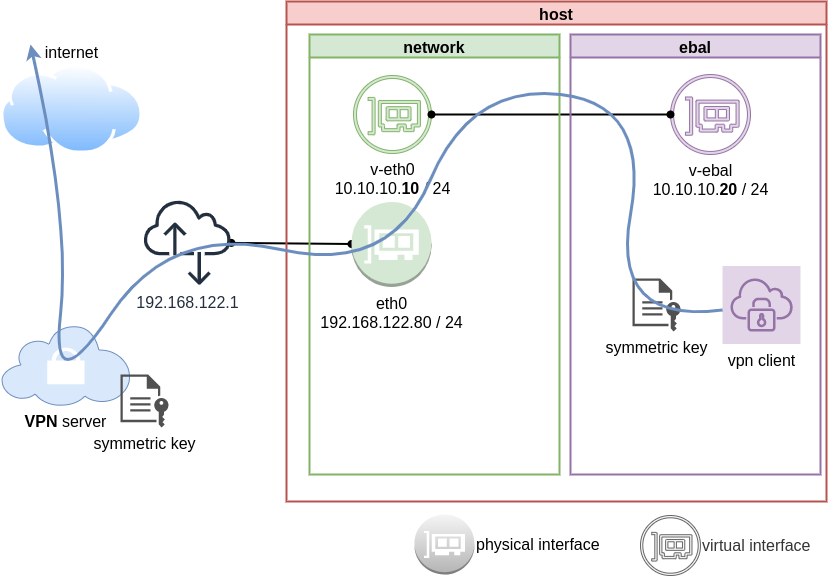
dsvpn
My VPN choice of preference is dsvpn and you can read in the below blog post, how to setup it.
dsvpn is a TCP, point-to-point VPN, using a symmetric key.
The instructions in this article will give you an understanding how to run a different vpn service.
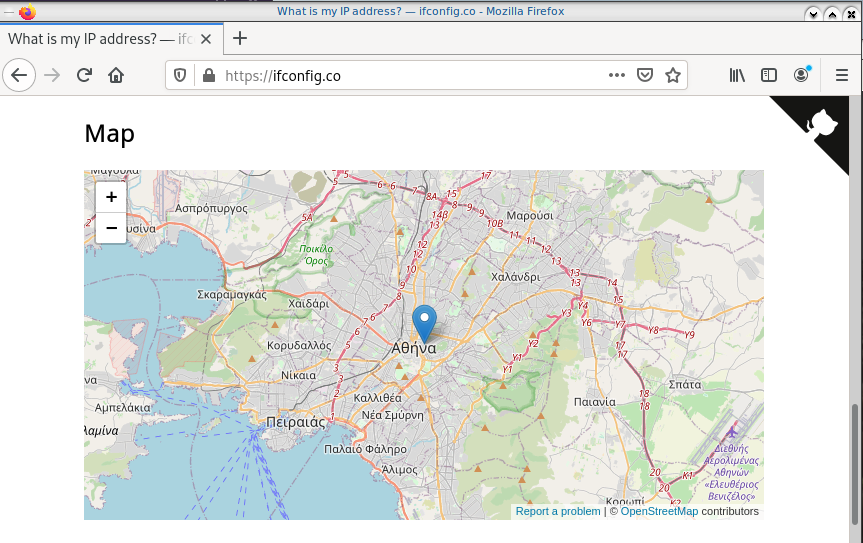
Find your external IP
Before running the vpn client, let’s see what is our current external IP address
ip netns exec ebal curl ifconfig.co
62.103.103.103
The above IP is an example.
IP address and route of the namespace
ip netns exec ebal ip address show v-ebal
375: v-ebal@if376: <BROADCAST,MULTICAST,UP,LOWER_UP> mtu 1500 qdisc noqueue state UP group default qlen 1000
    link/ether c2:f3:a4:8a:41:47 brd ff:ff:ff:ff:ff:ff link-netnsid 0
    inet 10.10.10.20/24 scope global v-ebal
       valid_lft forever preferred_lft forever
    inet6 fe80::c0f3:a4ff:fe8a:4147/64 scope link
       valid_lft forever preferred_lft forever
ip netns exec ebal ip route show
default via 10.10.10.10 dev v-ebal
10.10.10.0/24 dev v-ebal proto kernel scope link src 10.10.10.20
Firefox
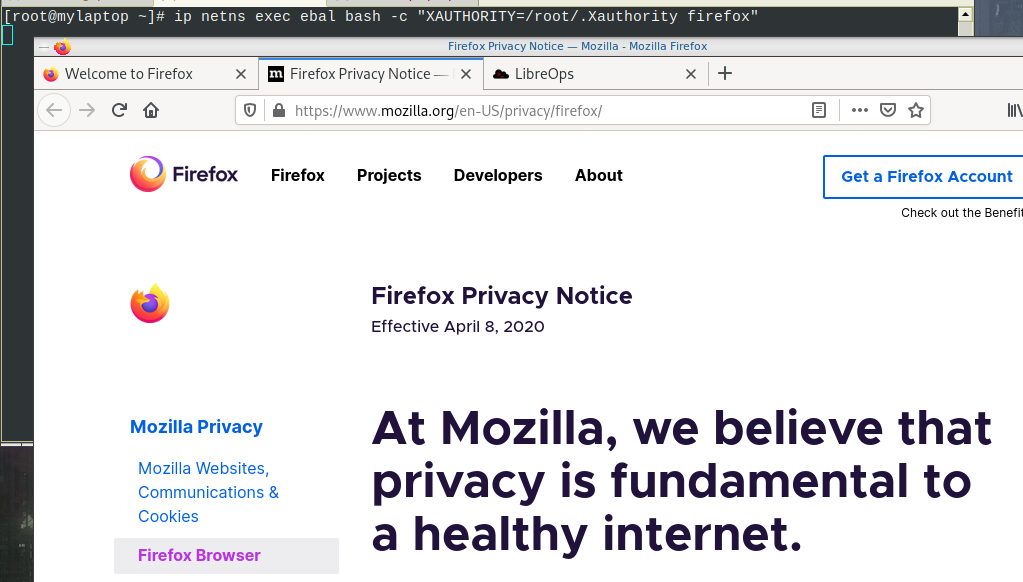
Open firefox (see part-two) and visit ifconfig.co we noticed see that the location of our IP is based in Athens, Greece.
ip netns exec ebal bash -c "XAUTHORITY=/root/.Xauthority firefox"
Run VPN client
We have the symmetric key dsvpn.key and we know the VPN server’s IP.
ip netns exec ebal dsvpn client dsvpn.key 93.184.216.34 443
Interface: [tun0]
Trying to reconnect
Connecting to 93.184.216.34:443...
net.ipv4.tcp_congestion_control = bbr
Connected
Host
We can not see this tunnel vpn interface from our host machine
# ip link
1: lo: <LOOPBACK,UP,LOWER_UP> mtu 65536 qdisc noqueue state UNKNOWN mode DEFAULT group default qlen 1000
    link/loopback 00:00:00:00:00:00 brd 00:00:00:00:00:00
2: eth0: <BROADCAST,MULTICAST,UP,LOWER_UP> mtu 1500 qdisc fq_codel state UP mode DEFAULT group default qlen 1000
    link/ether 94:de:80:6a:de:0e brd ff:ff:ff:ff:ff:ff

376: v-eth0@if375: <BROADCAST,MULTICAST,UP,LOWER_UP> mtu 1500 qdisc noqueue state UP mode DEFAULT group default qlen 1000
    link/ether 1a:f7:c2:fb:60:ea brd ff:ff:ff:ff:ff:ff link-netns ebal
netns
but it exists inside the namespace, we can see tun0 interface here
ip netns exec ebal ip link
1: lo: <LOOPBACK> mtu 65536 qdisc noop state DOWN mode DEFAULT group default qlen 1000
    link/loopback 00:00:00:00:00:00 brd 00:00:00:00:00:00

3: tun0: <POINTOPOINT,MULTICAST,NOARP,UP,LOWER_UP> mtu 9000 qdisc fq_codel state UNKNOWN mode DEFAULT group default qlen 500
    link/none

375: v-ebal@if376: <BROADCAST,MULTICAST,UP,LOWER_UP> mtu 1500 qdisc noqueue state UP mode DEFAULT group default qlen 1000
    link/ether c2:f3:a4:8a:41:47 brd ff:ff:ff:ff:ff:ff link-netnsid 0
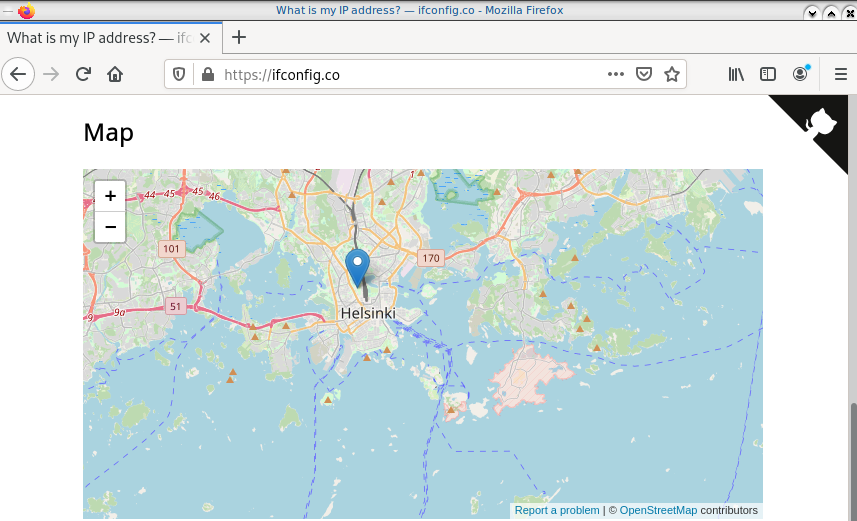
Find your external IP again
Checking your external internet IP from within the namespace
ip netns exec ebal curl ifconfig.co
93.184.216.34Firefox netns
running again firefox, we will noticed that our the location of our IP is based in Helsinki (vpn server’s location).
ip netns exec ebal bash -c "XAUTHORITY=/root/.Xauthority firefox"
systemd
We can wrap the dsvpn client under a systemcd service
[Unit]
Description=Dead Simple VPN - Client

[Service]
ExecStart=ip netns exec ebal /usr/local/bin/dsvpn client /root/dsvpn.key 93.184.216.34 443
Restart=always
RestartSec=20

[Install]
WantedBy=network.target
Start systemd service
systemctl start dsvpn.service
Verify
ip -n ebal a
1: lo: <LOOPBACK> mtu 65536 qdisc noop state DOWN group default qlen 1000
    link/loopback 00:00:00:00:00:00 brd 00:00:00:00:00:00

4: tun0: <POINTOPOINT,MULTICAST,NOARP,UP,LOWER_UP> mtu 9000 qdisc fq_codel state UNKNOWN group default qlen 500
    link/none
    inet 192.168.192.1 peer 192.168.192.254/32 scope global tun0
       valid_lft forever preferred_lft forever
    inet6 64:ff9b::c0a8:c001 peer 64:ff9b::c0a8:c0fe/96 scope global
       valid_lft forever preferred_lft forever
    inet6 fe80::ee69:bdd8:3554:d81/64 scope link stable-privacy
       valid_lft forever preferred_lft forever

375: v-ebal@if376: <BROADCAST,MULTICAST,UP,LOWER_UP> mtu 1500 qdisc noqueue state UP group default qlen 1000
    link/ether c2:f3:a4:8a:41:47 brd ff:ff:ff:ff:ff:ff link-netnsid 0
    inet 10.10.10.20/24 scope global v-ebal
       valid_lft forever preferred_lft forever
    inet6 fe80::c0f3:a4ff:fe8a:4147/64 scope link
       valid_lft forever preferred_lft forever
ip -n ebal route
default via 10.10.10.10 dev v-ebal
10.10.10.0/24 dev v-ebal proto kernel scope link src 10.10.10.20
192.168.192.254 dev tun0 proto kernel scope link src 192.168.192.1
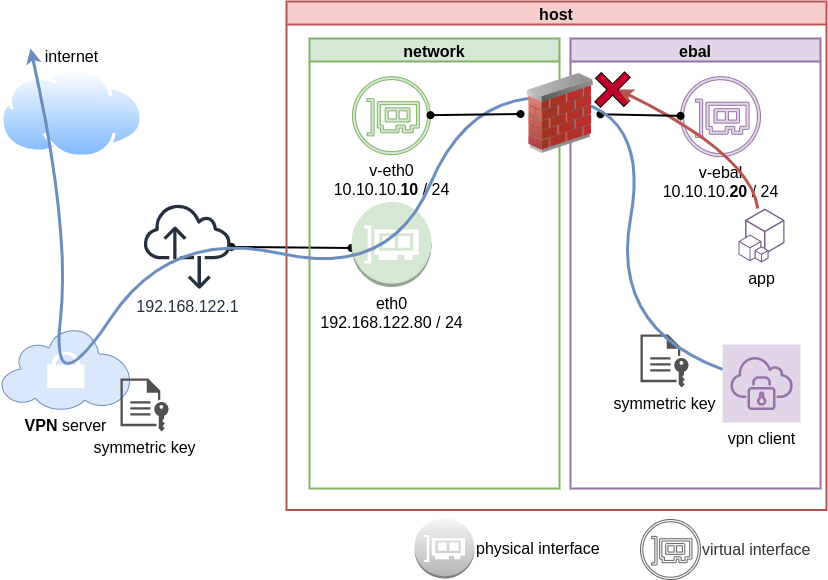
Firewall
We can also have different firewall policies for each namespace
outside
# iptables -nvL | wc -l
127
inside
ip netns exec ebal iptables -nvL
Chain INPUT (policy ACCEPT 9 packets, 2547 bytes)
 pkts bytes target     prot opt in     out     source        destination

Chain FORWARD (policy ACCEPT 0 packets, 0 bytes)
 pkts bytes target     prot opt in     out     source        destination

Chain OUTPUT (policy ACCEPT 2 packets, 216 bytes)
 pkts bytes target     prot opt in     out     source        destination
So for the VPN service running inside the namespace, we can REJECT every network traffic, except the traffic towards our VPN server and of course the veth interface (point-to-point) to our host machine.
iptable rules
Enter the namespace
inside
ip netns exec ebal bash
Before
verify that iptables rules are clear
iptables -nvL
Chain INPUT (policy ACCEPT 25 packets, 7373 bytes)
 pkts bytes target     prot opt in     out     source        destination

Chain FORWARD (policy ACCEPT 0 packets, 0 bytes)
 pkts bytes target     prot opt in     out     source        destination

Chain OUTPUT (policy ACCEPT 4 packets, 376 bytes)
 pkts bytes target     prot opt in     out     source        destination
Enable firewall
./iptables.netns.ebal.sh
The content of this file
## iptable rules

iptables -A INPUT -i lo -j ACCEPT
iptables -A INPUT -m conntrack --ctstate RELATED,ESTABLISHED -j ACCEPT
iptables -A INPUT -m conntrack --ctstate INVALID -j DROP
iptables -A INPUT -p icmp --icmp-type 8 -m conntrack --ctstate NEW -j ACCEPT

## netns - incoming
iptables -A INPUT -i v-ebal -s 10.0.0.0/8 -j ACCEPT

## Reject incoming traffic
iptables -A INPUT -j REJECT

## DSVPN
iptables -A OUTPUT -p tcp -m tcp -o v-ebal -d 93.184.216.34 --dport 443 -j ACCEPT

## net-ns outgoing
iptables -A OUTPUT -o v-ebal -d 10.0.0.0/8 -j ACCEPT

## Allow tun
iptables -A OUTPUT -o tun+ -j ACCEPT

## Reject outgoing traffic
iptables -A OUTPUT -p tcp -j REJECT --reject-with tcp-reset
iptables -A OUTPUT -p udp -j REJECT --reject-with icmp-port-unreachable
After
iptables -nvL
Chain INPUT (policy ACCEPT 0 packets, 0 bytes)
 pkts bytes target     prot opt in     out     source        destination
    0     0 ACCEPT     all  --  lo     *       0.0.0.0/0     0.0.0.0/0
    0     0 ACCEPT     all  --  *      *       0.0.0.0/0     0.0.0.0/0     ctstate RELATED,ESTABLISHED
    0     0 DROP       all  --  *      *       0.0.0.0/0     0.0.0.0/0     ctstate INVALID
    0     0 ACCEPT     icmp --  *      *       0.0.0.0/0     0.0.0.0/0     icmptype 8 ctstate NEW
    1   349 ACCEPT     all  --  v-ebal *       10.0.0.0/8    0.0.0.0/0
    0     0 REJECT     all  --  *      *       0.0.0.0/0     0.0.0.0/0     reject-with icmp-port-unreachable
    0     0 ACCEPT     all  --  lo     *       0.0.0.0/0     0.0.0.0/0
    0     0 ACCEPT     all  --  *      *       0.0.0.0/0     0.0.0.0/0     ctstate RELATED,ESTABLISHED
    0     0 DROP       all  --  *      *       0.0.0.0/0     0.0.0.0/0     ctstate INVALID
    0     0 ACCEPT     icmp --  *      *       0.0.0.0/0     0.0.0.0/0     icmptype 8 ctstate NEW
    0     0 ACCEPT     all  --  v-ebal *       10.0.0.0/8    0.0.0.0/0
    0     0 REJECT     all  --  *      *       0.0.0.0/0     0.0.0.0/0     reject-with icmp-port-unreachable

Chain FORWARD (policy ACCEPT 0 packets, 0 bytes)
 pkts bytes target     prot opt in     out     source        destination

Chain OUTPUT (policy ACCEPT 0 packets, 0 bytes)
 pkts bytes target     prot opt in     out     source        destination
    0     0 ACCEPT     tcp  --  *      v-ebal  0.0.0.0/0     95.216.215.96 tcp dpt:8443
    0     0 ACCEPT     all  --  *      v-ebal  0.0.0.0/0     10.0.0.0/8
    0     0 ACCEPT     all  --  *      tun+    0.0.0.0/0     0.0.0.0/0
    0     0 REJECT     tcp  --  *      *       0.0.0.0/0     0.0.0.0/0     reject-with tcp-reset
    0     0 REJECT     udp  --  *      *       0.0.0.0/0     0.0.0.0/0     reject-with icmp-port-unreachable
PS: We reject tcp/udp traffic (last 2 linew), but allow icmp (ping).
End of part three.
Previously on… Network Namespaces - Part One we discussed how to create an isolated network namespace and use a veth interfaces to talk between the host system and the namespace.
In this article we continue our story and we will try to connect that namespace to the internet.
recap previous commands
ip netns add ebal
ip link add v-eth0 type veth peer name v-ebal
ip link set v-ebal netns ebal
ip addr add 10.10.10.10/24 dev v-eth0
ip netns exec ebal ip addr add 10.10.10.20/24 dev v-ebal
ip link set v-eth0 up
ip netns exec ebal ip link set v-ebal up
Access namespace
ip netns exec ebal bash
# ip a
1: lo: <LOOPBACK> mtu 65536 qdisc noop state DOWN group default qlen 1000
    link/loopback 00:00:00:00:00:00 brd 00:00:00:00:00:00

3: v-ebal@if4: <BROADCAST,MULTICAST,UP,LOWER_UP> mtu 1500 qdisc noqueue state UP group default qlen 1000
    link/ether e2:07:60:da:d5:cf brd ff:ff:ff:ff:ff:ff link-netnsid 0
    inet 10.10.10.20/24 scope global v-ebal
       valid_lft forever preferred_lft forever
    inet6 fe80::e007:60ff:feda:d5cf/64 scope link
       valid_lft forever preferred_lft forever

# ip r
10.10.10.0/24 dev v-ebal proto kernel scope link src 10.10.10.20
Ping Veth
It’s not a gateway, this is a point-to-point connection.
# ping -c3 10.10.10.10

PING 10.10.10.10 (10.10.10.10) 56(84) bytes of data.
64 bytes from 10.10.10.10: icmp_seq=1 ttl=64 time=0.415 ms
64 bytes from 10.10.10.10: icmp_seq=2 ttl=64 time=0.107 ms
64 bytes from 10.10.10.10: icmp_seq=3 ttl=64 time=0.126 ms

--- 10.10.10.10 ping statistics ---
3 packets transmitted, 3 received, 0% packet loss, time 2008ms
rtt min/avg/max/mdev = 0.107/0.216/0.415/0.140 ms
Ping internet
trying to access anything else …
ip netns exec ebal ping -c2 192.168.122.80
ip netns exec ebal ping -c2 192.168.122.1
ip netns exec ebal ping -c2 8.8.8.8
ip netns exec ebal ping -c2 google.com
root@ubuntu2004:~# ping 192.168.122.80
ping: connect: Network is unreachable

root@ubuntu2004:~# ping 8.8.8.8
ping: connect: Network is unreachable

root@ubuntu2004:~# ping google.com
ping: google.com: Temporary failure in name resolution

root@ubuntu2004:~# exit
exit
exit from namespace.
Gateway
We need to define a gateway route from within the namespace
ip netns exec ebal ip route add default via 10.10.10.10
root@ubuntu2004:~# ip netns exec ebal ip route list
default via 10.10.10.10 dev v-ebal
10.10.10.0/24 dev v-ebal proto kernel scope link src 10.10.10.20
test connectivity - system
we can reach the host system, but we can not visit anything else
# ip netns exec ebal ping -c1 192.168.122.80
PING 192.168.122.80 (192.168.122.80) 56(84) bytes of data.
64 bytes from 192.168.122.80: icmp_seq=1 ttl=64 time=0.075 ms

--- 192.168.122.80 ping statistics ---
1 packets transmitted, 1 received, 0% packet loss, time 0ms
rtt min/avg/max/mdev = 0.075/0.075/0.075/0.000 ms

# ip netns exec ebal ping -c3 192.168.122.80
PING 192.168.122.80 (192.168.122.80) 56(84) bytes of data.
64 bytes from 192.168.122.80: icmp_seq=1 ttl=64 time=0.026 ms
64 bytes from 192.168.122.80: icmp_seq=2 ttl=64 time=0.128 ms
64 bytes from 192.168.122.80: icmp_seq=3 ttl=64 time=0.126 ms

--- 192.168.122.80 ping statistics ---
3 packets transmitted, 3 received, 0% packet loss, time 2033ms
rtt min/avg/max/mdev = 0.026/0.093/0.128/0.047 ms

# ip netns exec ebal ping -c3 8.8.8.8
PING 8.8.8.8 (8.8.8.8) 56(84) bytes of data.

--- 8.8.8.8 ping statistics ---
3 packets transmitted, 0 received, 100% packet loss, time 2044ms

root@ubuntu2004:~# ip netns exec ebal ping -c3 google.com
ping: google.com: Temporary failure in name resolution
Forward
What is the issue here ?
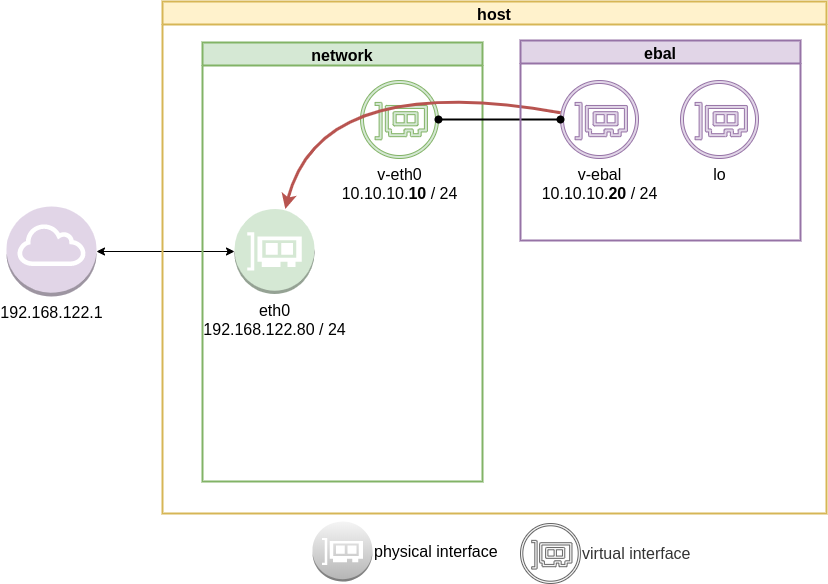
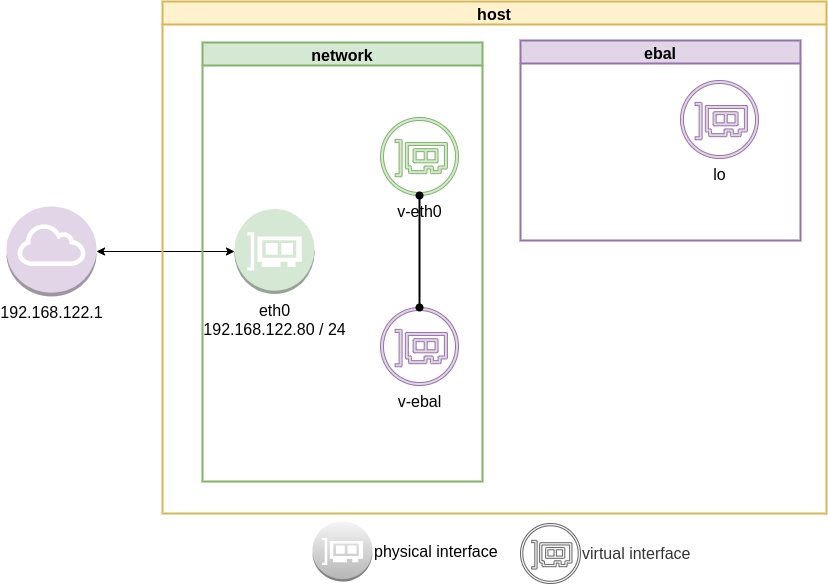
We added a default route to the network namespace. Traffic will start from our v-ebal (veth interface inside the namespace), goes to the v-eth0 (veth interface to our system) and then … then nothing.
The eth0 receive the network packages but does not know what to do with them. We need to create a forward rule to our host, so the eth0 network interface will know to forward traffic from the namespace to the next hop.
echo 1 > /proc/sys/net/ipv4/ip_forward
or
sysctl -w net.ipv4.ip_forward=1
permanent forward
If we need to permanent tell the eth0 to always forward traffic, then we need to edit /etc/sysctl.conf and add below line:
net.ipv4.ip_forward = 1
To enable this option without reboot our system
sysctl -p /etc/sysctl.conf
verify
root@ubuntu2004:~# sysctl net.ipv4.ip_forward
net.ipv4.ip_forward = 1
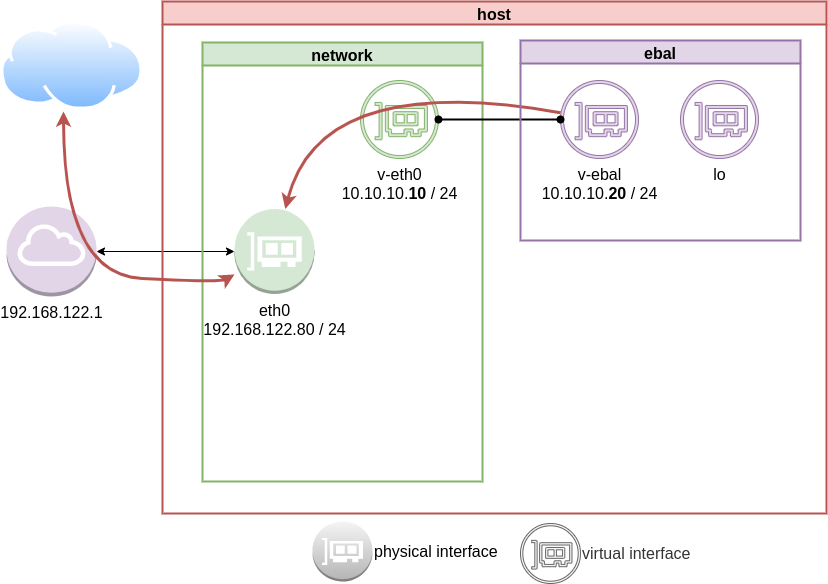
Masquerade
but if we test again, we will notice that nothing happened. Actually something indeed happened but not what we expected. At this moment, eth0 knows how to forward network packages to the next hope (perhaps next hope is the router or internet gateway) but next hop will get a package from an unknown network.
Remember that our internal network, is 10.10.10.20 with a point-to-point connection to 10.10.10.10. So there is no way for network 192.168.122.0/24 to know how to talk to 10.0.0.0/8.
We have to Masquerade all packages that come from 10.0.0.0/8 and the easiest way to do this if via iptables.
Using the postrouting nat table. That means the outgoing traffic with source 10.0.0.0/8 will have a mask, will pretend to be from 192.168.122.80 (eth0) before going to the next hop (gateway).
# iptables --table nat --flush
iptables --table nat --append POSTROUTING --source 10.0.0.0/8 --jump MASQUERADE
iptables --table nat --list
Chain PREROUTING (policy ACCEPT)
target     prot opt source               destination

Chain INPUT (policy ACCEPT)
target     prot opt source               destination

Chain OUTPUT (policy ACCEPT)
target     prot opt source               destination

Chain POSTROUTING (policy ACCEPT)
target     prot opt source               destination
MASQUERADE  all  --  10.0.0.0/8           anywhere
Test connectivity
test again the namespace connectivity
# ip netns exec ebal ping -c2 192.168.122.80
PING 192.168.122.80 (192.168.122.80) 56(84) bytes of data.
64 bytes from 192.168.122.80: icmp_seq=1 ttl=64 time=0.054 ms
64 bytes from 192.168.122.80: icmp_seq=2 ttl=64 time=0.139 ms

--- 192.168.122.80 ping statistics ---
2 packets transmitted, 2 received, 0% packet loss, time 1017ms
rtt min/avg/max/mdev = 0.054/0.096/0.139/0.042 ms

# ip netns exec ebal ping -c2 192.168.122.1
PING 192.168.122.1 (192.168.122.1) 56(84) bytes of data.
64 bytes from 192.168.122.1: icmp_seq=1 ttl=63 time=0.242 ms
64 bytes from 192.168.122.1: icmp_seq=2 ttl=63 time=0.636 ms

--- 192.168.122.1 ping statistics ---
2 packets transmitted, 2 received, 0% packet loss, time 1015ms
rtt min/avg/max/mdev = 0.242/0.439/0.636/0.197 ms

# ip netns exec ebal ping -c2 8.8.8.8
PING 8.8.8.8 (8.8.8.8) 56(84) bytes of data.
64 bytes from 8.8.8.8: icmp_seq=1 ttl=51 time=57.8 ms
64 bytes from 8.8.8.8: icmp_seq=2 ttl=51 time=58.0 ms

--- 8.8.8.8 ping statistics ---
2 packets transmitted, 2 received, 0% packet loss, time 1001ms
rtt min/avg/max/mdev = 57.805/57.896/57.988/0.091 ms

# ip netns exec ebal ping -c2 google.com
ping: google.com: Temporary failure in name resolution
success
DNS
almost!
If you carefully noticed above, ping on the IP works.
But no with name resolution.
netns - resolv
Reading ip-netns manual
# man ip-netns | tbl | grep resolv

  resolv.conf for a network namespace used to isolate your vpn you would name it /etc/netns/myvpn/resolv.conf.
we can create a resolver configuration file on this location:
/etc/netns/<namespace>/resolv.conf
mkdir -pv /etc/netns/ebal/
echo nameserver 88.198.92.222 > /etc/netns/ebal/resolv.conf
I am using radicalDNS for this namespace.
Verify DNS
# ip netns exec ebal cat /etc/resolv.conf
nameserver 88.198.92.222
Connect to the namespace
ip netns exec ebal bash
root@ubuntu2004:~# cat /etc/resolv.conf
nameserver 88.198.92.222

root@ubuntu2004:~# ping -c 5 ipv4.balaskas.gr
PING ipv4.balaskas.gr (158.255.214.14) 56(84) bytes of data.
64 bytes from ns14.balaskas.gr (158.255.214.14): icmp_seq=1 ttl=50 time=64.3 ms
64 bytes from ns14.balaskas.gr (158.255.214.14): icmp_seq=2 ttl=50 time=64.2 ms
64 bytes from ns14.balaskas.gr (158.255.214.14): icmp_seq=3 ttl=50 time=66.9 ms
64 bytes from ns14.balaskas.gr (158.255.214.14): icmp_seq=4 ttl=50 time=63.8 ms
64 bytes from ns14.balaskas.gr (158.255.214.14): icmp_seq=5 ttl=50 time=63.3 ms

--- ipv4.balaskas.gr ping statistics ---
5 packets transmitted, 5 received, 0% packet loss, time 4006ms
rtt min/avg/max/mdev = 63.344/64.502/66.908/1.246 ms

root@ubuntu2004:~# ping -c3 google.com
PING google.com (172.217.22.46) 56(84) bytes of data.
64 bytes from fra15s16-in-f14.1e100.net (172.217.22.46): icmp_seq=1 ttl=51 time=57.4 ms
64 bytes from fra15s16-in-f14.1e100.net (172.217.22.46): icmp_seq=2 ttl=51 time=55.4 ms
64 bytes from fra15s16-in-f14.1e100.net (172.217.22.46): icmp_seq=3 ttl=51 time=55.2 ms

--- google.com ping statistics ---
3 packets transmitted, 3 received, 0% packet loss, time 2003ms
rtt min/avg/max/mdev = 55.209/55.984/57.380/0.988 ms
bonus - run firefox from within namespace
xterm
start with something simple first, like xterm
ip netns exec ebal xterm
or
ip netns exec ebal xterm -fa liberation -fs 11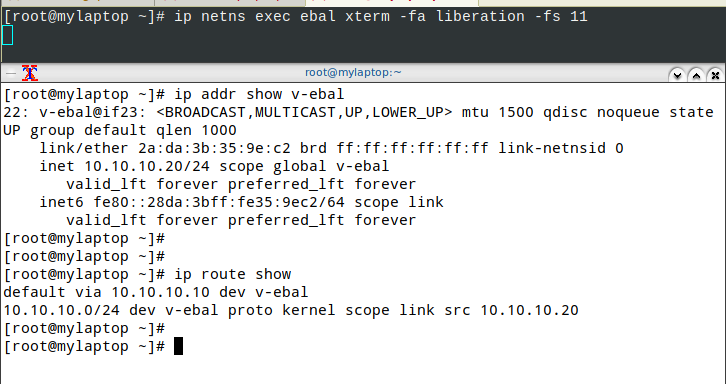
test firefox
trying to run firefox within this namespace, will produce an error
# ip netns exec ebal firefox
Running Firefox as root in a regular user's session is not supported.  ($XAUTHORITY is /home/ebal/.Xauthority which is owned by ebal.)
and xauth info will inform us, that the current Xauthority file is owned by our local user.
# xauth info
Authority file:       /home/ebal/.Xauthority
File new:             no
File locked:          no
Number of entries:    4
Changes honored:      yes
Changes made:         no
Current input:        (argv):1
okay, get inside this namespace
ip netns exec ebal bash
and provide a new authority file for firefox
XAUTHORITY=/root/.Xauthority firefox
# XAUTHORITY=/root/.Xauthority firefox

No protocol specified
Unable to init server: Could not connect: Connection refused
Error: cannot open display: :0.0
xhost
xhost provide access control to the Xorg graphical server.
By default should look like this:
$ xhost
access control enabled, only authorized clients can connect
We can also disable access control
xhost +
but what we need to do, is to disable access control on local
xhost +local:
firefox
and if we do all that
ip netns exec ebal bash -c "XAUTHORITY=/root/.Xauthority firefox"
End of part two
Have you ever wondered how containers work on the network level? How they isolate resources and network access? Linux namespaces is the magic behind all these and in this blog post, I will try to explain how to setup your own private, isolated network stack on your linux box.
notes based on ubuntu:20.04, root access.
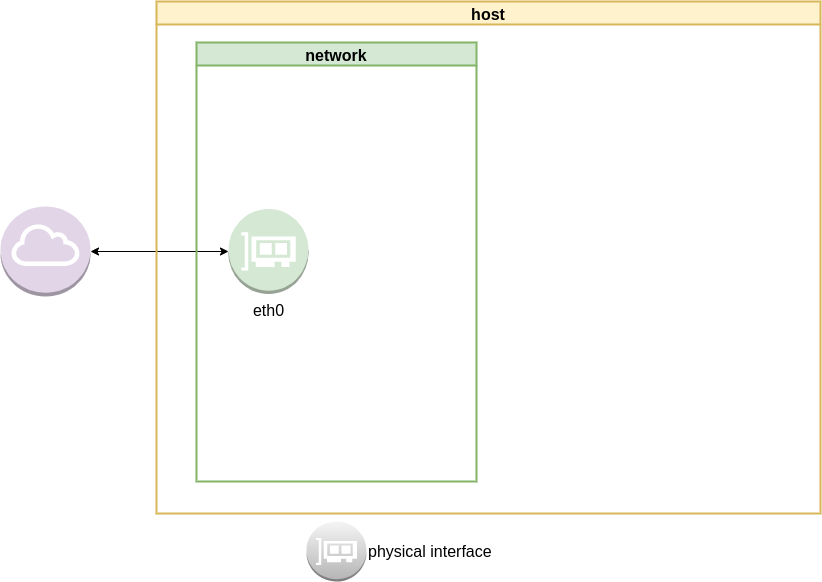
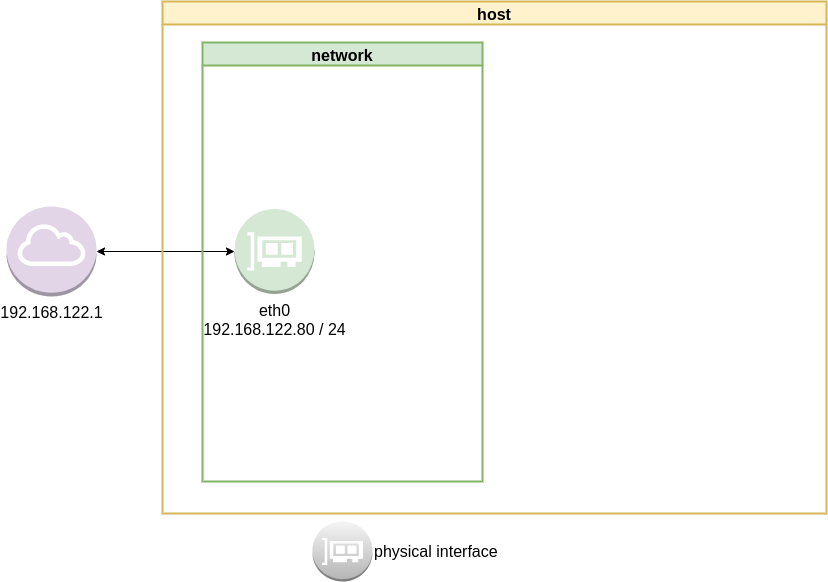
current setup
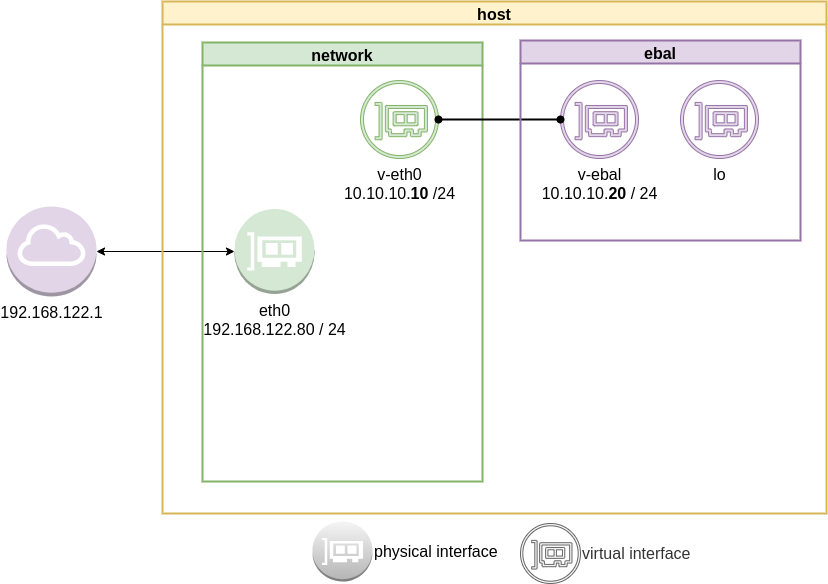
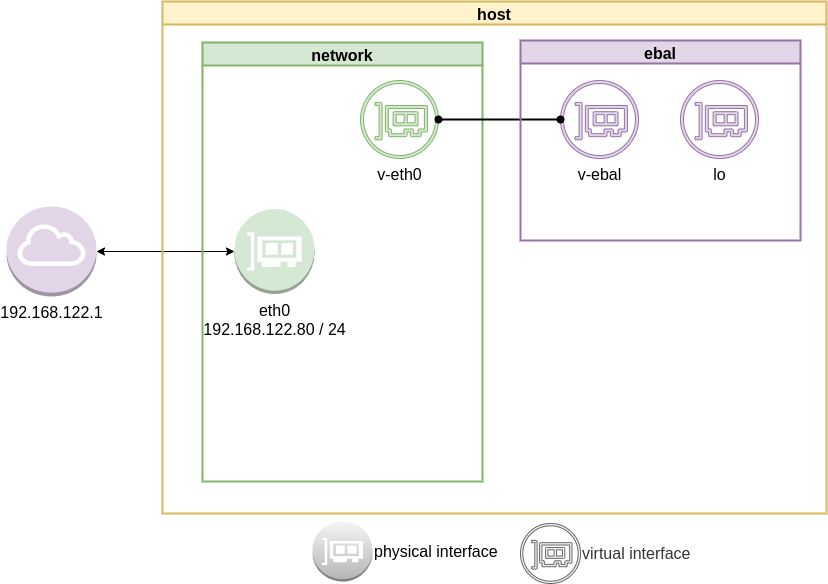
Our current setup is similar to this
List ethernet cards
ip address list
1: lo: <LOOPBACK,UP,LOWER_UP> mtu 65536 qdisc noqueue state UNKNOWN group default qlen 1000
    link/loopback 00:00:00:00:00:00 brd 00:00:00:00:00:00
    inet 127.0.0.1/8 scope host lo
       valid_lft forever preferred_lft forever
    inet6 ::1/128 scope host
       valid_lft forever preferred_lft forever
2: eth0: <BROADCAST,MULTICAST,UP,LOWER_UP> mtu 1500 qdisc fq_codel state UP group default qlen 1000
    link/ether 52:54:00:ea:50:87 brd ff:ff:ff:ff:ff:ff
    inet 192.168.122.80/24 brd 192.168.122.255 scope global eth0
       valid_lft forever preferred_lft forever
    inet6 fe80::5054:ff:feea:5087/64 scope link
       valid_lft forever preferred_lft forever
List routing table
ip route list
default via 192.168.122.1 dev eth0 proto static
192.168.122.0/24 dev eth0 proto kernel scope link src 192.168.122.80
Checking internet access and dns
ping -c 5 libreops.cc
PING libreops.cc (185.199.111.153) 56(84) bytes of data.
64 bytes from 185.199.111.153 (185.199.111.153): icmp_seq=1 ttl=54 time=121 ms
64 bytes from 185.199.111.153 (185.199.111.153): icmp_seq=2 ttl=54 time=124 ms
64 bytes from 185.199.111.153 (185.199.111.153): icmp_seq=3 ttl=54 time=182 ms
64 bytes from 185.199.111.153 (185.199.111.153): icmp_seq=4 ttl=54 time=162 ms
64 bytes from 185.199.111.153 (185.199.111.153): icmp_seq=5 ttl=54 time=168 ms

--- libreops.cc ping statistics ---
5 packets transmitted, 5 received, 0% packet loss, time 4004ms
rtt min/avg/max/mdev = 121.065/151.405/181.760/24.299 ms
linux network namespace management
In this article we will use the below programs:
so, let us start working with network namespaces.
list
To view the network namespaces, we can type:
ip netns
ip netns list
This will return nothing, an empty list.
help
So quicly view the help of ip-netns
# ip netns help

Usage:  ip netns list
  ip netns add NAME
  ip netns attach NAME PID
  ip netns set NAME NETNSID
  ip [-all] netns delete [NAME]
  ip netns identify [PID]
  ip netns pids NAME
  ip [-all] netns exec [NAME] cmd ...
  ip netns monitor
  ip netns list-id [target-nsid POSITIVE-INT] [nsid POSITIVE-INT]
NETNSID := auto | POSITIVE-INT
monitor
To monitor in real time any changes, we can open a new terminal and type:
ip netns monitor
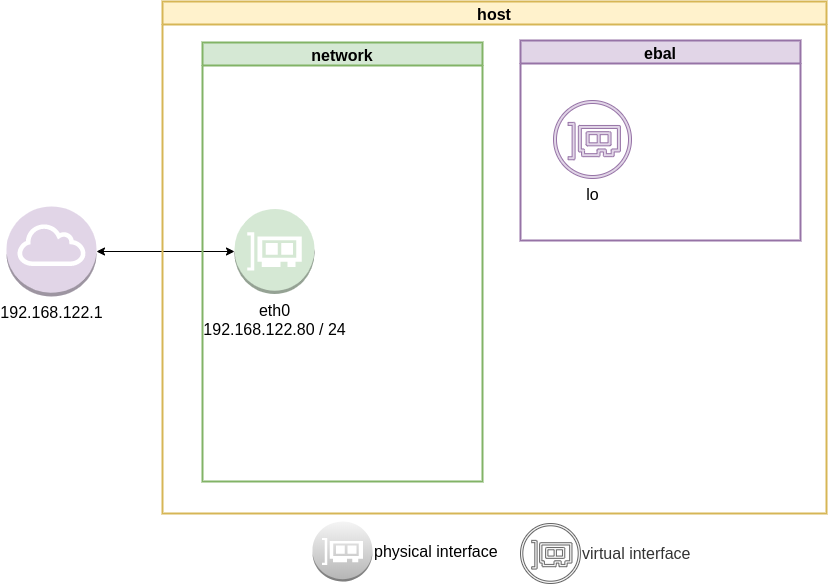
Add a new namespace
ip netns add ebal
List namespaces
ip netns list
root@ubuntu2004:~# ip netns add ebal
root@ubuntu2004:~# ip netns list
ebal
We have one namespace
Delete Namespace
ip netns del ebal
Full example
root@ubuntu2004:~# ip netns
root@ubuntu2004:~# ip netns list
root@ubuntu2004:~# ip netns add ebal
root@ubuntu2004:~# ip netns list
ebal
root@ubuntu2004:~# ip netns
ebal
root@ubuntu2004:~# ip netns del ebal
root@ubuntu2004:~#
root@ubuntu2004:~# ip netns
root@ubuntu2004:~# ip netns list
root@ubuntu2004:~#
monitor
root@ubuntu2004:~# ip netns monitor
add ebal
delete ebal
Directory
When we create a new network namespace, it creates an object under /var/run/netns/.
root@ubuntu2004:~# ls -l /var/run/netns/
total 0
-r--r--r-- 1 root root 0 May  9 16:44 ebal
exec
We can run commands inside a namespace.
eg.
ip netns exec ebal ip a
root@ubuntu2004:~# ip netns exec ebal ip a
1: lo: <LOOPBACK> mtu 65536 qdisc noop state DOWN group default qlen 1000
    link/loopback 00:00:00:00:00:00 brd 00:00:00:00:00:00
bash
we can also open a shell inside the namespace and run commands throught the shell.
eg.
root@ubuntu2004:~# ip netns exec ebal bash

root@ubuntu2004:~# ip a
1: lo: <LOOPBACK> mtu 65536 qdisc noop state DOWN group default qlen 1000
    link/loopback 00:00:00:00:00:00 brd 00:00:00:00:00:00

root@ubuntu2004:~# exit
exit
as you can see, the namespace is isolated from our system. It has only one local interface and nothing else.
We can bring up the loopback interface up
root@ubuntu2004:~# ip link set lo up

root@ubuntu2004:~# ip a
1: lo: <LOOPBACK,UP,LOWER_UP> mtu 65536 qdisc noqueue state UNKNOWN group default qlen 1000
    link/loopback 00:00:00:00:00:00 brd 00:00:00:00:00:00
    inet 127.0.0.1/8 scope host lo
       valid_lft forever preferred_lft forever
    inet6 ::1/128 scope host
       valid_lft forever preferred_lft forever

root@ubuntu2004:~# ip r
veth
The veth devices are virtual Ethernet devices. They can act as tunnels between network namespaces to create a bridge to a physical network device in another namespace, but can also be used as standalone network devices.
Think Veth as a physical cable that connects two different computers. Every veth is the end of this cable.
So we need 2 virtual interfaces to connect our system and the new namespace.
ip link add v-eth0 type veth peer name v-ebal
eg.
root@ubuntu2004:~# ip link add v-eth0 type veth peer name v-ebal

root@ubuntu2004:~# ip a
1: lo: <LOOPBACK,UP,LOWER_UP> mtu 65536 qdisc noqueue state UNKNOWN group default qlen 1000
    link/loopback 00:00:00:00:00:00 brd 00:00:00:00:00:00
    inet 127.0.0.1/8 scope host lo
       valid_lft forever preferred_lft forever
    inet6 ::1/128 scope host
       valid_lft forever preferred_lft forever

2: eth0: <BROADCAST,MULTICAST,UP,LOWER_UP> mtu 1500 qdisc fq_codel state UP group default qlen 1000
    link/ether 52:54:00:ea:50:87 brd ff:ff:ff:ff:ff:ff
    inet 192.168.122.80/24 brd 192.168.122.255 scope global eth0
       valid_lft forever preferred_lft forever
    inet6 fe80::5054:ff:feea:5087/64 scope link
       valid_lft forever preferred_lft forever

3: v-ebal@v-eth0: <BROADCAST,MULTICAST,M-DOWN> mtu 1500 qdisc noop state DOWN group default qlen 1000
    link/ether d6:86:88:3f:eb:42 brd ff:ff:ff:ff:ff:ff

4: v-eth0@v-ebal: <BROADCAST,MULTICAST,M-DOWN> mtu 1500 qdisc noop state DOWN group default qlen 1000
    link/ether 3e:85:9b:dd:c7:96 brd ff:ff:ff:ff:ff:ff
Attach veth0 to namespace
Now we are going to move one virtual interface (one end of the cable) to the new network namespace
ip link set v-ebal netns ebal
we will see that the interface is not showing on our system
root@ubuntu2004:~# ip a
1: lo: <LOOPBACK,UP,LOWER_UP> mtu 65536 qdisc noqueue state UNKNOWN group default qlen 1000
    link/loopback 00:00:00:00:00:00 brd 00:00:00:00:00:00
    inet 127.0.0.1/8 scope host lo
       valid_lft forever preferred_lft forever
    inet6 ::1/128 scope host
       valid_lft forever preferred_lft forever

2: eth0: <BROADCAST,MULTICAST,UP,LOWER_UP> mtu 1500 qdisc fq_codel state UP group default qlen 1000
    link/ether 52:54:00:ea:50:87 brd ff:ff:ff:ff:ff:ff
    inet 192.168.122.80/24 brd 192.168.122.255 scope global eth0
       valid_lft forever preferred_lft forever
    inet6 fe80::5054:ff:feea:5087/64 scope link
       valid_lft forever preferred_lft forever

4: v-eth0@if3: <BROADCAST,MULTICAST> mtu 1500 qdisc noop state DOWN group default qlen 1000
    link/ether 3e:85:9b:dd:c7:96 brd ff:ff:ff:ff:ff:ff link-netns ebal
inside the namespace
root@ubuntu2004:~# ip netns exec ebal ip a

1: lo: <LOOPBACK,UP,LOWER_UP> mtu 65536 qdisc noqueue state UNKNOWN group default qlen 1000
    link/loopback 00:00:00:00:00:00 brd 00:00:00:00:00:00
    inet 127.0.0.1/8 scope host lo
       valid_lft forever preferred_lft forever
    inet6 ::1/128 scope host
       valid_lft forever preferred_lft forever

3: v-ebal@if4: <BROADCAST,MULTICAST> mtu 1500 qdisc noop state DOWN group default qlen 1000
    link/ether d6:86:88:3f:eb:42 brd ff:ff:ff:ff:ff:ff link-netnsid 0
Connect the two virtual interfaces
outside
ip addr add 10.10.10.10/24 dev v-eth0
root@ubuntu2004:~# ip a
1: lo: <LOOPBACK,UP,LOWER_UP> mtu 65536 qdisc noqueue state UNKNOWN group default qlen 1000
    link/loopback 00:00:00:00:00:00 brd 00:00:00:00:00:00
    inet 127.0.0.1/8 scope host lo
       valid_lft forever preferred_lft forever
    inet6 ::1/128 scope host
       valid_lft forever preferred_lft forever

2: eth0: <BROADCAST,MULTICAST,UP,LOWER_UP> mtu 1500 qdisc fq_codel state UP group default qlen 1000
    link/ether 52:54:00:ea:50:87 brd ff:ff:ff:ff:ff:ff
    inet 192.168.122.80/24 brd 192.168.122.255 scope global eth0
       valid_lft forever preferred_lft forever
    inet6 fe80::5054:ff:feea:5087/64 scope link
       valid_lft forever preferred_lft forever

4: v-eth0@if3: <BROADCAST,MULTICAST> mtu 1500 qdisc noop state DOWN group default qlen 1000
    link/ether 3e:85:9b:dd:c7:96 brd ff:ff:ff:ff:ff:ff link-netns ebal
    inet 10.10.10.10/24 scope global v-eth0
       valid_lft forever preferred_lft forever
inside
ip netns exec ebal ip addr add 10.10.10.20/24 dev v-ebal
root@ubuntu2004:~# ip netns exec ebal ip a

1: lo: <LOOPBACK,UP,LOWER_UP> mtu 65536 qdisc noqueue state UNKNOWN group default qlen 1000
    link/loopback 00:00:00:00:00:00 brd 00:00:00:00:00:00
    inet 127.0.0.1/8 scope host lo
       valid_lft forever preferred_lft forever
    inet6 ::1/128 scope host
       valid_lft forever preferred_lft forever

3: v-ebal@if4: <BROADCAST,MULTICAST> mtu 1500 qdisc noop state DOWN group default qlen 1000
    link/ether d6:86:88:3f:eb:42 brd ff:ff:ff:ff:ff:ff link-netnsid 0
    inet 10.10.10.20/24 scope global v-ebal
       valid_lft forever preferred_lft forever
Both Interfaces are down!
But both interfaces are down, now we need to set up both interfaces:
outside
ip link set v-eth0 up
root@ubuntu2004:~# ip link set v-eth0 up

root@ubuntu2004:~# ip link show v-eth0
4: v-eth0@if3: <NO-CARRIER,BROADCAST,MULTICAST,UP> mtu 1500 qdisc noqueue state LOWERLAYERDOWN mode DEFAULT group default qlen 1000
    link/ether 3e:85:9b:dd:c7:96 brd ff:ff:ff:ff:ff:ff link-netns ebal
inside
ip netns exec ebal ip link set v-ebal up
root@ubuntu2004:~# ip netns exec ebal ip link set v-ebal up

root@ubuntu2004:~# ip netns exec ebal ip link show v-ebal
3: v-ebal@if4: <BROADCAST,MULTICAST,UP,LOWER_UP> mtu 1500 qdisc noqueue state UP mode DEFAULT group default qlen 1000
    link/ether d6:86:88:3f:eb:42 brd ff:ff:ff:ff:ff:ff link-netnsid 0
did it worked?
Let’s first see our routing table:
outside
root@ubuntu2004:~# ip r
default via 192.168.122.1 dev eth0 proto static
10.10.10.0/24 dev v-eth0 proto kernel scope link src 10.10.10.10
192.168.122.0/24 dev eth0 proto kernel scope link src 192.168.122.80
inside
root@ubuntu2004:~# ip netns exec ebal ip r
10.10.10.0/24 dev v-ebal proto kernel scope link src 10.10.10.20
Ping !
outside
root@ubuntu2004:~# ping -c 5 10.10.10.20
PING 10.10.10.20 (10.10.10.20) 56(84) bytes of data.
64 bytes from 10.10.10.20: icmp_seq=1 ttl=64 time=0.028 ms
64 bytes from 10.10.10.20: icmp_seq=2 ttl=64 time=0.042 ms
64 bytes from 10.10.10.20: icmp_seq=3 ttl=64 time=0.052 ms
64 bytes from 10.10.10.20: icmp_seq=4 ttl=64 time=0.042 ms
64 bytes from 10.10.10.20: icmp_seq=5 ttl=64 time=0.071 ms

--- 10.10.10.20 ping statistics ---
5 packets transmitted, 5 received, 0% packet loss, time 4098ms
rtt min/avg/max/mdev = 0.028/0.047/0.071/0.014 ms
inside
root@ubuntu2004:~# ip netns exec ebal bash
root@ubuntu2004:~#
root@ubuntu2004:~# ping -c 5 10.10.10.10
PING 10.10.10.10 (10.10.10.10) 56(84) bytes of data.
64 bytes from 10.10.10.10: icmp_seq=1 ttl=64 time=0.046 ms
64 bytes from 10.10.10.10: icmp_seq=2 ttl=64 time=0.042 ms
64 bytes from 10.10.10.10: icmp_seq=3 ttl=64 time=0.041 ms
64 bytes from 10.10.10.10: icmp_seq=4 ttl=64 time=0.044 ms
64 bytes from 10.10.10.10: icmp_seq=5 ttl=64 time=0.053 ms

--- 10.10.10.10 ping statistics ---
5 packets transmitted, 5 received, 0% packet loss, time 4088ms
rtt min/avg/max/mdev = 0.041/0.045/0.053/0.004 ms
root@ubuntu2004:~# exit
exit
It worked !!
End of part one.
Cloudflare has released an Argo Tunnel client named: cloudflared. It’s also a DNS over HTTPS (DoH) client and in this blog post, I will describe how to use cloudflared with LibreDNS, a public encrypted DNS service that people can use to maintain the secrecy of their DNS traffic, but also circumvent censorship.
Notes based on ubuntu 20.04, as root
Download and install latest stable version
curl -sLO https://bin.equinox.io/c/VdrWdbjqyF/cloudflared-stable-linux-amd64.tgz

tar xf cloudflared-stable-linux-amd64.tgz

ls -l
total 61160
-rwxr-xr-x 1 root root 43782944 May  6 03:45 cloudflared
-rw-r--r-- 1 root root 18839814 May  6 19:42 cloudflared-stable-linux-amd64.tgz

mv cloudflared /usr/local/bin/
check version
# cloudflared --version
cloudflared version 2020.5.0 (built 2020-05-06-0335 UTC)
doh support
# cloudflared proxy-dns --help
NAME:
   cloudflared proxy-dns - Run a DNS over HTTPS proxy server.

USAGE:
   cloudflared proxy-dns [command options]
LibreDNS Endpoints
LibreDNS has two endpoints:
- dns-query
- ads
The latest blocks trackers/ads etc.
standalone
We can use cloudflared as standalone for testing, here is on a non standard TCP port:
cloudflared proxy-dns --upstream https://doh.libredns.gr/ads --port 5454
INFO[0000] Adding DNS upstream                   url="https://doh.libredns.gr/ads"
INFO[0000] Starting DNS over HTTPS proxy server  addr="dns://localhost:5454"
INFO[0000] Starting metrics server               addr="127.0.0.1:41717/metrics"
Testing ads endpoint
$ dig @127.0.0.1 -p 5454 +short analytics.google.com
0.0.0.0
$ dig @127.0.0.1 -p 5454 +short google.com
216.58.210.14
$ dig @127.0.0.1 -p 5454 +short test.libredns.gr
116.202.176.26
conf
We have verified that cloudflared works with libredns, so let us create a configuration file.
By default, cloudflared is trying to find one of the below files (replace root with your user):
- /root/.cloudflared/config.yaml
- /root/.cloudflared/config.yml
- /root/.cloudflare-warp/config.yaml
- /root/cloudflare-warp/config.yaml
- /root/.cloudflare-warp/config.yml
- /root/cloudflare-warp/config.yml
- /usr/local/etc/cloudflared/config.yml
The most promising file is:
- /usr/local/etc/cloudflared/config.yml
Create the configuration file
mkdir -pv /usr/local/etc/cloudflared
cat > /usr/local/etc/cloudflared/config.yml << EOF
proxy-dns: true
proxy-dns-upstream:
 - https://doh.libredns.gr/dns-query
EOF
or for ads endpoint
mkdir -pv /usr/local/etc/cloudflared
cat > /usr/local/etc/cloudflared/config.yml << EOF
proxy-dns: true
proxy-dns-upstream:
 - https://doh.libredns.gr/ads
EOF
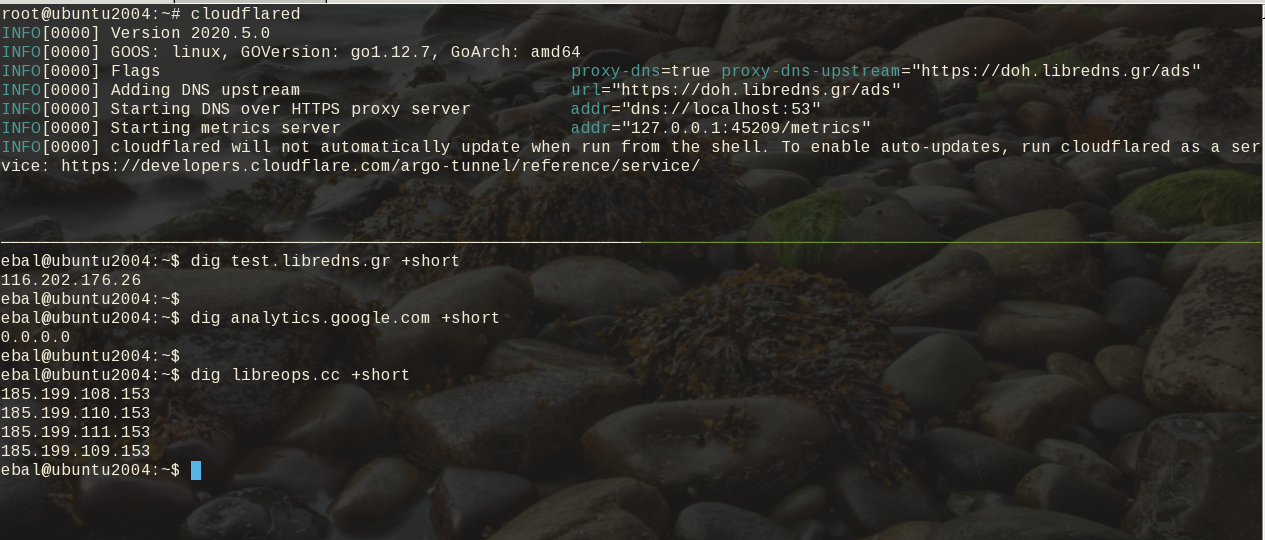
Testing
# cloudflared

INFO[0000] Version 2020.5.0
INFO[0000] GOOS: linux, GOVersion: go1.12.7, GoArch: amd64
INFO[0000] Flags                                         proxy-dns=true proxy-dns-upstream="https://doh.libredns.gr/ads"
INFO[0000] Adding DNS upstream                           url="https://doh.libredns.gr/ads"
INFO[0000] Starting DNS over HTTPS proxy server          addr="dns://localhost:53"
INFO[0000] Starting metrics server                       addr="127.0.0.1:33519/metrics"
INFO[0000] cloudflared will not automatically update when run from the shell. To enable auto-updates, run cloudflared as a service: https://developers.cloudflare.com/argo-tunnel/reference/service/
$ dig test.libredns.gr +short
116.202.176.26
Service
if you are a use of Argo Tunnel and you have a cloudflare account, then you login and get your cert.pem key. Then (and only then) you can install cloudflared as a service by:
cloudflared service installand you can use /etc/cloudflared or /usr/local/etc/cloudflared/ and must have two files:
- cert.pem and
- config.yml (the above file)
That’s it !
GitLab is a truly wonderful devops platform. It has a complete CI/CD toolchain, it’s opensource (GitLab Community Edition) and it can also be self-hosted. One of its greatest feature are the GitLab Runner that are used in the CI/CD pipelines.
The GitLab Runner is also an opensource project written in Go and handles CI jobs of a pipeline. GitLab Runner implements Executors to run the continuous integration builds for different scenarios and the most used of them is the docker executor, although nowadays most of sysadmins are migrating to kubernetes executors.
I have a few personal projects in GitLab under https://gitlab.com/ebal but I would like to run GitLab Runner local on my system for testing purposes. GitLab Runner has to register to a GitLab instance, but I do not want to install the entire GitLab application. I want to use the docker executor and run my CI tests local.
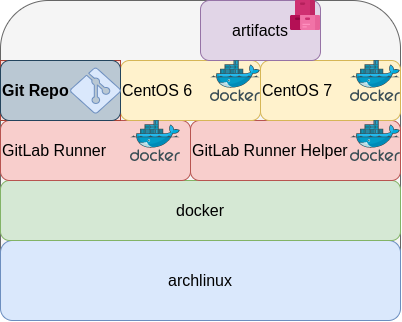
Here are my notes on how to run GitLab Runner with the docker executor. No root access needed as long as your user is in the docker group. To give a sense of what this blog post is, the below image will act as reference.
GitLab Runner
The docker executor comes in two flavors:
- alpine
- ubuntu
In this blog post, I will use the ubuntu flavor.
Get the latest ubuntu docker image
docker pull gitlab/gitlab-runner:ubuntuVerify
$ docker run --rm -ti gitlab/gitlab-runner:ubuntu --version
Version:      12.10.1
Git revision: ce065b93
Git branch:   12-10-stable
GO version:   go1.13.8
Built:        2020-04-22T21:29:52+0000
OS/Arch:      linux/amd64
exec help
We are going to use the exec command to spin up the docker executor. With exec we will not need to register with a token.
$ docker run --rm -ti gitlab/gitlab-runner:ubuntu exec --help

Runtime platform arch=amd64 os=linux pid=6 revision=ce065b93 version=12.10.1
NAME:
   gitlab-runner exec - execute a build locally

USAGE:
   gitlab-runner exec command [command options] [arguments...]

COMMANDS:
     shell       use shell executor
     ssh         use ssh executor
     virtualbox  use virtualbox executor
     custom      use custom executor
     docker      use docker executor
Runner
5 minutes ago
# Run your CI test with GitLab-Runner on your system
GitLab     parallels   use parallels executor

OPTIONS:
   --help, -h  show help
Git Repo - tmux
Now we need to download the git repo, we would like to test. Inside the repo, a .gitlab-ci.yml file should exist. The gitlab-ci file describes the CI pipeline, with all the stages and jobs. In this blog post, I will use a simple repo that builds the latest version of tmux for centos6 & centos7.
git clone https://gitlab.com/rpmbased/tmux.git
cd tmux
Docker In Docker
The docker executor will spawn the GitLab Runner. GitLab Runner needs to communicate with our local docker service to spawn the CentOS docker image and to run the CI job.
So we need to pass the docker socket from our local docker service to GitLab Runner docker container.
To test dind (docker-in-docker) we can try one of the below commands:
docker run --rm -ti
    -v /var/run/docker.sock:/var/run/docker.sock
    docker:latest sh
or
docker run --rm -ti
    -v /var/run/docker.sock:/var/run/docker.sock
    ubuntu:20.04 bash
Limitations
There are some limitations of gitlab-runner exec.
We can not run stages and we can not download artifacts.
- stages no
- artifacts no
Jobs
So we have to adapt. As we can not run stages, we will tell gitlab-runner exec to run one specific job.
In the tmux repo, the build-centos-6 is the build job for centos6 and the build-centos-7 for centos7.
Artifacts
GitLab Runner will use the /builds as the build directory. We need to mount this directory as read-write to a local directory to get the artifact.
mkdir -pv artifacts/The docker executor has many docker options, there are options to setup a different cache directory. To see all the docker options type:
$ docker run --rm -ti gitlab/gitlab-runner:ubuntu exec docker --help | grep dockerBash Script
We can put everything from above to a bash script. The bash script will mount our current git project directory to the gitlab-runner, then with the help of dind it will spin up the centos docker container, passing our code and gitlab-ci file, run the CI job and then save the artifacts under /builds.
#!/bin/bash

# This will be the directory to save our artifacts
rm -rf artifacts
mkdir -p artifacts

# JOB="build-centos-6"
JOB="build-centos-7"

DOCKER_SOCKET="/var/run/docker.sock"

docker run --rm                              \
  -v "$DOCKER_SOCKET":"$DOCKER_SOCKET"       \
  -v "$PWD":"$PWD"                           \
  --workdir "$PWD"                           \
  gitlab/gitlab-runner:ubuntu                \
  exec docker                                \
      --docker-volumes="$PWD/artifacts":/builds:rw \
      $JOB
That’s it.
You can try with your own gitlab repos, but dont forget to edit the gitlab-ci file accordingly, if needed.
Full example output
Last, but not least, here is the entire walkthrough
ebal@myhomepc:tmux(master)$ git remote -v
oring   git@gitlab.com:rpmbased/tmux.git (fetch)
oring   git@gitlab.com:rpmbased/tmux.git (push)
$ ./gitlab.run.sh

Runtime platform           arch=amd64 os=linux pid=6 revision=ce065b93 version=12.10.1
Running with gitlab-runner 12.10.1 (ce065b93)
Preparing the "docker" executor
Using Docker executor with image centos:6 ...
Pulling docker image centos:6 ...
Using docker image sha256:d0957ffdf8a2ea8c8925903862b65a1b6850dbb019f88d45e927d3d5a3fa0c31 for centos:6 ...
Preparing environment
Running on runner--project-0-concurrent-0 via 42b751e35d01...
Getting source from Git repository
Fetching changes...
Initialized empty Git repository in /builds/0/project-0/.git/
Created fresh repository.
From /home/ebal/gitlab-runner/tmux
 * [new branch]      master     -> origin/master
Checking out 6bb70469 as master...

Skipping Git submodules setup
Restoring cache
Downloading artifacts
Running before_script and script
$ export -p NAME=tmux
$ export -p VERSION=$(awk '/^Version/ {print $NF}' tmux.spec)
$ mkdir -p rpmbuild/{BUILD,RPMS,SOURCES,SPECS,SRPMS}
$ yum -y update &> /dev/null
$ yum -y install rpm-build curl gcc make automake autoconf pkg-config &> /dev/null
$ yum -y install libevent2-devel ncurses-devel &> /dev/null
$ cp $NAME.spec                  rpmbuild/SPECS/$NAME.spec
$ curl -sLo rpmbuild/SOURCES/$NAME-$VERSION.tar.gz   https://github.com/tmux/$NAME/releases/download/$VERSION/$NAME-$VERSION.tar.gz
$ curl -sLo rpmbuild/SOURCES/bash-it.completion.bash https://raw.githubusercontent.com/Bash-it/bash-it/master/completion/available/bash-it.completion.bash
$ rpmbuild --define "_topdir ${PWD}/rpmbuild/" --clean -ba rpmbuild/SPECS/$NAME.spec &> /dev/null
$ cp rpmbuild/RPMS/x86_64/$NAME*.x86_64.rpm $CI_PROJECT_DIR/
Running after_script
Saving cache
Uploading artifacts for successful job
Job succeeded
artifacts
and here is the tmux-3.1-1.el6.x86_64.rpm
$ ls -l artifacts/0/project-0
total 368
-rw-rw-rw- 1 root root    374 Apr 27 09:13 README.md
drwxr-xr-x 1 root root     70 Apr 27 09:17 rpmbuild
-rw-r--r-- 1 root root 365836 Apr 27 09:17 tmux-3.1-1.el6.x86_64.rpm
-rw-rw-rw- 1 root root   1115 Apr 27 09:13 tmux.spec
docker processes
if we run docker ps -a from another terminal, we see something like this:
$ docker ps -a
CONTAINER ID  IMAGE                        COMMAND                  CREATED        STATUS                   PORTS  NAMES
b5333a7281ac  d0957ffdf8a2                 "sh -c 'if [ -x /usr…"   3 minutes ago  Up 3 minutes                    runner--project-0-concurrent-0-e6ee009d5aa2c136-build-4
70491d10348f  b6b00e0f09b9                 "gitlab-runner-build"    3 minutes ago  Exited (0) 3 minutes ago        runner--project-0-concurrent-0-e6ee009d5aa2c136-predefined-3
7be453e5cd22  b6b00e0f09b9                 "gitlab-runner-build"    4 minutes ago  Exited (0) 4 minutes ago        runner--project-0-concurrent-0-e6ee009d5aa2c136-predefined-2
1046287fba5d  b6b00e0f09b9                 "gitlab-runner-build"    4 minutes ago  Exited (0) 4 minutes ago        runner--project-0-concurrent-0-e6ee009d5aa2c136-predefined-1
f1ebc99ce773  b6b00e0f09b9                 "gitlab-runner-build"    4 minutes ago  Exited (0) 4 minutes ago        runner--project-0-concurrent-0-e6ee009d5aa2c136-predefined-0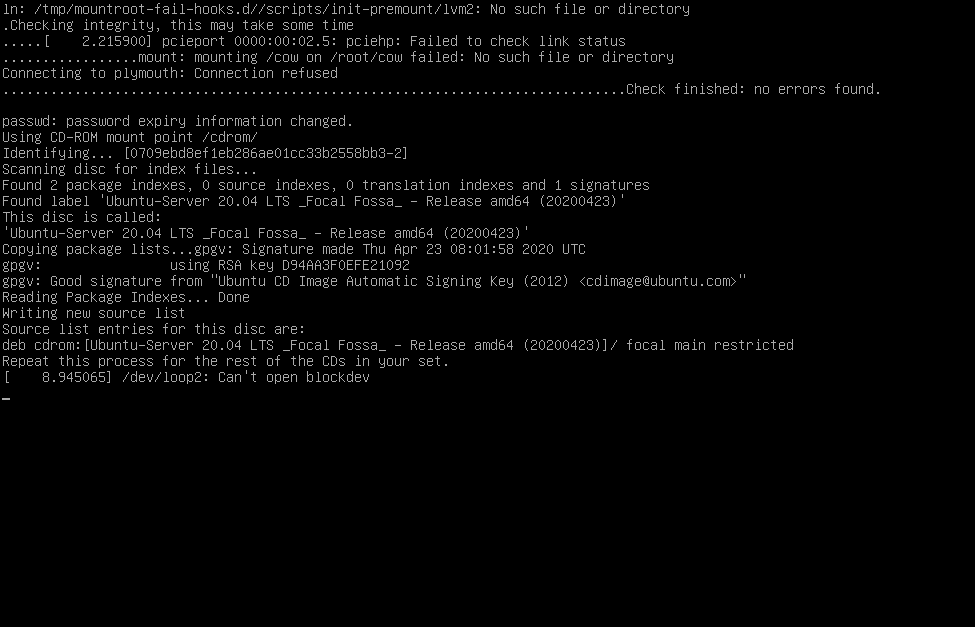
42b751e35d01 gitlab/gitlab-runner:ubuntu "/usr/bin/dumb-init …" 4 minutes ago Up 4 minutes vigorous_goldstineServer Edition
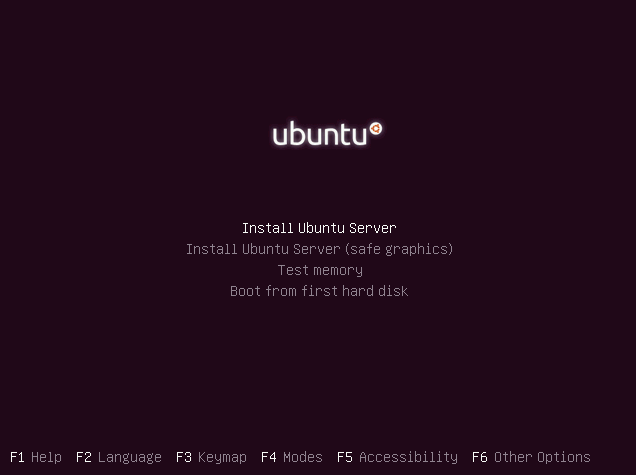
disclaimer: at this moment there is not an “official” server version of an 20.04 LTS available, so we we will use the development 20.04 release.
Maintenance
If this is a production server, do not forget to inform customers/users/clients that this machine is under maintenance before you start.
backup
When was the last time you took a backup?
Now is a good time.
Try to verify your backup otherwise do not proceed.
Update you current system
Before continue with the dist upgrade to 20.04 LTS, we need to update & upgrade our current LTS version.
Login to your system:
~> ssh ubuntu1804
apt update
apt -y upgrade
reboot is necessary.
update
root@ubuntu:~# apt update
Hit:1 http://gr.archive.ubuntu.com/ubuntu bionic InRelease
Hit:2 http://gr.archive.ubuntu.com/ubuntu bionic-updates InRelease
Hit:3 http://gr.archive.ubuntu.com/ubuntu bionic-backports InRelease
Hit:4 http://gr.archive.ubuntu.com/ubuntu bionic-security InRelease
Reading package lists... Done
Building dependency tree
Reading state information... Done
51 packages can be upgraded. Run 'apt list --upgradable' to see them.
upgrade
# apt -y upgrade
Reading package lists... Done
Building dependency tree
Reading state information... Done
Calculating upgrade... Done
The following packages will be upgraded:
  bsdutils distro-info-data dmidecode fdisk grub-common grub-pc grub-pc-bin grub2-common landscape-common libblkid1 libfdisk1 libmount1 libnss-systemd
  libpam-systemd libsmartcols1 libsystemd0 libudev1 libuuid1 linux-firmware mount open-vm-tools python3-update-manager sosreport systemd systemd-sysv udev
  unattended-upgrades update-manager-core util-linux uuid-runtime
51 upgraded, 0 newly installed, 0 to remove and 0 not upgraded.
Need to get 85.6 MB of archives.
After this operation, 751 kB of additional disk space will be used.
Get:1 http://gr.archive.ubuntu.com/ubuntu bionic-updates/main amd64 bsdutils amd64 1:2.31.1-0.4ubuntu3.6 [60.3 kB]
...
reboot
# rebootDo release upgrade
root@ubuntu:~# which do-release-upgrade
/usr/bin/do-release-upgrade
help
do-release-upgrade --helproot@ubuntu:~# do-release-upgrade --help
Usage: do-release-upgrade [options]
Options:
-h, --help show this help message and exit
-V, --version Show version and exit
-d, --devel-release If using the latest supported release, upgrade to the
development release
--data-dir=DATA_DIR Directory that contains the data files
-p, --proposed Try upgrading to the latest release using the upgrader
from $distro-proposed
-m MODE, --mode=MODE Run in a special upgrade mode. Currently 'desktop' for
regular upgrades of a desktop system and 'server' for
server systems are supported.
-f FRONTEND, --frontend=FRONTEND
Run the specified frontend
-c, --check-dist-upgrade-only
Check only if a new distribution release is available
and report the result via the exit code
--allow-third-party Try the upgrade with third party mirrors and
repositories enabled instead of commenting them out.
-q, --quiet
do-release-upgrade
# do-release-upgrade -m serverroot@ubuntu:~# do-release-upgrade -m server
Checking for a new Ubuntu release
There is no development version of an LTS available.
To upgrade to the latest non-LTS develoment release
set Prompt=normal in /etc/update-manager/release-upgrades.
server
do-release-upgrade -m server -droot@ubuntu:~# do-release-upgrade -m server -d
Checking for a new Ubuntu release
Get:1 Upgrade tool signature [1,554 B]
Get:2 Upgrade tool [1,344 kB]
Fetched 1,346 kB in 0s (0 B/s)
authenticate 'focal.tar.gz' against 'focal.tar.gz.gpg'
extracting 'focal.tar.gz'
at this moment, we will switch to a gnu/screen session
Reading cache

Checking package manager

Continue running under SSH?

This session appears to be running under ssh. It is not recommended
to perform a upgrade over ssh currently because in case of failure it
is harder to recover.

If you continue, an additional ssh daemon will be started at port
'1022'.
Do you want to continue?

Continue [yN]
Press: y
Starting additional sshd

To make recovery in case of failure easier, an additional sshd will
be started on port '1022'. If anything goes wrong with the running
ssh you can still connect to the additional one.
If you run a firewall, you may need to temporarily open this port. As
this is potentially dangerous it's not done automatically. You can
open the port with e.g.:
'iptables -I INPUT -p tcp --dport 1022 -j ACCEPT'

To continue please press [ENTER]
Press Enter
update repos
Reading package lists... Done
Building dependency tree
Reading state information... Done
Hit http://gr.archive.ubuntu.com/ubuntu bionic InRelease
Get:1 http://gr.archive.ubuntu.com/ubuntu bionic-updates InRelease [88.7 kB]

Get:2 http://gr.archive.ubuntu.com/ubuntu bionic-backports InRelease [74.6 kB]

Get:3 http://gr.archive.ubuntu.com/ubuntu bionic-security InRelease [88.7 kB]
Get:4 http://gr.archive.ubuntu.com/ubuntu bionic-updates/main amd64 Packages [916 kB]
Fetched 1,168 kB in 0s (0 B/s)
Reading package lists... Done
Building dependency tree
Reading state information... Done

Updating repository information
Get:1 http://gr.archive.ubuntu.com/ubuntu focal InRelease [265 kB]
...
…
...
Get:32 http://gr.archive.ubuntu.com/ubuntu focal-security/multiverse amd64 c-n-f Metadata [116 B]
Fetched 57.3 MB in 6s (1,247 kB/s)

Checking package manager
Reading package lists... Done
Building dependency tree
Reading state information... Done

Calculating the changes

Calculating the changes

Do you want to start the upgrade?

3 packages are going to be removed. 105 new packages are going to be
installed. 428 packages are going to be upgraded.

You have to download a total of 306 M. This download will take about
3 minutes with your connection.

Installing the upgrade can take several hours. Once the download has
finished, the process cannot be canceled.

 Continue [yN]  Details [d]
Press y
(or review by pressing d )
Fetching packages
Fetching

...
Get:3 http://gr.archive.ubuntu.com/ubuntu focal/main amd64 libcrypt1 amd64 1:4.4.10-10ubuntu4 [78.2 kB]
Get:4 http://gr.archive.ubuntu.com/ubuntu focal/main amd64 libc6 amd64 2.31-0ubuntu9 [2,713 kB]
...
services
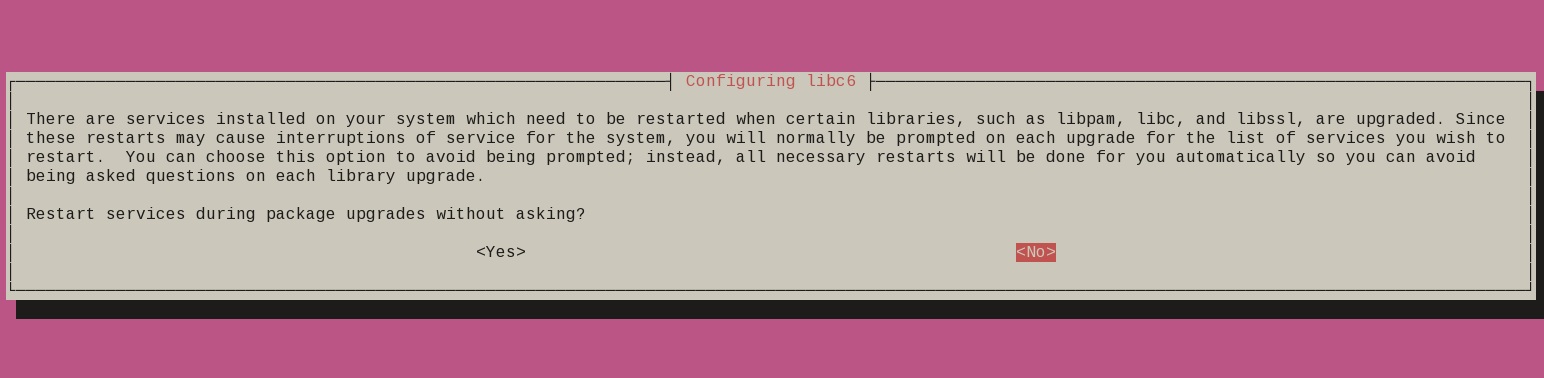
at some point a question will pop:
- Restart services during package upgrade without asking ?
I answered Yes but you should answer this the way you prefer.
patience is a virtue
Get a coffee or tea. Read a magazine.
till you see a jumping animal.
resolved
Configuration file '/etc/systemd/resolved.conf'
 ==> Modified (by you or by a script) since installation.
 ==> Package distributor has shipped an updated version.
   What would you like to do about it ?  Your options are:
    Y or I  : install the package maintainer's version
    N or O  : keep your currently-installed version
      D     : show the differences between the versions
      Z     : start a shell to examine the situation
 The default action is to keep your current version.
*** resolved.conf (Y/I/N/O/D/Z) [default=N] ?
I answered this Y, I will change it later.
vim
same here
Configuration file '/etc/vim/vimrc'
 ==> Modified (by you or by a script) since installation.
 ==> Package distributor has shipped an updated version.
   What would you like to do about it ?  Your options are:
    Y or I  : install the package maintainer's version
    N or O  : keep your currently-installed version
      D     : show the differences between the versions
      Z     : start a shell to examine the situation
 The default action is to keep your current version.
*** vimrc (Y/I/N/O/D/Z) [default=N] ? Y
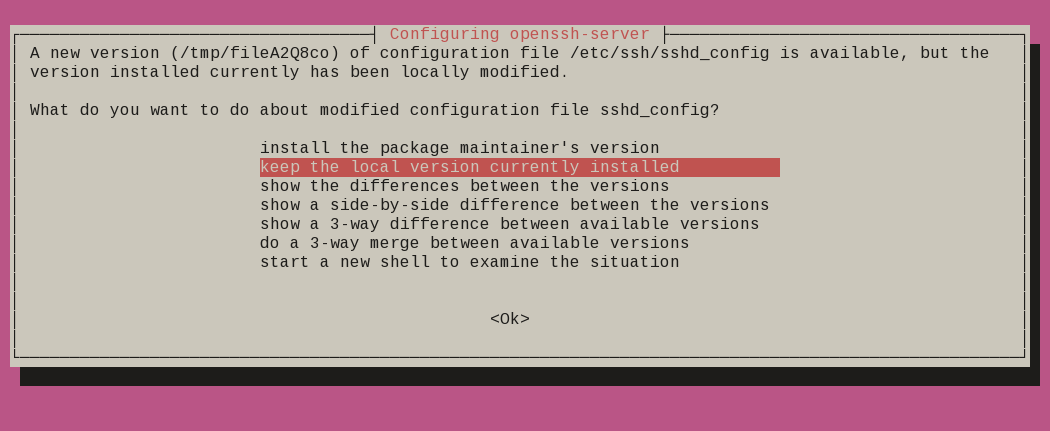
ssh conf
Remove obsolete packages
and finally
Progress: [ 99%]
Updating certificates in /etc/ssl/certs...
0 added, 0 removed; done.
Running hooks in /etc/ca-certificates/update.d...
done.
Processing triggers for initramfs-tools (0.136ubuntu6) ...
update-initramfs: Generating /boot/initrd.img-5.4.0-26-generic
Processing triggers for dbus (1.12.16-2ubuntu2) ...
Reading package lists... Done
Building dependency tree
Reading state information... Done

Searching for obsolete software
Reading state information... Done

Remove obsolete packages?

59 packages are going to be removed.

 Continue [yN]  Details [d]
Press y to continue
Restart
are you ready to restart your machine ?
System upgrade is complete.

Restart required

To finish the upgrade, a restart is required.
If you select 'y' the system will be restarted.

Continue [yN]
Press y to restart
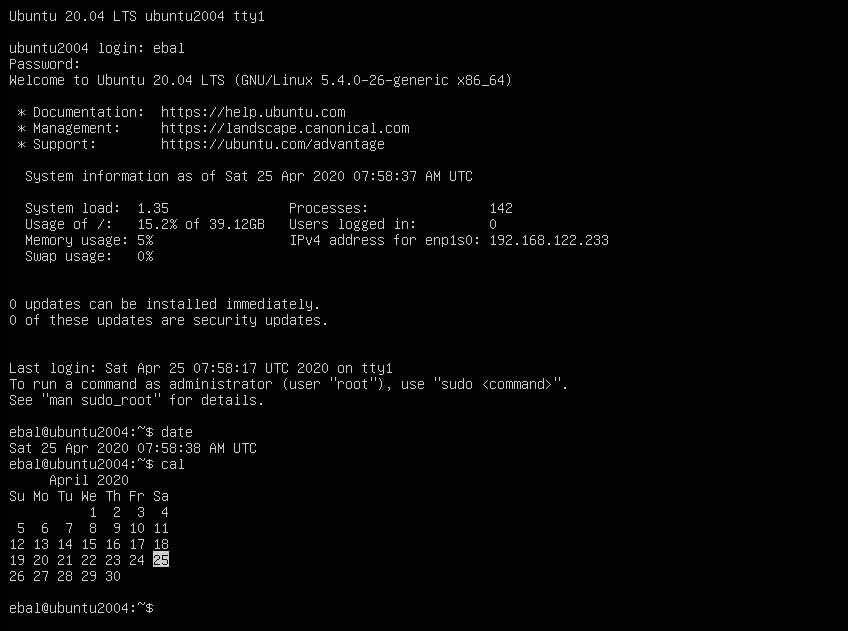
LTS 20.04
Welcome to Ubuntu 20.04 LTS (GNU/Linux 5.4.0-26-generic x86_64)
System information as of Sun 26 Apr 2020 10:34:43 AM UTC
System load: 0.52 Processes: 135
Usage of /: 24.9% of 19.56GB Users logged in: 0
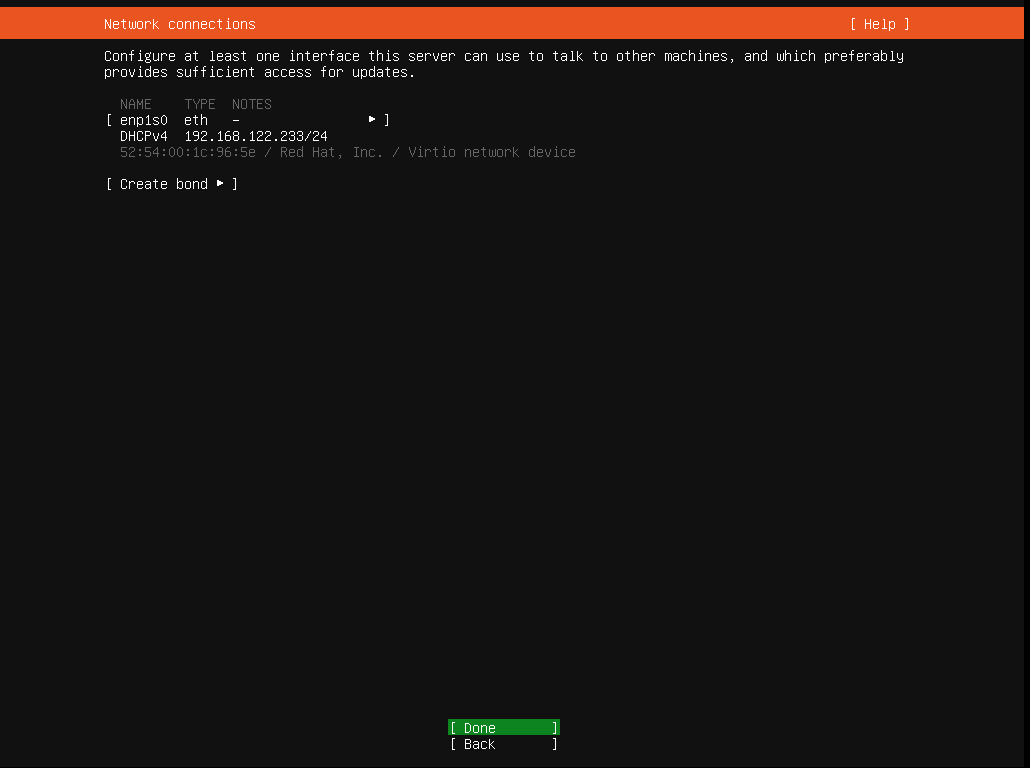
Memory usage: 3% IPv4 address for enp1s0: 192.168.122.77
Swap usage: 0%
* Ubuntu 20.04 LTS is out, raising the bar on performance, security,
and optimisation for Intel, AMD, Nvidia, ARM64 and Z15 as well as
AWS, Azure and Google Cloud.
https://ubuntu.com/blog/ubuntu-20-04-lts-arrives
0 updates can be installed immediately.
0 of these updates are security updates.
Last login: Sun Apr 26 07:50:39 2020 from 192.168.122.1
$ cat /etc/os-release

NAME="Ubuntu"
VERSION="20.04 LTS (Focal Fossa)"
ID=ubuntu
ID_LIKE=debian
PRETTY_NAME="Ubuntu 20.04 LTS"
VERSION_ID="20.04"
HOME_URL="https://www.ubuntu.com/"
SUPPORT_URL="https://help.ubuntu.com/"
BUG_REPORT_URL="https://bugs.launchpad.net/ubuntu/"
PRIVACY_POLICY_URL="https://www.ubuntu.com/legal/terms-and-policies/privacy-policy"
VERSION_CODENAME=focal
UBUNTU_CODENAME=focal

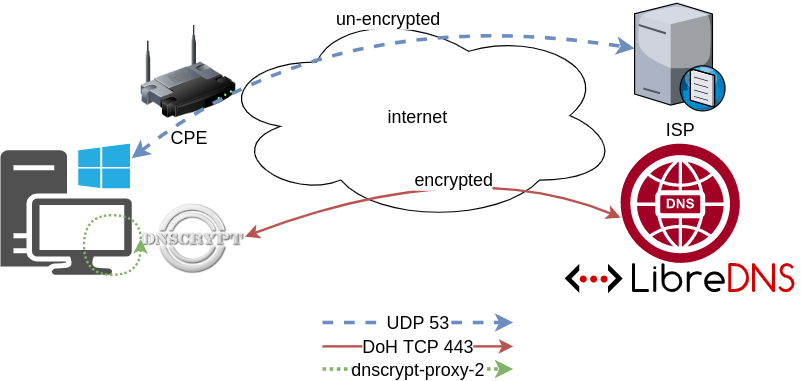
Using DNS over HTTPS aka DoH is fairly easy with the latest version of firefox. To use libredns is just a few settings in your browser, see here. In libredns’ site, there are also instructions for DNS over TLS aka DoT.
In this blog post, I am going to present how to use dnscrypt-proxy as a local dns proxy resolver using DoH the LibreDNS noAds (tracking) endpoint. With this setup, your entire operating system can use this endpoint for everything.
Disclaimer: This blog post is about dnscrypt-proxy version 2.
dnscrypt-proxy
dnscrypt-proxy 2 - A flexible DNS proxy, with support for modern encrypted DNS protocols such as DNSCrypt v2, DNS-over-HTTPS and Anonymized DNSCrypt.
Installation
sudo pacman -S dnscrypt-proxyVerify Package
$ pacman -Qi dnscrypt-proxy

Name            : dnscrypt-proxy
Version         : 2.0.39-3
Description     : DNS proxy, supporting encrypted DNS protocols such as DNSCrypt v2 and DNS-over-HTTPS
Architecture    : x86_64
URL             : https://dnscrypt.info
Licenses        : custom:ISC
Groups          : None
Provides        : None
Depends On      : glibc
Optional Deps   : python-urllib3: for generate-domains-blacklist [installed]
Required By     : None
Optional For    : None
Conflicts With  : None
Replaces        : None
Installed Size  : 12.13 MiB
Packager        : David Runge <dvzrv@archlinux.org>
Build Date      : Sat 07 Mar 2020 08:10:14 PM EET
Install Date    : Fri 20 Mar 2020 10:46:56 PM EET
Install Reason  : Explicitly installed
Install Script  : Yes
Validated By    : Signature
Disable systemd-resolved
if necessary
$ ps -e fuwww | grep re[s]olv
systemd+     525  0.0  0.1  30944 21804 ?        Ss   10:00   0:01 /usr/lib/systemd/systemd-resolved

$ sudo systemctl stop systemd-resolved.service

$ sudo systemctl disable systemd-resolved.service
Removed /etc/systemd/system/multi-user.target.wants/systemd-resolved.service.
Removed /etc/systemd/system/dbus-org.freedesktop.resolve1.service.
Configuration
It is time to configure dnscrypt-proxy to use libredns
sudo vim /etc/dnscrypt-proxy/dnscrypt-proxy.tomlIn the top of the file, there is a server_names section
server_names = ['libredns-noads']Resolv Conf
We can now change our resolv.conf to use our local IP address.
echo -e "nameserver 127.0.0.1noptions edns0 single-request-reopen" | sudo tee /etc/resolv.conf$ cat /etc/resolv.conf
nameserver 127.0.0.1
options edns0 single-request-reopenSystemd
start & enable dnscrypt service
sudo systemctl start dnscrypt-proxy.service

sudo systemctl enable dnscrypt-proxy.service
$ sudo ss -lntup '( sport = :domain )'
Netid State Recv-Q Send-Q Local Address:Port Peer Address:Port Process
udp UNCONN 0 0 127.0.0.1:53 0.0.0.0:* users:(("dnscrypt-proxy",pid=55795,fd=6))
tcp LISTEN 0 4096 127.0.0.1:53 0.0.0.0:* users:(("dnscrypt-proxy",pid=55795,fd=7))Verify
$ dnscrypt-proxy -config /etc/dnscrypt-proxy/dnscrypt-proxy.toml -list
libredns-noads
$ dnscrypt-proxy -config /etc/dnscrypt-proxy/dnscrypt-proxy.toml -resolve balaskas.gr
Resolving [balaskas.gr]
Domain exists: yes, 2 name servers found
Canonical name: balaskas.gr.
IP addresses: 158.255.214.14, 2a03:f80:49:158:255:214:14:80
TXT records: v=spf1 ip4:158.255.214.14/31 ip6:2a03:f80:49:158:255:214:14:0/112 -all
Resolver IP: 116.202.176.26 (libredns.gr.)Dig
asking our local dns (proxy)
dig @localhost balaskas.gr; <<>> DiG 9.16.1 <<>> @localhost balaskas.gr
; (2 servers found)
;; global options: +cmd
;; Got answer:
;; ->>HEADER<<- opcode: QUERY, status: NOERROR, id: 2449
;; flags: qr rd ra; QUERY: 1, ANSWER: 1, AUTHORITY: 0, ADDITIONAL: 1
;; OPT PSEUDOSECTION:
; EDNS: version: 0, flags:; udp: 512
;; QUESTION SECTION:
;balaskas.gr. IN A
;; ANSWER SECTION:
balaskas.gr. 7167 IN A 158.255.214.14
;; Query time: 0 msec
;; SERVER: 127.0.0.1#53(127.0.0.1)
;; WHEN: Sat Mar 21 19:48:53 EET 2020
;; MSG SIZE rcvd: 56That’s it !
Yoursystem is now using LibreDNS DoH noads endpoint.
Manual Steps
If your operating system does not yet support dnscrypt-proxy-2 then:
Latest version
You can always download the latest version from github:
To view the files
curl -sLo - $(curl -sL https://api.github.com/repos/DNSCrypt/dnscrypt-proxy/releases/latest | jq -r '.assets[].browser_download_url | select( contains("linux_x86_64"))') | tar tzf -

linux-x86_64/
linux-x86_64/dnscrypt-proxy
linux-x86_64/LICENSE
linux-x86_64/example-cloaking-rules.txt
linux-x86_64/example-dnscrypt-proxy.toml
linux-x86_64/example-blacklist.txt
linux-x86_64/example-whitelist.txt
linux-x86_64/localhost.pem
linux-x86_64/example-ip-blacklist.txt
linux-x86_64/example-forwarding-rules.txt
To extrace the files
$ curl -sLo - $(curl -sL https://api.github.com/repos/DNSCrypt/dnscrypt-proxy/releases/latest | jq -r '.assets[].browser_download_url | select( contains("linux_x86_64"))') | tar xzf -

$ ls -l linux-x86_64/
total 9932
-rwxr-xr-x 1 ebal ebal 10117120 Μαρ  21 13:56 dnscrypt-proxy
-rw-r--r-- 1 ebal ebal      897 Μαρ  21 13:50 example-blacklist.txt
-rw-r--r-- 1 ebal ebal     1277 Μαρ  21 13:50 example-cloaking-rules.txt
-rw-r--r-- 1 ebal ebal    20965 Μαρ  21 13:50 example-dnscrypt-proxy.toml
-rw-r--r-- 1 ebal ebal      970 Μαρ  21 13:50 example-forwarding-rules.txt
-rw-r--r-- 1 ebal ebal      439 Μαρ  21 13:50 example-ip-blacklist.txt
-rw-r--r-- 1 ebal ebal      743 Μαρ  21 13:50 example-whitelist.txt
-rw-r--r-- 1 ebal ebal      823 Μαρ  21 13:50 LICENSE
-rw-r--r-- 1 ebal ebal     2807 Μαρ  21 13:50 localhost.pem

$ cd linux-x86_64/
Prepare the configuration
$ cp example-dnscrypt-proxy.toml dnscrypt-proxy.toml
$
$ vim dnscrypt-proxy.toml
In the top of the file, there is a server_names section
server_names = ['libredns-noads']$ ./dnscrypt-proxy -config dnscrypt-proxy.toml --list
[2020-03-21 19:27:20] [NOTICE] dnscrypt-proxy 2.0.40
[2020-03-21 19:27:20] [NOTICE] Network connectivity detected
[2020-03-21 19:27:22] [NOTICE] Source [public-resolvers] loaded
[2020-03-21 19:27:23] [NOTICE] Source [relays] loaded
libredns-noadsRun as root
$ sudo ./dnscrypt-proxy -config ./dnscrypt-proxy.toml
[sudo] password for ebal: *******

[2020-03-21 20:11:04] [NOTICE] dnscrypt-proxy 2.0.40
[2020-03-21 20:11:04] [NOTICE] Network connectivity detected
[2020-03-21 20:11:04] [NOTICE] Source [public-resolvers] loaded
[2020-03-21 20:11:04] [NOTICE] Source [relays] loaded
[2020-03-21 20:11:04] [NOTICE] Firefox workaround initialized
[2020-03-21 20:11:04] [NOTICE] Now listening to 127.0.0.1:53 [UDP]
[2020-03-21 20:11:04] [NOTICE] Now listening to 127.0.0.1:53 [TCP]
[2020-03-21 20:11:04] [NOTICE] [libredns-noads] OK (DoH) - rtt: 65ms
[2020-03-21 20:11:04] [NOTICE] Server with the lowest initial latency: libredns-noads (rtt: 65ms)
[2020-03-21 20:11:04] [NOTICE] dnscrypt-proxy is ready - live servers: 1
Check DNS
Interesting enough, first time is 250ms , second time is zero!
$ dig libredns.gr

; <<>> DiG 9.11.3-1ubuntu1.11-Ubuntu <<>> libredns.gr
;; global options: +cmd
;; Got answer:
;; ->>HEADER<<- opcode: QUERY, status: NOERROR, id: 53609
;; flags: qr rd ra; QUERY: 1, ANSWER: 2, AUTHORITY: 0, ADDITIONAL: 1

;; OPT PSEUDOSECTION:
; EDNS: version: 0, flags:; udp: 512
;; QUESTION SECTION:
;libredns.gr.   IN  A

;; ANSWER SECTION:
libredns.gr.    2399  IN  A 116.202.176.26

;; Query time: 295 msec
;; SERVER: 127.0.0.1#53(127.0.0.1)
;; WHEN: Sat Mar 21 20:12:52 EET 2020
;; MSG SIZE  rcvd: 72

$ dig libredns.gr

; <<>> DiG 9.11.3-1ubuntu1.11-Ubuntu <<>> libredns.gr
;; global options: +cmd
;; Got answer:
;; ->>HEADER<<- opcode: QUERY, status: NOERROR, id: 31159
;; flags: qr rd ra; QUERY: 1, ANSWER: 2, AUTHORITY: 0, ADDITIONAL: 1

;; OPT PSEUDOSECTION:
; EDNS: version: 0, flags:; udp: 512
;; QUESTION SECTION:
;libredns.gr. IN  A

;; ANSWER SECTION:
libredns.gr.  2395  IN  A 116.202.176.26

;; Query time: 0 msec
;; SERVER: 127.0.0.1#53(127.0.0.1)
;; WHEN: Sat Mar 21 20:12:56 EET 2020
;; MSG SIZE  rcvd: 72
That’s it
almost three (3) years ago I wrote an article about the Tools I use daily. But for the last 18 months (or so), I am partial using windows 10 due to my new job role, thus I would like to write an updated version on that article.
I’ ll try to use the same structure for comparison as the previous article, keep in mind this a nine to five setup (work related). So here it goes.

NOTICE beer is just for decor ;)
Operating System
I use Win10 as my primary operating system in my worklaptop. I have a couple of impediments that can not work on a linux distribution but I am not going to bother you with them (it’s webex and some internal internet-explorer only sites).
We used to use webex as our primary communication tool. We are sharing our screen and have our video camera on, so that everybody can see each other.Working with remote teams, it’s kind of nice to see the faces of your coworkers. A lot of meetings are integrated with the company’s outlook. I use OWA (webmail) as an alternative but in fact it is still difficult to use both of them with a linux desktop.
We successful switched to slack for text communications, video calls and screen sharing. This choice gave us a boost in productivity as we are now daily using slack calls to align with each other. Although still webex is in the mix. Company is now using a newer webex version that works even better with browser support so that is a plus. It’s not always easy to get everybody with a webex license but as long as we are using slack it is okay. Only problem with slack in linux is when working with multiple monitors, you can not choose which monitor to share.
I have considered to use a VM (virtual machine) but a win10 vm needs more than 4G of RAM and a couple of CPUs just to boot up. In that case, it means that I have to reduce my work laptop resources for half the day, every day. So for the time being I am staying with Win10 as the primary operating system. I have to use the winVM for some other internal works but it is limited time.
Desktop
Default Win10 desktop
I daily use these OpenSource Tools:
- AutoHotkey for keyboard shortcut (I like switching languages by pressing capslock)
- Ditto as clipboard manager
- Greenshot for screenshot tool
and from time to time, I also use:
- X-Mouse Controls (window focus with mouse)
- Always on Top to Keep Any Window Visible Always
- Plumb a Tiling Window Manager
except plumb, everything else is opensource!
So I am trying to have the same user desktop experience as in my Linux desktop, like my language swith is capslock (authotkey), I dont even think about it.
Disk / Filesystem
Default Win10 filesystem with bitlocker. Every HW change will lock the entire system. In the past this happened twice with a windows firmware device upgrade. Twice!
Dropbox as a cloud sync software, with EncFSMP partition and syncthing for secure personal syncing files.
(same setup as linux, except bitlocker is luks)
OWA for calendar purposes and … still Thunderbird for primary reading mails.
Thunderbird 68.6.0 AddOns:
- TbSync
- Provider for CalDAV & CardDAV
- ExQuilla for Exchange
- CompactHeader
- Toggle Headers
- ConfigDate
- Duplicate Contacts Manager
- Remove Duplicates
- Lightning
- Expression Search / GMailUI
- Mail Redirect
- Markdown Here
- Open With
(same setup as linux)
Shell
Windows Subsystem for Linux aka WSL … waiting for the official WSLv2 ! This is a huge HUGE upgrade for windows. I have setup an Arch Linux WSL environment to continue work on a linux environment, I mean bash. I use my WSL archlinux as a jumphost to my VMs.
Terminal Emulator
- Mintty The best terminal emulator for WSL. Small, not to fancy, just works, beautiful, love it.
Editor
Using Visual Studio Code for scripting. vim within WSL and notepad for temporary text notes. I have switched to Boostnote for markdown and as my primary note editor.
(same setup as linux)
Browser
Multiple Instances of Firefox, Chromium, Tor Browser and brave
Primary Browser: Firefox
Primary Private Browsing: Brave
(same setup as linux)
Communication
I use mostly Slack and Signal Desktop. We are using webex but I prefer Zoom. Riot/Matrix for decentralized groups and IRC bridge. To be honest, I also use Viber & messanger (only through webbrowser).
(same setup as linux - minus the Viber client)
Media
VLC for windows, what else ? Also GIMP for image editing. I have switched to Spotify for music and draw io for diagrams. Last, I use CPod for podcasts. Netflix (sometimes).
(same setup as linux)
In conclusion
I have switched to a majority of electron applications. I use the same applications on my Linux boxes. Encrypted notes on boostnote, synced over syncthing. Same browsers, same bash/shell, the only thing I dont have on my linux boxes are webex and outlook. Consider everything else, I think it is a decent setup across every distro.
Thanks for reading my post.
restic is a fast, secure & efficient backup program.
I wanted to test restic for some time now. It is a go backup solution, I would say similar to rclone but it has a unique/different design. I prefer having an isolated clean environment when testing software, so I usually go with a VΜ. For this case, I installed elementary OS v5.1, an ubuntu LTS based distro focus on user experience. As backup storage solution, I used MinIO an S3 compatible object storage on the same VM. So here are my notes on restic and in the end of this article you will find how I setup minion.
Be aware this is a technical post!
restic
Most probably your distro package manager has already restic in their repositories.
pacman -S restic

or

apt -y install restic
download latest version
But just in case you want to install the latest binary version, you can use this command
curl -sLo - $(curl -sL https://api.github.com/repos/restic/restic/releases/latest | jq -r '.assets[].browser_download_url | select( contains("linux_amd64"))') \
  | bunzip2 - | sudo tee /usr/local/bin/restic > /dev/null

sudo chmod +x /usr/local/bin/restic
or if you are already root
curl -sLo - $(curl -sL https://api.github.com/repos/restic/restic/releases/latest | jq -r '.assets[].browser_download_url | select( contains("linux_amd64"))') \
  | bunzip2 - > /usr/local/bin/restic

chmod +x /usr/local/bin/restic
we can see the latest version
$ restic version
restic 0.9.6 compiled with go1.13.4 on linux/amd64
autocompletion
Enable autocompletion
sudo restic generate --bash-completion /etc/bash_completion.d/resticrestart your shell.
Prepare your repo
We need to prepare our destination repository. This is our backup endpoint. restic can save multiple snapshots for multiple hosts on the same endpoint (repo).
Apart from the files stored within the keys directory, all files are encrypted with AES-256 in counter mode (CTR). The integrity of the encrypted data is secured by a Poly1305-AES message authentication code (sometimes also referred to as a “signature”).
To access a restic repo, we need a key. We will use this key as password (or passphrase) and it is really important NOT to lose this key.
For automated backups (or scripts) we can use the environmental variables of our SHELL to export the password. It is best to export the password through a script or even better through a password file.
export -p RESTIC_PASSWORD=<our key>
or
export -p RESTIC_PASSWORD_FILE=<full path of 0400 file>
eg.
export -p RESTIC_PASSWORD=55C9225pXNK3s3f7624unWe can also declare the restic repository through an environmental variable
export -p RESTIC_REPOSITORY=<our repo>Local Repo
An example of local backup repo should be something like this:
$ cat restic.local.conf
export -p RESTIC_PASSWORD=55C9225pXNK3s3f7624un
export -p RESTIC_REPOSITORY="/mnt/backup/"
minio S3
We are going to use minio as an S3 object storage, so we need to export the Access & Sercet Key in a similar way as for amazon S3.
AccessKey <~> AWS_ACCESS_KEY_ID
SecretKey <~> AWS_SECRET_ACCESS_KEY
export -p AWS_ACCESS_KEY_ID=minioadmin
export -p AWS_SECRET_ACCESS_KEY=minioadminThe S3 endpoint is http://localhost:9000/demo so a full example should be:
$ cat restic.S3.conf
export -p AWS_ACCESS_KEY_ID=minioadmin
export -p AWS_SECRET_ACCESS_KEY=minioadmin
export -p RESTIC_PASSWORD=55C9225pXNK3s3f7624un
export -p RESTIC_REPOSITORY="s3:http://localhost:9000/demo"source the config file into your shell:
source restic.S3.confInitialize Repo
We are ready to initialise the remote repo
$ restic init
created restic repository f968b51633 at s3:http://localhost:9000/demo

Please note that knowledge of your password is required to access
the repository. Losing your password means that your data is
irrecoverably lost.
Be Careful if you asked to type a password, that means that you did not use a shell environmental variable to export a password. That is fine, but only if that was your purpose. Then you will see something like that:
$ restic init

enter password for new repository: <type your password here>
enter password again: <type your password here, again>

created restic repository ea97171d56 at s3:http://localhost:9000/demo

Please note that knowledge of your password is required to access
the repository. Losing your password means that your data is
irrecoverably lost.
enter password for new repository:
enter password again:
created restic repository ea97171d56 at s3:http://localhost:9000/demo

Please note that knowledge of your password is required to access
the repository. Losing your password means that your data is
irrecoverably lost.
backup
We are ready to take our first snapshot.
$ restic -v backup /home/ebal/

open repository
repository c8d9898b opened successfully, password is correct
created new cache in /home/ebal/.cache/restic
lock repository
load index files
start scan on [/home/ebal/]
start backup on [/home/ebal/]
scan finished in 0.567s: 2295 files, 307.823 MiB

Files:        2295 new,     0 changed,     0 unmodified
Dirs:            1 new,     0 changed,     0 unmodified
Data Blobs:   2383 new
Tree Blobs:      2 new
Added to the repo: 263.685 MiB

processed 2295 files, 307.823 MiB in 0:28
snapshot 33e8ae0d saved
You can exclude or include files with restic, but I will not get into this right now.
For more info, read Restic Documentation
standard input
restic can also take for backup:
mysqldump --all-databases -uroot -ppassword | xz - | restic --stdin --stdin-filename mysqldump.sql.bz2Check
$ restic -v check

using temporary cache in /tmp/restic-check-cache-528400534
repository c8d9898b opened successfully, password is correct
created new cache in /tmp/restic-check-cache-528400534
create exclusive lock for repository
load indexes
check all packs
check snapshots, trees and blobs
no errors were found
Take another snapshot
$ restic -v backup /home/ebal/ --one-file-system  --cleanup-cache

open repository
repository c8d9898b opened successfully, password is correct
lock repository
load index files
using parent snapshot 33e8ae0d
start scan on [/home/ebal/]
start backup on [/home/ebal/]
scan finished in 0.389s: 2295 files, 307.824 MiB

Files:           0 new,     4 changed,  2291 unmodified
Dirs:            0 new,     1 changed,     0 unmodified
Data Blobs:      4 new
Tree Blobs:      2 new
Added to the repo: 154.549 KiB

processed 2295 files, 307.824 MiB in 0:01
snapshot 280468f6 saved
List snapshots
$ restic -v snapshots

repository c8d9898b opened successfully, password is correct
ID        Time                 Host        Tags        Paths
-----------------------------------------------------------------
6988dda7  2020-03-14 23:32:55  elementary              /etc
33e8ae0d  2020-03-15 21:05:55  elementary              /home/ebal
280468f6  2020-03-15 21:08:38  elementary              /home/ebal
-----------------------------------------------------------------
3 snapshots
Remove snapshot
as you can see, I had one more snapshot before my home dir and I want to remove it
$ restic -v forget 6988dda7

repository c8d9898b opened successfully, password is correct
removed snapshot 6988dda7
list again
$ restic -v snapshots

repository c8d9898b opened successfully, password is correct
ID        Time                 Host        Tags        Paths
-----------------------------------------------------------------
33e8ae0d  2020-03-15 21:05:55  elementary              /home/ebal
280468f6  2020-03-15 21:08:38  elementary              /home/ebal
-----------------------------------------------------------------
2 snapshots
Compare snapshots
$ restic -v diff 33e8ae0d 280468f6

repository c8d9898b opened successfully, password is correct
comparing snapshot 33e8ae0d to 280468f6:

M    /home/ebal/.config/dconf/user
M    /home/ebal/.mozilla/firefox/pw9z9f9z.default-release/SiteSecurityServiceState.txt
M    /home/ebal/.mozilla/firefox/pw9z9f9z.default-release/datareporting/aborted-session-ping
M    /home/ebal/.mozilla/firefox/pw9z9f9z.default-release/storage/default/moz-extension+++62b23386-279d-4791-8ae7-66ab3d69d07d^userContextId=4294967295/idb/3647222921wleabcEoxlt-eengsairo.sqlite

Files:           0 new,     0 removed,     4 changed
Dirs:            0 new,     0 removed
Others:          0 new,     0 removed
Data Blobs:      4 new,     4 removed
Tree Blobs:     14 new,    14 removed
  Added:   199.385 KiB
  Removed: 197.990 KiB
Mount a snapshot
$ mkdir -p backup

$ restic -v mount backup/

repository c8d9898b opened successfully, password is correct
Now serving the repository at backup/
When finished, quit with Ctrl-c or umount the mountpoint.
open another terminal
$ cd backup/

$ ls -l
total 0
dr-xr-xr-x 1 ebal ebal 0 Μαρ  15 21:12 hosts
dr-xr-xr-x 1 ebal ebal 0 Μαρ  15 21:12 ids
dr-xr-xr-x 1 ebal ebal 0 Μαρ  15 21:12 snapshots
dr-xr-xr-x 1 ebal ebal 0 Μαρ  15 21:12 tags

$ ls -l hosts/
total 0
dr-xr-xr-x 1 ebal ebal 0 Μαρ  15 21:12 elementary

$ ls -l snapshots/
total 0
dr-xr-xr-x 3 ebal ebal 0 Μαρ  15 21:05 2020-03-15T21:05:55+02:00
dr-xr-xr-x 3 ebal ebal 0 Μαρ  15 21:08 2020-03-15T21:08:38+02:00
lrwxrwxrwx 1 ebal ebal 0 Μαρ  15 21:08 latest -> 2020-03-15T21:08:38+02:00

$ ls -l tags
total 0
So as we can see, snapshots are based on time.
$ du -sh snapshots/*

309M  snapshots/2020-03-15T21:05:55+02:00
309M  snapshots/2020-03-15T21:08:38+02:00
0     snapshots/latest
be aware as far as we have mounted the restic backup, there is a lock on the repo.
Do NOT forget to close the mount point when finished.
When finished, quit with Ctrl-c or umount the mountpoint.
  signal interrupt received, cleaning up
Check again
you may need to re-check to see if there is a lock on the repo
$ restic check

using temporary cache in /tmp/restic-check-cache-524606775
repository c8d9898b opened successfully, password is correct
created new cache in /tmp/restic-check-cache-524606775
create exclusive lock for repository
load indexes
check all packs
check snapshots, trees and blobs
no errors were found
Restore a snapshot
Identify which snapshot you want to restore
$ restic snapshots

repository c8d9898b opened successfully, password is correct
ID        Time                 Host        Tags        Paths
-----------------------------------------------------------------
33e8ae0d  2020-03-15 21:05:55  elementary              /home/ebal
280468f6  2020-03-15 21:08:38  elementary              /home/ebal
-----------------------------------------------------------------
2 snapshots
create a folder and restore the snapshot
$ mkdir -p restore
$ restic -v restore 280468f6 --target restore/

repository c8d9898b opened successfully, password is correct
restoring <Snapshot 280468f6 of [/home/ebal] at 2020-03-15 21:08:38.10445053 +0200 EET by ebal@elementary> to restore/
$ ls -l restore/
total 4
drwxr-xr-x 3 ebal ebal 4096 Μαρ 14 13:56 home
$ ls -l restore/home/
total 4
drwxr-xr-x 17 ebal ebal 4096 Μαρ 15 20:13 ebal
$ du -sh restore/home/ebal/
287M restore/home/ebal/List files from snapshot
$ restic -v ls 280468f6 | head
snapshot 280468f6 of [/home/ebal] filtered by [] at 2020-03-15 21:08:38.10445053 +0200 EET):

/home
/home/ebal
/home/ebal/.ICEauthority
/home/ebal/.Xauthority
/home/ebal/.bash_history
/home/ebal/.bash_logout
/home/ebal/.bashrc
/home/ebal/.cache
/home/ebal/.cache/.notifications.session
keys
$ restic key list

repository ea97171d opened successfully, password is correct
 ID        User  Host        Created
------------------------------------------------
*8c112442  ebal  elementary  2020-03-14 23:22:49
------------------------------------------------
restic rotate snapshot policy
a few more words about forget
Forget mode has a feature of keep last TIME snapshots, where time can be
- number of snapshots
- hourly
- daily
- weekly
- monthly
- yearly
and makes restic with local feature an ideally replacement for rsnapshot!
$ restic help forget

The "forget" command removes snapshots according to a policy. Please note that
this command really only deletes the snapshot object in the repository, which
is a reference to data stored there. In order to remove this (now unreferenced)
data after 'forget' was run successfully, see the 'prune' command.

Flags:
  -l, --keep-last n            keep the last n snapshots
  -H, --keep-hourly n          keep the last n hourly snapshots
  -d, --keep-daily n           keep the last n daily snapshots
  -w, --keep-weekly n          keep the last n weekly snapshots
  -m, --keep-monthly n         keep the last n monthly snapshots
  -y, --keep-yearly n          keep the last n yearly snapshots
Appendix - minio
MinIO is a s3 compatible object storage.
install server
sudo curl -sLo /usr/local/bin/minio \
  https://dl.min.io/server/minio/release/linux-amd64/minio

sudo chmod +x /usr/local/bin/minio

minio --version
minio version RELEASE.2020-03-14T02-21-58Z
run server
minio server ./dataEndpoint: http://192.168.122.31:9000 http://127.0.0.1:9000
AccessKey: minioadmin
SecretKey: minioadmin
Browser Access:
http://192.168.122.31:9000 http://127.0.0.1:9000
Command-line Access: https://docs.min.io/docs/minio-client-quickstart-guide
$ mc config host add myminio http://192.168.122.31:9000 minioadmin minioadmin
Object API (Amazon S3 compatible):
Go: https://docs.min.io/docs/golang-client-quickstart-guide
Java: https://docs.min.io/docs/java-client-quickstart-guide
Python: https://docs.min.io/docs/python-client-quickstart-guide
JavaScript: https://docs.min.io/docs/javascript-client-quickstart-guide
.NET: https://docs.min.io/docs/dotnet-client-quickstart-guide
Detected default credentials 'minioadmin:minioadmin',
please change the credentials immediately using 'MINIO_ACCESS_KEY' and 'MINIO_SECRET_KEY'browser
create demo bucket
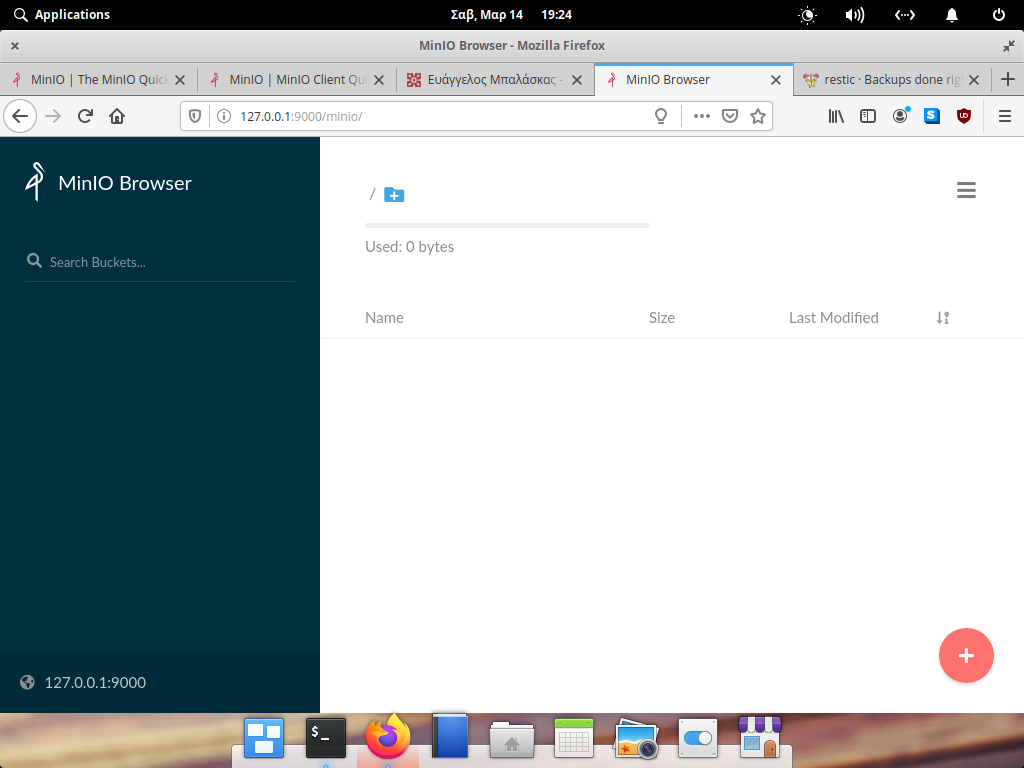


install client
sudo curl -sLo /usr/local/bin/mc
  https://dl.min.io/client/mc/release/linux-amd64/mc

sudo chmod +x /usr/local/bin/mc

mc -v
mc version RELEASE.2020-03-14T01-23-37Z
configure client
mc config host add myminio http://192.168.122.31:9000 minioadmin minioadminrun mc client
$ mc ls myminio
[2020-03-14 19:01:25 EET]      0B demo/

$ mc tree myminio/demo
$
mc autocompletion
mc --autocompletionyou need to restart your shell.
$ mc ls myminio/demo/

[2020-03-15 21:03:15 EET]    155B config
[2020-03-15 21:34:13 EET]      0B data/
[2020-03-15 21:34:13 EET]      0B index/
[2020-03-15 21:34:13 EET]      0B keys/
[2020-03-15 21:34:13 EET]      0B snapshots/
That’s It!
The other day I was thinking about my first ever job in this industry as a junior software engineer at the age of 20. I was doing okay with my studies at the Athens university of applied sciences but I was working outside of this industry. I had to gain some working experience in the field, so I made a decision to find part time work in a small software house. The (bad) experience and lessons learned in those couple weeks are still with me till this day … almost 20 years after!
Introductions
I got a flyer from the job board at school and I walked a couple of kilometers to the address of the place. I didn’t have a car back then (or for the next 7 years), so I had to use public transportation (bus) or walk wherever I wanted to go. I rang the doorbell around noon and went up on the second floor. There I introduced myself and asked for an opportunity to work with them. The owner/head of software team asked me a few things and got to the technical parts of the job.
- We are working with visual studio, but we are using HTML pages as forms for our product. In a sense we have copied the Amazon model!
Impressed, that I was going to work with the next amazon, I immediately said Yes to the offer.
HTML4
- Do you know HTML ?
- No, but I am a quick study.
He smiled at me and gave me (I think) this 800 pages book to read about HTML4.

HTML-4-Bible-Bryan-Pfaffenberger
He then told me:
- Read this book and come back when you finished it.
That was Friday noon.
I spent 10 hours quickly reading the book and keeping notes. Then I made a static demo site about Milos Island, where I had spent two weeks in the summer with my girlfriend. I had photos and material to write about, so I did that as an exercise.
Monday morning, I was presenting him with my homework. He didn’t believe me and spent a couple of hours talking about HTML4, just to prove that I had made the site, reading the book he gave me. In the end he was convinced.
Visual Studio
My next assignment was to learn about Visual Basic and Visual Studio. I had a basic idea about this but I had never worked as a professional programmer, so he prepared a few coding exercises to get familiar with the codebase. This was my onboarding period.
- Take this exercise and come back when you finish it. It will take you about a week.
Next day, I was again first in the office.
- So you came back to ask for help. That is okay. You should ask for help but you need to make an effort to do it yourself.
- I finished it, it was easy.
- Really? Then here is your next assignment. This is more difficult. Come back when you finished it.
Next day … I was back in the office.
- I finished it, what is next ?
- Okay, read this today and come back tomorrow.
Read it, returned the next day.
- Done
- Okay, I need you to sit here and work on the next assignments. I want to see how you are working on these coding exercises for myself.
- Okay.
Next two days, worked there on coding exercises to get familiar with their codebase. He was impressed and I was very happy.
QA
Next day (Friday):
- You now have access to our production code. Here are your tasks, whenever your finish something I want to see it. But before all that, here is a copy of our product. Today you will test it and report any bugs that you think we need to fix.
I took this task as my personal goal to prove myself. Worked ten hours that day and made a few comments on how to improve customer experience.
I asked if I can take the CD back with me at home and tested it on my personal computer.
It was a windows executable and the installer was pretty decent.
Next, next, install, done.
My windows 98 second edition didn’t have enough free space on my hard disk, and I needed to also install oracle to work on my semester lab exercises. My 8G hard disk and the gazillion of floppy disks around my home office on my Pentium III was my entire kingdom back then. So I uninstalled the application and rebooted my computer.
Then something horrible happened. My computer could not start the operating system. There were indications of missing DLLs.
I re-installed (repair) windows and was curious about what happened.
I re-installed the application and re-uninstalled it once more.
Reboot Windows and again missing DLLs.
First Conflict
I returned on Monday morning at the office and explained in details the extreme bug I had found. When a customer removes our software, they would corrupt their operating system. The majority of our customers didn’t have the technical experience to fix this problem. So I made it very clear that this is something we need to fix ASAP and we should inform every customer not to remove our application and reboot their machine. I was really proud that I had found this super bug and that we were going to save our company.
And then the owner told me:
- Our customers are paying us for installation of our software application. They are not paying us for fixing their computer problems.
- But this is something we introduced.
- Do not be silly, we are professionals, we do not make mistakes.
- But …
- No butts, this is not our problem.
Whatttt ?
First business lesson was:
- We do not make mistakes, customers should pay us for fixing our bugs!
Fixing Bugs
The next thing was to check the installer. We’ve noticed that they had marked a few windows DLLs as important to be there for our application to run. To avoid any mistakes we copied these DLLs from the application’s CD to our customer’s windows. The uninstallation process, was removing everything that installed so … the windows DLLs were gone! It was a simple mistake and easy to fix. Click on the correct checkbox for those files, not to be removed during the uninstallation process.
Distribution
We needed to distribute our application to all 2.000 customers all over Greece. We had to burn 2.000 physical CD’s, print 2.000 CD covers, compile 2.000 CD cases and put them in 2.000 envelopes and write 2.000 addresses on the envelopes. Then visit the local post office, pay for stamps etc and mail 2.000 CDs to our customer’s snail addresses.
We also had to provide letters of instructions:
- Uninstall the previous version
- Install the new version
in any circumstance do not reboot your PC till the new version is up and running. Then copy your license key into the program and connect to the internet to upload your contracts/data or sync your data from the central database to your laptop/desktop.
Money
For every patch (that meant a new CD to sent) our business model was to get money from our customers for our work and any expenses for distributing these CDs around Greece. That was the business deal with our customers. Customers were paying us, for our mistakes and could also take a week or so to get the fix. Depending on the post office delays. License keys were valid (I am not sure but I believe) for a year and then there was a subscription model for the patches. If customers wanted to subscribe. then they should pay us for every CD, for every patch, for every mistake. Our business model depended on that.
Second Conflict
For some reasons I had opinions about this effort. I made a suggestion to use our web server (web site) to provide the patch, so the customers can download from the internet and install it immediately without waiting for weeks till we sent the next CD with the latest version. Also ,no need of extra money for the post office or CDs or burning 2.000 CDs through the weekend. Customers should pay for the patch (our work) so this way would be best for everybody.
The owner replied to me, that they made more money with the current system, so no need of making things easier or cheaper for customers and I should keep this innovated ideas to myself.
At that point, the thought that I wasn’t working for the next amazon came in mind. They would put this extra profit on top of their customer’s needs.
Coding style
Finally, after my first week as an employee, I was now writing code as a software engineer. I did an impressive work of fixing bugs and refactoring code and in a sense made our product better, faster and safer. I had ideas and worked closely with the senior programmer on a few things. I was doing good, working fast, learning and providing value.
I’ve noticed a specific coding style so I kept it. The senior programmer could read my code and comments (I wrote a lot of comments) and vice versa. Finally I had joy from my work as a programmer.
Third Conflict
I vividly remember a specific coding issue, even 20 years after it happened. There was a form with 10 buttons. 10 clicks were the maximum possible events on this form. So I wrote a case statement of 9 events and one default. I submitting the code and the owner/head software programmer came to the office yelling at me.
- I’ve started reviewing your code and I can not read it. Why you are writing code like this. this is shit code. Case statements!!! No no no no. I want from you to write the same code as I write, so I can read/review it.
- But your example is a nested if-then-else for 11 events and we only have 10 events there. I made a case statement of 9 events and a default. It’s better.
- No, this is not better, it’s shit. I can not review your code. I want you to delete everything and start from the beginning. I want to read your code and think that I was writing this code instead of you.
- I am sorry, but I think your are wrong on this. This is better, trust me. I worked closely with our senior programmer and we believe this is better.
- No, remove everything.
Final Discussion
after a couple of hours
- So I need to talk with you.
- Sure, what can I do for you?
- I think this collaboration is not working between you and us.
- okay, I am really sorry about that. Can I please ask what are the problems so that I can improve in the future. This is my first job.
The truth bomb:
- You have all these new ideas to disturb our business model and cash flow. Using the web server to publish and distribute patches? Come on, you are very young to give me advice on how to run my business. you do not know anything.
- You made a lot of comments and suggestions about what we are doing wrong. This should never be the case, especially if you are talking to customers. We never make mistakes and we need to be paid for every customer request. I never make mistakes. I have a master’s degree in computer science and you are still a student. If something is wrong, customers should make a request and we are going to make a patch. That’s it.
- Finally ,you are writing code that I can not read/review. I am the head software engineer and I need from you to write code as I write code. You should never introduce anything new that I can not read.
Exit
Two weeks, I felt like really shit. I felt like I didn’t know anything about business but he paid me for the whole month.
After all these years, I now believe that he was afraid of my ideas. Of using the internet to help our business and reduce customer’s costs but the most important was he was afraid that new people came to his business and wrote code that he could not understand.
I made a promise that day to myself, that last Friday from my very first job:
- I will try always to do my best in this industry.
Almost 20 years have past from those two weeks, I never worked as a programmer, I chose to work as a sysadmin, mostly doing operations.
Thankfully I think I am doing well. So here, to the next 20 years ahead.
Thank you for reading my story.
Origin Post on LinkedIn, Published on January 6, 2020

Being abroad in Japan the last couple weeks, I’ve noticed that the high efficiency -from crossing roads to almost everything- they do (cooking/public transportation/etc) is due to the fact of using small queues for every step of the process. Reaching to a maximum throughout with small effort.
The culture of small batches/queues reminds me the core principles of #DevOps as they have identified in the book “The Goal: A Process of Ongoing Improvement” by Eli Goldratt and of course in “Theory of Constraints”.
Imagine this culture to everything you do in your life. From work to your personal life. Reducing any unnecessary extra cost, reducing waste by performing Kata. Kata is about form, from dancing to creating your cloud infrastructure with reproducible daily work or routines that are focusing in the process for reaching your business goals.
This truly impresses me in Japanese culture among with the respect they are showing to each other. You may of course notice the young people riding their bicycles in the middle of the street, watching their smartphone instead of the road 😀but the majority of people bow their head to show respect to other people and other people’s work or service.
We, sometimes forget this simple rule in our work. Sometimes the pressure, the deadlines or the plethora of open tickets in our Jira board (or boards) makes us cranky with our colleagues. We forget to show our respect to other people work. We forget that we need each other for reaching to our business values as a team.
We forget to have fun and joy. To be productive is not about closing tickets is about using your creativity to solve problems or provide a new or improve an old feature that can make your customers happy.
Is about the feedback you will get from your customers and colleagues, is about the respect to your work. Is about being happy.
For the first time in my life, I took almost 30days out of work, to relax, to detox (not having a laptop with me) to spend some time with family and friends. To be happy. So if any colleague from work is reading this article:
- Domo arigato
Happy new year (2020) to everybody. I wish you all good health and happiness.
PS: I am writing this article in a superexpress speed train going to Hiroshima, at 300 km/h
AppImage is a brilliant way to have executable linux apps to every distro, without the need of re-packaging or re-build them. Without getting into too many details, it uses FUSE (Filesystem in Userspace) and SquashFS to bundle the app into one file.
AppImages require FUSE to run. Filesystem in Userspace (FUSE) is a system that lets non-root users mount filesystems.
So here are my personal notes on how to create Mozilla Firefox 68.3.0esr binary archive to an AppImage file.
download
Let’s begin by gathering all necessaries files
export VERSION=68.3.0esr

curl -sLO https://github.com/AppImage/AppImageKit/releases/download/continuous/appimagetool-x86_64.AppImage

curl -sL https://ftp.mozilla.org/pub/firefox/releases/$VERSION/linux-x86_64/en-US/firefox-$VERSION.tar.bz2 | tar xjf -
configuration files
we need 3 files, under the firefox directory
AppRun(executable shell script)Icon(.png,.svg,.xpm)firefox.desktop(freedesktop.org desktop file)
AppRun
this is our guide, this file will start our application inside the AppImage mount.
#!/bin/sh
cd "$(dirname "$0")"
exec ./firefox "$@"
or
cat > firefox/AppRun <<EOF
#!/bin/sh
cd "\$(dirname "\$0")"
exec ./firefox "\$@"

EOF
Dont forget to make it executable
chmod +x firefox/AppRunIcon
There is an image within firefox directory that we can use as firefox icon:
./firefox/browser/chrome/icons/default/default128firefox.desktop
for more info check here: Desktop Entry Specification
[Desktop Entry]
Categories=Network;WebBrowser;
Icon=/browser/chrome/icons/default/default128
Name=Mozilla Firefox
Terminal=false
Type=Application
Version=1.0
or
cat > firefox/firefox.desktop <<EOF
[Desktop Entry]
Categories=Network;WebBrowser;
Icon=/browser/chrome/icons/default/default128
Name=Mozilla Firefox
Terminal=false
Type=Application
Version=1.0
EOF
In the Icon attribute, it must be an absolute path, not relative.
Perms
Give execute permission to appimagetool
chmod +x appimagetool-x86_64.AppImageBuild your AppImage
./appimagetool-x86_64.AppImage --no-appstream firefox/Mozilla Firefox
if everything is okay, you will see this:
ls -l Mozilla_Firefox-x86_64.AppImageand you can run it !
./Mozilla_Firefox-x86_64.AppImage
if you want to run a specific profile:
./Mozilla_Firefox-x86_64.AppImage --profile $(pwd)/.mozilla/firefox/ichznbon.test/Mount
When you are running your AppImage, you will notice that there is a new mount point in our system (fusermount)
$ mount | grep -i firefox
Mozilla_Firefox-x86_64.AppImage on /tmp/.mount_MozillshcmPB type fuse.Mozilla_Firefox-x86_64.AppImage (ro,nosuid,nodev,relatime,user_id=347,group_id=347)
and if you look really careful, you will see that it is mounted under /tmp/ !
$ ls /tmp/.mount_MozillshcmPB
application.ini     firefox          icons               libmozsqlite3.so  libplc4.so       minidump-analyzer     Throbber-small.gif
AppRun              firefox-bin      libfreeblpriv3.chk  libmozwayland.so  libplds4.so      omni.ja               updater
browser             firefox-bin.sig  libfreeblpriv3.so   libnspr4.so       libsmime3.so     pingsender            updater.ini
chrome.manifest     firefox.desktop  liblgpllibs.so      libnss3.so        libsoftokn3.chk  platform.ini          update-settings.ini
crashreporter       firefox.sig      libmozavcodec.so    libnssckbi.so     libsoftokn3.so   plugin-container
crashreporter.ini   fonts            libmozavutil.so     libnssdbm3.chk    libssl3.so       plugin-container.sig
defaults            gmp-clearkey     libmozgtk.so        libnssdbm3.so     libxul.so        precomplete
dependentlibs.list  gtk2             libmozsandbox.so    libnssutil3.so    libxul.so.sig    removed-files
That’s it !
Your first AppImage bundle linux package.
Docker Notes
FUSE · AppImage/AppImageKit Wiki · GitHub
docker run --cap-add SYS_ADMIN --cap-add MKNOD --device /dev/fuse:mrw --rm -ti ubuntu:18.04 bash
 apt-get update

 apt-get -y install curl libfuse2 file

 export VERSION=68.3.0esr

 curl -sLO https://github.com/AppImage/AppImageKit/releases/download/continuous/appimagetool-x86_64.AppImage

 curl -sL https://ftp.mozilla.org/pub/firefox/releases/$VERSION/linux-x86_64/en-US/firefox-$VERSION.tar.bz2 | tar xjf -

 cat > firefox/AppRun <<EOF
#!/bin/sh
cd "\$(dirname "\$0")"
exec ./firefox "\$@"
EOF

 cat > firefox/firefox.desktop <<EOF
[Desktop Entry]
Categories=Network;WebBrowser;
Icon=/browser/chrome/icons/default/default128
Name=Mozilla Firefox
Terminal=false
Type=Application
Version=1.0
EOF

 chmod +x appimagetool-x86_64.AppImage

 ./appimagetool-x86_64.AppImage --no-appstream firefox/
appimagetool, continuous build (commit 64321b7), build 2111 built on 2019-11-23 22:20:53 UTC
WARNING: gpg2 or gpg command is missing, please install it if you want to create digital signatures
Using architecture x86_64
/firefox should be packaged as Mozilla_Firefox-x86_64.AppImage
Deleting pre-existing .DirIcon
Creating .DirIcon symlink based on information from desktop file
Generating squashfs...
Parallel mksquashfs: Using 8 processors
Creating 4.0 filesystem on Mozilla_Firefox-x86_64.AppImage, block size 131072.
[===========================================================================================================================|] 1583/1583 100%

Exportable Squashfs 4.0 filesystem, gzip compressed, data block size 131072
    compressed data, compressed metadata, compressed fragments,
    compressed xattrs, compressed ids
    duplicates are removed
Filesystem size 71064.05 Kbytes (69.40 Mbytes)
    36.14% of uncompressed filesystem size (196646.16 Kbytes)
Inode table size 5305 bytes (5.18 Kbytes)
    60.46% of uncompressed inode table size (8774 bytes)
Directory table size 1026 bytes (1.00 Kbytes)
    54.78% of uncompressed directory table size (1873 bytes)
Number of duplicate files found 3
Number of inodes 81
Number of files 67
Number of fragments 7
Number of symbolic links  1
Number of device nodes 0
Number of fifo nodes 0
Number of socket nodes 0
Number of directories 13
Number of ids (unique uids + gids) 1
Number of uids 1
    root (0)
Number of gids 1
    root (0)
Embedding ELF...
Marking the AppImage as executable...
Embedding MD5 digest
Success

Please consider submitting your AppImage to AppImageHub, the crowd-sourced
central directory of available AppImages, by opening a pull request
at https://github.com/AppImage/appimage.github.io
final notes:
 du -h Mozilla_Firefox-x86_64.AppImage
70M Mozilla_Firefox-x86_64.AppImage

 ls -l Mozilla_Firefox-x86_64.AppImage
-rwxr-xr-x 1 root root 72962088 Dec 26 21:55 Mozilla_Firefox-x86_64.AppImage

 file Mozilla_Firefox-x86_64.AppImage
Mozilla_Firefox-x86_64.AppImage: ELF 64-bit LSB executable, x86-64, version 1 (SYSV), dynamically linked, interpreter /lib64/l, for GNU/Linux 2.6.18, stripped

 ldd Mozilla_Firefox-x86_64.AppImage
    not a dynamic executable
A couple months ago, we announced a public and free DNS service, so people can have encrypted DNS in their browsers and systems. We support both DNS over HTTPS (DoH) and DNS over TLS and our DoH service has two endpoints, the default /dns-query and one for blocking trackers and ads /ads. You can visit our page for more info.
dns
What is DNS?
Domain Name Service in a nutshell is when you are asking directions to find where Wikipedia is in the internet. Your browser does not know, so it will ask your computer. Your computer will ask your internet provider and your internet provider will ask someone else till they find the correct answer. In the end, your browser will know where to go and this is how you are visiting Wikipedia.
You need to trust all the above parties, to give you the correct answer and everybody knows that you are visiting Wikipedia.
doh
What is DoH (DNS Queries over HTTPS)?
It’s the implementation of RFC 8484. This is a way for your browser to ask where to find Wikipedia, without exposing to everybody that you want to visit Wikipedia! Still you need someone to ask for directions, but now both your question and the answer are encrypted. So you have privacy.
let’s get technical
What is RFC 8484?
In the above rfc, your client (eg. browser) asks your DNS via HTTP/2 representational state transfer (REST). DoH clients and servers need to sent a application/dns-message content (question/answer) and encode both the question and the answer in a bace64url message. Usually is GET, but POST is also supported on some servers.
doh-cli
So, today, we introduce doh-cli, a simple command line DoH client, written in python. You can use doh-cli as a binary client in your system. We support a few DoH public servers to test, and of course both LibreDNS DoH endpoints
You can see the code here:
install it
It is super easy
pip install doh-cli
or if python3 is not your default python
pip3 install doh-cli
howto use it?
Just ask your favorite DoH server (default is https://doh.libredns.gr/dns-query)
eg.
doh-cli libredns.gr A
and use help to see all the options
doh-cli --help
Why default output is json?
With modern tools and with multiline output, it is best to support a serialized format so you can use doh-cli with your tools. But if you dont like it:
doh-cli --output plain libredns.gr A
You can see all the options and help, on the project’s page.
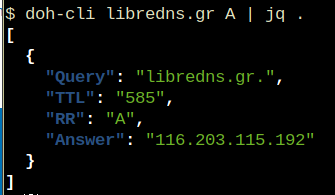
A few day ago, I was introduced to xip.io.
TLDR; You can have hostname for any IP Address!
$ dig +short @ipname.me www.192-168-1-1-ipname.me
192.168.1.1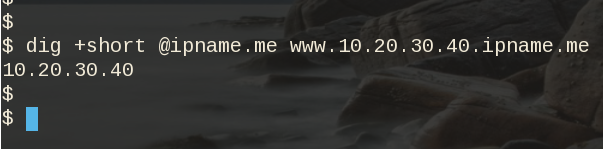
project
It uses the powerdns pipe backend to run a (187 lines) bash script, that strips the IP from the hostname and returns the IP. This works so well, that a few services depends on xip!
I was playing with the idea of using dnsdist to do that with the embedded Lua supports that dnsdist has. And the proof-of-concept result is about 10lines of Lua code.
The project is here: ipname on github
ifconfig
But not only returns you an IP Address for any (dynamic) hostname you ask, but you can also use this free & public service as a what-is-my-ip project over DNS.
$ dig +short @ipname.me googleyahoo.com
116.202.176.26
PS The code also validates the IPv4 Addresses!
In this blog post I will describe the easiest installation of a DoH/DoT VM for personal use, using dnsdist.
Next I will present a full installation example (from start) with dnsdist and PowerDNS.
Server Notes: Ubuntu 18.04
Client Notes: Archlinux
Every
{{ }}is a variable you need to change.
Do NOT copy/paste without making the changes.
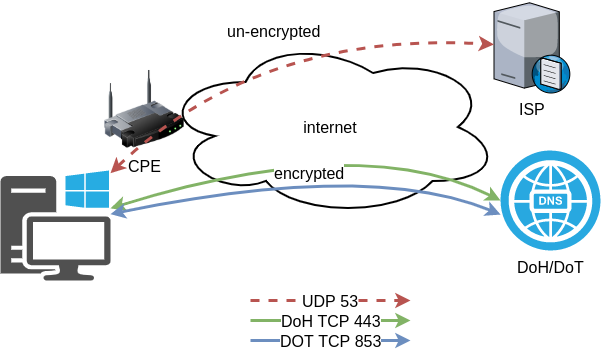
Login to VM
and became root
$ ssh {{ VM }}
$ sudo -i
from now on, we are running commands as root.
TLDR;
dnsdist DoH/DoT
If you just need your own DoH and DoT instance, then dnsdist will forward your cleartext queries to another public DNS server with the below configuration.
cat > /etc/dnsdist/dnsdist.conf <<EOF

-- resets the list to this array
setACL("::/0")
addACL("0.0.0.0/0")

addDOHLocal('0.0.0.0', '/etc/dnsdist/fullchain.pem', '/etc/dnsdist/privkey.pem')
addTLSLocal('0.0.0.0', '/etc/dnsdist/fullchain.pem', '/etc/dnsdist/privkey.pem')

newServer({address="9.9.9.9:53"})
EOF
You will need -of course- to have your certificates before hand.
That’s It !
a DoH/DoT using dnsdist and powerdns
For people that need a more in-depth article, here are my notes on how to setup from scratch an entire VM with powerdns recursor and dnsdist.
Let’s Begin:
Enable PowerDNS Repos
Add key
curl -sL https://repo.powerdns.com/FD380FBB-pub.asc | apt-key add -
OK
Create PowerDNS source list
cat > /etc/apt/sources.list.d/powerdns.list <<EOF
deb [arch=amd64] http://repo.powerdns.com/ubuntu bionic-dnsdist-14 main
deb [arch=amd64] http://repo.powerdns.com/ubuntu bionic-rec-42 main
EOF

cat > /etc/apt/preferences.d/pdns <<EOF
Package: pdns-* dnsdist*
Pin: origin repo.powerdns.com
Pin-Priority: 600
EOF
Update System and Install packages
apt-get update
apt-get -qy install dnsdist pdns-recursor certbot
You may see errors from powerdns, like
failed: E: Sub-process /usr/bin/dpkg returned an error code (1)ignore them for the time being.
PowerDNS Recursor
We are going to setup our recursor first and let’s make it a little interesting.
PowerDNS Configuration
cat > /etc/powerdns/recursor.conf <<EOF
config-dir=/etc/powerdns
hint-file=/etc/powerdns/root.hints
local-address=127.0.0.1
local-port=5353
lua-dns-script=/etc/powerdns/pdns.lua
etc-hosts-file=/etc/powerdns/hosts.txt
export-etc-hosts=on
quiet=yes
setgid=pdns
setuid=pdns
EOF

chmod 0644 /etc/powerdns/recursor.conf
chown pdns:pdns /etc/powerdns/recursor.conf
Create a custom response
This will be handy for testing our dns from cli.
cat > /etc/powerdns/pdns.lua <<EOF
domainame = "test.{{ DOMAIN }}"
response  = "{{ VM_ipv4.address }}"

function nxdomain(dq)
    if dq.qname:equal(domainame) then
        dq.rcode=0 -- make it a normal answer
        dq:addAnswer(pdns.A, response)
        dq.variable = true -- disable packet cache
        return true
    end
    return false
end
EOF

chmod 0644 /etc/powerdns/pdns.lua
chown pdns:pdns /etc/powerdns/pdns.lua
AdBlock
Let’s make it more interesting, block trackers and ads.
cat > /usr/local/bin/update.stevenBlack.hosts.sh <<EOF
#!/bin/bash

# Get StevenBlack hosts
curl -sLo /tmp/hosts.txt https://raw.githubusercontent.com/StevenBlack/hosts/master/hosts

touch /etc/powerdns/hosts.txt

# Get diff
diff -q <(sort -V /etc/powerdns/hosts.txt | column -t) <(sort -V /tmp/hosts.txt | column -t)
DIFF_STATUS=$?

# Get Lines
LINES=`grep -c ^ /tmp/hosts.txt`

# Check & restart if needed
if [ "${LINES}" -gt "200" -a "${DIFF_STATUS}" != "0" ]; then
    mv -f /tmp/hosts.txt /etc/powerdns/hosts.txt
    chmod 0644 /etc/powerdns/hosts.txt
    chown pdns:pdns /etc/powerdns/hosts.txt
    systemctl restart pdns-recursor
fi

# vim: sts=2 sw=2 ts=2 et
EOF

chmod +x /usr/local/bin/update.stevenBlack.hosts.sh
/usr/local/bin/update.stevenBlack.hosts.sh
Be Careful with Copy/Paste. Check the
$dollar sign.
OpenNic Project
Is it possible to make it more interesting ?
Yes! by using OpenNIC Project, instead of the default root NS
cat > /usr/local/bin/update.root.hints.sh <<EOF
#!/bin/bash

# Get root hints
dig . NS @75.127.96.89 | egrep -v '^;|^$' > /tmp/root.hints

touch /etc/powerdns/root.hints

# Get diff
diff -q <(sort -V /etc/powerdns/root.hints | column -t) <(sort -V /tmp/root.hints | column -t)
DIFF_STATUS=$?

# Get Lines
LINES=`grep -c ^ /tmp/root.hints`

# Check & restart if needed
if [ "${LINES}" -gt "20" -a "${DIFF_STATUS}" != "0" ]; then
    mv -f /tmp/root.hints /etc/powerdns/root.hints
    chmod 0644 /etc/powerdns/root.hints
    chown pdns:pdns /etc/powerdns/root.hints
    systemctl restart pdns-recursor
fi

# vim: sts=2 sw=2 ts=2 et
EOF

chmod +x /usr/local/bin/update.root.hints.sh
/usr/local/bin/update.root.hints.sh
dnsdist
dnsdist is a DNS load balancer with enhanced features.
dnsdist configuration
cat > /etc/dnsdist/dnsdist.conf <<EOF
-- resets the list to this array
setACL("::/0")
addACL("0.0.0.0/0")

addDOHLocal('0.0.0.0', '/etc/dnsdist/fullchain.pem', '/etc/dnsdist/privkey.pem')
addTLSLocal('0.0.0.0', '/etc/dnsdist/fullchain.pem', '/etc/dnsdist/privkey.pem')

newServer({address="127.0.0.1:5353"})
EOF
Certbot
Now it is time to get a new certificate with the help of letsencrypt.
Replace
{{ DOMAIN }}with your domain
We need to create the post hook first and this is why we need to copy the certificates under dnsdist folder.
cat > /usr/local/bin/certbot_post_hook.sh <<EOF
#!/bin/bash

cp -f /etc/letsencrypt/live/{{ DOMAIN }}/*pem /etc/dnsdist/
systemctl restart dnsdist.service

# vim: sts=2 sw=2 ts=2 et
EOF

chmod +x /usr/local/bin/certbot_post_hook.sh
and of course create a certbot script.
Caveat: I have the dry-run option in the below script. When you are ready, remove it.
cat > /usr/local/bin/certbot.create.sh <<EOF
#!/bin/bash

certbot --dry-run --agree-tos --standalone certonly --register-unsafely-without-email
    --pre-hook 'systemctl stop dnsdist'
    --post-hook /usr/local/bin/certbot_post_hook.sh
    -d {{ DOMAIN }} -d doh.{{ DOMAIN }} -d dot.{{ DOMAIN }}

# vim: sts=2 sw=2 ts=2 et
EOF

chmod +x /usr/local/bin/certbot.create.sh
Firewall
Now open your firewall to the below TCP Ports:
ufw allow 80/tcp
ufw allow 443/tcp
ufw allow 853/tcp- TCP 80 for certbot
- TCP 443 for dnsdist (DoT) and certbot !
- TCP 853 for dnsdist (DoH)
Let’s Encrypt
When you are ready, run the script
/usr/local/bin/certbot.create.shThat’s it !
Client
For this blog post, my test settings are:
Domain: ipname.me
IP: 88.99.36.45
DoT - Client
From systemd 243+ there is an option to validate certificates on DoT but
systemd-resolved only validates the DNS server certificate if it is issued for the server’s IP address (a rare occurrence).
so it is best to use: opportunistic
/etc/systemd/resolved.conf [Resolve]
DNS=88.99.36.45
FallbackDNS=1.1.1.1
DNSSEC=no
#DNSOverTLS=yes
DNSOverTLS=opportunistic
Cache=yes
ReadEtcHosts=yessystemctl restart systemd-resolved
Query
resolvectl query test.ipname.me test.ipname.me: 88.99.36.45 -- link: eth0
-- Information acquired via protocol DNS in 1.9ms.
-- Data is authenticated: noDoH - Client
Firefox Settings
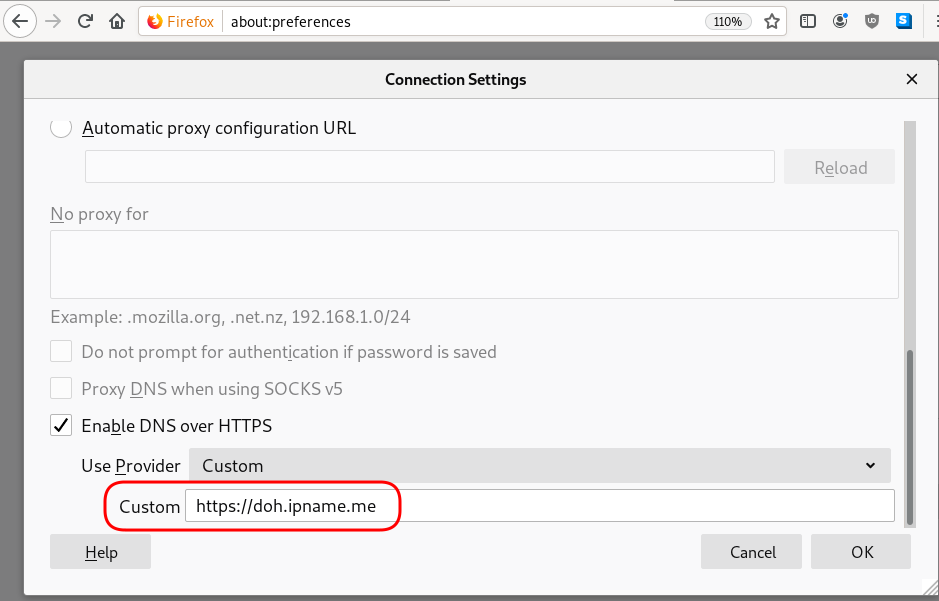
Firefox TRR
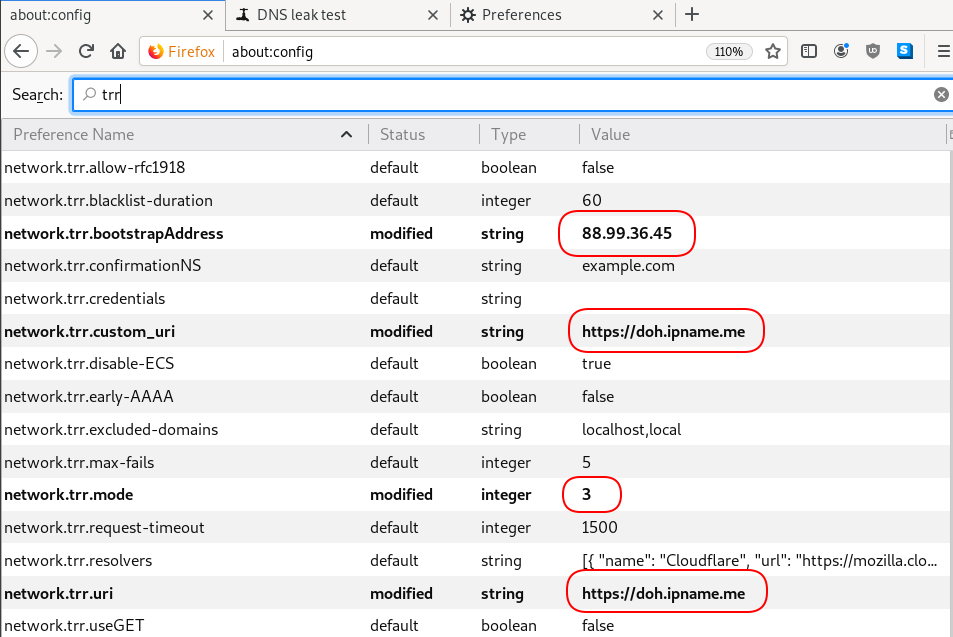
dnsleak
Click on DNS leak test site to verify
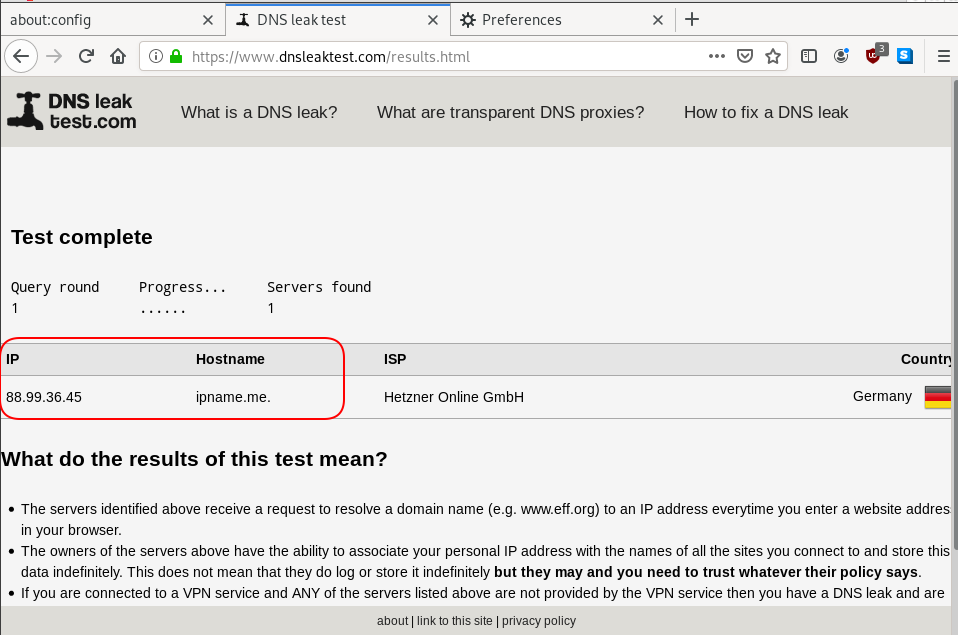
In this blog post you will find my personal notes on how to setup a Kubernetes as a Service (KaaS). I will be using Terraform to create the infrastructure on Hetzner’s VMs, Rancher for KaaS and Helm to install the first application on Kubernetes.
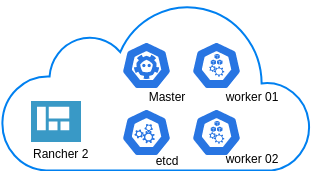
Many thanks to dear friend: adamo for his help.
Terraform
Let’s build our infrastructure!
We are going to use terraform to build 5 VMs
- One (1) master
- One (1) etcd
- Two (2) workers
- One (1) for the Web dashboard
I will not go to much details about terraform, but to have a basic idea
Provider.tf
provider "hcloud" {
    token = var.hcloud_token
}
Hetzner.tf
data "template_file" "userdata" {
  template = "${file("user-data.yml")}"
  vars = {
    hostname = var.domain
    sshdport = var.ssh_port
  }
}

resource "hcloud_server" "node" {
  count       = 5
  name        = "rke-${count.index}"
  image       = "ubuntu-18.04"
  server_type = "cx11"
  user_data   = data.template_file.userdata.rendered
}
Output.tf
output "IPv4" {
  value = hcloud_server.node.*.ipv4_address
}
In my user-data (cloud-init) template, the most important lines are these
  - usermod -a -G docker deploy
  - ufw allow 6443/tcp
  - ufw allow 2379/tcp
  - ufw allow 2380/tcp
  - ufw allow 80/tcp
  - ufw allow 443/tcp
build infra
$ terraform init
$ terraform plan
$ terraform apply
output
IPv4 = [
  "78.47.6x.yyy",
  "78.47.1x.yyy",
  "78.46.2x.yyy",
  "78.47.7x.yyy",
  "78.47.4x.yyy",
]
In the end we will see something like this on hetzner cloud
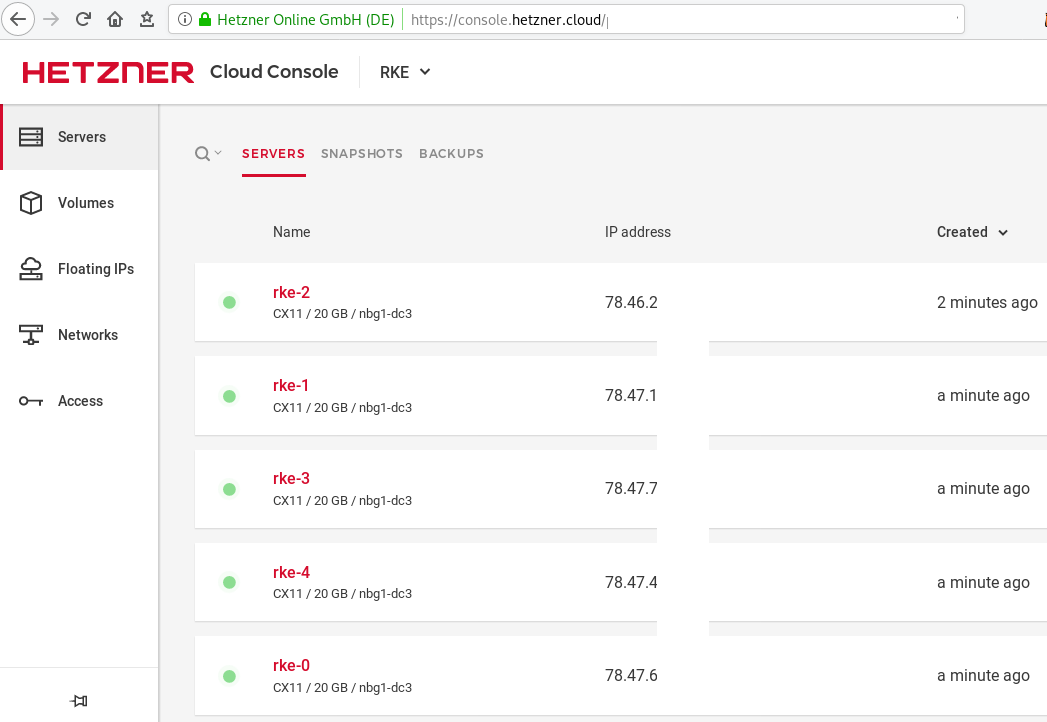
Rancher Kubernetes Engine
Take a look here for more details about what is required and important on using rke: Requirements.
We are going to use the rke aka the Rancher Kubernetes Engine, an extremely simple, lightning fast Kubernetes installer that works everywhere.
download
Download the latest binary from github:
Release Release v1.0.0
$ curl -sLO https://github.com/rancher/rke/releases/download/v1.0.0/rke_linux-amd64
$ chmod +x rke_linux-amd64
$ sudo mv rke_linux-amd64 /usr/local/bin/rke
version
$ rke --version

rke version v1.0.0
rke config
We are ready to configure our Kubernetes Infrastructure using the first 4 VMs.
$ rke configmaster
[+] Cluster Level SSH Private Key Path [~/.ssh/id_rsa]:
[+] Number of Hosts [1]: 4
[+] SSH Address of host (1) [none]: 78.47.6x.yyy
[+] SSH Port of host (1) [22]:
[+] SSH Private Key Path of host (78.47.6x.yyy) [none]:
[-] You have entered empty SSH key path, trying fetch from SSH key parameter
[+] SSH Private Key of host (78.47.6x.yyy) [none]:
[-] You have entered empty SSH key, defaulting to cluster level SSH key: ~/.ssh/id_rsa
[+] SSH User of host (78.47.6x.yyy) [ubuntu]:
[+] Is host (78.47.6x.yyy) a Control Plane host (y/n)? [y]:
[+] Is host (78.47.6x.yyy) a Worker host (y/n)? [n]: n
[+] Is host (78.47.6x.yyy) an etcd host (y/n)? [n]: n
[+] Override Hostname of host (78.47.6x.yyy) [none]: rke-master
[+] Internal IP of host (78.47.6x.yyy) [none]:
[+] Docker socket path on host (78.47.6x.yyy) [/var/run/docker.sock]:
etcd
[+] SSH Address of host (2) [none]: 78.47.1x.yyy
[+] SSH Port of host (2) [22]:
[+] SSH Private Key Path of host (78.47.1x.yyy) [none]:
[-] You have entered empty SSH key path, trying fetch from SSH key parameter
[+] SSH Private Key of host (78.47.1x.yyy) [none]:
[-] You have entered empty SSH key, defaulting to cluster level SSH key: ~/.ssh/id_rsa
[+] SSH User of host (78.47.1x.yyy) [ubuntu]:
[+] Is host (78.47.1x.yyy) a Control Plane host (y/n)? [y]: n
[+] Is host (78.47.1x.yyy) a Worker host (y/n)? [n]: n
[+] Is host (78.47.1x.yyy) an etcd host (y/n)? [n]: y
[+] Override Hostname of host (78.47.1x.yyy) [none]: rke-etcd
[+] Internal IP of host (78.47.1x.yyy) [none]:
[+] Docker socket path on host (78.47.1x.yyy) [/var/run/docker.sock]:
workers
worker-01
[+] SSH Address of host (3) [none]: 78.46.2x.yyy
[+] SSH Port of host (3) [22]:
[+] SSH Private Key Path of host (78.46.2x.yyy) [none]:
[-] You have entered empty SSH key path, trying fetch from SSH key parameter
[+] SSH Private Key of host (78.46.2x.yyy) [none]:
[-] You have entered empty SSH key, defaulting to cluster level SSH key: ~/.ssh/id_rsa
[+] SSH User of host (78.46.2x.yyy) [ubuntu]:
[+] Is host (78.46.2x.yyy) a Control Plane host (y/n)? [y]: n
[+] Is host (78.46.2x.yyy) a Worker host (y/n)? [n]: y
[+] Is host (78.46.2x.yyy) an etcd host (y/n)? [n]: n
[+] Override Hostname of host (78.46.2x.yyy) [none]: rke-worker-01
[+] Internal IP of host (78.46.2x.yyy) [none]:
[+] Docker socket path on host (78.46.2x.yyy) [/var/run/docker.sock]:
worker-02
[+] SSH Address of host (4) [none]: 78.47.4x.yyy
[+] SSH Port of host (4) [22]:
[+] SSH Private Key Path of host (78.47.4x.yyy) [none]:
[-] You have entered empty SSH key path, trying fetch from SSH key parameter
[+] SSH Private Key of host (78.47.4x.yyy) [none]:
[-] You have entered empty SSH key, defaulting to cluster level SSH key: ~/.ssh/id_rsa
[+] SSH User of host (78.47.4x.yyy) [ubuntu]:
[+] Is host (78.47.4x.yyy) a Control Plane host (y/n)? [y]: n
[+] Is host (78.47.4x.yyy) a Worker host (y/n)? [n]: y
[+] Is host (78.47.4x.yyy) an etcd host (y/n)? [n]: n
[+] Override Hostname of host (78.47.4x.yyy) [none]: rke-worker-02
[+] Internal IP of host (78.47.4x.yyy) [none]:
[+] Docker socket path on host (78.47.4x.yyy) [/var/run/docker.sock]:
Network Plugin Type
[+] Network Plugin Type (flannel, calico, weave, canal) [canal]: rke_config
[+] Authentication Strategy [x509]:
[+] Authorization Mode (rbac, none) [rbac]: none
[+] Kubernetes Docker image [rancher/hyperkube:v1.16.3-rancher1]:
[+] Cluster domain [cluster.local]:
[+] Service Cluster IP Range [10.43.0.0/16]:
[+] Enable PodSecurityPolicy [n]:
[+] Cluster Network CIDR [10.42.0.0/16]:
[+] Cluster DNS Service IP [10.43.0.10]:
[+] Add addon manifest URLs or YAML files [no]:
cluster.yml
the rke config will produce a cluster yaml file, for us to review or edit in case of misconfigure
$ ls -l cluster.yml
-rw-r----- 1 ebal ebal 4720 Dec  7 20:57 cluster.yml
rke up
We are ready to setup our KaaS by running:
$ rke upINFO[0000] Running RKE version: v1.0.0
INFO[0000] Initiating Kubernetes cluster
INFO[0000] [dialer] Setup tunnel for host [78.47.6x.yyy]
INFO[0000] [dialer] Setup tunnel for host [78.47.1x.yyy]
INFO[0000] [dialer] Setup tunnel for host [78.46.2x.yyy]
INFO[0000] [dialer] Setup tunnel for host [78.47.7x.yyy]
...
INFO[0329] [dns] DNS provider coredns deployed successfully
INFO[0329] [addons] Setting up Metrics Server
INFO[0329] [addons] Saving ConfigMap for addon rke-metrics-addon to Kubernetes
INFO[0329] [addons] Successfully saved ConfigMap for addon rke-metrics-addon to Kubernetes
INFO[0329] [addons] Executing deploy job rke-metrics-addon
INFO[0335] [addons] Metrics Server deployed successfully
INFO[0335] [ingress] Setting up nginx ingress controller
INFO[0335] [addons] Saving ConfigMap for addon rke-ingress-controller to Kubernetes
INFO[0335] [addons] Successfully saved ConfigMap for addon rke-ingress-controller to Kubernetes
INFO[0335] [addons] Executing deploy job rke-ingress-controller
INFO[0341] [ingress] ingress controller nginx deployed successfully
INFO[0341] [addons] Setting up user addons
INFO[0341] [addons] no user addons defined
INFO[0341] Finished building Kubernetes cluster successfully Kubernetes
The output of rke will produce a local kube config cluster yaml file for us to connect to kubernetes cluster.
kube_config_cluster.ymlLet’s test our k8s !
$ kubectl --kubeconfig=kube_config_cluster.yml get nodes -A
NAME           STATUS   ROLES          AGE    VERSION
rke-etcd       Ready    etcd           2m5s   v1.16.3
rke-master     Ready    controlplane   2m6s   v1.16.3
rke-worker-1   Ready    worker         2m4s   v1.16.3
rke-worker-2   Ready    worker         2m2s   v1.16.3

$ kubectl --kubeconfig=kube_config_cluster.yml get pods -A
NAMESPACE       NAME                                      READY   STATUS      RESTARTS   AGE
ingress-nginx   default-http-backend-67cf578fc4-nlbb6     1/1     Running     0          96s
ingress-nginx   nginx-ingress-controller-7scft            1/1     Running     0          96s
ingress-nginx   nginx-ingress-controller-8bmmm            1/1     Running     0          96s
kube-system     canal-4x58t                               2/2     Running     0          114s
kube-system     canal-fbr2w                               2/2     Running     0          114s
kube-system     canal-lhz4x                               2/2     Running     1          114s
kube-system     canal-sffwm                               2/2     Running     0          114s
kube-system     coredns-57dc77df8f-9h648                  1/1     Running     0          24s
kube-system     coredns-57dc77df8f-pmtvk                  1/1     Running     0          107s
kube-system     coredns-autoscaler-7774bdbd85-qhs9g       1/1     Running     0          106s
kube-system     metrics-server-64f6dffb84-txglk           1/1     Running     0          101s
kube-system     rke-coredns-addon-deploy-job-9dhlx        0/1     Completed   0          110s
kube-system     rke-ingress-controller-deploy-job-jq679   0/1     Completed   0          98s
kube-system     rke-metrics-addon-deploy-job-nrpjm        0/1     Completed   0          104s
kube-system     rke-network-plugin-deploy-job-x7rt9       0/1     Completed   0          117s

$ kubectl --kubeconfig=kube_config_cluster.yml get componentstatus
NAME                 AGE
controller-manager   <unknown>
scheduler            <unknown>
etcd-0               <unknown>             <unknown>

$ kubectl --kubeconfig=kube_config_cluster.yml get deployments -A
NAMESPACE       NAME                   READY   UP-TO-DATE   AVAILABLE   AGE
ingress-nginx   default-http-backend   1/1     1            1           2m58s
kube-system     coredns                2/2     2            2           3m9s
kube-system     coredns-autoscaler     1/1     1            1           3m8s
kube-system     metrics-server         1/1     1            1           3m4s

$ kubectl --kubeconfig=kube_config_cluster.yml get ns
NAME              STATUS   AGE
default           Active   4m28s
ingress-nginx     Active   3m24s
kube-node-lease   Active   4m29s
kube-public       Active   4m29s
kube-system       Active   4m29s
Rancer2
Now login to the 5th VM we have in Hetzner:
ssh "78.47.4x.yyy" -l ubuntu -p zzzzand install the stable version of Rancher2
$ docker run -d
    --restart=unless-stopped
    -p 80:80 -p 443:443
    --name rancher2
    -v /opt/rancher:/var/lib/rancher
    rancher/rancher:stable
    --acme-domain k8s.ipname.me
Caveat: I have create a domain and assigned to this hostname the IP of the latest VMs!
Now I can use letsencrypt with rancher via acme-domain.
verify
$ docker images -a
REPOSITORY          TAG                 IMAGE ID            CREATED             SIZE
rancher/rancher     stable              5ebba94410d8        10 days ago         654MB

$ docker ps -a -a
CONTAINER ID        IMAGE                    COMMAND                  CREATED             STATUS              PORTS                                      NAMES
8f798fb8184c        rancher/rancher:stable   "entrypoint.sh --acm…"   17 seconds ago      Up 15 seconds       0.0.0.0:80->80/tcp, 0.0.0.0:443->443/tcp   rancher2
Access
Before we continue, we need to give access to these VMs so they can communicate with each other. In cloud you can create a VPC with the correct security groups. But with VMs the easiest way is to do something like this:
sudo ufw allow from "78.47.6x.yyy",
sudo ufw allow from "78.47.1x.yyy",
sudo ufw allow from "78.46.2x.yyy",
sudo ufw allow from "78.47.7x.yyy",
sudo ufw allow from "78.47.4x.yyy",
Dashboard
Open your browser and type the IP of your rancher2 VM:
https://78.47.4x.yyyor (in my case):
https://k8s.ipname.meand follow the below instructions
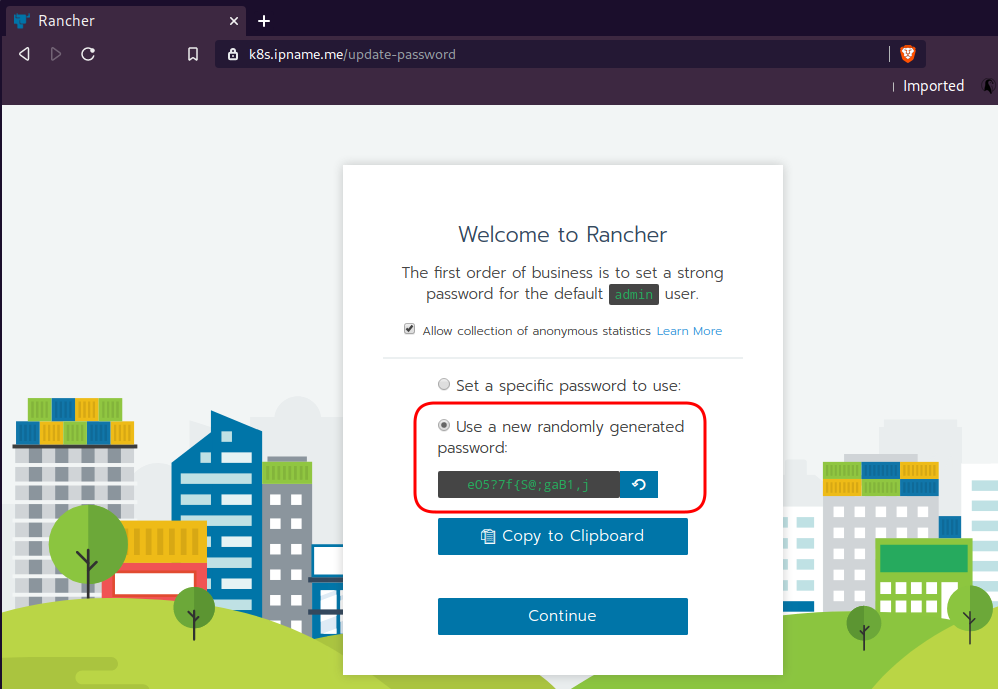


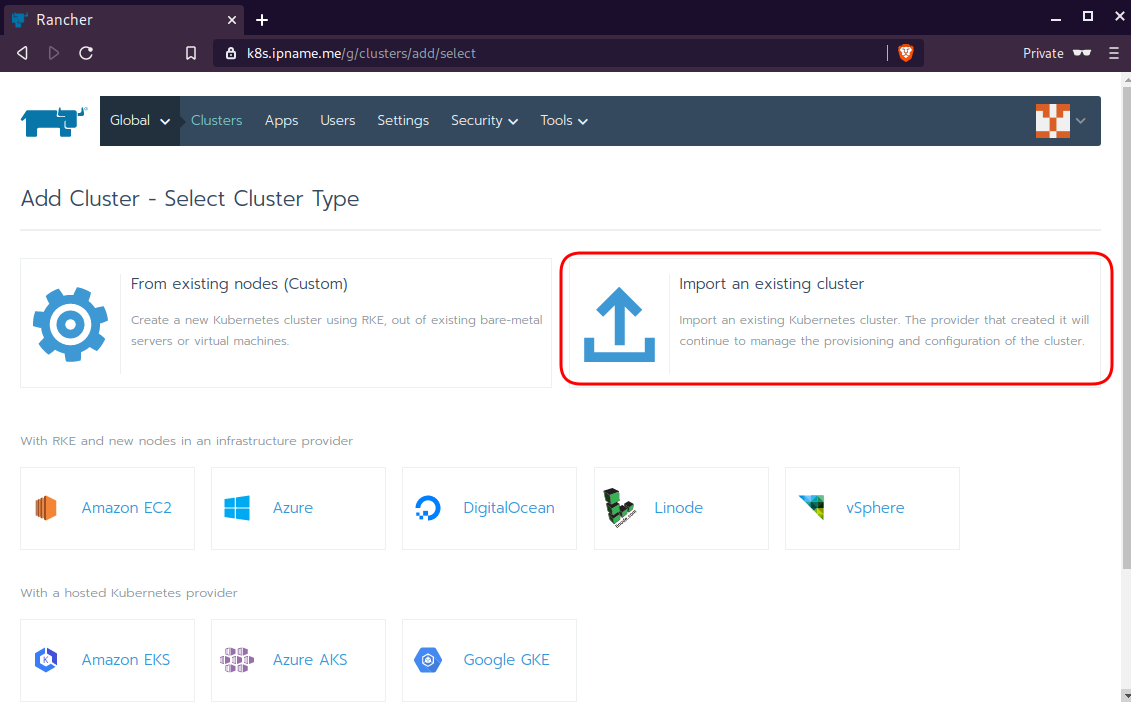
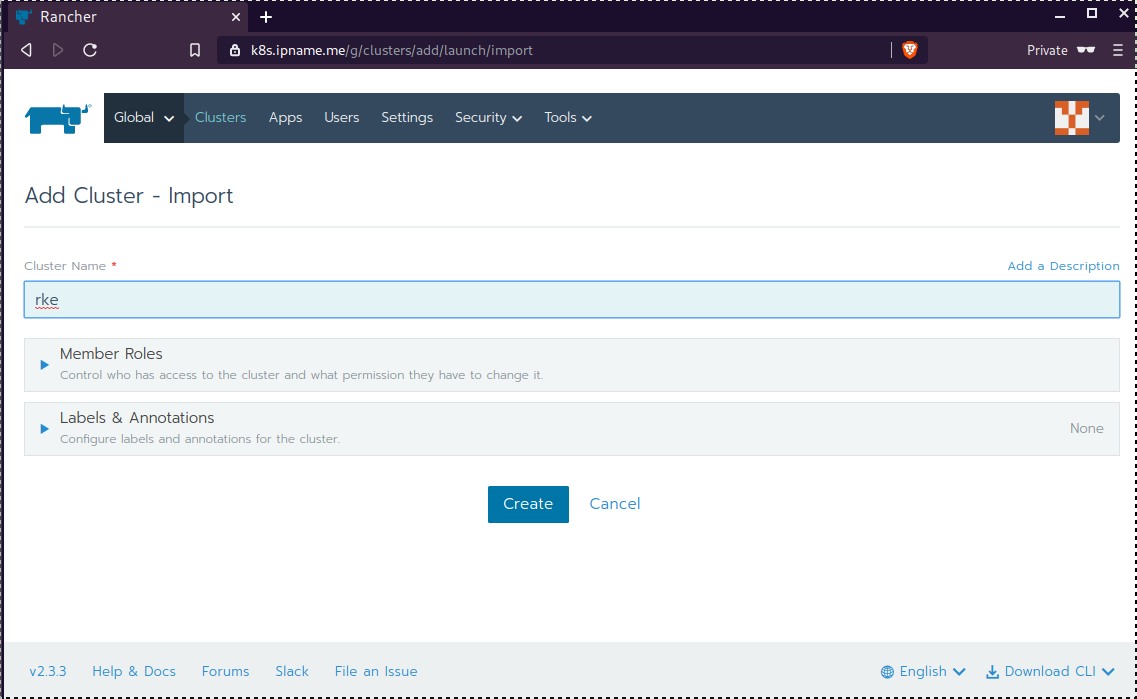
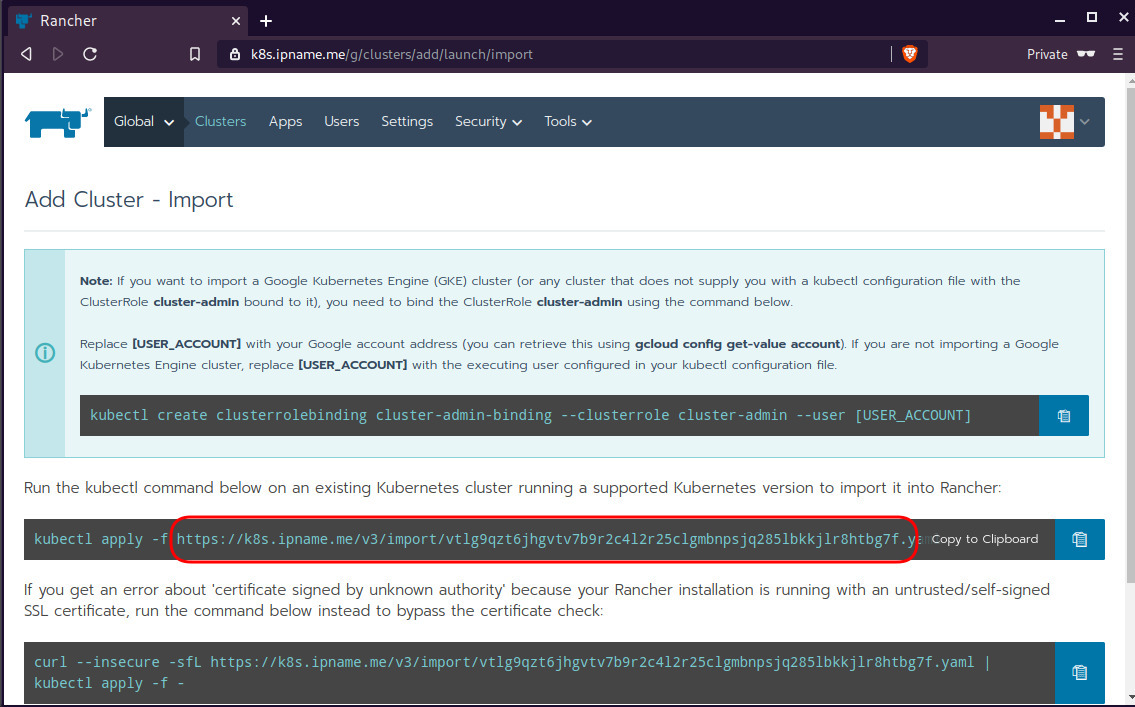
Connect cluster with Rancher2
Download the racnher2 yaml file to your local directory:
$ curl -sLo rancher2.yaml https://k8s.ipname.me/v3/import/nk6p4mg9tzggqscrhh8bzbqdt4447fsffwfm8lms5ghr8r498lngtp.yamlAnd apply this yaml file to your kubernetes cluster:
$ kubectl --kubeconfig=kube_config_cluster.yml apply -f rancher2.yaml

clusterrole.rbac.authorization.k8s.io/proxy-clusterrole-kubeapiserver unchanged
clusterrolebinding.rbac.authorization.k8s.io/proxy-role-binding-kubernetes-master unchanged
namespace/cattle-system unchanged
serviceaccount/cattle unchanged
clusterrolebinding.rbac.authorization.k8s.io/cattle-admin-binding unchanged
secret/cattle-credentials-2704c5f created
clusterrole.rbac.authorization.k8s.io/cattle-admin configured
deployment.apps/cattle-cluster-agent configured
daemonset.apps/cattle-node-agent configured
Web Gui

kubectl config
We can now use the Rancher kubectl config by downloading from here:

In this post, it is rancher2.config.yml
helm
Final step is to use helm to install an application to our kubernetes cluster
download and install
$ curl -sfL https://get.helm.sh/helm-v3.0.1-linux-amd64.tar.gz | tar -zxf -

$ chmod +x linux-amd64/helm
$ sudo mv linux-amd64/helm /usr/local/bin/
Add Repo
$ helm repo add stable https://kubernetes-charts.storage.googleapis.com/
"stable" has been added to your repositories

$ helm repo update
Hang tight while we grab the latest from your chart repositories...
...
Successfully got an update from the "stable" chart repository
Update Complete. ⎈ Happy Helming!⎈
weave-scope
Install weave scope to rancher:
$ helm --kubeconfig rancher2.config.yml install stable/weave-scope --generate-nameNAME: weave-scope-1575800948
LAST DEPLOYED: Sun Dec 8 12:29:12 2019
NAMESPACE: default
STATUS: deployed
REVISION: 1
NOTES:
You should now be able to access the Scope frontend in your web browser, by
using kubectl port-forward:
kubectl -n default port-forward $(kubectl -n default get endpoints
weave-scope-1575800948-weave-scope -o jsonpath='{.subsets[0].addresses[0].targetRef.name}') 8080:4040
then browsing to http://localhost:8080/.
For more details on using Weave Scope, see the Weave Scope documentation:
https://www.weave.works/docs/scope/latest/introducing/Proxy
Last, we are going to use kubectl to create a forwarder
$ kubectl --kubeconfig=rancher2.config.yml -n default port-forward $(kubectl --kubeconfig=rancher2.config.yml -n default get endpoints weave-scope-1575800948-weave-scope -o jsonpath='{.subsets[0].addresses[0].targetRef.name}') 8080:4040
Forwarding from 127.0.0.1:8080 -> 4040
Forwarding from [::1]:8080 -> 4040
Open your browser in this url:
http://localhost:8080
That’s it !
LibreDNS has a new endpoint
https://doh.libredns.gr/adsThis new endpoint is unique cause it blocks by default Ads & Trackers !
AdBlock
We are currently using Steven Black’s hosts file.
noticeable & mentionable
LibreDNS DOES NOT keep any logs and we are using OpenNIC as TLD Tier1 root NS
Here are my settings
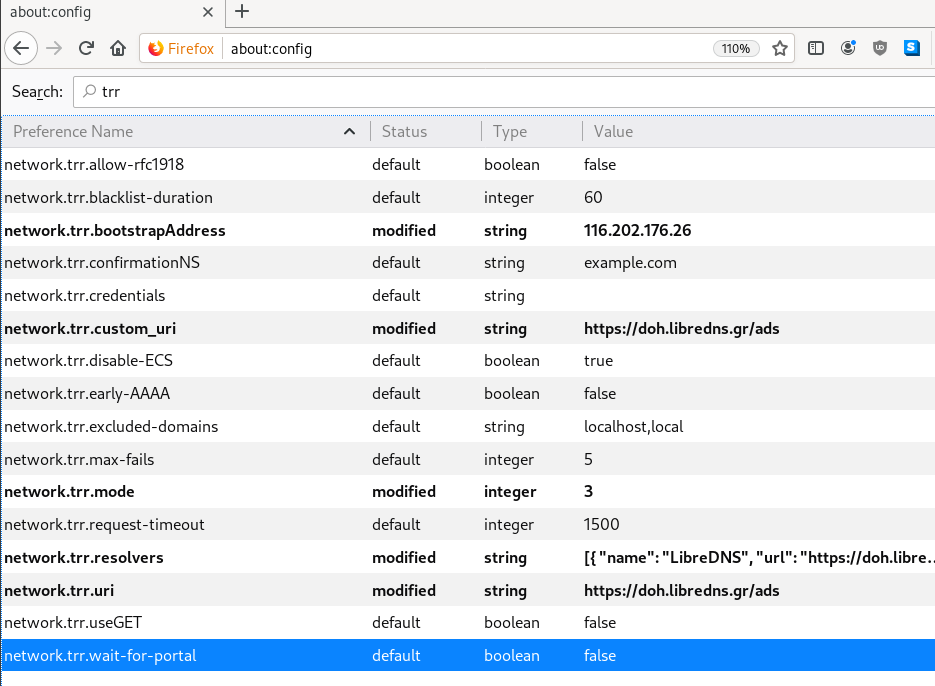
LibreOps & LibreDNS
LibreOps announced a new public service: LibreDNS, a new DoH/DoT (DNS over Https/DNS over TLS) free public service for people that want to bypass DNS restrictions and/or want to use TLS in their DNS queries. Firefox has already collaborated with Cloudflare for this case but I believe we can do better than using a centralized public service of a profit-company.
Personal Notes
So here are my personal notes for using LibreDNS in firefox
Firefox
Open Preferences/Options
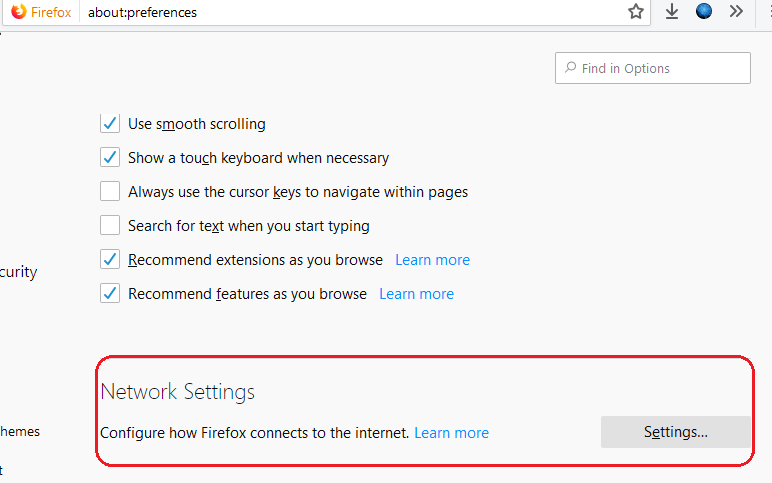
Enable DoH

TRR mode 2
Now the tricky part.
TRR mode is 2 when you enable DoH. What does this mean?
2 is when firefox is trying to use DoH but if it fails (or timeout) then firefox will go back to ask your operating system’s DNS.
DoH is a URL, so the first time firefox needs to resolve doh.libredns.gr and it will ask your operating system for that.
host file
There is way to exclude doh.libredns.gr from DoH , and use your /etc/hosts file instead your local DNS and enable TRR mode to 3, which means you will ONLY use DoH service for DNS queries.
# grep doh.libredns.gr /etc/hosts
116.202.176.26 doh.libredns.gr
TRR mode 3
and in
about:config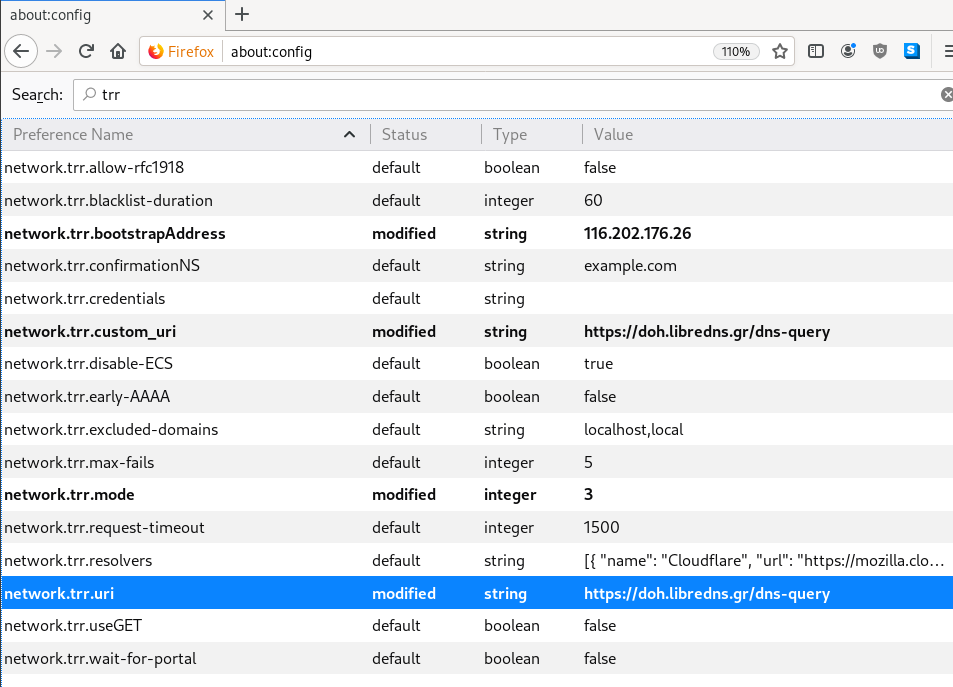
DNS Leak
Try DNS Leak Test to verify that your local ISP is NOT your firefox DNS
Thunderbird
Thunderbird also supports DoH and here are my settings
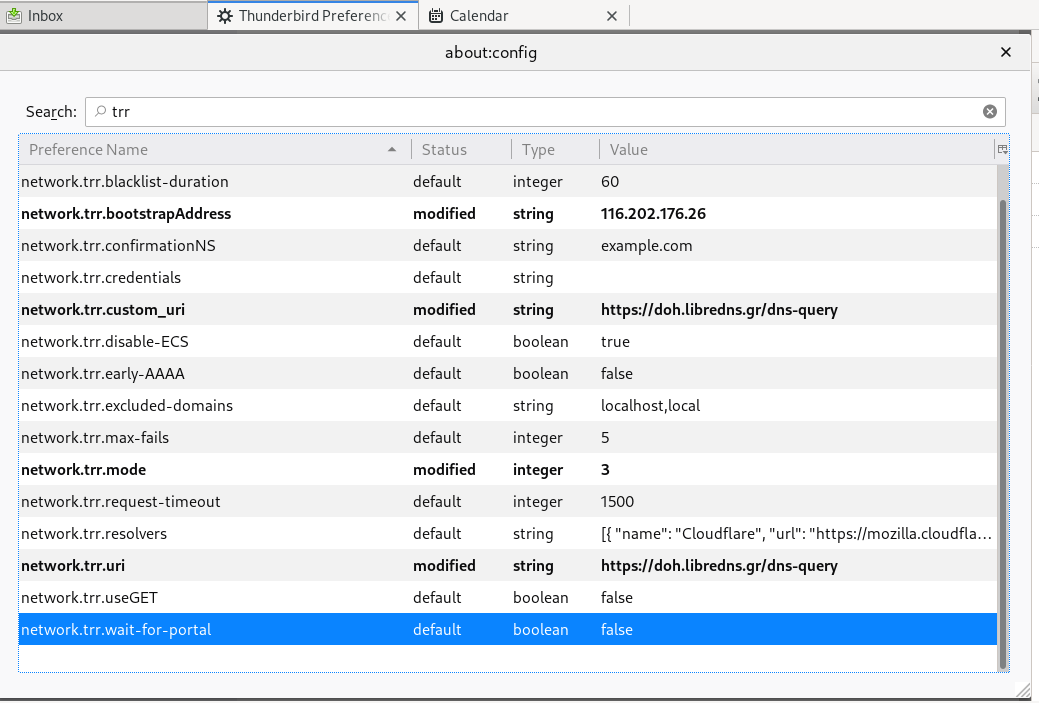
PS: Do not forget, this is NOT a global change, just your firefox will ask libredns for any dns query.
a few days ago CentOS-8 (1905) was released and you can find details here ReleaseNotes
Below is a visual guide on how to net-install centos8 1905
notes on a qemu-kvm
Boot
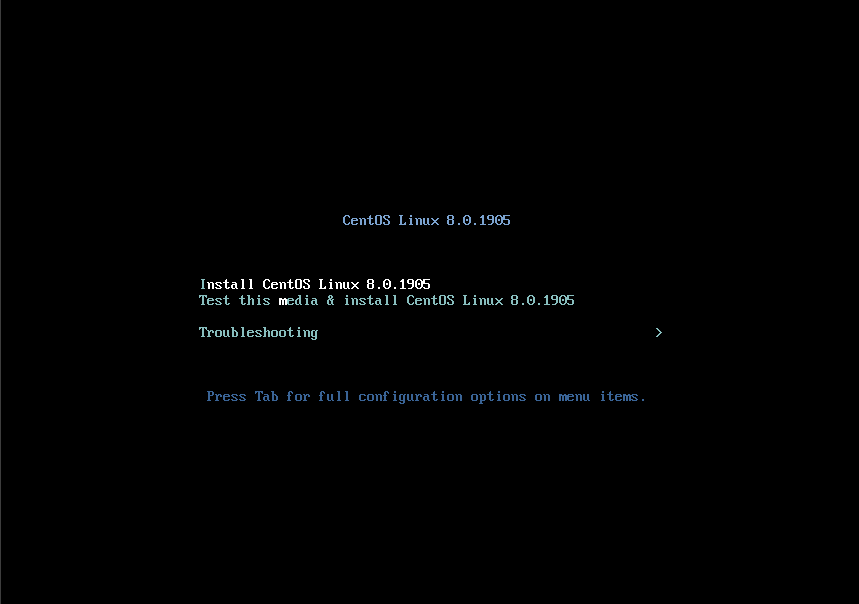
Select Language
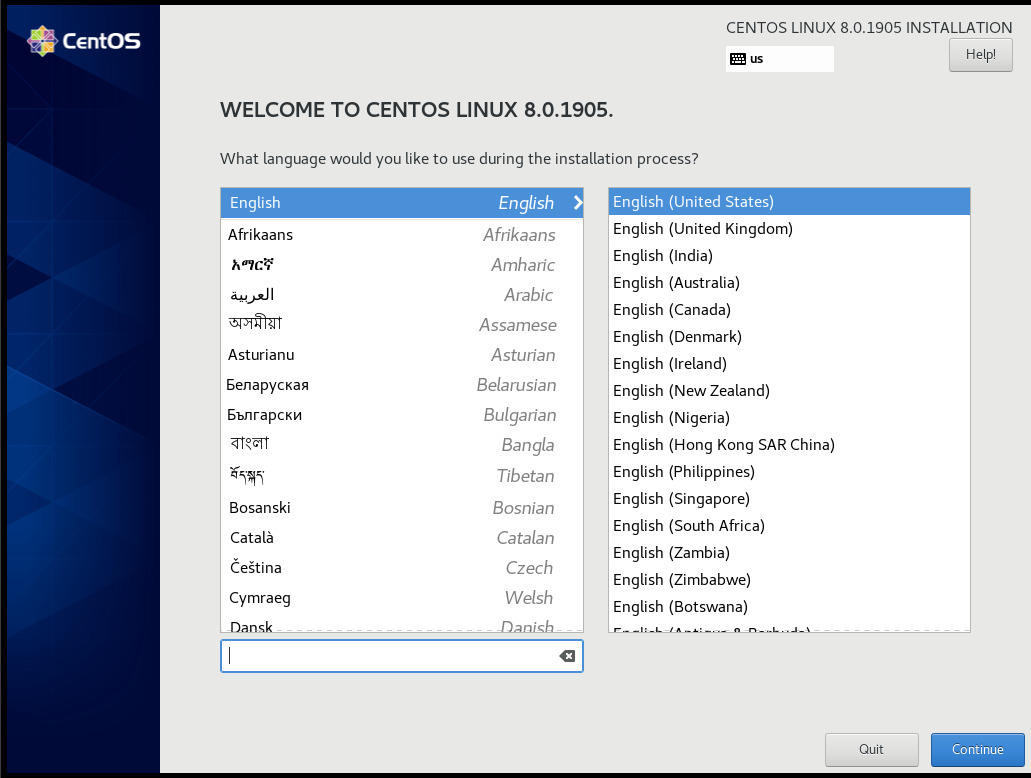
Menu
I have marked the next screens. For netinstall you need to setup first network
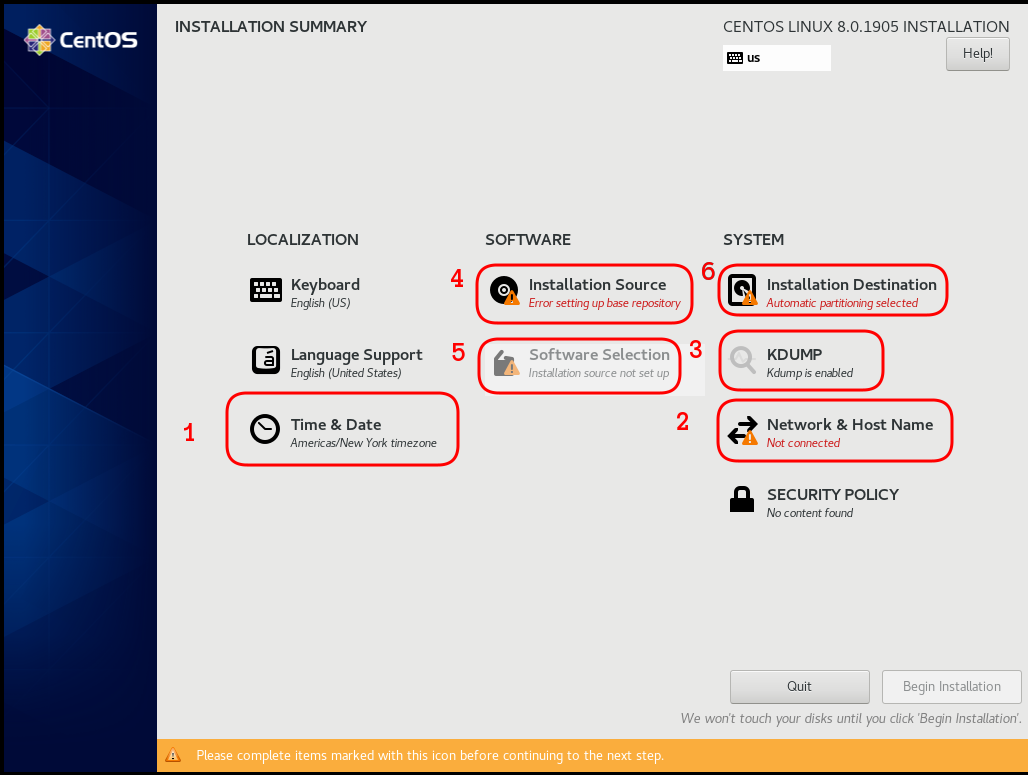
Time

Network
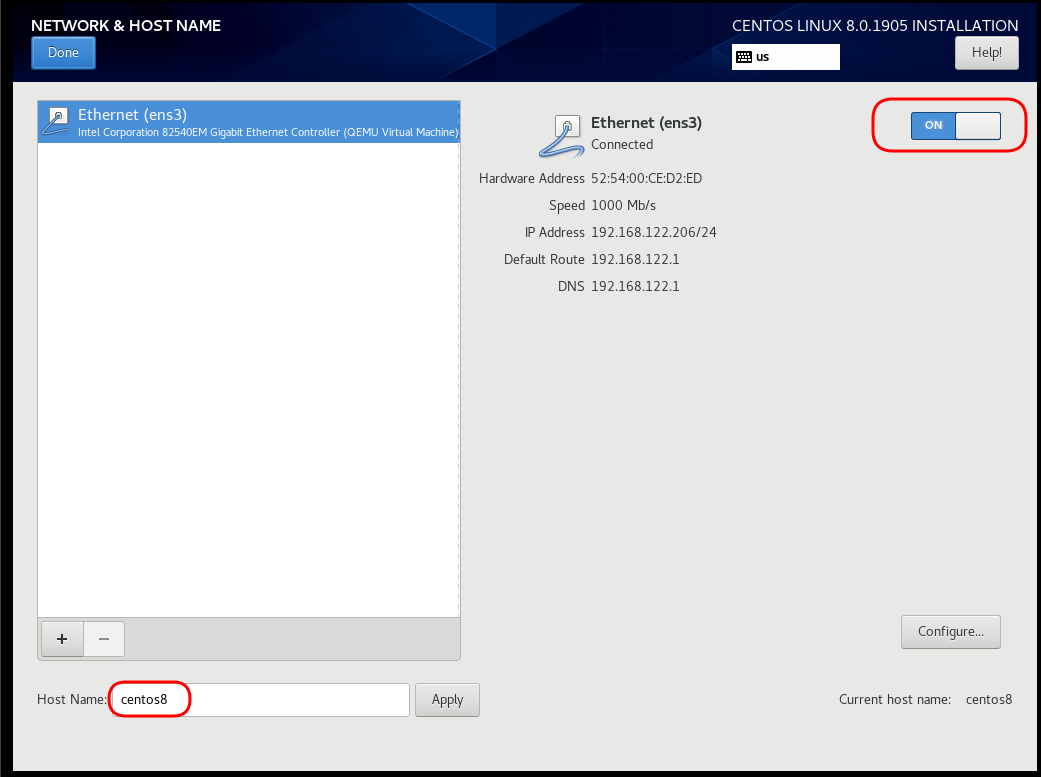
Disable kdump
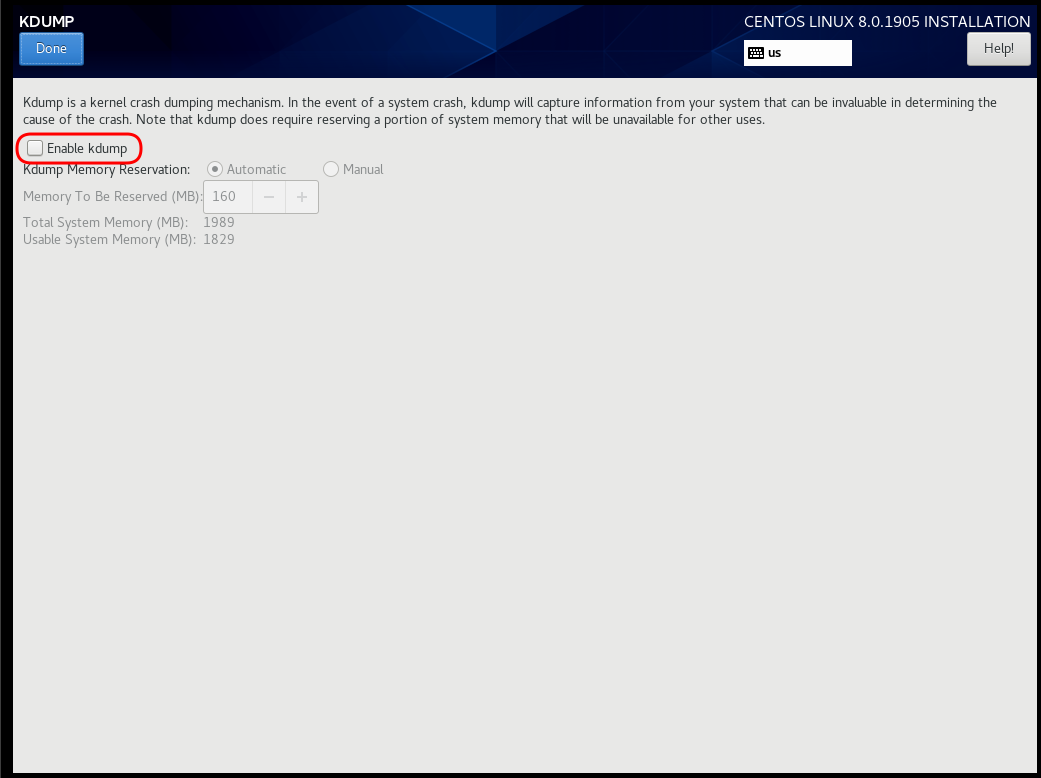
Add Repo
ftp.otenet.gr/linux/centos/8/BaseOS/x86_64/os/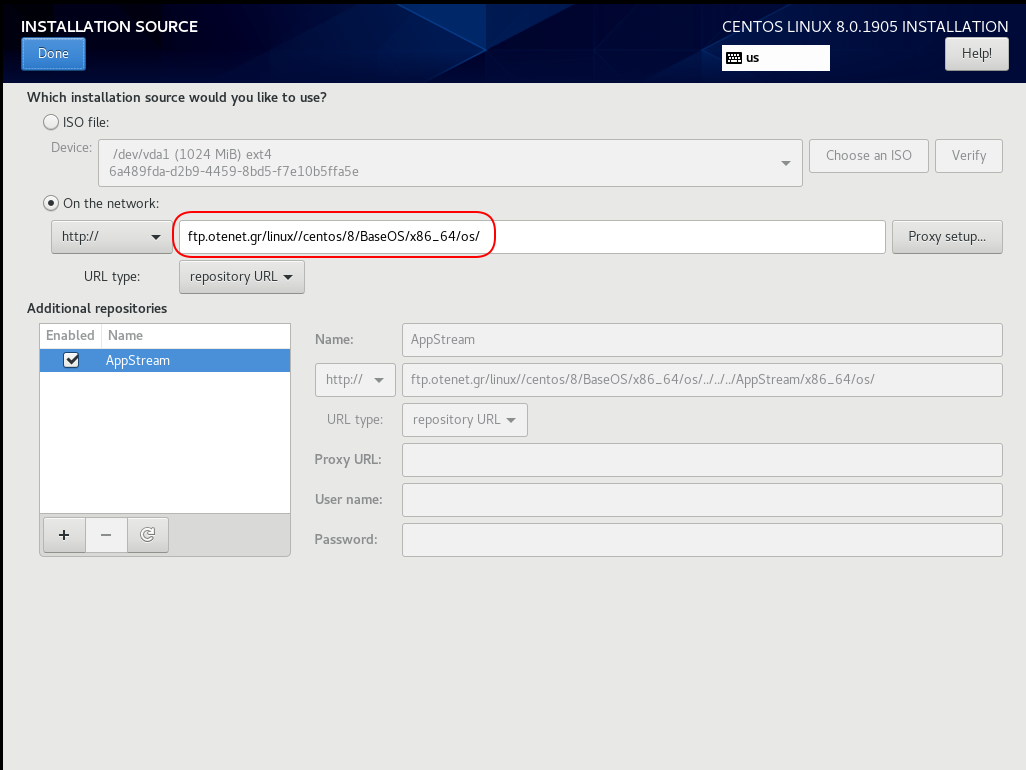
Server Installation
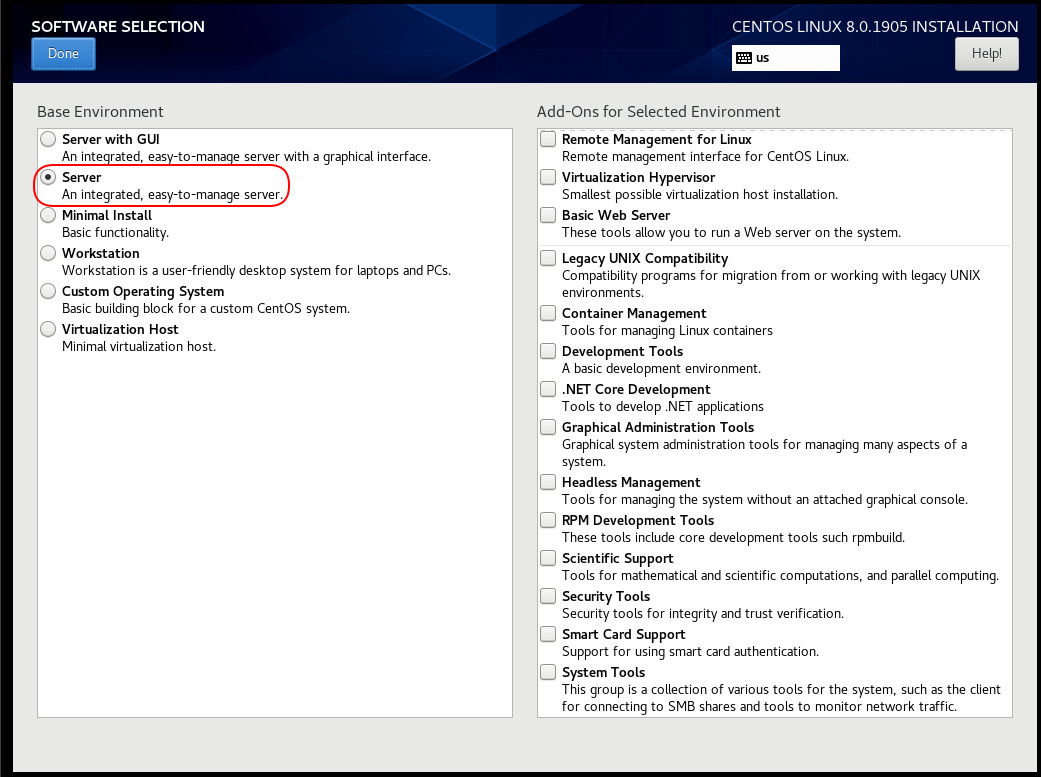
Disk
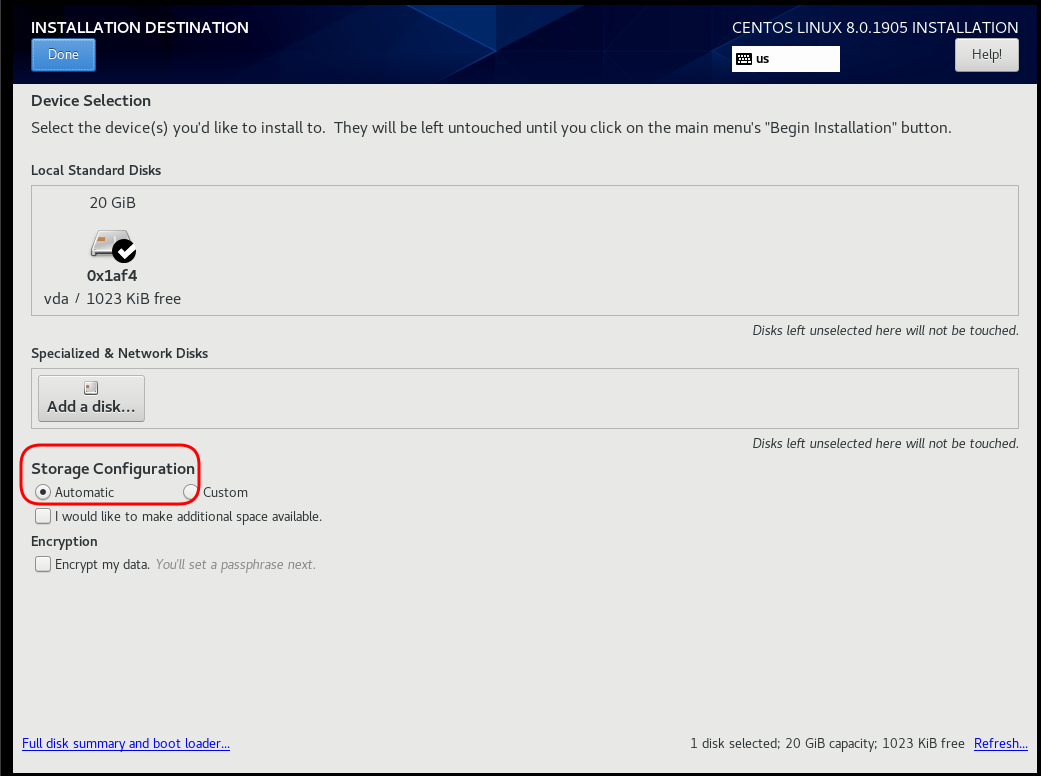
Review
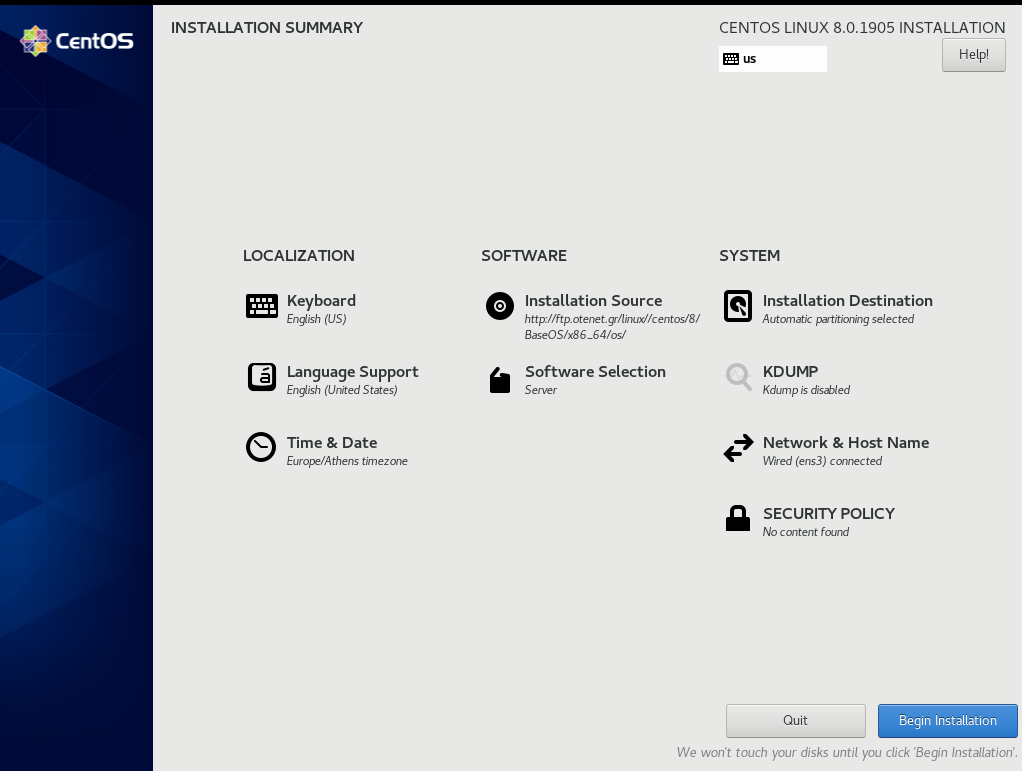
Begin Installation
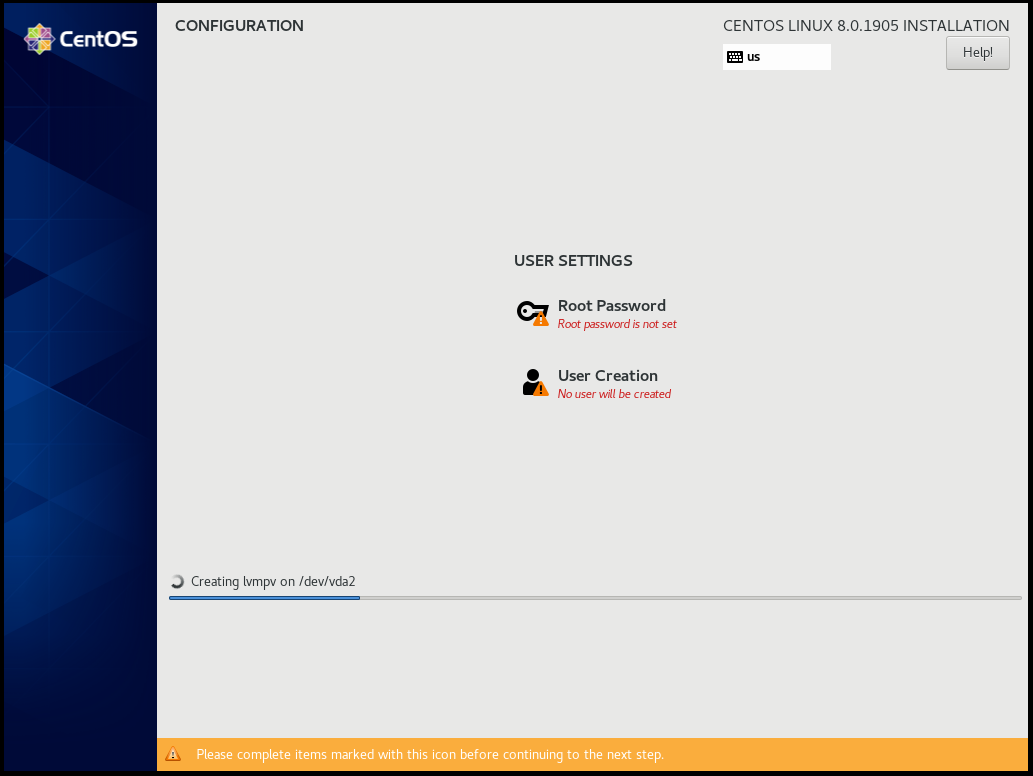
Root

User
Make this user administrator
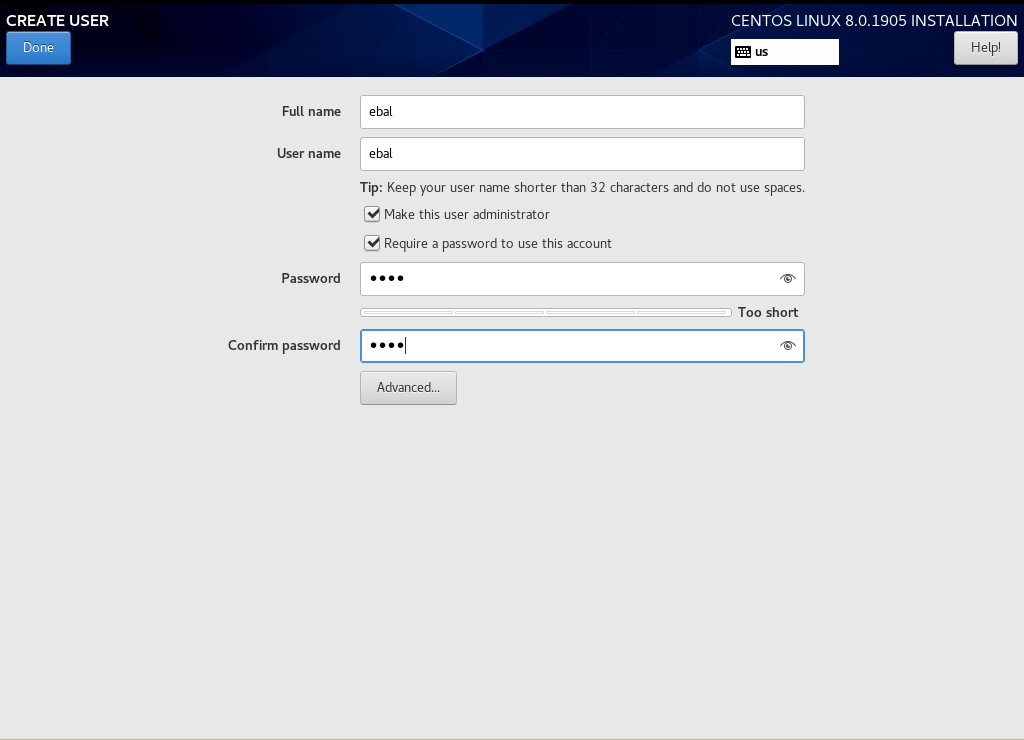
Installation
Reboot
Grub
Boot

CentOS-8 (1905)
