Hardware Details
HP ProLiant MicroServer
AMD Turion(tm) II Neo N54L Dual-Core Processor
Memory Size: 2 GB - DIMM Speed: 1333 MT/s
Maximum Capacity: 8 GB
Running 24×7 from 23/08/2010, so nine years!

Prologue
The above server started it’s life on CentOS 5 and ext3. Re-formatting to run CentOS 6.x with ext4 on 4 x 1TB OEM Hard Disks with mdadm raid-5. That provided 3 TB storage with Fault tolerance 1-drive failure. And believe me, I used that setup to zeroing broken disks or replacing faulty disks.
As we are reaching the end of CentOS 6.x and there is no official dist-upgrade path for CentOS, and still waiting for CentOS 8.x, I made decision to switch to Ubuntu 18.04 LTS. At that point this would be the 3rd official OS re-installation of this server. I chose ubuntu so that I can dist-upgrade from LTS to LTS.
This is a backup server, no need for huge RAM, but for a reliable system. On that storage I have 2m files that in retrospect are not very big. So with the re-installation I chose to use xfs instead of ext4 filesystem.
I am also running an internal snapshot mechanism to have delta for every day and that pushed the storage usage to 87% of the 3Tb. If you do the math, 2m is about 1.2Tb usage, we need a full initial backup, so 2.4Tb (80%) and then the daily (rotate) incremental backups are ~210Mb per day. That gave me space for five (5) daily snapshots aka a work-week.
To remove this impediment, I also replaced the disks with WD Red Pro 6TB 7200rpm disks, and use raid-1 instead of raid-5. Usage is now ~45%
Problem
Frozen System
From time to time, this very new, very clean, very reliable system froze to death!
When attached monitor & keyboard no output. Strange enough I can ping the network interfaces but I can not ssh to the server or even telnet (nc) to ssh port. Awkward! Okay - hardware cold reboot then.
As this system is remote … in random times, I need to ask from someone to cold-reboot this machine. Awkward again.
Kernel Panic
If that was not enough, this machine also has random kernel panics.

Errors
Let’s start troubleshooting this system
# journalctl -p 3 -x
Important Errors
ERST: Failed to get Error Log Address Range.
APEI: Can not request [mem 0x7dfab650-0x7dfab6a3] for APEI BERT registers
ipmi_si dmi-ipmi-si.0: Could not set up I/O space
and more important Errors:
INFO: task kswapd0:40 blocked for more than 120 seconds.
      Not tainted 4.15.0-54-generic #58-Ubuntu
"echo 0 > /proc/sys/kernel/hung_task_timeout_secs" disables this message.
INFO: task xfsaild/dm-0:761 blocked for more than 120 seconds.
      Not tainted 4.15.0-54-generic #58-Ubuntu
"echo 0 > /proc/sys/kernel/hung_task_timeout_secs" disables this message.
INFO: task kworker/u9:2:3612 blocked for more than 120 seconds.
      Not tainted 4.15.0-54-generic #58-Ubuntu
"echo 0 > /proc/sys/kernel/hung_task_timeout_secs" disables this message.
INFO: task kworker/1:0:5327 blocked for more than 120 seconds.
      Not tainted 4.15.0-54-generic #58-Ubuntu
"echo 0 > /proc/sys/kernel/hung_task_timeout_secs" disables this message.
INFO: task rm:5901 blocked for more than 120 seconds.
      Not tainted 4.15.0-54-generic #58-Ubuntu
"echo 0 > /proc/sys/kernel/hung_task_timeout_secs" disables this message.
INFO: task kworker/u9:1:5902 blocked for more than 120 seconds.
      Not tainted 4.15.0-54-generic #58-Ubuntu
"echo 0 > /proc/sys/kernel/hung_task_timeout_secs" disables this message.
INFO: task kworker/0:0:5906 blocked for more than 120 seconds.
      Not tainted 4.15.0-54-generic #58-Ubuntu
"echo 0 > /proc/sys/kernel/hung_task_timeout_secs" disables this message.
INFO: task kswapd0:40 blocked for more than 120 seconds.
      Not tainted 4.15.0-54-generic #58-Ubuntu
"echo 0 > /proc/sys/kernel/hung_task_timeout_secs" disables this message.
INFO: task xfsaild/dm-0:761 blocked for more than 120 seconds.
      Not tainted 4.15.0-54-generic #58-Ubuntu
"echo 0 > /proc/sys/kernel/hung_task_timeout_secs" disables this message.
INFO: task kworker/u9:2:3612 blocked for more than 120 seconds.
      Not tainted 4.15.0-54-generic #58-Ubuntu
"echo 0 > /proc/sys/kernel/hung_task_timeout_secs" disables this message.
First impressions ?

BootOptions
After a few (hours) of internet research the suggestion is to disable
- ACPI stands for Advanced Configuration and Power Interface.
- APIC stands for Advanced Programmable Interrupt Controller.
This site is very helpful for ubuntu, although Red Hat still has a huge advanced on describing kernel options better than canonical.
Grub
# vim /etc/default/grub
GRUB_CMDLINE_LINUX="noapic acpi=off"
then
# update-grub
Sourcing file `/etc/default/grub'
Sourcing file `/etc/default/grub.d/50-curtin-settings.cfg'
Generating grub configuration file ...
Found linux image: /boot/vmlinuz-4.15.0-54-generic
Found initrd image: /boot/initrd.img-4.15.0-54-generic
Found linux image: /boot/vmlinuz-4.15.0-52-generic
Found initrd image: /boot/initrd.img-4.15.0-52-generic
done
Verify
# grep noapic /boot/grub/grub.cfg | head -1

        linux   /boot/vmlinuz-4.15.0-54-generic root=UUID=0c686739-e859-4da5-87a2-dfd5fcccde3d ro noapic acpi=off maybe-ubiquity
reboot and check again:
#  journalctl -p 3 -xb
-- Logs begin at Thu 2019-03-14 19:26:12 EET, end at Wed 2019-07-03 21:31:08 EEST. --
Jul 03 21:30:49 servertwo kernel: ipmi_si dmi-ipmi-si.0: Could not set up I/O space
okay !!!
ipmi_si
Unfortunately I could not find anything useful regarding
# dmesg | grep -i ipm
[   10.977914] ipmi message handler version 39.2
[   11.188484] ipmi device interface
[   11.203630] IPMI System Interface driver.
[   11.203662] ipmi_si dmi-ipmi-si.0: ipmi_platform: probing via SMBIOS
[   11.203665] ipmi_si: SMBIOS: mem 0x0 regsize 1 spacing 1 irq 0
[   11.203667] ipmi_si: Adding SMBIOS-specified kcs state machine
[   11.203729] ipmi_si: Trying SMBIOS-specified kcs state machine at mem address 0x0, slave address 0x20, irq 0
[   11.203732] ipmi_si dmi-ipmi-si.0: Could not set up I/O space

# ipmitool list
Could not open device at /dev/ipmi0 or /dev/ipmi/0 or /dev/ipmidev/0: No such file or directory

# lsmod | grep -i ipmi
ipmi_si                61440  0
ipmi_devintf           20480  0
ipmi_msghandler        53248  2 ipmi_devintf,ipmi_si
blocked for more than 120 seconds.
But let’s try to fix the timeout warnings:
INFO: task kswapd0:40 blocked for more than 120 seconds.
      Not tainted 4.15.0-54-generic #58-Ubuntu
"echo 0 > /proc/sys/kernel/hung_task_timeout_secs" disables this message
if you search online the above message, most of the sites will suggest to tweak dirty pages for your system.
This is the most common response across different sites:
This is a know bug. By default Linux uses up to 40% of the available memory for file system caching. After this mark has been reached the file system flushes all outstanding data to disk causing all following IOs going synchronous. For flushing out this data to disk this there is a time limit of 120 seconds by default. In the case here the IO subsystem is not fast enough to flush the data withing 120 seconds. This especially happens on systems with a lot of memory.
Okay this may be the problem but we do not have a lot of memory, only 2GB RAM and 2GB Swap. But even then, our vm.dirty_ratio = 20 setting is 20% instead of 40%.
But I have the ability to cross-check ubuntu 18.04 with CentOS 6.10 to compare notes:
ubuntu 18.04
# uname -r
4.15.0-54-generic

# sysctl -a | egrep -i  'swap|dirty|raid'|sort
dev.raid.speed_limit_max = 200000
dev.raid.speed_limit_min = 1000
vm.dirty_background_bytes = 0
vm.dirty_background_ratio = 10
vm.dirty_bytes = 0
vm.dirty_expire_centisecs = 3000
vm.dirty_ratio = 20
vm.dirtytime_expire_seconds = 43200
vm.dirty_writeback_centisecs = 500
vm.swappiness = 60
CentOS 6.11
#  uname -r
2.6.32-754.15.3.el6.centos.plus.x86_64

# sysctl -a | egrep -i  'swap|dirty|raid'|sort
dev.raid.speed_limit_max = 200000
dev.raid.speed_limit_min = 1000
vm.dirty_background_bytes = 0
vm.dirty_background_ratio = 10
vm.dirty_bytes = 0
vm.dirty_expire_centisecs = 3000
vm.dirty_ratio = 20
vm.dirty_writeback_centisecs = 500
vm.swappiness = 60
Scheduler for Raid
This is the best online documentation on the
optimize raid
Comparing notes we see that both systems have the same settings, even when the kernel version is a lot different, 2.6.32 Vs 4.15.0 !!!
Researching on raid optimization there is a note of kernel scheduler.
Ubuntu 18.04
# for drive in {a..c}; do cat /sys/block/sd${drive}/queue/scheduler; done

noop deadline [cfq]
noop deadline [cfq]
noop deadline [cfq]
CentOS 6.11
# for drive in {a..d}; do cat /sys/block/sd${drive}/queue/scheduler; done

noop anticipatory deadline [cfq]
noop anticipatory deadline [cfq]
noop anticipatory deadline [cfq]
noop anticipatory deadline [cfq]
Anticipatory scheduling
CentOS supports Anticipatory scheduling on the hard disks but nowadays anticipatory scheduler is not supported in modern kernel versions.
That said, from the above output we can verify that both systems are running the default scheduler cfq.
Disks
Ubuntu 18.04
- Western Digital Red Pro WDC WD6003FFBX-6
# for i in sd{b..c} ; do hdparm -Tt  /dev/$i; done

/dev/sdb:
 Timing cached reads:   2344 MB in  2.00 seconds = 1171.76 MB/sec
 Timing buffered disk reads: 738 MB in  3.00 seconds = 245.81 MB/sec

/dev/sdc:
 Timing cached reads:   2264 MB in  2.00 seconds = 1131.40 MB/sec
 Timing buffered disk reads: 774 MB in  3.00 seconds = 257.70 MB/sec
CentOS 6.11
- Seagate ST1000DX001
/dev/sdb:
 Timing cached reads:   2490 MB in  2.00 seconds = 1244.86 MB/sec
 Timing buffered disk reads: 536 MB in  3.01 seconds = 178.31 MB/sec

/dev/sdc:
 Timing cached reads:   2524 MB in  2.00 seconds = 1262.21 MB/sec
 Timing buffered disk reads: 538 MB in  3.00 seconds = 179.15 MB/sec

/dev/sdd:
 Timing cached reads:   2452 MB in  2.00 seconds = 1226.15 MB/sec
 Timing buffered disk reads: 546 MB in  3.01 seconds = 181.64 MB/sec
So what I am missing ?
My initial personal feeling was the low memory. But after running a manual rsync I’ve realized that:
cpu
was load average: 0.87, 0.46, 0.19
mem
was (on high load), when hit 40% of RAM, started to use swap.
KiB Mem :  2008464 total,    77528 free,   635900 used,  1295036 buff/cache
KiB Swap:  2097148 total,  2096624 free,      524 used.  1184220 avail Mem
So I tweaked a bit the swapiness and reduce it from 60% to 40%
and run a local snapshot (that is a bit heavy on the disks) and doing an upgrade and trying to increase CPU load. Still everything is fine !
I will keep an eye on this story.

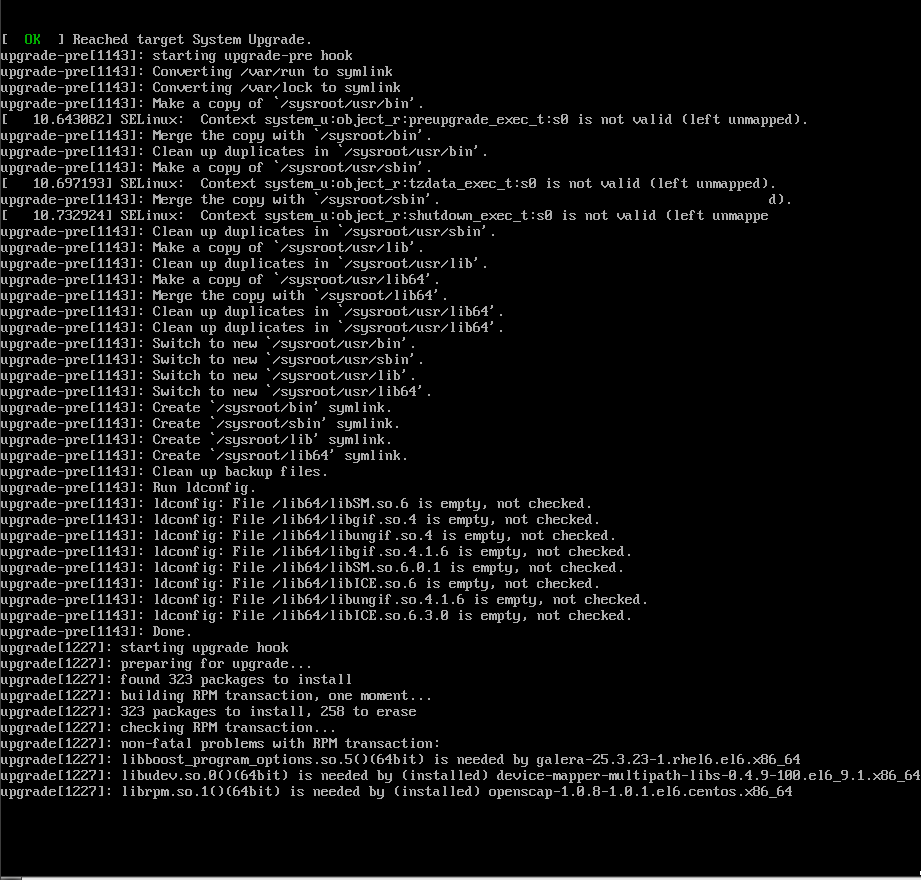
Upgrading CentOS 6.x to CentOS 7.x
Disclaimer : Create a recent backup of the system. This is an unofficial , unsupported procedure !
CentOS 6
CentOS release 6.9 (Final)
Kernel 2.6.32-696.16.1.el6.x86_64 on an x86_64

centos69 login: root
Password:
Last login: Tue May  8 19:45:45 on tty1

[root@centos69 ~]# cat /etc/redhat-release
CentOS release 6.9 (Final)
Pre Tasks
There are some tasks you can do to prevent from unwanted results.
Like:
- Disable selinux
- Remove unnecessary repositories
- Take a recent backup!
CentOS Upgrade Repository
Create a new centos repository:
cat > /etc/yum.repos.d/centos-upgrade.repo <<EOF
[centos-upgrade]
name=centos-upgrade
baseurl=http://dev.centos.org/centos/6/upg/x86_64/
enabled=1
gpgcheck=0
EOF
Install Pre-Upgrade Tool
First install the openscap version from dev.centos.org:
# yum -y install https://buildlogs.centos.org/centos/6/upg/x86_64/Packages/openscap-1.0.8-1.0.1.el6.centos.x86_64.rpmthen install the redhat upgrade tool:
# yum -y install redhat-upgrade-tool preupgrade-assistant-*
Import CentOS 7 PGP Key
# rpm --import http://ftp.otenet.gr/linux/centos/RPM-GPG-KEY-CentOS-7
Mirror
to bypass errors like:
Downloading failed: invalid data in .treeinfo: No section: ‘checksums’
append CentOS Vault under mirrorlist:
 mkdir -pv /var/tmp/system-upgrade/base/ /var/tmp/system-upgrade/extras/  /var/tmp/system-upgrade/updates/

 echo http://vault.centos.org/7.0.1406/os/x86_64/       >  /var/tmp/system-upgrade/base/mirrorlist.txt
 echo http://vault.centos.org/7.0.1406/extras/x86_64/   >  /var/tmp/system-upgrade/extras/mirrorlist.txt
 echo http://vault.centos.org/7.0.1406/updates/x86_64/  >  /var/tmp/system-upgrade/updates/mirrorlist.txt
These are enough to upgrade to 7.0.1406. You can add the below mirros, to upgrade to 7.5.1804
More Mirrors
 echo http://ftp.otenet.gr/linux/centos/7.5.1804/os/x86_64/  >>  /var/tmp/system-upgrade/base/mirrorlist.txt
 echo http://mirror.centos.org/centos/7/os/x86_64/           >>  /var/tmp/system-upgrade/base/mirrorlist.txt

 echo http://ftp.otenet.gr/linux/centos/7.5.1804/extras/x86_64/ >>  /var/tmp/system-upgrade/extras/mirrorlist.txt
 echo http://mirror.centos.org/centos/7/extras/x86_64/          >>  /var/tmp/system-upgrade/extras/mirrorlist.txt

 echo http://ftp.otenet.gr/linux/centos/7.5.1804/updates/x86_64/  >>  /var/tmp/system-upgrade/updates/mirrorlist.txt
 echo http://mirror.centos.org/centos/7/updates/x86_64/           >>  /var/tmp/system-upgrade/updates/mirrorlist.txt
Pre-Upgrade
preupg is actually a python script!
# yes | preupg -v Preupg tool doesn't do the actual upgrade.
Please ensure you have backed up your system and/or data in the event of a failed upgrade
that would require a full re-install of the system from installation media.
Do you want to continue? y/n
Gathering logs used by preupgrade assistant:
All installed packages : 01/11 ...finished (time 00:00s)
All changed files : 02/11 ...finished (time 00:18s)
Changed config files : 03/11 ...finished (time 00:00s)
All users : 04/11 ...finished (time 00:00s)
All groups : 05/11 ...finished (time 00:00s)
Service statuses : 06/11 ...finished (time 00:00s)
All installed files : 07/11 ...finished (time 00:01s)
All local files : 08/11 ...finished (time 00:01s)
All executable files : 09/11 ...finished (time 00:01s)
RedHat signed packages : 10/11 ...finished (time 00:00s)
CentOS signed packages : 11/11 ...finished (time 00:00s)
Assessment of the system, running checks / SCE scripts:
001/096 ...done (Configuration Files to Review)
002/096 ...done (File Lists for Manual Migration)
003/096 ...done (Bacula Backup Software)
...
./result.html
/bin/tar: .: file changed as we read it
Tarball with results is stored here /root/preupgrade-results/preupg_results-180508202952.tar.gz .
The latest assessment is stored in directory /root/preupgrade .
Summary information:
We found some potential in-place upgrade risks.
Read the file /root/preupgrade/result.html for more details.
Upload results to UI by command:
e.g. preupg -u http://127.0.0.1:8099/submit/ -r /root/preupgrade-results/preupg_results-*.tar.gz .this must finish without any errors.
CentOS Upgrade Tool
We need to find out what are the possible problems when upgrade:
# centos-upgrade-tool-cli --network=7
          --instrepo=http://vault.centos.org/7.0.1406/os/x86_64/
Then by force we can upgrade to it’s latest version:
# centos-upgrade-tool-cli --force --network=7
          --instrepo=http://vault.centos.org/7.0.1406/os/x86_64/
          --cleanup-post
Output
setting up repos...
base                                                          | 3.6 kB     00:00
base/primary_db                                               | 4.9 MB     00:04
centos-upgrade                                                | 1.9 kB     00:00
centos-upgrade/primary_db                                     |  14 kB     00:00
cmdline-instrepo                                              | 3.6 kB     00:00
cmdline-instrepo/primary_db                                   | 4.9 MB     00:03
epel/metalink                                                 |  14 kB     00:00
epel                                                          | 4.7 kB     00:00
epel                                                          | 4.7 kB     00:00
epel/primary_db                                               | 6.0 MB     00:04
extras                                                        | 3.6 kB     00:00
extras/primary_db                                             | 4.9 MB     00:04
mariadb                                                       | 2.9 kB     00:00
mariadb/primary_db                                            |  33 kB     00:00
remi-php56                                                    | 2.9 kB     00:00
remi-php56/primary_db                                         | 229 kB     00:00
remi-safe                                                     | 2.9 kB     00:00
remi-safe/primary_db                                          | 950 kB     00:00
updates                                                       | 3.6 kB     00:00
updates/primary_db                                            | 4.9 MB     00:04
.treeinfo                                                     | 1.1 kB     00:00
getting boot images...
vmlinuz-redhat-upgrade-tool                                   | 4.7 MB     00:03
initramfs-redhat-upgrade-tool.img                             |  32 MB     00:24
setting up update...
finding updates 100% [=========================================================]
(1/323): MariaDB-10.2.14-centos6-x86_64-client.rpm            |  48 MB     00:38
(2/323): MariaDB-10.2.14-centos6-x86_64-common.rpm            | 154 kB     00:00
(3/323): MariaDB-10.2.14-centos6-x86_64-compat.rpm            | 4.0 MB     00:03
(4/323): MariaDB-10.2.14-centos6-x86_64-server.rpm            | 109 MB     01:26
(5/323): acl-2.2.51-12.el7.x86_64.rpm                         |  81 kB     00:00
(6/323): apr-1.4.8-3.el7.x86_64.rpm                           | 103 kB     00:00
(7/323): apr-util-1.5.2-6.el7.x86_64.rpm                      |  92 kB     00:00
(8/323): apr-util-ldap-1.5.2-6.el7.x86_64.rpm                 |  19 kB     00:00
(9/323): attr-2.4.46-12.el7.x86_64.rpm                        |  66 kB     00:00
...
(320/323): yum-plugin-fastestmirror-1.1.31-24.el7.noarch.rpm  |  28 kB     00:00
(321/323): yum-utils-1.1.31-24.el7.noarch.rpm                 | 111 kB     00:00
(322/323): zlib-1.2.7-13.el7.x86_64.rpm                       |  89 kB     00:00
(323/323): zlib-devel-1.2.7-13.el7.x86_64.rpm                 |  49 kB     00:00
testing upgrade transaction
rpm transaction 100% [=========================================================]
rpm install 100% [=============================================================]
setting up system for upgrade
Finished. Reboot to start upgrade.
Reboot
The upgrade procedure, will download all rpm packages to a directory and create a new grub entry. Then on reboot the system will try to upgrade the distribution release to it’s latest version.
# reboot
Upgrade


CentOS 7
CentOS Linux 7 (Core)
Kernel 3.10.0-123.20.1.el7.x86_64 on an x86_64

centos69 login: root
Password:
Last login: Fri May 11 15:42:30 on ttyS0

[root@centos69 ~]# cat /etc/redhat-release
CentOS Linux release 7.0.1406 (Core)
[notes based on a docker centos5]
# cat /etc/redhat-release
CentOS release 5.11 (Final)Setup Enviroment
Install compiler:
# yum -y install gcc make
Install zlib headers:
# yum -y install zlib-devel
Install tools:
# yum -y install curl unzip
SSL/TLS Errors
If you are on a CentOS 5x machine, when trying to download files from the internet, you will get this error msg:
This is a brown out of TLSv1 support. TLSv1 support is going away soon, upgrade to a TLSv1.2+ capable client.or
SSL routines:SSL23_GET_SERVER_HELLO:tlsv1 alert protocol versionthat is because CentOS 5x has an old cipher suite that doesnt work with today’s standards.
OpenSSL
To bypass these SSL/TLS errors, we need to install a recent version of openssl.
# cd /root/

# curl -LO https://www.openssl.org/source/openssl-1.0.2o.tar.gz
# tar xf openssl*.tar.gz
# cd openssl*

# ./Configure shared linux-x86_64
# make
# make install
The output has a useful info:
OpenSSL shared libraries have been installed in:
  /usr/local/ssl
So, we have to update the system’s library paths, to include this one:
# echo "/usr/local/ssl/lib/" >> /etc/ld.so.conf
# /sbin/ldconfig
Python 2.7
Download the latest Python2.7
# cd /root/
# curl -LO https://www.python.org/ftp/python/2.7.14/Python-2.7.14.tgz
# tar xf Python*.tgz
# cd Python*
Install Python:
# ./configure --prefix=/opt/Python27 --enable-shared
# make
# make install
PATH
# export PATH=/opt/Python27/bin/:$PATH
# python -c "import ssl; print(ssl.OPENSSL_VERSION)"OpenSSL 1.0.2o 27 Mar 2018SetupTools
Download the latest setuptools
# cd /root/

# export PYTHONHTTPSVERIFY=0
# python -c 'import urllib; urllib.urlretrieve ("https://pypi.python.org/packages/72/c2/c09362ab29338413ab687b47dab03bab4a792e2bbb727a1eb5e0a88e3b86/setuptools-39.0.1.zip", "setuptools-39.0.1.zip")'
Install setuptools
# unzip setuptools*.zip
# cd setuptools*

# python2.7 setup.py build
# python2.7 setup.py install
PIP
Install PIP
# cd /root/
# easy_install pip
Searching for pip
Reading https://pypi.python.org/simple/pip/
Downloading https://pypi.python.org/packages/4b/5a/8544ae02a5bd28464e03af045e8aabde20a7b02db1911a9159328e1eb25a/pip-10.0.0b1-py2.py3-none-any.whl#md5=34dd54590477e79bc681d9ff96b9fd39
Best match: pip 10.0.0b1
Processing pip-10.0.0b1-py2.py3-none-any.whl
Installing pip-10.0.0b1-py2.py3-none-any.whl to /opt/Python27/lib/python2.7/site-packages
writing requirements to /opt/Python27/lib/python2.7/site-packages/pip-10.0.0b1-py2.7.egg/EGG-INFO/requires.txt
Adding pip 10.0.0b1 to easy-install.pth file
Installing pip script to /opt/Python27/bin
Installing pip3.6 script to /opt/Python27/bin
Installing pip3 script to /opt/Python27/bin

Installed /opt/Python27/lib/python2.7/site-packages/pip-10.0.0b1-py2.7.egg
Processing dependencies for pip
Finished processing dependencies for pip
Ansible
Now, we are ready to install ansible
# pip install ansible
Collecting ansible

/opt/Python27/lib/python2.7/site-packages/pip-10.0.0b1-py2.7.egg/pip/_vendor/urllib3/util/ssl_.py:339: SNIMissingWarning: An HTTPS request has been made, but the SNI (Subject Name Indication) extension to TLS is not available on this platform. This may cause the server to present an incorrect TLS certificate, which can cause validation failures. You can upgrade to a newer version of Python to solve this. For more information, see https://urllib3.readthedocs.io/en/latest/advanced-usage.html#ssl-warnings
  SNIMissingWarning
  Using cached ansible-2.5.0-py2.py3-none-any.whl
Collecting paramiko (from ansible)
  Using cached paramiko-2.4.1-py2.py3-none-any.whl
Collecting cryptography (from ansible)
  Using cached cryptography-2.2.2-cp27-cp27m-manylinux1_x86_64.whl
Requirement already satisfied: setuptools in /opt/Python27/lib/python2.7/site-packages/setuptools-39.0.1-py2.7.egg (from ansible) (39.0.1)
Collecting PyYAML (from ansible)
  Using cached PyYAML-3.12.tar.gz
Collecting jinja2 (from ansible)
  Using cached Jinja2-2.10-py2.py3-none-any.whl
Collecting pyasn1>=0.1.7 (from paramiko->ansible)
  Using cached pyasn1-0.4.2-py2.py3-none-any.whl
Collecting bcrypt>=3.1.3 (from paramiko->ansible)
  Using cached bcrypt-3.1.4-cp27-cp27m-manylinux1_x86_64.whl
Collecting pynacl>=1.0.1 (from paramiko->ansible)
  Using cached PyNaCl-1.2.1-cp27-cp27m-manylinux1_x86_64.whl
Collecting six>=1.4.1 (from cryptography->ansible)
  Using cached six-1.11.0-py2.py3-none-any.whl
Collecting cffi>=1.7; platform_python_implementation != "PyPy" (from cryptography->ansible)
  Using cached cffi-1.11.5-cp27-cp27m-manylinux1_x86_64.whl
Collecting enum34; python_version < "3" (from cryptography->ansible)
  Using cached enum34-1.1.6-py2-none-any.whl
Collecting asn1crypto>=0.21.0 (from cryptography->ansible)
  Using cached asn1crypto-0.24.0-py2.py3-none-any.whl
Collecting idna>=2.1 (from cryptography->ansible)
  Using cached idna-2.6-py2.py3-none-any.whl
Collecting ipaddress; python_version < "3" (from cryptography->ansible)
  Using cached ipaddress-1.0.19.tar.gz
Collecting MarkupSafe>=0.23 (from jinja2->ansible)
  Using cached MarkupSafe-1.0.tar.gz
Collecting pycparser (from cffi>=1.7; platform_python_implementation != "PyPy"->cryptography->ansible)
  Using cached pycparser-2.18.tar.gz
Installing collected packages: pyasn1, six, pycparser, cffi, bcrypt, enum34, asn1crypto, idna, ipaddress, cryptography, pynacl, paramiko, PyYAML, MarkupSafe, jinja2, ansible
  Running setup.py install for pycparser ... done
  Running setup.py install for ipaddress ... done
  Running setup.py install for PyYAML ... done
  Running setup.py install for MarkupSafe ... done

Successfully installed MarkupSafe-1.0 PyYAML-3.12 ansible-2.5.0 asn1crypto-0.24.0 bcrypt-3.1.4 cffi-1.11.5 cryptography-2.2.2 enum34-1.1.6 idna-2.6 ipaddress-1.0.19 jinja2-2.10 paramiko-2.4.1 pyasn1-0.4.2 pycparser-2.18 pynacl-1.2.1 six-1.11.0
Version
# ansible --version
ansible 2.5.0
  config file = None
  configured module search path = [u'/root/.ansible/plugins/modules', u'/usr/share/ansible/plugins/modules']
  ansible python module location = /opt/Python27/lib/python2.7/site-packages/ansible
  executable location = /opt/Python27/bin/ansible
  python version = 2.7.14 (default, Mar 31 2018, 20:00:21) [GCC 4.1.2 20080704 (Red Hat 4.1.2-55)]
Ansible v2
# ansible -m ping localhost
localhost | SUCCESS => {
    "changed": false,
    "ping": "pong"
}
Ansible v1
or a previous version for testing
eg. 1.9.6
# pip install 'ansible==1.9.6'
# ansible --version
ansible 1.9.6
  configured module search path = None
# yum -y install python-simplejson
# ansible localhost -c local -m ping -i "localhost,"
localhost | success >> {
    "changed": false,
    "ping": "pong"
}
Possible Building Error
When building python from source, setup.py will try to look for /usr/local/ssl/ directory to find the libraries and included headers of openssl. Althouth it works from _ssl.c , it doesnt for _hashlib.c.
To fix this problem, you must manual edit the Python-2.7.14/setup.py
 869                 ssl_incs += ['/usr/local/ssl/include']
 870                 ssl_libs += ['/usr/local/ssl/lib']
the full code is:
 865         if have_any_openssl:
 866             if have_usable_openssl:
 867                 # The _hashlib module wraps optimized implementations
 868                 # of hash functions from the OpenSSL library.
 869                 ssl_incs += ['/usr/local/ssl/include']
 870                 ssl_libs += ['/usr/local/ssl/lib']
 871                 exts.append( Extension('_hashlib', ['_hashopenssl.c'],
 872                                        include_dirs = ssl_incs,
 873                                        library_dirs = ssl_libs,
 874                                        libraries = ['ssl', 'crypto']) )
 875             else:
 876                 print ("warning: openssl 0x%08x is too old for _hashlib" %
 877                        openssl_ver)
 878                 missing.append('_hashlib')
hope that helps!
Let’s Encrypt client: certbot is been written in python and as it’s predecessor needs at least Python 2.7.
But (still) in CentOS series 6 (currently 6.8) there is no natively support for python27.
So I did this thing below, quick & dirty:
# cd /usr/local/src/
# wget -c https://www.python.org/ftp/python/2.7.11/Python-2.7.11.tgz
# tar xf Python-2.7.11.tgz
# cd Python-2.7.11
# ./configure
# make
# make install
and these are my notes for renew certificates :
# ln -s /opt/Python-2.7/bin/python2.7 /usr/local/bin/python2

[root@1 certbot]# source venv/bin/activate
(venv)[root@1 certbot]#

# cd venv/bin/

# ./certbot renew --dry-run

# ./certbot renew

# rm /usr/local/bin/python2
So … it seems that some router gives dhcp ipv6 prefixes for specific lans.
The default behaviour of CentOS is to autoconfigure the network interface with ifup script.
We havent finished our #ipv6 schema/deployment so we need to disable this ipv6 autoconfigure feature.
global
# vim /etc/sysconfig/network

NETWORKING_IPV6=no
IPV6FORWARDING=no
IPV6_AUTOCONF=no
interface
# vim /etc/sysconfig/network-scripts/ifcfg-eth0
IPV6INIT=no
Flushing
# ip -6 addr flush eth0

# ip -6 route flush scope global
and finally restart
# service restart network
The inspiration for this post comes from Kees Cook’s tweet about having
VisualHostKey yes
on his ~/.ssh/config file.
I’ve played with this option in the past, but having some scripts running over ssh, I was afraid about parsing the “wrong” things on the output.
I’ve enabled this option again this evening, so the head of my ~/.ssh/config looks like:
Host *
    VisualHostKey yes
    Compression yes
I started to ssh login in to a few machines, just to see the output.
A sample output, looks like this:
+---[RSA 2048]----+
|.E       . . o   |
|= . .   . . o o  |
| +   o .  ..o. . |
|  o . o . .*.    |
|   .   +S...*. o |
|      . ...+o.+oo|
|        . +o  +.B|
|       . + oo+ +=|
|        . o.=o. .|
+----[SHA256]-----+
RSA 2048 is the size of the servers public key and you can check the size of the servers key -as of course yours too- with this command:
# ssh-keygen -l -f /etc/ssh/ssh_host_rsa_key.pub
on your local machine:
> ssh-keygen -l -f ~/.ssh/id_rsa.pub
I have changed a few times my ssh key pair (you must remember to append your new public key to your server authorized_keys, before removing your old key) but I never changed the servers key pairs.
After searching online for a few minutes to educate my self on the matter, seems that when your (in this case) centos machine is starting ssh daemon for the first time, it creates new ssh key pairs.
The procedure is really easy, but before doing anything, we need to edit
/etc/init.d/sshd to add a 4096 bit keysize for SSHv2 RSA:
echo -n $"Generating SSH2 RSA host key: "
rm -f $RSA_KEY
if test ! -f $RSA_KEY && $KEYGEN -q -b 4096 -t rsa -f $RSA_KEY -C '' -N '' >&/dev/null; then
The final steps are these:
> ssh linuxbox
> sudo -s
# cd /etc/
# tar cf ssh.tar ssh
# cd ssh
# rm -f ssh_host_*
# service sshd restart
If you test your ssh connection, you will get an ugly message:
@@@@@@@@@@@@@@@@@@@@@@@@@@@@@@@@@@@@@@@@@@@@@@@@@@@@@@@@@@@
@    WARNING: REMOTE HOST IDENTIFICATION HAS CHANGED!     @
@@@@@@@@@@@@@@@@@@@@@@@@@@@@@@@@@@@@@@@@@@@@@@@@@@@@@@@@@@@
BUT you have to see this error msg.
If you dont, then you have a very serious problem !
Edit your ~/.ssh/known_hosts to get rid of this message and delete the previous record about the old server ssh public key.
Try again, now it should show you something like:
Are you sure you want to continue connecting (yes/no)? yes
Type yes and memorize your new VisualHostKey !
A colleague of mine wants to add a new vhost on one of our apache web servers.
Running:
/etc/init.d/httpd configtest
he noticed that php_admin_flag had produced an error msg. We comment this flag out and tried to restart the web server. Unfortunately the httpd didnt came up.
Searching through logs I’ve seen these:
Dec 14 14:33:54 Erased: php-snmp
Dec 14 14:33:54 Erased: php-mbstring
Dec 14 14:33:54 Erased: php-pear
Dec 14 14:33:55 Erased: php-common
Dec 14 14:33:55 Erased: php-mcrypt
Dec 14 14:33:55 Erased: php-gd
Dec 14 14:33:55 Erased: php-mysql
Dec 14 14:33:55 Erased: php-cli
Dec 14 14:33:55 Erased: php-pgsql
Dec 14 14:33:55 Erased: php-ldap
Dec 14 14:33:55 Erased: php
Dec 14 14:33:55 Erased: php-devel
Dec 14 14:33:56 Erased: php-pdo
Dec 14 14:34:17 Installed: php53-common-5.3.3-22.el5_10.x86_64
Dec 14 14:34:17 Installed: php53-pdo-5.3.3-22.el5_10.x86_64
Dec 14 14:34:27 Installed: libc-client-2004g-2.2.1.x86_64
Dec 14 14:34:28 Installed: php53-mcrypt-5.3.3-1.el5.x86_64
Dec 14 14:34:28 Installed: php53-mysql-5.3.3-22.el5_10.x86_64
Dec 14 14:34:28 Installed: php53-ldap-5.3.3-22.el5_10.x86_64
Dec 14 14:34:28 Installed: php53-mbstring-5.3.3-22.el5_10.x86_64
Dec 14 14:34:28 Installed: php53-gd-5.3.3-22.el5_10.x86_64
Dec 14 14:34:28 Installed: php53-xml-5.3.3-22.el5_10.x86_64
Dec 14 14:34:28 Installed: php53-imap-5.3.3-22.el5_10.x86_64
Dec 14 14:34:28 Installed: php53-snmp-5.3.3-22.el5_10.x86_64
Dec 14 14:34:28 Installed: php53-pgsql-5.3.3-22.el5_10.x86_64
Dec 14 14:34:28 Installed: php53-cli-5.3.3-22.el5_10.x86_64
If you havent noticed the horror yet let me explain it to you:
There is NO php on the system!
A couple weeks ago, another colleague did a not so successfully update on this server.
blah blah blah
blah blah blah
blah blah blah
and story told short:
yum install php53.x86_64
worked it’s magic.
So keep it in mind that after yum update, you have to do manual restarts on the running services and check that everything works properly OR someone like me, will try to destroy your Christmas plans as a revenge !
WTF, in only 40min, ssh brute force attack !
Jul 14 17:54:56 server1 sshd[1135]: Server listening on 0.0.0.0 port 22.
…
Jul 14 18:36:16 server1 sshd[2325]: Invalid user center from 70.38.23.166
thank Venema for TCP Wrapper
I believe that this is a security risk for new installations.
Ok, root cant ssh access the server.
But common!
We create a simple user to login and then su to root.
I dont want ssh daemon to be started by default, before i finished with my linux server configuration and add some security measures to prevent issues like that.
And the most significant part is that i had configured my router sshd port to a non known tcp port !!!!