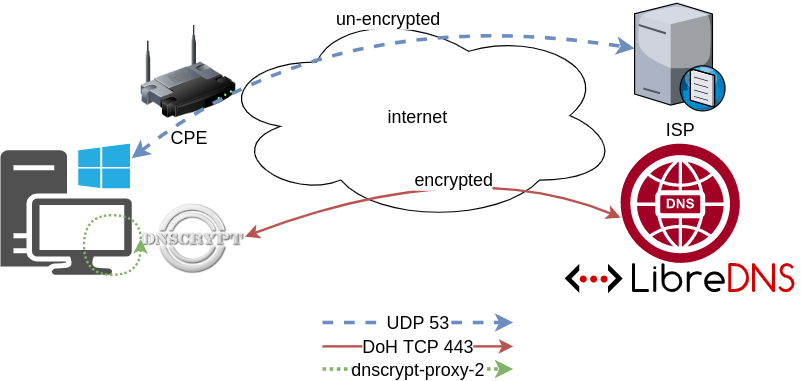
Using DNS over HTTPS aka DoH is fairly easy with the latest version of firefox. To use libredns is just a few settings in your browser, see here. In libredns’ site, there are also instructions for DNS over TLS aka DoT.
In this blog post, I am going to present how to use dnscrypt-proxy as a local dns proxy resolver using DoH the LibreDNS noAds (tracking) endpoint. With this setup, your entire operating system can use this endpoint for everything.
Disclaimer: This blog post is about dnscrypt-proxy version 2.

dnscrypt-proxy
dnscrypt-proxy 2 - A flexible DNS proxy, with support for modern encrypted DNS protocols such as DNSCrypt v2, DNS-over-HTTPS and Anonymized DNSCrypt.
Installation
sudo pacman -S dnscrypt-proxyVerify Package
$ pacman -Qi dnscrypt-proxy

Name            : dnscrypt-proxy
Version         : 2.0.39-3
Description     : DNS proxy, supporting encrypted DNS protocols such as DNSCrypt v2 and DNS-over-HTTPS
Architecture    : x86_64
URL             : https://dnscrypt.info
Licenses        : custom:ISC
Groups          : None
Provides        : None
Depends On      : glibc
Optional Deps   : python-urllib3: for generate-domains-blacklist [installed]
Required By     : None
Optional For    : None
Conflicts With  : None
Replaces        : None
Installed Size  : 12.13 MiB
Packager        : David Runge <dvzrv@archlinux.org>
Build Date      : Sat 07 Mar 2020 08:10:14 PM EET
Install Date    : Fri 20 Mar 2020 10:46:56 PM EET
Install Reason  : Explicitly installed
Install Script  : Yes
Validated By    : Signature
Disable systemd-resolved
if necessary
$ ps -e fuwww | grep re[s]olv
systemd+     525  0.0  0.1  30944 21804 ?        Ss   10:00   0:01 /usr/lib/systemd/systemd-resolved

$ sudo systemctl stop systemd-resolved.service

$ sudo systemctl disable systemd-resolved.service
Removed /etc/systemd/system/multi-user.target.wants/systemd-resolved.service.
Removed /etc/systemd/system/dbus-org.freedesktop.resolve1.service.
Configuration
It is time to configure dnscrypt-proxy to use libredns
sudo vim /etc/dnscrypt-proxy/dnscrypt-proxy.tomlIn the top of the file, there is a server_names section
server_names = ['libredns-noads']Resolv Conf
We can now change our resolv.conf to use our local IP address.
echo -e "nameserver 127.0.0.1noptions edns0 single-request-reopen" | sudo tee /etc/resolv.conf$ cat /etc/resolv.conf
nameserver 127.0.0.1
options edns0 single-request-reopenSystemd
start & enable dnscrypt service
sudo systemctl start dnscrypt-proxy.service

sudo systemctl enable dnscrypt-proxy.service
$ sudo ss -lntup '( sport = :domain )'
Netid State Recv-Q Send-Q Local Address:Port Peer Address:Port Process
udp UNCONN 0 0 127.0.0.1:53 0.0.0.0:* users:(("dnscrypt-proxy",pid=55795,fd=6))
tcp LISTEN 0 4096 127.0.0.1:53 0.0.0.0:* users:(("dnscrypt-proxy",pid=55795,fd=7))Verify
$ dnscrypt-proxy -config /etc/dnscrypt-proxy/dnscrypt-proxy.toml -list
libredns-noads
$ dnscrypt-proxy -config /etc/dnscrypt-proxy/dnscrypt-proxy.toml -resolve balaskas.gr
Resolving [balaskas.gr]
Domain exists: yes, 2 name servers found
Canonical name: balaskas.gr.
IP addresses: 158.255.214.14, 2a03:f80:49:158:255:214:14:80
TXT records: v=spf1 ip4:158.255.214.14/31 ip6:2a03:f80:49:158:255:214:14:0/112 -all
Resolver IP: 116.202.176.26 (libredns.gr.)Dig
asking our local dns (proxy)
dig @localhost balaskas.gr; <<>> DiG 9.16.1 <<>> @localhost balaskas.gr
; (2 servers found)
;; global options: +cmd
;; Got answer:
;; ->>HEADER<<- opcode: QUERY, status: NOERROR, id: 2449
;; flags: qr rd ra; QUERY: 1, ANSWER: 1, AUTHORITY: 0, ADDITIONAL: 1
;; OPT PSEUDOSECTION:
; EDNS: version: 0, flags:; udp: 512
;; QUESTION SECTION:
;balaskas.gr. IN A
;; ANSWER SECTION:
balaskas.gr. 7167 IN A 158.255.214.14
;; Query time: 0 msec
;; SERVER: 127.0.0.1#53(127.0.0.1)
;; WHEN: Sat Mar 21 19:48:53 EET 2020
;; MSG SIZE rcvd: 56That’s it !
Yoursystem is now using LibreDNS DoH noads endpoint.
Manual Steps
If your operating system does not yet support dnscrypt-proxy-2 then:
Latest version
You can always download the latest version from github:
To view the files
curl -sLo - $(curl -sL https://api.github.com/repos/DNSCrypt/dnscrypt-proxy/releases/latest | jq -r '.assets[].browser_download_url | select( contains("linux_x86_64"))') | tar tzf -

linux-x86_64/
linux-x86_64/dnscrypt-proxy
linux-x86_64/LICENSE
linux-x86_64/example-cloaking-rules.txt
linux-x86_64/example-dnscrypt-proxy.toml
linux-x86_64/example-blacklist.txt
linux-x86_64/example-whitelist.txt
linux-x86_64/localhost.pem
linux-x86_64/example-ip-blacklist.txt
linux-x86_64/example-forwarding-rules.txt
To extrace the files
$ curl -sLo - $(curl -sL https://api.github.com/repos/DNSCrypt/dnscrypt-proxy/releases/latest | jq -r '.assets[].browser_download_url | select( contains("linux_x86_64"))') | tar xzf -

$ ls -l linux-x86_64/
total 9932
-rwxr-xr-x 1 ebal ebal 10117120 Μαρ  21 13:56 dnscrypt-proxy
-rw-r--r-- 1 ebal ebal      897 Μαρ  21 13:50 example-blacklist.txt
-rw-r--r-- 1 ebal ebal     1277 Μαρ  21 13:50 example-cloaking-rules.txt
-rw-r--r-- 1 ebal ebal    20965 Μαρ  21 13:50 example-dnscrypt-proxy.toml
-rw-r--r-- 1 ebal ebal      970 Μαρ  21 13:50 example-forwarding-rules.txt
-rw-r--r-- 1 ebal ebal      439 Μαρ  21 13:50 example-ip-blacklist.txt
-rw-r--r-- 1 ebal ebal      743 Μαρ  21 13:50 example-whitelist.txt
-rw-r--r-- 1 ebal ebal      823 Μαρ  21 13:50 LICENSE
-rw-r--r-- 1 ebal ebal     2807 Μαρ  21 13:50 localhost.pem

$ cd linux-x86_64/
Prepare the configuration
$ cp example-dnscrypt-proxy.toml dnscrypt-proxy.toml
$
$ vim dnscrypt-proxy.toml
In the top of the file, there is a server_names section
server_names = ['libredns-noads']$ ./dnscrypt-proxy -config dnscrypt-proxy.toml --list
[2020-03-21 19:27:20] [NOTICE] dnscrypt-proxy 2.0.40
[2020-03-21 19:27:20] [NOTICE] Network connectivity detected
[2020-03-21 19:27:22] [NOTICE] Source [public-resolvers] loaded
[2020-03-21 19:27:23] [NOTICE] Source [relays] loaded
libredns-noadsRun as root
$ sudo ./dnscrypt-proxy -config ./dnscrypt-proxy.toml
[sudo] password for ebal: *******

[2020-03-21 20:11:04] [NOTICE] dnscrypt-proxy 2.0.40
[2020-03-21 20:11:04] [NOTICE] Network connectivity detected
[2020-03-21 20:11:04] [NOTICE] Source [public-resolvers] loaded
[2020-03-21 20:11:04] [NOTICE] Source [relays] loaded
[2020-03-21 20:11:04] [NOTICE] Firefox workaround initialized
[2020-03-21 20:11:04] [NOTICE] Now listening to 127.0.0.1:53 [UDP]
[2020-03-21 20:11:04] [NOTICE] Now listening to 127.0.0.1:53 [TCP]
[2020-03-21 20:11:04] [NOTICE] [libredns-noads] OK (DoH) - rtt: 65ms
[2020-03-21 20:11:04] [NOTICE] Server with the lowest initial latency: libredns-noads (rtt: 65ms)
[2020-03-21 20:11:04] [NOTICE] dnscrypt-proxy is ready - live servers: 1
Check DNS
Interesting enough, first time is 250ms , second time is zero!
$ dig libredns.gr

; <<>> DiG 9.11.3-1ubuntu1.11-Ubuntu <<>> libredns.gr
;; global options: +cmd
;; Got answer:
;; ->>HEADER<<- opcode: QUERY, status: NOERROR, id: 53609
;; flags: qr rd ra; QUERY: 1, ANSWER: 2, AUTHORITY: 0, ADDITIONAL: 1

;; OPT PSEUDOSECTION:
; EDNS: version: 0, flags:; udp: 512
;; QUESTION SECTION:
;libredns.gr.   IN  A

;; ANSWER SECTION:
libredns.gr.    2399  IN  A 116.202.176.26

;; Query time: 295 msec
;; SERVER: 127.0.0.1#53(127.0.0.1)
;; WHEN: Sat Mar 21 20:12:52 EET 2020
;; MSG SIZE  rcvd: 72

$ dig libredns.gr

; <<>> DiG 9.11.3-1ubuntu1.11-Ubuntu <<>> libredns.gr
;; global options: +cmd
;; Got answer:
;; ->>HEADER<<- opcode: QUERY, status: NOERROR, id: 31159
;; flags: qr rd ra; QUERY: 1, ANSWER: 2, AUTHORITY: 0, ADDITIONAL: 1

;; OPT PSEUDOSECTION:
; EDNS: version: 0, flags:; udp: 512
;; QUESTION SECTION:
;libredns.gr. IN  A

;; ANSWER SECTION:
libredns.gr.  2395  IN  A 116.202.176.26

;; Query time: 0 msec
;; SERVER: 127.0.0.1#53(127.0.0.1)
;; WHEN: Sat Mar 21 20:12:56 EET 2020
;; MSG SIZE  rcvd: 72
That’s it
almost three (3) years ago I wrote an article about the Tools I use daily. But for the last 18 months (or so), I am partial using windows 10 due to my new job role, thus I would like to write an updated version on that article.
I’ ll try to use the same structure for comparison as the previous article, keep in mind this a nine to five setup (work related). So here it goes.

NOTICE beer is just for decor ;)
Operating System
I use Win10 as my primary operating system in my worklaptop. I have a couple of impediments that can not work on a linux distribution but I am not going to bother you with them (it’s webex and some internal internet-explorer only sites).
We used to use webex as our primary communication tool. We are sharing our screen and have our video camera on, so that everybody can see each other.Working with remote teams, it’s kind of nice to see the faces of your coworkers. A lot of meetings are integrated with the company’s outlook. I use OWA (webmail) as an alternative but in fact it is still difficult to use both of them with a linux desktop.
We successful switched to slack for text communications, video calls and screen sharing. This choice gave us a boost in productivity as we are now daily using slack calls to align with each other. Although still webex is in the mix. Company is now using a newer webex version that works even better with browser support so that is a plus. It’s not always easy to get everybody with a webex license but as long as we are using slack it is okay. Only problem with slack in linux is when working with multiple monitors, you can not choose which monitor to share.
I have considered to use a VM (virtual machine) but a win10 vm needs more than 4G of RAM and a couple of CPUs just to boot up. In that case, it means that I have to reduce my work laptop resources for half the day, every day. So for the time being I am staying with Win10 as the primary operating system. I have to use the winVM for some other internal works but it is limited time.
Desktop
Default Win10 desktop
I daily use these OpenSource Tools:
- AutoHotkey for keyboard shortcut (I like switching languages by pressing capslock)
- Ditto as clipboard manager
- Greenshot for screenshot tool
and from time to time, I also use:
- X-Mouse Controls (window focus with mouse)
- Always on Top to Keep Any Window Visible Always
- Plumb a Tiling Window Manager
except plumb, everything else is opensource!
So I am trying to have the same user desktop experience as in my Linux desktop, like my language swith is capslock (authotkey), I dont even think about it.
Disk / Filesystem
Default Win10 filesystem with bitlocker. Every HW change will lock the entire system. In the past this happened twice with a windows firmware device upgrade. Twice!
Dropbox as a cloud sync software, with EncFSMP partition and syncthing for secure personal syncing files.
(same setup as linux, except bitlocker is luks)
OWA for calendar purposes and … still Thunderbird for primary reading mails.
Thunderbird 68.6.0 AddOns:
- TbSync
- Provider for CalDAV & CardDAV
- ExQuilla for Exchange
- CompactHeader
- Toggle Headers
- ConfigDate
- Duplicate Contacts Manager
- Remove Duplicates
- Lightning
- Expression Search / GMailUI
- Mail Redirect
- Markdown Here
- Open With
(same setup as linux)
Shell
Windows Subsystem for Linux aka WSL … waiting for the official WSLv2 ! This is a huge HUGE upgrade for windows. I have setup an Arch Linux WSL environment to continue work on a linux environment, I mean bash. I use my WSL archlinux as a jumphost to my VMs.
Terminal Emulator
- Mintty The best terminal emulator for WSL. Small, not to fancy, just works, beautiful, love it.
Editor
Using Visual Studio Code for scripting. vim within WSL and notepad for temporary text notes. I have switched to Boostnote for markdown and as my primary note editor.
(same setup as linux)
Browser
Multiple Instances of Firefox, Chromium, Tor Browser and brave
Primary Browser: Firefox
Primary Private Browsing: Brave
(same setup as linux)
Communication
I use mostly Slack and Signal Desktop. We are using webex but I prefer Zoom. Riot/Matrix for decentralized groups and IRC bridge. To be honest, I also use Viber & messanger (only through webbrowser).
(same setup as linux - minus the Viber client)
Media
VLC for windows, what else ? Also GIMP for image editing. I have switched to Spotify for music and draw io for diagrams. Last, I use CPod for podcasts. Netflix (sometimes).
(same setup as linux)
In conclusion
I have switched to a majority of electron applications. I use the same applications on my Linux boxes. Encrypted notes on boostnote, synced over syncthing. Same browsers, same bash/shell, the only thing I dont have on my linux boxes are webex and outlook. Consider everything else, I think it is a decent setup across every distro.
Thanks for reading my post.
restic is a fast, secure & efficient backup program.
I wanted to test restic for some time now. It is a go backup solution, I would say similar to rclone but it has a unique/different design. I prefer having an isolated clean environment when testing software, so I usually go with a VΜ. For this case, I installed elementary OS v5.1, an ubuntu LTS based distro focus on user experience. As backup storage solution, I used MinIO an S3 compatible object storage on the same VM. So here are my notes on restic and in the end of this article you will find how I setup minion.
Be aware this is a technical post!
restic
Most probably your distro package manager has already restic in their repositories.
pacman -S restic

or

apt -y install restic
download latest version
But just in case you want to install the latest binary version, you can use this command
curl -sLo - $(curl -sL https://api.github.com/repos/restic/restic/releases/latest | jq -r '.assets[].browser_download_url | select( contains("linux_amd64"))') \
  | bunzip2 - | sudo tee /usr/local/bin/restic > /dev/null

sudo chmod +x /usr/local/bin/restic
or if you are already root
curl -sLo - $(curl -sL https://api.github.com/repos/restic/restic/releases/latest | jq -r '.assets[].browser_download_url | select( contains("linux_amd64"))') \
  | bunzip2 - > /usr/local/bin/restic

chmod +x /usr/local/bin/restic
we can see the latest version
$ restic version
restic 0.9.6 compiled with go1.13.4 on linux/amd64
autocompletion
Enable autocompletion
sudo restic generate --bash-completion /etc/bash_completion.d/resticrestart your shell.
Prepare your repo
We need to prepare our destination repository. This is our backup endpoint. restic can save multiple snapshots for multiple hosts on the same endpoint (repo).
Apart from the files stored within the keys directory, all files are encrypted with AES-256 in counter mode (CTR). The integrity of the encrypted data is secured by a Poly1305-AES message authentication code (sometimes also referred to as a “signature”).
To access a restic repo, we need a key. We will use this key as password (or passphrase) and it is really important NOT to lose this key.
For automated backups (or scripts) we can use the environmental variables of our SHELL to export the password. It is best to export the password through a script or even better through a password file.
export -p RESTIC_PASSWORD=<our key>
or
export -p RESTIC_PASSWORD_FILE=<full path of 0400 file>
eg.
export -p RESTIC_PASSWORD=55C9225pXNK3s3f7624unWe can also declare the restic repository through an environmental variable
export -p RESTIC_REPOSITORY=<our repo>Local Repo
An example of local backup repo should be something like this:
$ cat restic.local.conf
export -p RESTIC_PASSWORD=55C9225pXNK3s3f7624un
export -p RESTIC_REPOSITORY="/mnt/backup/"
minio S3
We are going to use minio as an S3 object storage, so we need to export the Access & Sercet Key in a similar way as for amazon S3.
AccessKey <~> AWS_ACCESS_KEY_ID
SecretKey <~> AWS_SECRET_ACCESS_KEY
export -p AWS_ACCESS_KEY_ID=minioadmin
export -p AWS_SECRET_ACCESS_KEY=minioadminThe S3 endpoint is http://localhost:9000/demo so a full example should be:
$ cat restic.S3.conf
export -p AWS_ACCESS_KEY_ID=minioadmin
export -p AWS_SECRET_ACCESS_KEY=minioadmin
export -p RESTIC_PASSWORD=55C9225pXNK3s3f7624un
export -p RESTIC_REPOSITORY="s3:http://localhost:9000/demo"source the config file into your shell:
source restic.S3.confInitialize Repo
We are ready to initialise the remote repo
$ restic init
created restic repository f968b51633 at s3:http://localhost:9000/demo

Please note that knowledge of your password is required to access
the repository. Losing your password means that your data is
irrecoverably lost.
Be Careful if you asked to type a password, that means that you did not use a shell environmental variable to export a password. That is fine, but only if that was your purpose. Then you will see something like that:
$ restic init

enter password for new repository: <type your password here>
enter password again: <type your password here, again>

created restic repository ea97171d56 at s3:http://localhost:9000/demo

Please note that knowledge of your password is required to access
the repository. Losing your password means that your data is
irrecoverably lost.
enter password for new repository:
enter password again:
created restic repository ea97171d56 at s3:http://localhost:9000/demo

Please note that knowledge of your password is required to access
the repository. Losing your password means that your data is
irrecoverably lost.
backup
We are ready to take our first snapshot.
$ restic -v backup /home/ebal/

open repository
repository c8d9898b opened successfully, password is correct
created new cache in /home/ebal/.cache/restic
lock repository
load index files
start scan on [/home/ebal/]
start backup on [/home/ebal/]
scan finished in 0.567s: 2295 files, 307.823 MiB

Files:        2295 new,     0 changed,     0 unmodified
Dirs:            1 new,     0 changed,     0 unmodified
Data Blobs:   2383 new
Tree Blobs:      2 new
Added to the repo: 263.685 MiB

processed 2295 files, 307.823 MiB in 0:28
snapshot 33e8ae0d saved
You can exclude or include files with restic, but I will not get into this right now.
For more info, read Restic Documentation
standard input
restic can also take for backup:
mysqldump --all-databases -uroot -ppassword | xz - | restic --stdin --stdin-filename mysqldump.sql.bz2Check
$ restic -v check

using temporary cache in /tmp/restic-check-cache-528400534
repository c8d9898b opened successfully, password is correct
created new cache in /tmp/restic-check-cache-528400534
create exclusive lock for repository
load indexes
check all packs
check snapshots, trees and blobs
no errors were found
Take another snapshot
$ restic -v backup /home/ebal/ --one-file-system  --cleanup-cache

open repository
repository c8d9898b opened successfully, password is correct
lock repository
load index files
using parent snapshot 33e8ae0d
start scan on [/home/ebal/]
start backup on [/home/ebal/]
scan finished in 0.389s: 2295 files, 307.824 MiB

Files:           0 new,     4 changed,  2291 unmodified
Dirs:            0 new,     1 changed,     0 unmodified
Data Blobs:      4 new
Tree Blobs:      2 new
Added to the repo: 154.549 KiB

processed 2295 files, 307.824 MiB in 0:01
snapshot 280468f6 saved
List snapshots
$ restic -v snapshots

repository c8d9898b opened successfully, password is correct
ID        Time                 Host        Tags        Paths
-----------------------------------------------------------------
6988dda7  2020-03-14 23:32:55  elementary              /etc
33e8ae0d  2020-03-15 21:05:55  elementary              /home/ebal
280468f6  2020-03-15 21:08:38  elementary              /home/ebal
-----------------------------------------------------------------
3 snapshots
Remove snapshot
as you can see, I had one more snapshot before my home dir and I want to remove it
$ restic -v forget 6988dda7

repository c8d9898b opened successfully, password is correct
removed snapshot 6988dda7
list again
$ restic -v snapshots

repository c8d9898b opened successfully, password is correct
ID        Time                 Host        Tags        Paths
-----------------------------------------------------------------
33e8ae0d  2020-03-15 21:05:55  elementary              /home/ebal
280468f6  2020-03-15 21:08:38  elementary              /home/ebal
-----------------------------------------------------------------
2 snapshots
Compare snapshots
$ restic -v diff 33e8ae0d 280468f6

repository c8d9898b opened successfully, password is correct
comparing snapshot 33e8ae0d to 280468f6:

M    /home/ebal/.config/dconf/user
M    /home/ebal/.mozilla/firefox/pw9z9f9z.default-release/SiteSecurityServiceState.txt
M    /home/ebal/.mozilla/firefox/pw9z9f9z.default-release/datareporting/aborted-session-ping
M    /home/ebal/.mozilla/firefox/pw9z9f9z.default-release/storage/default/moz-extension+++62b23386-279d-4791-8ae7-66ab3d69d07d^userContextId=4294967295/idb/3647222921wleabcEoxlt-eengsairo.sqlite

Files:           0 new,     0 removed,     4 changed
Dirs:            0 new,     0 removed
Others:          0 new,     0 removed
Data Blobs:      4 new,     4 removed
Tree Blobs:     14 new,    14 removed
  Added:   199.385 KiB
  Removed: 197.990 KiB
Mount a snapshot
$ mkdir -p backup

$ restic -v mount backup/

repository c8d9898b opened successfully, password is correct
Now serving the repository at backup/
When finished, quit with Ctrl-c or umount the mountpoint.
open another terminal
$ cd backup/

$ ls -l
total 0
dr-xr-xr-x 1 ebal ebal 0 Μαρ  15 21:12 hosts
dr-xr-xr-x 1 ebal ebal 0 Μαρ  15 21:12 ids
dr-xr-xr-x 1 ebal ebal 0 Μαρ  15 21:12 snapshots
dr-xr-xr-x 1 ebal ebal 0 Μαρ  15 21:12 tags

$ ls -l hosts/
total 0
dr-xr-xr-x 1 ebal ebal 0 Μαρ  15 21:12 elementary

$ ls -l snapshots/
total 0
dr-xr-xr-x 3 ebal ebal 0 Μαρ  15 21:05 2020-03-15T21:05:55+02:00
dr-xr-xr-x 3 ebal ebal 0 Μαρ  15 21:08 2020-03-15T21:08:38+02:00
lrwxrwxrwx 1 ebal ebal 0 Μαρ  15 21:08 latest -> 2020-03-15T21:08:38+02:00

$ ls -l tags
total 0
So as we can see, snapshots are based on time.
$ du -sh snapshots/*

309M  snapshots/2020-03-15T21:05:55+02:00
309M  snapshots/2020-03-15T21:08:38+02:00
0     snapshots/latest
be aware as far as we have mounted the restic backup, there is a lock on the repo.
Do NOT forget to close the mount point when finished.
When finished, quit with Ctrl-c or umount the mountpoint.
  signal interrupt received, cleaning up
Check again
you may need to re-check to see if there is a lock on the repo
$ restic check

using temporary cache in /tmp/restic-check-cache-524606775
repository c8d9898b opened successfully, password is correct
created new cache in /tmp/restic-check-cache-524606775
create exclusive lock for repository
load indexes
check all packs
check snapshots, trees and blobs
no errors were found
Restore a snapshot
Identify which snapshot you want to restore
$ restic snapshots

repository c8d9898b opened successfully, password is correct
ID        Time                 Host        Tags        Paths
-----------------------------------------------------------------
33e8ae0d  2020-03-15 21:05:55  elementary              /home/ebal
280468f6  2020-03-15 21:08:38  elementary              /home/ebal
-----------------------------------------------------------------
2 snapshots
create a folder and restore the snapshot
$ mkdir -p restore
$ restic -v restore 280468f6 --target restore/

repository c8d9898b opened successfully, password is correct
restoring <Snapshot 280468f6 of [/home/ebal] at 2020-03-15 21:08:38.10445053 +0200 EET by ebal@elementary> to restore/
$ ls -l restore/
total 4
drwxr-xr-x 3 ebal ebal 4096 Μαρ 14 13:56 home
$ ls -l restore/home/
total 4
drwxr-xr-x 17 ebal ebal 4096 Μαρ 15 20:13 ebal
$ du -sh restore/home/ebal/
287M restore/home/ebal/List files from snapshot
$ restic -v ls 280468f6 | head
snapshot 280468f6 of [/home/ebal] filtered by [] at 2020-03-15 21:08:38.10445053 +0200 EET):

/home
/home/ebal
/home/ebal/.ICEauthority
/home/ebal/.Xauthority
/home/ebal/.bash_history
/home/ebal/.bash_logout
/home/ebal/.bashrc
/home/ebal/.cache
/home/ebal/.cache/.notifications.session
keys
$ restic key list

repository ea97171d opened successfully, password is correct
 ID        User  Host        Created
------------------------------------------------
*8c112442  ebal  elementary  2020-03-14 23:22:49
------------------------------------------------
restic rotate snapshot policy
a few more words about forget
Forget mode has a feature of keep last TIME snapshots, where time can be
- number of snapshots
- hourly
- daily
- weekly
- monthly
- yearly
and makes restic with local feature an ideally replacement for rsnapshot!
$ restic help forget

The "forget" command removes snapshots according to a policy. Please note that
this command really only deletes the snapshot object in the repository, which
is a reference to data stored there. In order to remove this (now unreferenced)
data after 'forget' was run successfully, see the 'prune' command.

Flags:
  -l, --keep-last n            keep the last n snapshots
  -H, --keep-hourly n          keep the last n hourly snapshots
  -d, --keep-daily n           keep the last n daily snapshots
  -w, --keep-weekly n          keep the last n weekly snapshots
  -m, --keep-monthly n         keep the last n monthly snapshots
  -y, --keep-yearly n          keep the last n yearly snapshots
Appendix - minio
MinIO is a s3 compatible object storage.
install server
sudo curl -sLo /usr/local/bin/minio \
  https://dl.min.io/server/minio/release/linux-amd64/minio

sudo chmod +x /usr/local/bin/minio

minio --version
minio version RELEASE.2020-03-14T02-21-58Z
run server
minio server ./dataEndpoint: http://192.168.122.31:9000 http://127.0.0.1:9000
AccessKey: minioadmin
SecretKey: minioadmin
Browser Access:
http://192.168.122.31:9000 http://127.0.0.1:9000
Command-line Access: https://docs.min.io/docs/minio-client-quickstart-guide
$ mc config host add myminio http://192.168.122.31:9000 minioadmin minioadmin
Object API (Amazon S3 compatible):
Go: https://docs.min.io/docs/golang-client-quickstart-guide
Java: https://docs.min.io/docs/java-client-quickstart-guide
Python: https://docs.min.io/docs/python-client-quickstart-guide
JavaScript: https://docs.min.io/docs/javascript-client-quickstart-guide
.NET: https://docs.min.io/docs/dotnet-client-quickstart-guide
Detected default credentials 'minioadmin:minioadmin',
please change the credentials immediately using 'MINIO_ACCESS_KEY' and 'MINIO_SECRET_KEY'browser
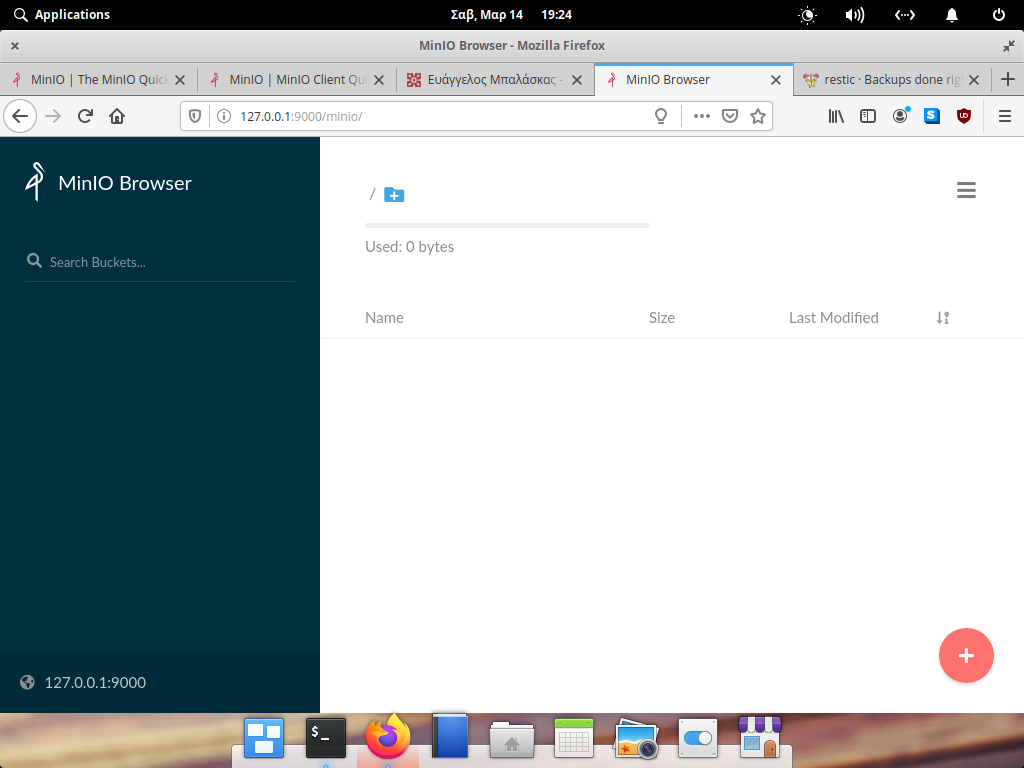
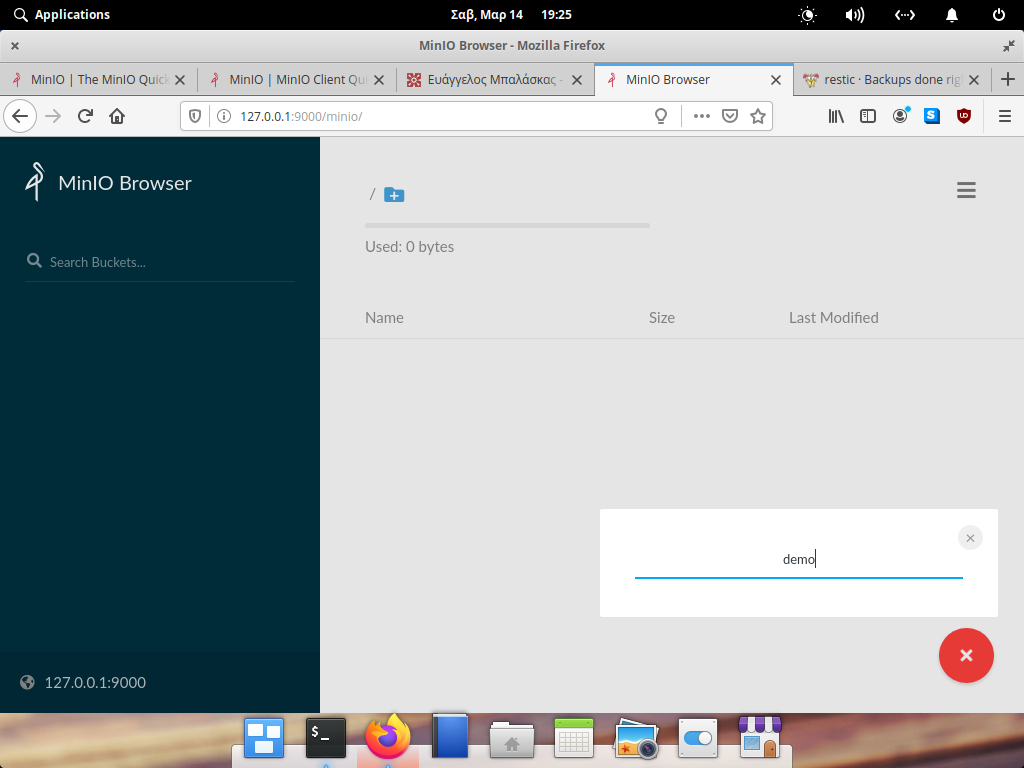
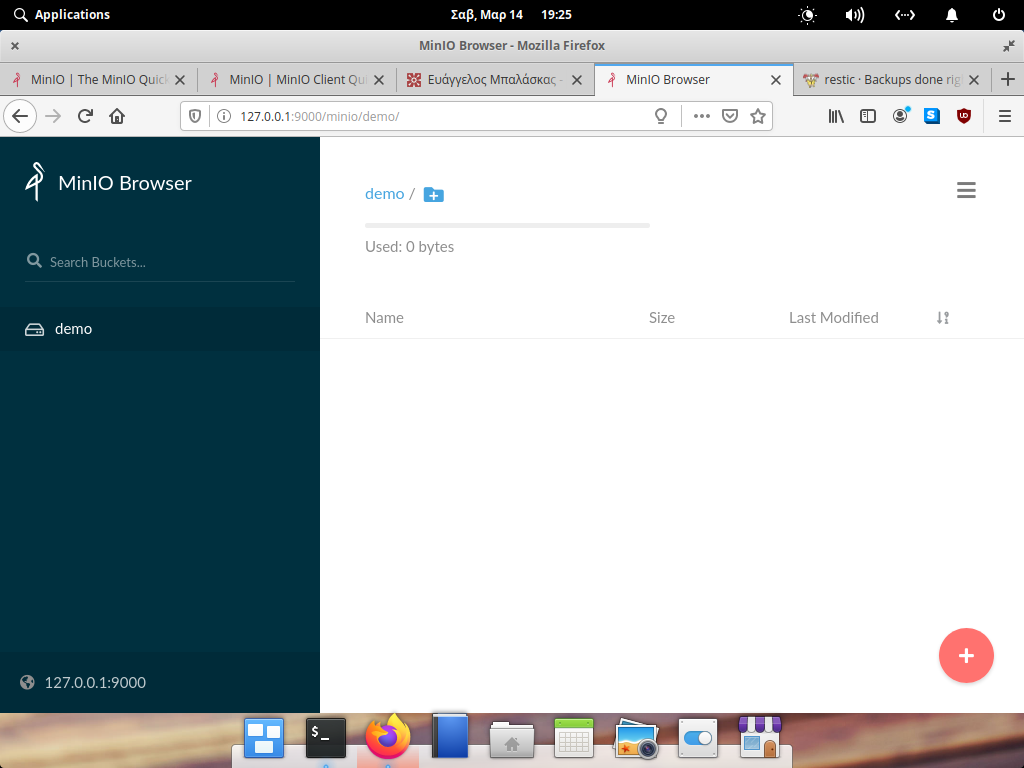
create demo bucket


install client
sudo curl -sLo /usr/local/bin/mc
  https://dl.min.io/client/mc/release/linux-amd64/mc

sudo chmod +x /usr/local/bin/mc

mc -v
mc version RELEASE.2020-03-14T01-23-37Z
configure client
mc config host add myminio http://192.168.122.31:9000 minioadmin minioadminrun mc client
$ mc ls myminio
[2020-03-14 19:01:25 EET]      0B demo/

$ mc tree myminio/demo
$
mc autocompletion
mc --autocompletionyou need to restart your shell.
$ mc ls myminio/demo/

[2020-03-15 21:03:15 EET]    155B config
[2020-03-15 21:34:13 EET]      0B data/
[2020-03-15 21:34:13 EET]      0B index/
[2020-03-15 21:34:13 EET]      0B keys/
[2020-03-15 21:34:13 EET]      0B snapshots/
That’s It!
