2FA SSH aka OpenSSH OATH, Two-Factor Authentication
prologue
Good security is based on layers of protection. At some point the usability gets in the way. My thread model on accessing systems is to create a different ssh pair of keys (private/public) and only use them instead of a login password. I try to keep my digital assets separated and not all of them under the same basket. My laptop is encrypted and I dont run any services on it, but even then a bad actor can always find a way.
Back in the days, I was looking on Barada/Gort. Barada is an implementation of HOTP: An HMAC-Based One-Time Password Algorithm and Gort is the android app you can install to your mobile and connect to barada. Both of these application have not been updated since 2013/2014 and Gort is even removed from f-droid!
Talking with friends on our upcoming trip to 34C4, discussing some security subjects, I thought it was time to review my previous inquiry on ssh-2FA. Most of my friends are using yubikeys. I would love to try some, but at this time I dont have the time to order/test/apply to my machines. To reduce any risk, the idea of combining a bastion/jump-host server with 2FA seemed to be an easy and affordable solution.
OpenSSH with OATH
As ssh login is based on PAM (Pluggable Authentication Modules), we can use Gnu OATH Toolkit. OATH stands for Open Authentication and it is an open standard. In a nutshell, we add a new authorization step that we can verify our login via our mobile device.
Below are my personal notes on how to setup oath-toolkit, oath-pam and how to synchronize it against your android device. These are based on centos 6.9
EPEL
We need to install the epel repository:
# yum -y install https://dl.fedoraproject.org/pub/epel/6/x86_64/epel-release-6-8.noarch.rpm
Searching packages
Searching for oath
# yum search oath
the results are similar to these:
liboath.x86_64       : Library for OATH handling
liboath-devel.x86_64 : Development files for liboath
liboath-doc.noarch   : Documentation files for liboath

pam_oath.x86_64      : A PAM module for pluggable login authentication for OATH
gen-oath-safe.noarch : Script for generating HOTP/TOTP keys (and QR code)
oathtool.x86_64      : A command line tool for generating and validating OTPs
Installing packages
We need to install three packages:
- pam_oath is the PAM for OATH
- oathtool is the gnu oath-toolkit
- gen-oath-safe is the program that we will use to sync our mobile device with our system
# yum -y install pam_oath oathtool gen-oath-safe
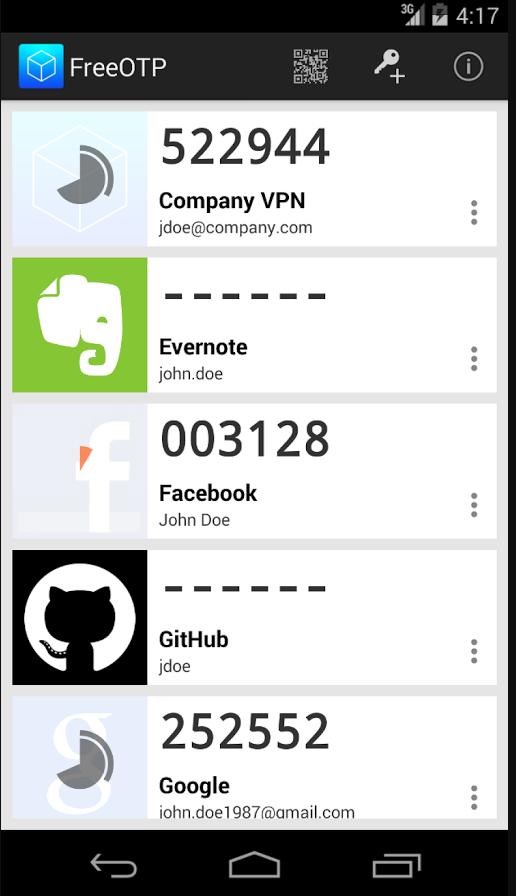
FreeOTP
Before we continue with our setup, I believe now is the time to install FreeOTP

FreeOTP looks like:
HOTP
Now, it is time to generate and sync our 2FA, using HOTP
Generate
You should replace username with your USER_NAME !
# gen-oath-safe username HOTP

Sync
and scan the QR with FreeOTP

You can see in the top a new entry!

Save
Do not forget to save your HOTP key (hex) to the gnu oath-toolkit user file.
eg.
Key in Hex: e9379dd63ec367ee5c378a7c6515af01cf650c89
# echo "HOTP username - e9379dd63ec367ee5c378a7c6515af01cf650c89" > /etc/liboath/oathuserfile
verify:
# cat /etc/liboath/oathuserfile
HOTP username - e9379dd63ec367ee5c378a7c6515af01cf650c89OpenSSH
The penultimate step is to setup our ssh login with the PAM oath library.
Verify PAM
# ls -l /usr/lib64/security/pam_oath.so
-rwxr-xr-x 1 root root 11304 Nov 11 2014 /usr/lib64/security/pam_oath.soSSHD-PAM
# cat /etc/pam.d/sshd
In modern systems, the sshd pam configuration file seems:
#%PAM-1.0
auth       required pam_sepermit.so
auth       include      password-auth
account    required     pam_nologin.so
account    include      password-auth
password   include      password-auth
# pam_selinux.so close should be the first session rule
session    required     pam_selinux.so close
session    required     pam_loginuid.so
# pam_selinux.so open should only be followed by sessions to be executed in the user context
session    required     pam_selinux.so open env_params
session    required     pam_namespace.so
session    optional     pam_keyinit.so force revoke
session    include      password-auth
We need one line in the top of the file.
I use something like this:
auth sufficient /usr/lib64/security/pam_oath.so debug usersfile=/etc/liboath/oathuserfile window=5 digits=6
Depending on your policy and thread model, you can switch sufficient to requisite , you can remove debug option. In the third field, you can try typing just the pam_path.so without the full path and you can change the window to something else:
eg.
auth requisite pam_oath.so usersfile=/etc/liboath/oathuserfile window=10 digits=6Restart sshd
In every change/test remember to restart your ssh daemon:
# service sshd restart
Stopping sshd:                                             [  OK  ]
Starting sshd:                                             [  OK  ]
SELINUX
If you are getting some weird messages, try to change the status of selinux to permissive and try again. If the selinux is the issue, you have to review selinux audit logs and add/fix any selinux policies/modules so that your system can work properly.
# getenforce
Enforcing

# setenforce 0

# getenforce
Permissive
Testing
The last and most important thing, is to test it !

Links
- 34C3 - https://events.ccc.de/congress/2017/wiki/index.php/Main_Page
- HOTP - https://tools.ietf.org/html/rfc4226
- OATH - https://openauthentication.org/
- FreeOTP - https://freeotp.github.io
- Gnu OATH ToolKit - http://www.nongnu.org/oath-toolkit/index.html
- PAM - https://www.linux.com/news/understanding-pam
Post Scriptum
The idea of using OATH & FreeOTP can also be applied to login into your laptop as PAM is the basic authentication framework on a linux machine. You can use OATH in every service that can authenticate it self through PAM.
How to install Signal dekstop to archlinux
Download Signal Desktop
eg. latest version v1.0.41
$ curl -s https://updates.signal.org/desktop/apt/pool/main/s/signal-desktop/signal-desktop_1.0.41_amd64.deb \
    -o /tmp/signal-desktop_1.0.41_amd64.deb
Verify Package
There is a way to manually verify the integrity of the package, by checking the hash value of the file against a gpg signed file. To do that we need to add a few extra steps in our procedure.
Download Key from the repository
$ wget -c https://updates.signal.org/desktop/apt/keys.asc
--2017-12-11 22:13:34--  https://updates.signal.org/desktop/apt/keys.asc
Loaded CA certificate '/etc/ssl/certs/ca-certificates.crt'
Connecting to 127.0.0.1:8118... connected.
Proxy request sent, awaiting response... 200 OK
Length: 3090 (3.0K) [application/pgp-signature]
Saving to: ‘keys.asc’

keys.asc                          100%[============================================================>]   3.02K  --.-KB/s    in 0s

2017-12-11 22:13:35 (160 MB/s) - ‘keys.asc’ saved [3090/3090]
Import the key to your gpg keyring
$ gpg2 --import keys.asc
gpg: key D980A17457F6FB06: public key "Open Whisper Systems <support@whispersystems.org>" imported
gpg: Total number processed: 1
gpg:               imported: 1
you can also verify/get public key from a known key server
$ gpg2 --verbose --keyserver pgp.mit.edu --recv-keys 0xD980A17457F6FB06
gpg: data source: http://pgp.mit.edu:11371
gpg: armor header: Version: SKS 1.1.6
gpg: armor header: Comment: Hostname: pgp.mit.edu
gpg: pub  rsa4096/D980A17457F6FB06 2017-04-05  Open Whisper Systems <support@whispersystems.org>
gpg: key D980A17457F6FB06: "Open Whisper Systems <support@whispersystems.org>" not changed
gpg: Total number processed: 1
gpg:              unchanged: 1
Here is already in place, so no changes.
Download Release files
$ wget -c https://updates.signal.org/desktop/apt/dists/xenial/Release
$ wget -c https://updates.signal.org/desktop/apt/dists/xenial/Release.gpg
Verify Release files
$ gpg2 --no-default-keyring --verify Release.gpg Release
gpg: Signature made Sat 09 Dec 2017 04:11:06 AM EET
gpg:                using RSA key D980A17457F6FB06
gpg: Good signature from "Open Whisper Systems <support@whispersystems.org>" [unknown]
gpg: WARNING: This key is not certified with a trusted signature!
gpg:          There is no indication that the signature belongs to the owner.
Primary key fingerprint: DBA3 6B51 81D0 C816 F630  E889 D980 A174 57F6 FB06
That means that Release file is signed from whispersystems and the integrity of the file is not changed/compromized.
Download Package File
We need one more file and that is the Package file that contains the hash values of the deb packages.
$ wget -c https://updates.signal.org/desktop/apt/dists/xenial/main/binary-amd64/Packages
But is this file compromized?
Let’s check it against Release file:
$ sha256sum Packages
ec74860e656db892ab38831dc5f274d54a10347934c140e2a3e637f34c402b78 Packages$ grep ec74860e656db892ab38831dc5f274d54a10347934c140e2a3e637f34c402b78 Release
ec74860e656db892ab38831dc5f274d54a10347934c140e2a3e637f34c402b78 1713 main/binary-amd64/Packagesyeay !
Verify deb Package
Finally we are now ready to manually verify the integrity of the deb package:
$ sha256sum signal-desktop_1.0.41_amd64.deb
9cf87647e21bbe0c1b81e66f88832fe2ec7e868bf594413eb96f0bf3633a3f25 signal-desktop_1.0.41_amd64.deb$ egrep 9cf87647e21bbe0c1b81e66f88832fe2ec7e868bf594413eb96f0bf3633a3f25 Packages
SHA256: 9cf87647e21bbe0c1b81e66f88832fe2ec7e868bf594413eb96f0bf3633a3f25Perfect, we are now ready to continue
Extract under tmp filesystem
$ cd /tmp/
$ ar vx signal-desktop_1.0.41_amd64.deb
x - debian-binary
x - control.tar.gz
x - data.tar.xz
Extract data under tmp filesystem
$ tar xf data.tar.xz
Move Signal-Desktop under root filesystem
# sudo mv opt/Signal/ /opt/Signal/
Done
Actually, that’s it!
Run
Run signal-desktop as a regular user:
$ /opt/Signal/signal-desktop
Signal Desktop

Proxy
Define your proxy settings on your environment:
declare -x ftp_proxy="proxy.example.org:8080"
declare -x http_proxy="proxy.example.org:8080"
declare -x https_proxy="proxy.example.org:8080"
Signal

The year is 2144. A group of anti-patent scientists are working to reverse engineer drugs in free labs, for (poor) people to have access to them. Agents of International Property Coalition are trying to find the lead pirate-scientist and stop any patent violation by any means necessary. In this era, without a franchise (citizenship) autonomous robots and people are slaves. But only a few of the bots have are autonomous. Even then, can they be free ? Can androids choose their own gender identity ? Transhumanism and extension life drugs are helping people to live a longer and better life.
A science fiction novel without Digital Rights Management (DRM).
Fighting Spam
Fighting email spam in modern times most of the times looks like this:

Rspamd
Rspamd is a rapid spam filtering system. Written in C with Lua script engine extension seems to be really fast and a really good solution for SOHO environments.
In this blog post, I'’ll try to present you a quickstart guide on working with rspamd on a CentOS 6.9 machine running postfix.
DISCLAIMER: This blog post is from a very technical point of view!
Installation
We are going to install rspamd via know rpm repositories:
Epel Repository
We need to install epel repository first:
# yum -y install http://fedora-mirror01.rbc.ru/pub/epel/6/x86_64/epel-release-6-8.noarch.rpm
Rspamd Repository
Now it is time to setup the rspamd repository:
# curl https://rspamd.com/rpm-stable/centos-6/rspamd.repo -o /etc/yum.repos.d/rspamd.repo
Install the gpg key
# rpm --import http://rspamd.com/rpm-stable/gpg.key
and verify the repository with # yum repolist
repo id     repo name
base        CentOS-6 - Base
epel        Extra Packages for Enterprise Linux 6 - x86_64
extras      CentOS-6 - Extras
rspamd      Rspamd stable repository
updates     CentOS-6 - Updates
Rpm
Now it is time to install rspamd to our linux box:
# yum -y install rspamd
# yum info rspamd

Name        : rspamd
Arch        : x86_64
Version     : 1.6.3
Release     : 1
Size        : 8.7 M
Repo        : installed
From repo   : rspamd
Summary     : Rapid spam filtering system
URL         : https://rspamd.com
License     : BSD2c
Description : Rspamd is a rapid, modular and lightweight spam filter. It is designed to work
            : with big amount of mail and can be easily extended with own filters written in
            : lua.
Init File
We need to correct rspamd init file so that rspamd can find the correct configuration file:
# vim /etc/init.d/rspamd
# ebal, Wed, 06 Sep 2017 00:31:37 +0300
## RSPAMD_CONF_FILE="/etc/rspamd/rspamd.sysvinit.conf"
RSPAMD_CONF_FILE="/etc/rspamd/rspamd.conf"
or
# ln -s /etc/rspamd/rspamd.conf /etc/rspamd/rspamd.sysvinit.conf
Start Rspamd
We are now ready to start for the first time rspamd daemon:
# /etc/init.d/rspamd restart
syntax OK
Stopping rspamd:                                           [FAILED]
Starting rspamd:                                           [  OK  ]
verify that is running:
# ps -e fuwww | egrep -i rsp[a]md
root      1337  0.0  0.7 205564  7164 ?        Ss   20:19   0:00 rspamd: main process
_rspamd   1339  0.0  0.7 206004  8068 ?        S    20:19   0:00  _ rspamd: rspamd_proxy process
_rspamd   1340  0.2  1.2 209392 12584 ?        S    20:19   0:00  _ rspamd: controller process
_rspamd   1341  0.0  1.0 208436 11076 ?        S    20:19   0:00  _ rspamd: normal process
perfect, now it is time to enable rspamd to run on boot:
# chkconfig rspamd on
# chkconfig --list | egrep rspamd
rspamd          0:off   1:off   2:on    3:on    4:on    5:on    6:off
Postfix
In a nutshell, postfix will pass through (filter) an email using the milter protocol to another application before queuing it to one of postfix’s mail queues. Think milter as a bridge that connects two different applications.

Rspamd Proxy
In Rspamd 1.6 Rmilter is obsoleted but rspamd proxy worker supports milter protocol. That means we need to connect our postfix with rspamd_proxy via milter protocol.
Rspamd has a really nice documentation: https://rspamd.com/doc/index.html
On MTA integration you can find more info.
# netstat -ntlp | egrep -i rspamd
output:
tcp        0      0 0.0.0.0:11332               0.0.0.0:*                   LISTEN      1451/rspamd
tcp        0      0 0.0.0.0:11333               0.0.0.0:*                   LISTEN      1451/rspamd
tcp        0      0 127.0.0.1:11334             0.0.0.0:*                   LISTEN      1451/rspamd
tcp        0      0 :::11332                    :::*                        LISTEN      1451/rspamd
tcp        0      0 :::11333                    :::*                        LISTEN      1451/rspamd
tcp        0      0 ::1:11334                   :::*                        LISTEN      1451/rspamd
# egrep -A1 proxy /etc/rspamd/rspamd.conf
worker "rspamd_proxy" {
    bind_socket = "*:11332";
    .include "$CONFDIR/worker-proxy.inc"
    .include(try=true; priority=1,duplicate=merge) "$LOCAL_CONFDIR/local.d/worker-proxy.inc"
    .include(try=true; priority=10) "$LOCAL_CONFDIR/override.d/worker-proxy.inc"
}
Milter
If you want to know all the possibly configuration parameter on postfix for milter setup:
# postconf | egrep -i milter
output:
milter_command_timeout = 30s
milter_connect_macros = j {daemon_name} v
milter_connect_timeout = 30s
milter_content_timeout = 300s
milter_data_macros = i
milter_default_action = tempfail
milter_end_of_data_macros = i
milter_end_of_header_macros = i
milter_helo_macros = {tls_version} {cipher} {cipher_bits} {cert_subject} {cert_issuer}
milter_macro_daemon_name = $myhostname
milter_macro_v = $mail_name $mail_version
milter_mail_macros = i {auth_type} {auth_authen} {auth_author} {mail_addr} {mail_host} {mail_mailer}
milter_protocol = 6
milter_rcpt_macros = i {rcpt_addr} {rcpt_host} {rcpt_mailer}
milter_unknown_command_macros =
non_smtpd_milters =
smtpd_milters =
We are mostly interested in the last two, but it is best to follow rspamd documentation:
# vim /etc/postfix/main.cf
Adding the below configuration lines:
# ebal, Sat, 09 Sep 2017 18:56:02 +0300

## A list of Milter (mail filter) applications for new mail that does not arrive via the Postfix smtpd(8) server.
on_smtpd_milters = inet:127.0.0.1:11332

## A list of Milter (mail filter) applications for new mail that arrives via the Postfix smtpd(8) server.
smtpd_milters = inet:127.0.0.1:11332

## Send macros to mail filter applications
milter_mail_macros = i {auth_type} {auth_authen} {auth_author} {mail_addr} {client_addr} {client_name} {mail_host} {mail_mailer}

## skip mail without checks if something goes wrong, like rspamd is down !
milter_default_action = accept
Reload postfix
# postfix reload
postfix/postfix-script: refreshing the Postfix mail systemTesting
netcat
From a client:
$ nc 192.168.122.96 25
220 centos69.localdomain ESMTP Postfix
EHLO centos69
250-centos69.localdomain
250-PIPELINING
250-SIZE 10240000
250-VRFY
250-ETRN
250-ENHANCEDSTATUSCODES
250-8BITMIME
250 DSN
MAIL FROM: <root@example.org>
250 2.1.0 Ok
RCPT TO: <root@localhost>
250 2.1.5 Ok
DATA
354 End data with <CR><LF>.<CR><LF>
test
.
250 2.0.0 Ok: queued as 4233520144
^]
Logs
Looking through logs may be a difficult task for many, even so it is a task that you have to do.
MailLog
# egrep 4233520144 /var/log/maillog
Sep  9 19:08:01 localhost postfix/smtpd[1960]: 4233520144: client=unknown[192.168.122.1]
Sep  9 19:08:05 localhost postfix/cleanup[1963]: 4233520144: message-id=<>
Sep  9 19:08:05 localhost postfix/qmgr[1932]: 4233520144: from=<root@example.org>, size=217, nrcpt=1 (queue active)
Sep  9 19:08:05 localhost postfix/local[1964]: 4233520144: to=<root@localhost.localdomain>, orig_to=<root@localhost>, relay=local, delay=12, delays=12/0.01/0/0.01, dsn=2.0.0, status=sent (delivered to mailbox)
Sep  9 19:08:05 localhost postfix/qmgr[1932]: 4233520144: removed
Everything seems fine with postfix.
Rspamd Log
# egrep -i 4233520144 /var/log/rspamd/rspamd.log
2017-09-09 19:08:05 #1455(normal) <79a04e>; task; rspamd_message_parse: loaded message; id: <undef>; queue-id: <4233520144>; size: 6; checksum: <a6a8e3835061e53ed251c57ab4f22463>

2017-09-09 19:08:05 #1455(normal) <79a04e>; task; rspamd_task_write_log: id: <undef>, qid: <4233520144>, ip: 192.168.122.1, from: <root@example.org>, (default: F (add header): [9.40/15.00] [MISSING_MID(2.50){},MISSING_FROM(2.00){},MISSING_SUBJECT(2.00){},MISSING_TO(2.00){},MISSING_DATE(1.00){},MIME_GOOD(-0.10){text/plain;},ARC_NA(0.00){},FROM_NEQ_ENVFROM(0.00){;root@example.org;},RCVD_COUNT_ZERO(0.00){0;},RCVD_TLS_ALL(0.00){}]), len: 6, time: 87.992ms real, 4.723ms virtual, dns req: 0, digest: <a6a8e3835061e53ed251c57ab4f22463>, rcpts: <root@localhost>
It works !
Training
If you have already a spam or junk folder is really easy training the Bayesian classifier with rspamc.
I use Maildir, so for my setup the initial training is something like this:
# cd /storage/vmails/balaskas.gr/evaggelos/.Spam/cur/ # find . -type f -exec rspamc learn_spam {} \;
Auto-Training
I’ve read a lot of tutorials that suggest real-time training via dovecot plugins or something similar. I personally think that approach adds complexity and for small companies or personal setup, I prefer using Cron daemon:
@daily /bin/find /storage/vmails/balaskas.gr/evaggelos/.Spam/cur/ -type f -mtime -1 -exec rspamc learn_spam {} \;
That means every day, search for new emails in my spam folder and use them to train rspamd.
Training from mbox
First of all seriously ?
Split mbox
There is a nice and simply way to split a mbox to separated files for rspamc to use them.
# awk '/^From / {i++}{print > "msg"i}' Spam
and then feed rspamc:
# ls -1 msg* | xargs rspamc --verbose learn_spam
Stats
# rspamc stat
Results for command: stat (0.068 seconds)
Messages scanned: 2
Messages with action reject: 0, 0.00%
Messages with action soft reject: 0, 0.00%
Messages with action rewrite subject: 0, 0.00%
Messages with action add header: 2, 100.00%
Messages with action greylist: 0, 0.00%
Messages with action no action: 0, 0.00%
Messages treated as spam: 2, 100.00%
Messages treated as ham: 0, 0.00%
Messages learned: 1859
Connections count: 2
Control connections count: 2157
Pools allocated: 2191
Pools freed: 2170
Bytes allocated: 542k
Memory chunks allocated: 41
Shared chunks allocated: 10
Chunks freed: 0
Oversized chunks: 736
Fuzzy hashes in storage "rspamd.com": 659509399
Fuzzy hashes stored: 659509399
Statfile: BAYES_SPAM type: sqlite3; length: 32.66M; free blocks: 0; total blocks: 430.29k; free: 0.00%; learned: 1859; users: 1; languages: 4
Statfile: BAYES_HAM type: sqlite3; length: 9.22k; free blocks: 0; total blocks: 0; free: 0.00%; learned: 0; users: 1; languages: 1
Total learns: 1859
X-Spamd-Result
To view the spam score in every email, we need to enable extended reporting headers and to do that we need to edit our configuration:
# vim /etc/rspamd/modules.d/milter_headers.conf
and just above use add :
    # ebal, Wed, 06 Sep 2017 01:52:08 +0300
    extended_spam_headers = true;

   use = [];
then reload rspamd:
# /etc/init.d/rspamd reload
syntax OK
Reloading rspamd:                                          [  OK  ]
View Source
If your open the email in view-source then you will see something like this:
X-Rspamd-Queue-Id: D0A5728ABF
X-Rspamd-Server: centos69
X-Spamd-Result: default: False [3.40 / 15.00]
Web Server
Rspamd comes with their own web server. That is really useful if you dont have a web server in your mail server, but it is not recommended.
By-default, rspamd web server is only listening to local connections. We can see that from the below ss output
# ss -lp | egrep -i rspamd
LISTEN     0      128                    :::11332                   :::*        users:(("rspamd",7469,10),("rspamd",7471,10),("rspamd",7472,10),("rspamd",7473,10))
LISTEN     0      128                     *:11332                    *:*        users:(("rspamd",7469,9),("rspamd",7471,9),("rspamd",7472,9),("rspamd",7473,9))
LISTEN     0      128                    :::11333                   :::*        users:(("rspamd",7469,18),("rspamd",7473,18))
LISTEN     0      128                     *:11333                    *:*        users:(("rspamd",7469,16),("rspamd",7473,16))
LISTEN     0      128                   ::1:11334                   :::*        users:(("rspamd",7469,14),("rspamd",7472,14),("rspamd",7473,14))
LISTEN     0      128             127.0.0.1:11334                    *:*        users:(("rspamd",7469,12),("rspamd",7472,12),("rspamd",7473,12))
127.0.0.1:11334
So if you want to change that (dont) you have to edit the rspamd.conf (core file):
# vim +/11334 /etc/rspamd/rspamd.conf
and change this line:
bind_socket = "localhost:11334";to something like this:
bind_socket = "YOUR_SERVER_IP:11334";or use sed:
# sed -i -e 's/localhost:11334/YOUR_SERVER_IP/' /etc/rspamd/rspamd.conf
and then fire up your browser:

Web Password
It is a good tactic to change the default password of this web-gui to something else.
# vim /etc/rspamd/worker-controller.inc
  # password = "q1";
  password = "password";
always a good idea to restart rspamd.
Reverse Proxy
I dont like having exposed any web app without SSL or basic authentication, so I shall put rspamd web server under a reverse proxy (apache).
So on httpd-2.2 the configuration is something like this:
ProxyPreserveHost On

<Location /rspamd>
    AuthName "Rspamd Access"
    AuthType Basic
    AuthUserFile /etc/httpd/rspamd_htpasswd
    Require valid-user

    ProxyPass http://127.0.0.1:11334
    ProxyPassReverse http://127.0.0.1:11334

    Order allow,deny
    Allow from all

</Location>
Http Basic Authentication
You need to create the file that is going to be used to store usernames and password for basic authentication:
# htpasswd -csb /etc/httpd/rspamd_htpasswd rspamd rspamd_passwd
Adding password for user rspamd
restart your apache instance.
bind_socket
Of course for this to work, we need to change the bind socket on rspamd.conf
Dont forget this ;)
bind_socket = "127.0.0.1:11334";Selinux
If there is a problem with selinux, then:
# setsebool -P httpd_can_network_connect=1
or
# setsebool httpd_can_network_connect_db on
Errors ?
If you see an error like this:
IO write error
when running rspamd, then you need explicit tell rspamd to use:
rspamc -h 127.0.0.1:11334
To prevent any future errors, I’ve created a shell wrapper:
/usr/local/bin/rspamc
#!/bin/sh
/usr/bin/rspamc -h 127.0.0.1:11334 $*
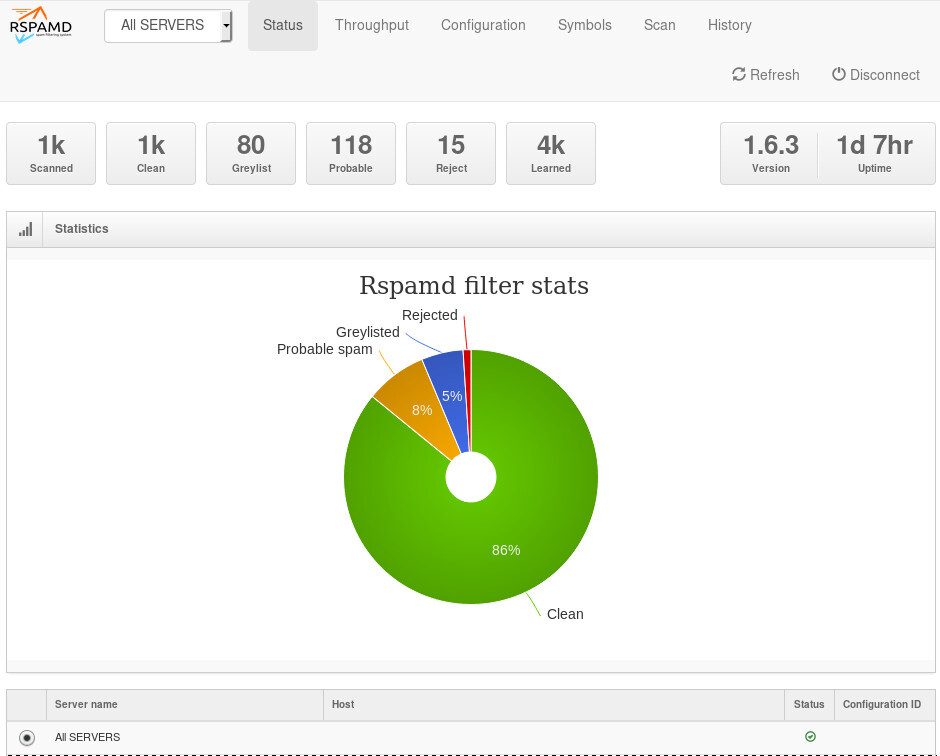
Final Thoughts
I am using rspamd for a while know and I am pretty happy with it.
I’ve setup a spamtrap email address to feed my spam folder and let the cron script to train rspamd.
So after a thousand emails:

![]()
In many companies, nagios is the de-facto monitoring tool. Even with new modern alternatives solutions, this opensource project, still, has a large amount of implementations in place. This guide is based on a “clean/fresh” CentOS 6.9 virtual machine.
Epel
An official nagios repository exist in this address: https://repo.nagios.com/
I prefer to install nagios via the EPEL repository:
# yum -y install http://fedora-mirror01.rbc.ru/pub/epel/6/x86_64/epel-release-6-8.noarch.rpm
# yum info nagios | grep Version
Version     : 4.3.2
# yum -y install nagios
Selinux
Every online manual, suggest to disable selinux with nagios. There is a reason for that ! but I will try my best to provide info on how to keep selinux enforced. To write our own nagios selinux policies the easy way, we need one more package:
# yum -y install policycoreutils-python
Starting nagios:
# /etc/init.d/nagios restart
will show us some initial errors in /var/log/audit/audit.log selinux log file
Filtering the results:
# egrep denied /var/log/audit/audit.log | audit2allow
will display something like this:
#============= nagios_t ==============
allow nagios_t initrc_tmp_t:file write;
allow nagios_t self:capability chown;
To create a policy file based on your errors:
# egrep denied /var/log/audit/audit.log | audit2allow -a -M nagios_t
and to enable it:
# semodule -i nagios_t.pp
BE AWARE this is not the only problem with selinux, but I will provide more details in few moments.
Nagios
Now we are ready to start the nagios daemon:
# /etc/init.d/nagios restart
filtering the processes of our system:
# ps -e fuwww | egrep na[g]ios
nagios    2149  0.0  0.1  18528  1720 ?        Ss   19:37   0:00 /usr/sbin/nagios -d /etc/nagios/nagios.cfg
nagios    2151  0.0  0.0      0     0 ?        Z    19:37   0:00  _ [nagios] <defunct>
nagios    2152  0.0  0.0      0     0 ?        Z    19:37   0:00  _ [nagios] <defunct>
nagios    2153  0.0  0.0      0     0 ?        Z    19:37   0:00  _ [nagios] <defunct>
nagios    2154  0.0  0.0      0     0 ?        Z    19:37   0:00  _ [nagios] <defunct>
nagios    2155  0.0  0.0  18076   712 ?        S    19:37   0:00  _ /usr/sbin/nagios -d /etc/nagios/nagios.cfg
super!
Apache
Now it is time to start our web server apache:
# /etc/init.d/httpd restart
Starting httpd: httpd: apr_sockaddr_info_get() failed
httpd: Could not reliably determine the server's fully qualified domain name, using 127.0.0.1 for ServerName
This is a common error, and means that we need to define a ServerName in our apache configuration.
First, we give an name to our host file:
# vim /etc/hosts
for this guide, I ‘ll go with the centos69 but you can edit that according your needs:
127.0.0.1 localhost localhost.localdomain localhost4 localhost4.localdomain4 centos69then we need to edit the default apache configuration file:
# vim /etc/httpd/conf/httpd.conf
#ServerName www.example.com:80
ServerName centos69
and restart the process:
# /etc/init.d/httpd restart
Stopping httpd:      [  OK  ]
Starting httpd:      [  OK  ]
We can see from the netstat command that is running:
# netstat -ntlp | grep 80
tcp 0 0 :::80 :::* LISTEN 2729/httpd Firewall
It is time to fix our firewall and open the default http port, so that we can view the nagios from our browser.
That means, we need to fix our iptables !
# iptables -A INPUT -m state --state NEW -m tcp -p tcp --dport 80 -j ACCEPT
this is want we need. To a more permanent solution, we need to edit the default iptables configuration file:
# vim /etc/sysconfig/iptables
and add the below entry on INPUT chain section:
-A INPUT -m state --state NEW -m tcp -p tcp --dport 80 -j ACCEPTWeb Browser
We are ready to fire up our web browser and type the address of our nagios server.
Mine is on a local machine with the IP: 129.168.122.96, so
http://192.168.122.96/nagios/
User Authentication
The default user authentication credentials are:
nagiosadmin // nagiosadminbut we can change them!
From our command line, we type something similar:
# htpasswd -sb /etc/nagios/passwd nagiosadmin e4j9gDkk6LXncCdDg
so that htpasswd will update the default nagios password entry on the /etc/nagios/passwd with something else, preferable random and difficult password.
ATTENTION: e4j9gDkk6LXncCdDg is just that, a random password that I created for this document only. Create your own and dont tell anyone!
Selinux, Part Two
at this moment and if you are tail-ing the selinux audit file, you will see some more error msgs.
Below, you will see my nagios_t selinux policy file with all the things that are needed for nagios to run properly - at least at the moment.!
module nagios_t 1.0;

require {
        type nagios_t;
        type initrc_tmp_t;
        type nagios_spool_t;
        type nagios_system_plugin_t;
        type nagios_exec_t;
        type httpd_nagios_script_t;
        class capability chown;
        class file { write read open execute_no_trans getattr };
}

#============= httpd_nagios_script_t ==============
allow httpd_nagios_script_t nagios_spool_t:file { open read getattr };

#============= nagios_t ==============
allow nagios_t initrc_tmp_t:file write;
allow nagios_t nagios_exec_t:file execute_no_trans;
allow nagios_t self:capability chown;

#============= nagios_system_plugin_t ==============
allow nagios_system_plugin_t nagios_exec_t:file getattr;
Edit your nagios_t.te file accordingly and then build your selinux policy:
# make -f /usr/share/selinux/devel/Makefile
You are ready to update the previous nagios selinux policy :
# semodule -i nagios_t.pp
Selinux - Nagios package
So … there is an rpm package with the name: nagios-selinux on Version: 4.3.2
you can install it, but does not resolve all the selinux errors in audit file ….. so ….
I think my way is better, cause you can understand some things better and have more flexibility on defining your selinux policy
Nagios Plugins
Nagios is the core process, daemon. We need the nagios plugins - the checks !
You can do something like this:
# yum install nagios-plugins-all.x86_64
but I dont recommend it.
These are the defaults :
nagios-plugins-load-2.2.1-4git.el6.x86_64
nagios-plugins-ping-2.2.1-4git.el6.x86_64
nagios-plugins-disk-2.2.1-4git.el6.x86_64
nagios-plugins-procs-2.2.1-4git.el6.x86_64
nagios-plugins-users-2.2.1-4git.el6.x86_64
nagios-plugins-http-2.2.1-4git.el6.x86_64
nagios-plugins-swap-2.2.1-4git.el6.x86_64
nagios-plugins-ssh-2.2.1-4git.el6.x86_64
# yum -y install nagios-plugins-load nagios-plugins-ping nagios-plugins-disk nagios-plugins-procs nagios-plugins-users nagios-plugins-http nagios-plugins-swap nagios-plugins-ssh
and if everything is going as planned, you will see something like this:

PNP4Nagios
It is time, to add pnp4nagios a simple graphing tool and get read the nagios performance data and represent them to graphs.
# yum info pnp4nagios | grep Version
Version     : 0.6.22
# yum -y install pnp4nagios
We must not forget to restart our web server:
# /etc/init.d/httpd restart
Bulk Mode with NPCD
I’ve spent toooooo much time to understand why the default Synchronous does not work properly with nagios v4x and pnp4nagios v0.6x
In the end … this is what it works - so try not to re-invent the wheel , as I tried to do and lost so many hours.
Performance Data
We need to tell nagios to gather performance data from their check:
# vim +/process_performance_data /etc/nagios/nagios.cfg
process_performance_data=1
We also need to tell nagios, what to do with this data:
nagios.cfg
# *** the template definition differs from the one in the original nagios.cfg
#
service_perfdata_file=/var/log/pnp4nagios/service-perfdata
service_perfdata_file_template=DATATYPE::SERVICEPERFDATAtTIMET::$TIMET$tHOSTNAME::$HOSTNAME$tSERVICEDESC::$SERVICEDESC$tSERVICEPERFDATA::$SERVICEPERFDATA$tSERVICECHECKCOMMAND::$SERVICECHECKCOMMAND$tHOSTSTATE::$HOSTSTATE$tHOSTSTATETYPE::$HOSTSTATETYPE$tSERVICESTATE::$SERVICESTATE$tSERVICESTATETYPE::$SERVICESTATETYPE$
service_perfdata_file_mode=a
service_perfdata_file_processing_interval=15
service_perfdata_file_processing_command=process-service-perfdata-file

# *** the template definition differs from the one in the original nagios.cfg
#
host_perfdata_file=/var/log/pnp4nagios/host-perfdata
host_perfdata_file_template=DATATYPE::HOSTPERFDATAtTIMET::$TIMET$tHOSTNAME::$HOSTNAME$tHOSTPERFDATA::$HOSTPERFDATA$tHOSTCHECKCOMMAND::$HOSTCHECKCOMMAND$tHOSTSTATE::$HOSTSTATE$tHOSTSTATETYPE::$HOSTSTATETYPE$
host_perfdata_file_mode=a
host_perfdata_file_processing_interval=15
host_perfdata_file_processing_command=process-host-perfdata-file
Commands
In the above configuration, we introduced two new commands
service_perfdata_file_processing_command  &
host_perfdata_file_processing_command
We need to define them in the /etc/nagios/objects/commands.cfg file :
#
# Bulk with NPCD mode
#
define command {
       command_name    process-service-perfdata-file
       command_line    /bin/mv /var/log/pnp4nagios/service-perfdata /var/spool/pnp4nagios/service-perfdata.$TIMET$
}

define command {
       command_name    process-host-perfdata-file
       command_line    /bin/mv /var/log/pnp4nagios/host-perfdata /var/spool/pnp4nagios/host-perfdata.$TIMET$
}
If everything have gone right … then you will be able to see on a nagios check something like this:

Verify
Verify your pnp4nagios setup:
# wget -c http://verify.pnp4nagios.org/verify_pnp_config

# perl verify_pnp_config -m bulk+npcd -c /etc/nagios/nagios.cfg -p /etc/pnp4nagios/
NPCD
The NPCD daemon (Nagios Performance C Daemon) is the daemon/process that will translate the gathered performance data to graphs, so let’s started it:
# /etc/init.d/npcd restart
Stopping npcd:                                             [FAILED]
Starting npcd:                                             [  OK  ]
You should see some warnings but not any critical errors.
Templates
Two new template definition should be created, one for the host and one for the service:
/etc/nagios/objects/templates.cfg
define host {
   name       host-pnp
   action_url /pnp4nagios/index.php/graph?host=$HOSTNAME$&srv=_HOST_' class='tips' rel='/pnp4nagios/index.php/popup?host=$HOSTNAME$&srv=_HOST_
   register   0
}

define service {
   name       srv-pnp
   action_url /pnp4nagios/graph?host=$HOSTNAME$&srv=$SERVICEDESC$' class='tips' rel='/pnp4nagios/popup?host=$HOSTNAME$&srv=$SERVICEDESC$
   register   0
}
Host Definition
Now we need to apply the host-pnp template to our system:
so this configuration: /etc/nagios/objects/localhost.cfg
define host{
        use                     linux-server            ; Name of host template to use
                                                        ; This host definition will inherit all variables that are defined
                                                        ; in (or inherited by) the linux-server host template definition.
        host_name               localhost
        alias                   localhost
        address                 127.0.0.1
        }
becomes:
define host{
        use                     linux-server,host-pnp            ; Name of host template to use
                                                        ; This host definition will inherit all variables that are defined
                                                        ; in (or inherited by) the linux-server host template definition.
        host_name               localhost
        alias                   localhost
        address                 127.0.0.1
        }
Service Definition
And we finally must append the pnp4nagios service template to our services:
srv-pnp
define service{
        use                             local-service,srv-pnp         ; Name of service template to use
        host_name                       localhost
Graphs
We should be able to see graphs like these:

Happy Measurements!
appendix
These are some extra notes on the above article, you need to take in mind:
Services
# chkconfig httpd on
# chkconfig iptables on
# chkconfig nagios on
# chkconfig npcd on
PHP
If you are not running the default php version on your system, it is possible to get this error msg:
Non-static method nagios_Core::SummaryLink()There is a simply solution for that, you need to modify the index file to exclude the deprecated php error msgs:
# vim +/^error_reporting /usr/share/nagios/html/pnp4nagios/index.php
// error_reporting(E_ALL & ~E_STRICT);
error_reporting(E_ALL & ~E_STRICT & ~E_DEPRECATED);
SCAM
Τον τελευταίο καιρό, όλο και περισσότερα email με το παρακάτω (ή παρόμοιο) body φτάνουν στο mailbox μου.
Οι περισσότεροι από εσάς, εύκολα θα διαπιστώσετε πως το παρακάτω είναι google translate, άλλοι πάλι όχι με μια πρώτη ματιά.
Be careful
Είναι, λοιπόν, ένα SCAM email, που προσπαθεί να σας ψαρέψει τα στοιχεία.
Π Ο Τ Ε καμία εταιρεία (πάροχος ή τράπεζα) δεν πρόκειται να σας ζητήσει μέσω email τα στοιχεία σας.
για αυτό Μ Η Ν απαντάτε ΠΟΤΕ σε emails της παρακάτω μορφής.
Actions
Το καλύτερο που έχετε να κάνετε, είναι να προωθήσετε ΑΜΕΣΩΣ το παρακάτω email στο abuse department της εταιρείας σας.
Μπορείτε να βοηθήσετε στην καταπολέμηση της εξάπλωσης αυτού του scam.
Abuse
Τα εκάστοτε abuse departments έχουν εργαλεία που καταγράφουν αυτές τις απόπειρες “ψαρέματος” κι εντοπίζουν τα μολυσμένα PC ή compromised accounts
Με ένα γρήγορο online search βρίσκουμε πολύ γρήγορα μερικά από τα παρακάτω abuse email addresses:
abuse@cosmote.gr
abuse@ote.gr
abuse@forthnet.gr
abuse@wind.gr
abuse@hq.cyta.gr
abuse@hol.gr
postmaster@hol.gr
abuse@nbg.gr
abuse@alpha.gr
support@winbank.gr
Inform Other People
Το καλύτερο που έχετε να κάνετε, είναι να μιλήσετε με τους ανθρώπους του κύκλου σας και να τους ενημερώσετε σχετικά με αυτό.
Μην ξεχνάτε πως εάν τους “χακέψουν” πολύ πιθανά να έχουν στους υπολογιστές τους, δικά σας στοιχεία (από την αποθηκευμένη ατζέντα επαφών)
ή (μερική) πρόσβαση στα email που τους έχετε στείλει κι εσείς.
Οπότε, προστατεύοντάς τους, προστατεύεται και τον εαυτό σας!!
Body
παρακάτω, ένα ενδεικτικό δείγμα. Μπορεί το κείμενο να δείχνει σε άλλο πάροχο ή σε κάποια τράπεζα.
Να έχει κάποιο σύνδεσμο, στον οποίο να πρέπει να πατήσει κάποιος και να συμπληρώσει τα στοιχεία του
ή κάποια φόρμα επικοινωνίας.
Μην ξεχνάτε: Π Ο Τ Ε δεν πρέπει να δίνουμε τα στοιχεία μας, όταν βλέπουμε τέτοια emails.
Cosmote υπηρεσία OTEnet Mail

Μετά την αυτόματη ανανέωση της εγγραφή® σας το διακομιστής αντιμετώπισε κάποια λάθη να μην απαριθμήσω διεύθυνση σας.
Σας ενημερώνουμε ότι δεν μπορείτε να αποκτήσετε πρόσβαση στο λογαριασμό σας! Ή χρησιμοποιήστε το σχετικό προφίλ
αν δεν αναγνωρίσετε τον εαυτό σας σύμφωνα με τους κανονισμούς μας. Παρακαλώ μέσα σε 72 ώρες για να επιβεβαιώσετε
τη διεύθυνση ηλεκτρονικού ταχυδρομείου σας OTEnet Mail, καθώς και όλες τις πληροφορίες που ζητούνται μέσω της παρακάτω φόρμας.

ΕΠΙΒΕΒΑΙΩΣΗ ΤΟΥ ΕΝΤΥΠΟΥ (κάντε κλικ απάντηση και διαβιβάζει τα στοιχεία σας στην υπηρεσία επιβεβαίωσης στη συνέχεια αποστολή)

όνομα:........................
Όνομα:........................
Στοιχεία σύνδεσης (Απαιτείται)
Email OTEnet! :........................
κωδικό πρόσβασης:........................
Εναλλακτικές Email:........................
κωδικό πρόσβασης:........................
χώρα:........................
Ταχυδρομικός κώδικας:........................
τηλέφωνο:........................

Σημείωση: Σε περίπτωση έλλειψης των πληροφοριών που ζητούνται γνωρίζετε ότι αυτό θα διαγράψει οριστικά τη διεύθυνση ηλεκτρονικού ταχυδρομείου σας.

Με εκτίμηση.Let’s Encrypt
I’ve written some posts on Let’s Encrypt but the most frequently question is how to auto renew a certificate every 90 days.
Disclaimer
This is my mini how-to, on centos 6 with a custom compiled Python 2.7.13 that I like to run on virtualenv from latest git updated certbot. Not a copy/paste solution for everyone!
Cron
Cron doesnt not seem to have something useful to use on comparison to 90 days:

Modification Time
The most obvious answer is to look on the modification time on lets encrypt directory :
eg. domain: balaskas.gr
# find /etc/letsencrypt/live/balaskas.gr -type d -mtime +90 -exec ls -ld {} \;

# find /etc/letsencrypt/live/balaskas.gr -type d -mtime +80 -exec ls -ld {} \;

# find /etc/letsencrypt/live/balaskas.gr -type d -mtime +70 -exec ls -ld {} \;
# find /etc/letsencrypt/live/balaskas.gr -type d -mtime +60 -exec ls -ld {} \;
drwxr-xr-x. 2 root root 4096 May 15 20:45 /etc/letsencrypt/live/balaskas.gr
OpenSSL
# openssl x509 -in <(openssl s_client -connect balaskas.gr:443 2>/dev/null) -noout -enddate
If you have registered your email with Let’s Encrypt then you get your first email in 60 days!
Renewal
Here are my own custom steps:
#  cd /root/certbot.git
#  git pull origin

#  source venv/bin/activate && source venv/bin/activate
#  cd venv/bin/

#  monit stop httpd

#  ./venv/bin/certbot renew --cert-name balaskas.gr --standalone

#  monit start httpd

#  deactivate
Script
I use monit, you can edit the script accordingly to your needs :
#!/bin/sh

DOMAIN=$1

## Update certbot
cd /root/certbot.git
git pull origin

# Enable Virtual Environment for python
source venv/bin/activate && source venv/bin/activate

## Stop Apache
monit stop httpd

sleep 5

## Renewal
./venv/bin/certbot renew  --cert-name ${DOMAIN} --standalone

## Exit virtualenv
deactivate

## Start Apache
monit start httpd
All Together
# find /etc/letsencrypt/live/balaskas.gr -type d -mtime +80 -exec /usr/local/bin/certbot.autorenewal.sh balaskas.gr \;
Systemd Timers
or put it on cron
whatever :P
How to install slack dekstop to archlinux
Download Slack Desktop
eg. latest version
https://downloads.slack-edge.com/linux_releases/slack-2.6.3-0.1.fc21.x86_64.rpm
Extract under root filesystem
# cd /
# rpmextract.sh slack-2.6.3-0.1.fc21.x86_64.rpm
Done
Actually, that’s it!
Run
Run slack-desktop as a regular user:
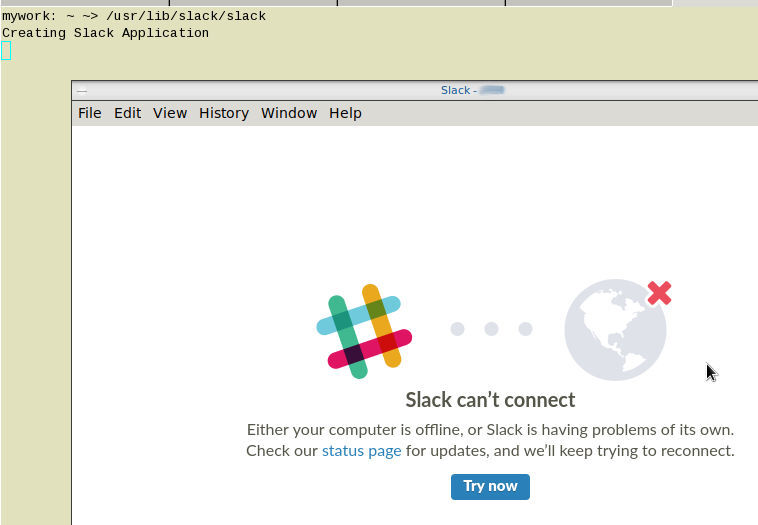
$ /usr/lib/slack/slack
Slack Desktop
Proxy
Define your proxy settings on your environment:
declare -x ftp_proxy="proxy.example.org:8080"
declare -x http_proxy="proxy.example.org:8080"
declare -x https_proxy="proxy.example.org:8080"
Slack
Iterator
a few months ago, I wrote an article on RecursiveDirectoryIterator, you can find the article here: PHP Recursive Directory File Listing . If you run the code example, you ‘ll see that the output is not sorted.
Object
Recursive Iterator is actually an object, a special object that we can perform iterations on sequence (collection) of data. So it is a little difficult to sort them using known php functions. Let me give you an example:
$Iterator = new RecursiveDirectoryIterator('./');
foreach ($Iterator as $file)
    var_dump($file);
object(SplFileInfo)#7 (2) {
  ["pathName":"SplFileInfo":private]=>
  string(12) "./index.html"
  ["fileName":"SplFileInfo":private]=>
  string(10) "index.html"
}
You see here, the iterator is an object of SplFileInfo class.
Internet Answers
Unfortunately stackoverflow and other related online results provide the most complicated answers on this matter. Of course this is not stackoverflow’s error, and it is really a not easy subject to discuss or understand, but personally I dont get the extra fuzz (complexity) on some of the responses.
Back to basics
So let us go back a few steps and understand what an iterator really is. An iterator is an object that we can iterate! That means we can use a loop to walk through the data of an iterator. Reading the above output you can get (hopefully) a better idea.
We can also loop the Iterator as a simply array.
eg.
$It = new RecursiveDirectoryIterator('./');
foreach ($It as $key=>$val)
    echo $key.":".$val."n";
output:
./index.html:./index.htmlArrays
It is difficult to sort Iterators, but it is really easy to sort arrays!
We just need to convert the Iterator into an Array:
// Copy the iterator into an array
$array = iterator_to_array($Iterator);
that’s it!
Sorting
For my needs I need to reverse sort the array by key (filename on a recursive directory), so my sorting looks like:
krsort( $array );easy, right?
Just remember that you can use ksort before the array is already be defined. You need to take two steps, and that is ok.
Convert to Iterator
After sorting, we need to change back an iterator object format:
// Convert Array to an Iterator
$Iterator = new ArrayIterator($array);
and that’s it !
Full Code Example
the entire code in one paragraph:
<?php
# ebal, Fri, 07 Jul 2017 22:01:48 +0300

// Directory to Recursive search
$dir = "/tmp/";

// Iterator Object
$files =  new RecursiveIteratorIterator(
          new RecursiveDirectoryIterator($dir)
          );

// Convert to Array
$Array = iterator_to_array ( $files );
// Reverse Sort by key the array
krsort ( $Array );
// Convert to Iterator
$files = new ArrayIterator( $Array );

// Print the file name
foreach($files as $name => $object)
    echo "$namen";

?>Prologue
Part of my day job is to protect a large mail infrastructure. That means that on a daily basis we are fighting SPAM and try to protect our customers for any suspicious/malicious mail traffic. This is not an easy job. Actually globally is not a easy job. But we are trying and trying hard.
ReplyTo
The last couple months, I have started a project on gitlab gathering the malicious ReplyTo from already identified spam emails. I was looking for a pattern or something that I can feed our antispam engines with so that we can identify spam more accurately. It’s doesnt seem to work as i thought. Spammers can alter their ReplyTo in a matter of minutes!
TheList
Here is the list for the last couple months: ReplyTo
I will -from time to time- try to update it and hopefully someone can find it useful
Free domains
It’s not much yet, but even with this small sample you can see that ~ 50% of phishing goes back to gmail !
    105 gmail.com
     49 yahoo.com
     18 hotmail.com
     17 outlook.com
More Info
You can contact me with various ways if you are interested in more details.
Preferably via encrypted email: PGP: ‘ 0×1c8968af8d2c621f ‘
or via DM in twitter: @ebalaskas
PS
I also keep another list, of suspicious fwds
but keep in mind that it might have some false positives.
Prologue
I should have written this post like a decade ago, but laziness got the better of me.
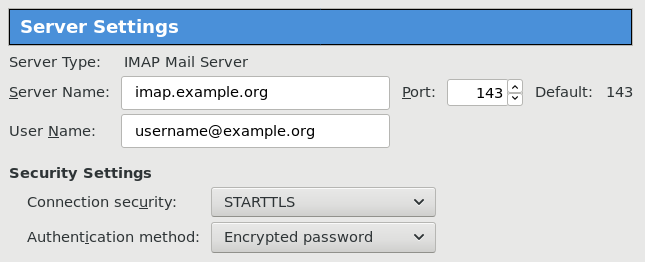
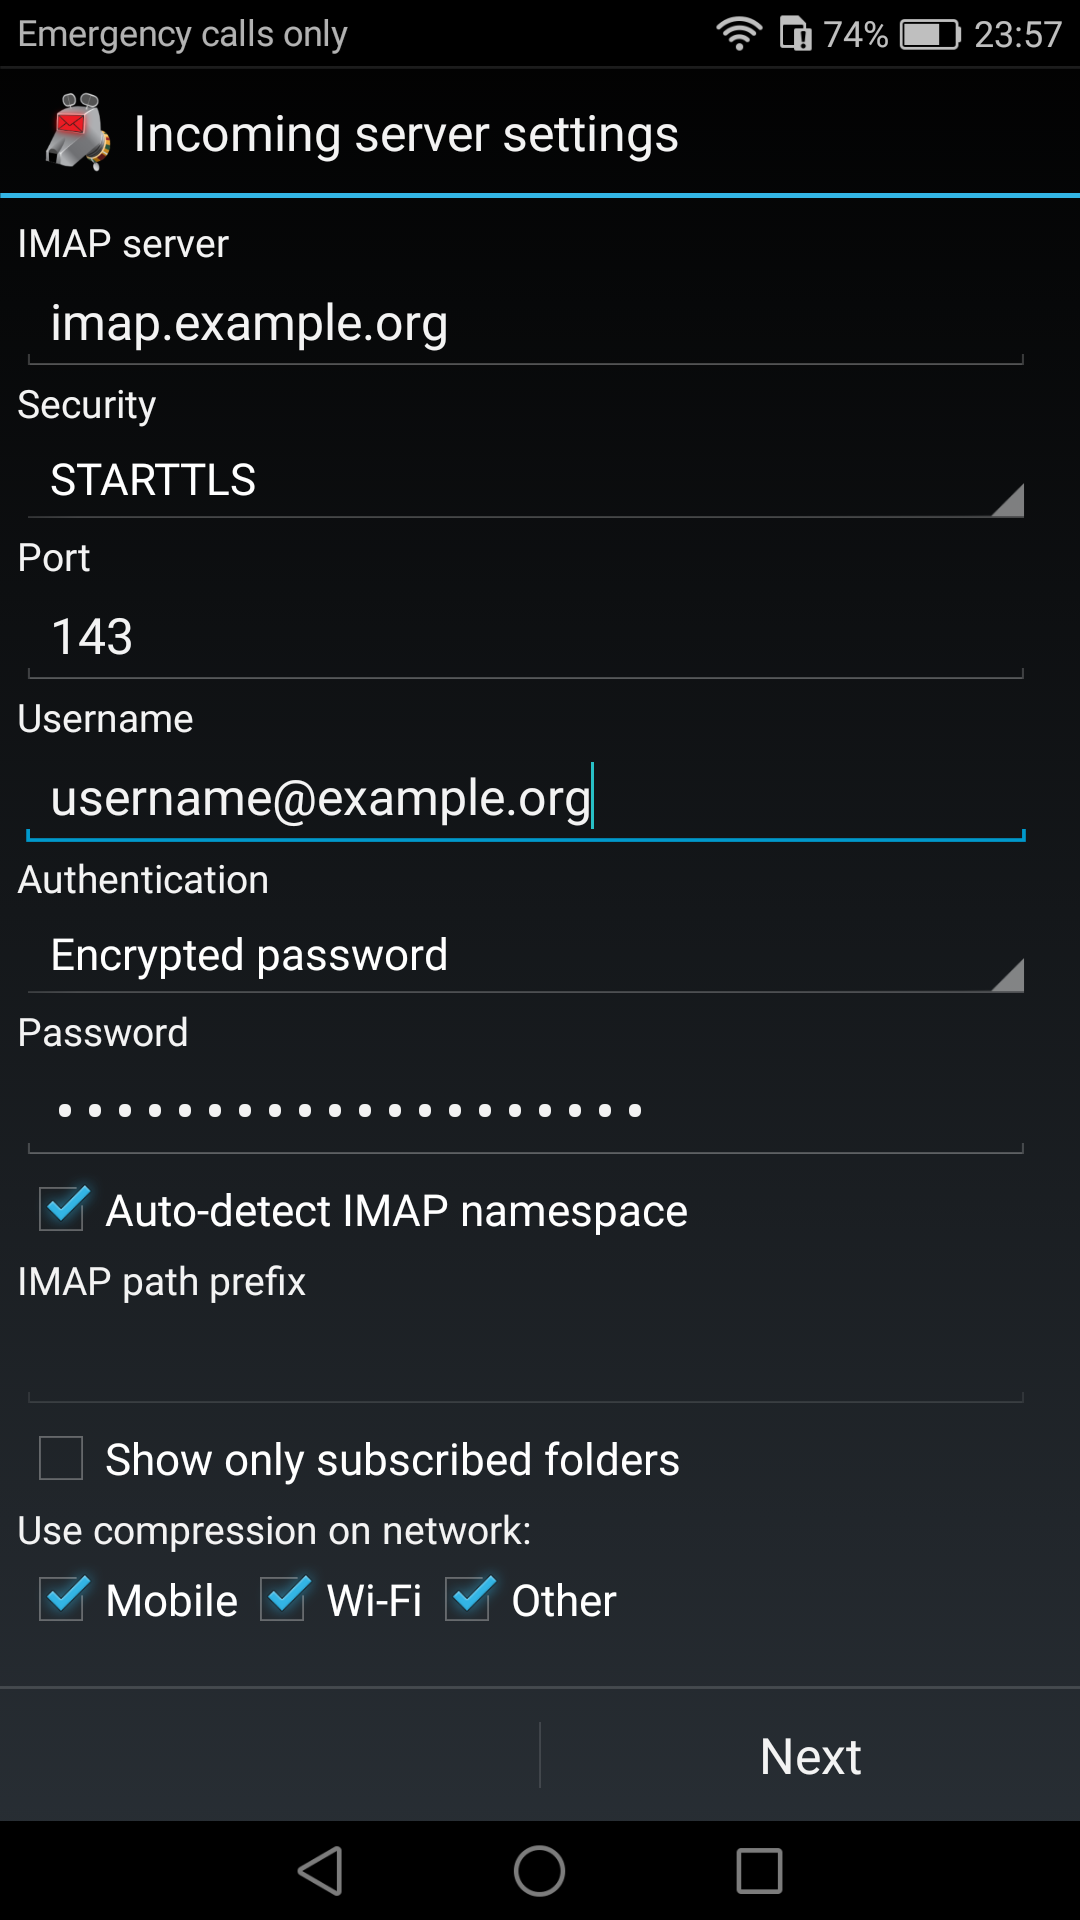
I use TLS with IMAP and SMTP mail server. That means I encrypt the connection by protocol against the mail server and not by port (ssl Vs tls). Although I do not accept any authentication before STARTTLS command is being provided (that means no cleartext passwords in authentication), I was leaving the PLAIN TEXT authentication mechanism in the configuration. That’s not an actual problem unless you are already on the server and you are trying to connect on localhost but I can do better.
LDAP
I use OpenLDAP as my backend authentication database. Before all, the ldap attribute password must be changed from cleartext to CRAM-MD5
Typing the doveadm command from dovecot with the password method:
# doveadm pw
Enter new password:    test
Retype new password:   test
{CRAM-MD5}e02d374fde0dc75a17a557039a3a5338c7743304777dccd376f332bee68d2cf6
will return the CRAM-MD5 hash of our password (test)
Then we need to edit our DN (distinguished name) with ldapvi:
From:
uid=USERNAME,ou=People,dc=example,dc=org
userPassword: test
To:
uid=USERNAME,ou=People,dc=example,dc=org
userPassword: {CRAM-MD5}e02d374fde0dc75a17a557039a3a5338c7743304777dccd376f332bee68d2cf6
Dovecot
Dovecot is not only the imap server but also the “Simple Authentication and Security Layer” aka SASL service. That means that imap & smtp are speaking with dovecot for authentication and dovecot uses ldap as the backend. To change AUTH=PLAIN to cram-md5 we need to do the below change:
file: 10-auth.conf
From:
auth_mechanisms = plain
To:
auth_mechanisms = cram-md5Before restarting dovecot, we need to make one more change. This step took me a couple hours to figure it out! On our dovecot-ldap.conf.ext configuration file, we need to tell dovecot NOT to bind to ldap for authentication but let dovecot to handle the authentication process itself:
From:
# Enable Authentication Binds
# auth_bind = yes
To:
# Enable Authentication Binds
auth_bind = no
To guarantee that the entire connection is protected by TLS encryption, change in 10-ssl.conf the below setting:
From:
ssl = yesTo:
ssl = requiredSSL/TLS is always required, even if non-plaintext authentication mechanisms are used. Any attempt to authenticate before SSL/TLS is enabled will cause an authentication failure.
After that, restart your dovecot instance.
Testing
# telnet example.org imap
Trying 172.12.13.14 ...
Connected to example.org.
Escape character is '^]'.
* OK [CAPABILITY IMAP4rev1 LITERAL+ SASL-IR LOGIN-REFERRALS ID ENABLE IDLE STARTTLS AUTH=CRAM-MD5] Dovecot ready.

1 LOGIN USERNAME@example.org test

1 NO [ALERT] Unsupported authentication mechanism.
^]
telnet> clo
That meas no cleartext authentication is permitted
MUA
Now the hard part, the mail clients:
RainLoop
My default webmail client since v1.10.1.123 supports CRAM-MD5
To verify that, open your application.ini file under your data folder and search for something like that:
    imap_use_auth_plain = On
    imap_use_auth_cram_md5 = On
    smtp_use_auth_plain = On
    smtp_use_auth_cram_md5 = On
as a bonus, rainloop supports STARTTLS and authentication for imap & smtp, even when talking to 127.0.0.1
Thunderbird
K9


When traveling, I make an effort to visit the local hackerspace. I understand that this is not normal behavior for many people, but for us (free / opensource advocates) is always a must.
This was my 4th week on Bratislava and for the first time, I had a couple free hours to visit ProgressBar HackerSpace.
For now, they are allocated in the middle of the historical city on the 2nd floor. The entrance is on a covered walkway (gallery) between two buildings. There is a bell to ring and automated (when members are already inside) the door is wide open for any visitor. No need to wait or explain why you are there!
Entering ProgressBar there is no doubt that you are entering a hackerspace.

You can view a few photos by clicking here: ProgressBar - Photos
And you can find ProgressBar on OpenStreet Map
Some cool-notable projects:
- bitcoin vending machine
- robot arm to fetch clubmate
- magic wood to switch on/off lights
- blinkwall
- Cool T-shirts
their lab is fool with almost anything you need to play/hack with.
I was really glad to make time and visit them.

An Amazing Book!!!
Must Read !!
I’ve listened to the audiobook like in two days.
Couldnt leave it down.
Then organize a CryptoParty to your local hackerspace
Failures
Every SysAdmin, DevOp, SRE, Computer Engineer or even Developer knows that failures WILL occur. So you need to plan with that constant in mind. Failure causes can be present in hardware, power, operating system, networking, memory or even bugs in software. We often call them system failures but it is possible that a Human can be also the cause of such failure!
Listening to the stories on the latest episode of stack overflow podcast felt compelled to share my own oh-shit moment in recent history.
I am writing this article so others can learn from this story, as I did in the process.
Rolling upgrades
I am a really big fun of rolling upgrades.
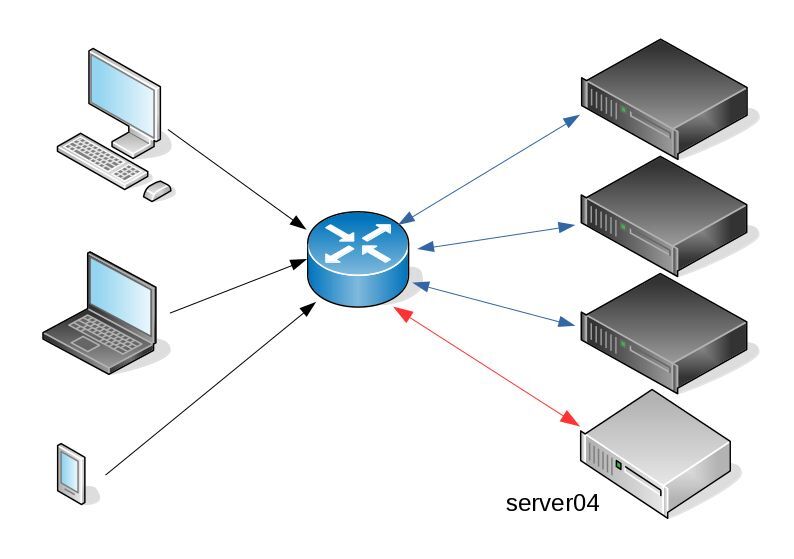
I am used to work with server farms. In a nutshell that means a lot of servers connected to their own switch behind routers/load balancers. This architecture gives me a great opportunity when it is time to perform operations, like scheduling service updates in working hours.
eg. Update software version 1.2.3 to 1.2.4 on serverfarm001
The procedure is really easy:
- From the load balancers, stop any new incoming traffic to one of the servers.
- Monitor all processes on the server and wait for them to terminate.
- When all connections hit zero, stop the service you want to upgrade.
- Perform the service update
- Testing
- Monitor logs and possible alarms
- Be ready to rollback if necessary
- Send some low traffic and try to test service with internal users
- When everything is OK, tell the load balancers to send more traffic
- Wait, monitor everything, test, be sure
- Revert changes on the load balancers so that the specific server can take equal traffic/connection as the others.
This procedure is well established in such environments, and gives us the benefit of working with the whole team in working hours without the need of scheduling a maintenance window in the middle of the night, when low customer traffic is reaching us. During the day, if something is not going as planned, we can also reach other departments and work with them, figuring out what is happening.
Configuration Management
We are using ansible as the main configuration management tool. Every file, playbook, role, task of ansible is under a version control system, so that we can review changes before applying them to production. Viewing diffs from a modern web tool can be a lifesaver in these days.
Virtualization
We also use docker images or virtual images as development machines, so that we can perform any new configuration, update/upgrade on those machines and test it there.
Ansible Inventory
To perform service updates with ansible on servers, we are using the ansible inventory to host some metadata (aka variables) for every machine in a serverfarm. Let me give you an example:
[serverfarm001]
server01 version=1.2.3
server02 version=1.2.3
server03 version=1.2.3
server04 version=1.2.4
And performing the update action via ansible limits
eg.
~> ansible-playbook serverfarm001.yml -t update -C -D -l server04
Rollback
When something is not going as planned, we revert the changes on ansible (version control) and re-push the previous changes on a system. Remember the system is not getting any traffic from the front-end routers.
The Update
I was ready to do the update. Nagios was opened, logs were tailed -f
and then:
~> ansible-playbook serverfarm001.yml -t update
The Mistake
I run the ansible-playbook without limiting the server I wanted to run the update !!!
So all new changes passed through all servers, at once!
On top of that, new configuration broke running software with previous version. When the restart notify of service occurred every server simple stopped!!!
Funny thing, the updated machine server04 worked perfectly, but no traffic was reaching through the load balancers to this server.
Activate Rollback
It was time to run the rollback procedure.
Reverting changes from version control is easy. Took me like a moment or something.
Running again:
~> ansible-playbook serverfarm001.yml
and …
Waiting for Nagios
In 2,5 minutes I had fixed the error and I was waiting for nagios to be green again.
Then … Nothing! Red alerts everywhere!
Oh-Shit Moment
It was time for me to inform everyone what I have done.
Explaining to my colleagues and manager the mistake and trying to figuring out what went wrong with the rollback procedure.
Collaboration
On this crucial moment everything else worked like clockwise.
My colleagues took every action to:
- informing helpdesk
- looking for errors
- tailing logs
- monitor graphs
- viewing nagios
- talking to other people
- do the leg-work in general
and leaving me in piece with calm to figure out what went wrong.
I felt so proud to be part of the team at that specific moment.
If any of you reading this article: Truly thank all guys and gals .
Work-Around
I bypass ansible and copied the correct configuration to all servers via ssh.
My colleagues were telling me the good news and I was going through one by one of ~xx servers.
In 20minutes everything was back in normal.
And finally nagios was green again.
Blameless Post-Mortem
It was time for post-mortem and of course drafting the company’s incident report.
We already knew what happened and how, but nevertheless we need to write everything down and try to keep a good timeline of all steps.
This is not only for reporting but also for us. We need to figure out what happened exactly, do we need more monitoring tools?
Can we place any failsafes in our procedures? Also why the rollback procedure didnt work.
Fixing Rollback
I am writing this paragraph first, but to be honest with you, it took me some time getting to the bottom of this!
Rollback procedure actually is working as planned. I did a mistake with the version control system.
What we have done is to wrap ansible under another script so that we can select the version control revision number at runtime.
This is actually pretty neat, cause it gives us the ability to run ansible with previous versions of our configuration, without reverting in master branch.
The ansible wrapper asks for revision and by default we run it with [tip].
So the correct way to do rollbacks is:
eg.
~> ansible-playbook serverfarm001.yml -rev 238
At the time of problem, I didnt do that. I thought it was better to revert all changes and re-run ansible.
But ansible was running into default mode with tip revision !!
Although I manage pretty well on panic mode, that day my brain was frozen!
Re-Design Ansible
I wrap my head around and tried to find a better solution on performing service updates. I needed to change something that can run without the need of limit in ansible.
The answer has obvious in less than five minutes later:
files/serverfarm001/1.2.3
files/serverfarm001/1.2.4
I need to keep a separated configuration folder and run my ansible playbooks with variable instead of absolute paths.
eg.
- copy: src=files/serverfarm001/{{version}} dest=/etc/service/configuration
That will suffice next time (and actually did!). When the service upgrade is finished, We can simple remove the previous configuration folder without changing anything else in ansible.
Ansible Groups
Another (more simplistic) approach is to create a new group in ansible inventory.
Like you do with your staging Vs production environment.
eg.
[serverfarm001]
server01 version=1.2.3
server02 version=1.2.3
server03 version=1.2.3

[serverfarm001_new]
server04 version=1.2.4
and create a new yml file
---
- hosts: serverfarm001_new
run the ansible-playbook against the new serverfarm001_new group .
Validation
A lot of services nowadays have syntax check commands for their configuration.
You can use this validation process in ansible!
here is an example from ansible docs:
# Update sshd configuration safely, avoid locking yourself out
- template:
    src: etc/ssh/sshd_config.j2
    dest: /etc/ssh/sshd_config
    owner: root
    group: root
    mode: '0600'
    validate: /usr/sbin/sshd -t -f %s
    backup: yes
or you can use registers like this:
  - name: Check named
    shell: /usr/sbin/named-checkconf -t /var/named/chroot
    register: named_checkconf
    changed_when: "named_checkconf.rc == 0"
    notify: anycast rndc reconfig
Conclusion
Everyone makes mistakes. I know, I have some oh-shit moments in my career for sure. Try to learn from these failures and educate others. Keep notes and write everything down in a wiki or in whatever documentation tool you are using internally. Always keep your calm. Do not hide any errors from your team or your manager. Be the first person that informs everyone. If the working environment doesnt make you feel safe, making mistakes, perhaps you should think changing scenery. You will make a mistake, failures will occur. It is a well known fact and you have to be ready when the time is up. Do a blameless post-mortem. The only way a team can be better is via responsibility, not blame. You need to perform disaster-recovery scenarios from time to time and test your backup. And always -ALWAYS- use a proper configuration management tool for all changes on your infrastructure.
post scriptum
After writing this draft, I had a talk with some friends regarding the cloud industry and how this experience can be applied into such environment. The quick answer is you SHOULD NOT.
Working with cloud, means you are mostly using virtualization. Docker images or even Virtual Machines should be ephemeral. When it’s time to perform upgrades (system patching or software upgrades) you should be creating new virtual machines that will replace the old ones. There is no need to do it in any other way. You can rolling replacing the virtual machines (or docker images) without the need of stopping the service in a machine, do the upgrade, testing, put it back. Those ephemeral machines should not have any data or logs in the first place. Cloud means that you can (auto) scale as needed it without thinking where the data are.
thanks for reading.
CAA
Reading RFC 6844 you will find the definition of “DNS Certification Authority Authorization (CAA) Resource Record”.
You can read everything here: RFC 6844
So, what is CAA anyhow?
Certificate Authority
In a nutshell you are declaring which your Certificate Authority is for your domain.
It’s another way to verify that the certificate your site is announcing is in fact signed by the issuer that the certificate is showing.
So let’s see what my certificate is showing:

DNS
Now, let’s find out what my DNS is telling us:
# dig caa balaskas.gr

;; ANSWER SECTION:
balaskas.gr.        5938    IN  CAA 1 issue "letsencrypt.org"
Testing
You can also use the Qualys ssl server test:
https://www.ssllabs.com/ssltest/

Postfix
smtp Vs smtpd

- postfix/smtp
- The SMTP daemon is for sending emails to the Internet (outgoing mail server).
- postfix/smtpd
- The SMTP daemon is for receiving emails from the Internet (incoming mail server).
TLS
Encryption on mail transport is what we call: opportunistic. If both parties (sender’s outgoing mail server & recipient’s incoming mail server) agree to exchange encryption keys, then a secure connection may be used. Otherwise a plain connection will be established. Plain as in non-encrypted aka cleartext over the wire.
SMTP - Outgoing Traffic
In the begging there where only three options in postfix:
- none
- may
- encrypt
The default option on a Centos 6x is none:
# postconf -d | grep smtp_tls_security_level
smtp_tls_security_level =
Nowadays, postfix supports more options, like:
- dane
- verify
- secure
Here is the basic setup, to enable TLS on your outgoing mail server:
smtp_tls_security_level = may
smtp_tls_loglevel = 1
From postfix v2.6 and later, can you disable weak encryption by selecting the cipher suite and protocols you prefer to use:
smtp_tls_ciphers = export
smtp_tls_protocols = !SSLv2, !SSLv3
You can also define where the file that holds all the root certificates on your linux server is, and thus to verify the certificate that provides an incoming mail server:
smtp_tls_CAfile = /etc/pki/tls/certs/ca-bundle.crt
I dont recommend to go higher with your setup, cause (unfortunately) not everyone is using TLS on their incoming mail server!
SMTPD - Incoming Traffic
To enable TLS in your incoming mail server, you need to provide some encryption keys aka certificates!
I use letsencrypt on my server and the below notes are based on that.
Let’s Encrypt
A quick explanation on what exists on your letsencrypt folder:
# ls -1 /etc/letsencrypt/live/example.com/

privkey.pem    ===>  You Private Key
cert.pem       ===>  Your Certificate
chain.pem      ===>  Your Intermediate
fullchain.pem  ===>  Your Certificate with Your Intermediate
Postfix
Below you can find the most basic configuration setup you need for your incoming mail server.
smtpd_tls_ask_ccert = yes
smtpd_tls_security_level = may
smtpd_tls_loglevel = 1
Your mail server is asking for a certificate so that a trusted TLS connection can be established between outgoing and incoming mail server.
The servers must exchange certificates and of course, verify them!
Now, it’s time to present your own domain certificate to the world. Offering only your public certificate cert.pem isnt enough. You have to offer both your certificate and the intermediate’s certificate, so that the sender’s mail server can verify you, by checking the digital signatures on those certificates.
smtpd_tls_cert_file = /etc/letsencrypt/live/example.com/fullchain.pem
smtpd_tls_key_file = /etc/letsencrypt/live/example.com/privkey.pem

smtpd_tls_CAfile = /etc/pki/tls/certs/ca-bundle.crt
smtpd_tls_CApath = /etc/pki/tls/certs
CAfile & CApath helps postfix to verify the sender’s certificate by looking on your linux distribution file, that holds all the root certificates.
And you can also disable weak ciphers and protocols:
smtpd_tls_ciphers = high
smtpd_tls_exclude_ciphers = aNULL, MD5, EXPORT
smtpd_tls_protocols = !SSLv2, !SSLv3
Logs
Here is an example from gmail:
SMTPD - Incoming Mail from Gmail
You can see that there is a trusted TLS connection established From google:
Jun  4 11:52:07 kvm postfix/smtpd[14150]:
        connect from mail-oi0-x236.google.com[2607:f8b0:4003:c06::236]
Jun  4 11:52:08 kvm postfix/smtpd[14150]:
        Trusted TLS connection established from mail-oi0-x236.google.com[2607:f8b0:4003:c06::236]:
        TLSv1.2 with cipher ECDHE-RSA-AES128-GCM-SHA256 (128/128 bits)
Jun  4 11:52:09 kvm postfix/smtpd[14150]:
        4516420F32: client=mail-oi0-x236.google.com[2607:f8b0:4003:c06::236]
Jun  4 11:52:10 kvm postfix/smtpd[14150]:
        disconnect from mail-oi0-x236.google.com[2607:f8b0:4003:c06::236]
SMTP - Outgoing Mail from Gmail
And this is the response To gmail :
Jun  4 12:01:32 kvm postfix/smtpd[14808]:
        initializing the server-side TLS engine
Jun  4 12:01:32 kvm postfix/smtpd[14808]:
        connect from example.com[2a00:1838:20:1::XXXX:XXXX]
Jun  4 12:01:33 kvm postfix/smtpd[14808]:
        setting up TLS connection from example.com[2a00:1838:20:1::XXXX:XXXX]
Jun  4 12:01:33 kvm postfix/smtpd[14808]:
        example.com[2a00:1838:20:1::XXXX:XXXX]: TLS cipher list "aNULL:-aNULL:ALL:!EXPORT:!LOW:!MEDIUM:+RC4:@STRENGTH:!aNULL:!MD5:!EXPORT:!aNULL"
Jun  4 12:01:33 kvm postfix/smtpd[14808]:
        Anonymous TLS connection established from example.com[2a00:1838:20:1::XXXX:XXXX]:
        TLSv1.2 with cipher ECDHE-RSA-AES128-GCM-SHA256 (128/128 bits)
Jun  4 12:01:35 kvm postfix/smtpd[14808]:
        disconnect from example.com[2a00:1838:20:1::XXXX:XXXX]
As you can see -In both cases (sending/receiving)- the mail servers have established a trusted secure TLSv1.2 connection.
The preferred cipher (in both scenarios) is : ECDHE-RSA-AES128-GCM-SHA256
IPv6
Tell postfix to prefer ipv6 Vs ipv4 and use TLS if two mail servers support it !
#IPv6
smtp_address_preference = ipv6
What is the time?
Time offset is the amount of time that is off (or drift) from a specific value. In Linux systems, date is been calculating from the beginning of time. That is 00:00:00 1 January 1970 or as it called Unix Time and systems define date (time) as the number of seconds that have elapsed from 01.01.1970.
It is so important that even a few seconds off can cause tremendous disaster in data centers and applications.
Network Time
To avoid problems with time, systems must and should synchronize their time over the Internet every now and then. This is being done by asking a central NTP server via Network Time Protocol. The most common scenario for infrastructures is to have one or two NTP servers and then all the systems inside this infrastructure can synchronize their time from those machines.
Nagios - NRPE
In my case, I have a centralized NTP Daemon that runs on the Nagios Linux machine. That gives me the opportunity to check the EPOCH time of any system in my infrastructure against the time that the Nagios Server has.
Nagios Check
This is the script I am using:
# ebal, Thu, 11 May 2017 12:08:50 +0000

# EPOCH
TIME=$1
WARN=5
CRIT=10

# seconds
OFFSET=$( echo $(( $(date -d 'now ' +%s) - ${TIME} )) | sed -e 's#-##g' )

if [ "${OFFSET}" -lt "${WARN}" ]; then
        echo "OK"
        exit 0
elif [ "${OFFSET}" -ge "${CRIT}" ]; then
        echo "CRITICAL- ${OFFSET}"
        exit 2
elif [ "${OFFSET}" -lt "${CRIT}" ]; then
        echo "WARNING- ${OFFSET}"
        exit 1
else
        echo "UNKNOWN- ${OFFSET}"
        exit 3
fi
In a nutshell the script gets as the first argument an epoch time and calculate the diff between it’s own epoch time and that.
Example
./check_time_offset $(date -d 'now + 1 min' +%s)
The output is this:
CRITICAL- 60
Nrpe Configuration
This is the configuration for nrpe to run the check_time_offset
# tail -1 /etc/nrpe.d/time_offset.cfg
command[check_time_offset]=/usr/lib64/nagios/plugins/check_time_offset $ARG1$Nagios Configuration
and this is my nagios configuration setup to use a remote nrpe :
define service{
        use                             service-critical
        hostgroup_name                  lnxserver01
        service_description             time_offset
        check_command                   check_nrpe!check_time_offset!$TIMET$
        }
Take a minute to observer a little better the nrpe command.
check_nrpe!check_time_offset!$TIMET$
TIMET
I was having problems passing the nagios epoch time as an argument on the definition of the above service.
Testing the nrpe command as below, I was getting the results I was looking for:
./check_nrpe -H lnxserver01 -c check_time_offset -a $(date -d 'now + 6 sec' +%s)
But is there a way to pass as a nagios argument the output of a command ?
- No
A dear colleague of mine mentioned nagios macros:
$TIMET$ Current time stamp in time_t format (seconds since the UNIX epoch)Perfect !!!
The problem
The last couple weeks, a backup server I am managing is failing to make backups!
The backup procedure (a script via cron daemon) is to rsync data from a primary server to it’s /backup directory. I was getting cron errors via email, informing me that the previous rsync script hasnt already finished when the new one was starting (by checking a lock file). This was strange as the time duration is 12hours. 12 hours werent enough to perform a ~200M data transfer over a 100Mb/s network port. That was really strange.
This is the second time in less than a year that this server is making problems. A couple months ago I had to remove a faulty disk from the software raid setup and check the system again. My notes on the matter, can be found here:
https://balaskas.gr/blog/2016/10/17/linux-raid-mdadm-md0/
Identify the problem
So let us start to identify the problem. A slow rsync can mean a lot of things, especially over ssh. Replacing network cables, viewing dmesg messages, rebooting servers or even changing the filesystem werent changing any things for the better. Time to move on the disks.
Manage and Monitor software RAID devices
On this server, I use raid5 with four hard disks:
# mdadm --verbose --detail /dev/md0
/dev/md0:
        Version : 1.2
  Creation Time : Wed Feb 26 21:00:17 2014
     Raid Level : raid5
     Array Size : 2929893888 (2794.16 GiB 3000.21 GB)
  Used Dev Size : 976631296 (931.39 GiB 1000.07 GB)
   Raid Devices : 4
  Total Devices : 4
    Persistence : Superblock is persistent

    Update Time : Sun May  7 11:00:32 2017
          State : clean
 Active Devices : 4
Working Devices : 4
 Failed Devices : 0
  Spare Devices : 0

         Layout : left-symmetric
     Chunk Size : 512K

           Name : ServerTwo:0  (local to host ServerTwo)
           UUID : ef5da4df:3e53572e:c3fe1191:925b24cf
         Events : 10496

    Number   Major   Minor   RaidDevice State
       4       8       16        0      active sync   /dev/sdb
       1       8       32        1      active sync   /dev/sdc
       6       8       48        2      active sync   /dev/sdd
       5       8        0        3      active sync   /dev/sda
View hardware parameters of hard disk drive
aka test the hard disks:
# hdparm -Tt /dev/sda
/dev/sda:
 Timing cached reads:   2490 MB in  2.00 seconds = 1245.06 MB/sec
 Timing buffered disk reads: 580 MB in  3.01 seconds = 192.93 MB/sec
# hdparm -Tt /dev/sdb
/dev/sdb:
 Timing cached reads:   2520 MB in  2.00 seconds = 1259.76 MB/sec
 Timing buffered disk reads: 610 MB in  3.00 seconds = 203.07 MB/sec
# hdparm -Tt /dev/sdc
/dev/sdc:
 Timing cached reads:   2512 MB in  2.00 seconds = 1255.43 MB/sec
 Timing buffered disk reads: 570 MB in  3.01 seconds = 189.60 MB/sec
# hdparm -Tt /dev/sdd
/dev/sdd:
 Timing cached reads:     2 MB in  7.19 seconds = 285.00 kB/sec
 Timing buffered disk reads:   2 MB in  5.73 seconds = 357.18 kB/sec
Root Cause
Seems that one of the disks (/dev/sdd) in raid5 setup, is not performing as well as the others. The same hard disk had a problem a few months ago.
What I did the previous time, was to remove the disk, reformatting it in Low Level Format and add it again in the same setup. The system rebuild the raid5 and after 24hours everything was performing fine.
However the same hard disk seems that still has some issues . Now it is time for me to remove it and find a replacement disk.
Remove Faulty disk
I need to manually fail and then remove the faulty disk from the raid setup.
Failing the disk
Failing the disk manually, means that mdadm is not recognizing the disk as failed (as it did previously). I need to tell mdadm that this specific disk is a faulty one:
# mdadm --manage /dev/md0 --fail /dev/sdd
mdadm: set /dev/sdd faulty in /dev/md0
Removing the disk
now it is time to remove the faulty disk from our raid setup:
# mdadm --manage /dev/md0 --remove  /dev/sdd
mdadm: hot removed /dev/sdd from /dev/md0
Show details
# mdadm --verbose --detail /dev/md0
/dev/md0:
        Version : 1.2
  Creation Time : Wed Feb 26 21:00:17 2014
     Raid Level : raid5
     Array Size : 2929893888 (2794.16 GiB 3000.21 GB)
  Used Dev Size : 976631296 (931.39 GiB 1000.07 GB)
   Raid Devices : 4
  Total Devices : 3
    Persistence : Superblock is persistent

    Update Time : Sun May  7 11:08:44 2017
          State : clean, degraded
 Active Devices : 3
Working Devices : 3
 Failed Devices : 0
  Spare Devices : 0

         Layout : left-symmetric
     Chunk Size : 512K

           Name : ServerTwo:0  (local to host ServerTwo)
           UUID : ef5da4df:3e53572e:c3fe1191:925b24cf
         Events : 10499

    Number   Major   Minor   RaidDevice State
       4       8       16        0      active sync   /dev/sdb
       1       8       32        1      active sync   /dev/sdc
       4       0        0        4      removed
       5       8        0        3      active sync   /dev/sda
Mounting the Backup
Now it’s time to re-mount the backup directory and re-run the rsync script
mount /backup/
and run the rsync with verbose and progress parameters to review the status of syncing
/usr/bin/rsync -zravxP --safe-links --delete-before --partial --protect-args -e ssh 192.168.2.1:/backup/ /backup/
Everything seems ok.
A replacement order has already been placed.
Rsync times manage to hit ~ 10.27MB/s again!
rsync time for a daily (12h) diff is now again in normal rates:
real    15m18.112s
user    0m34.414s
sys     0m36.850s