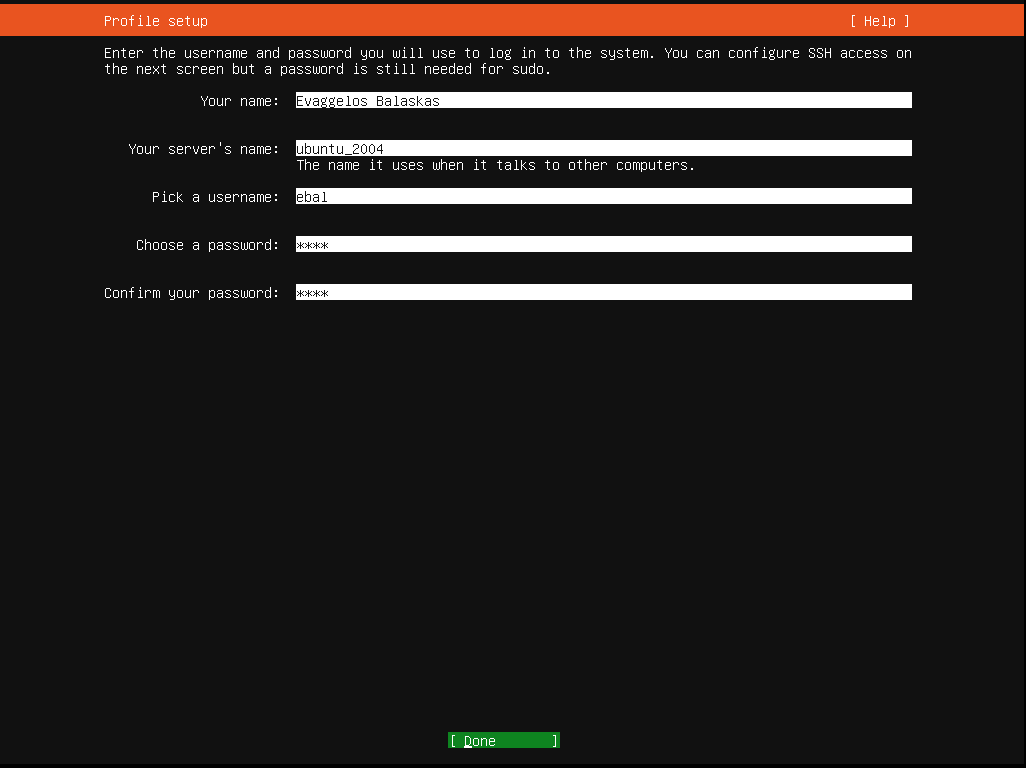
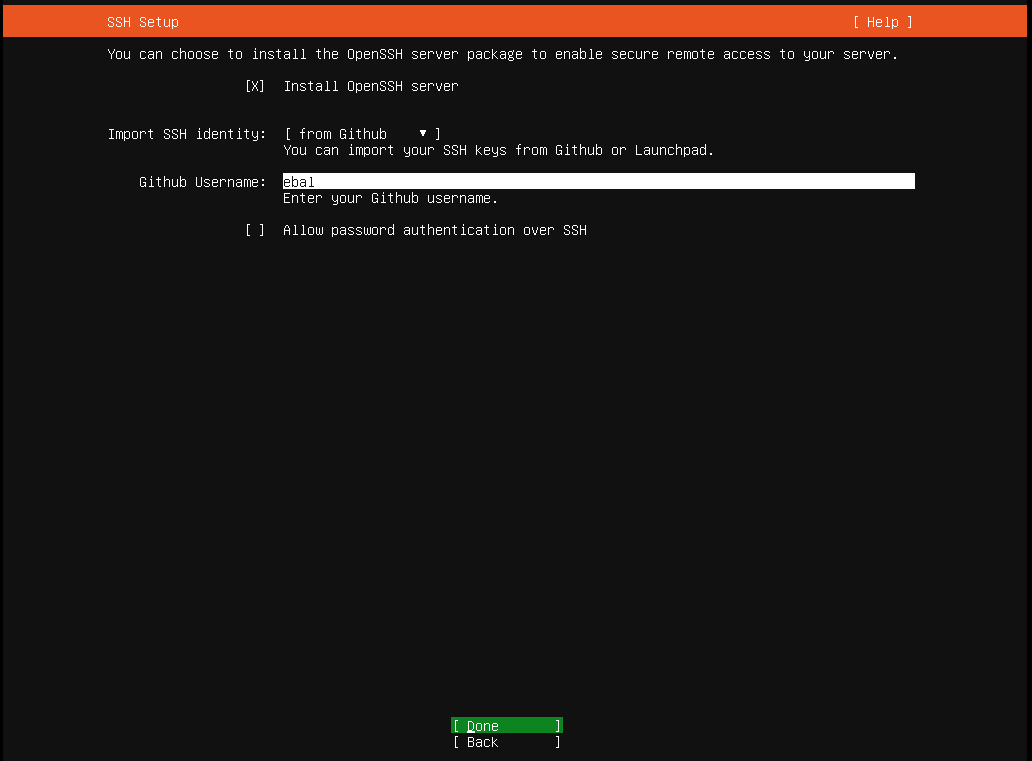
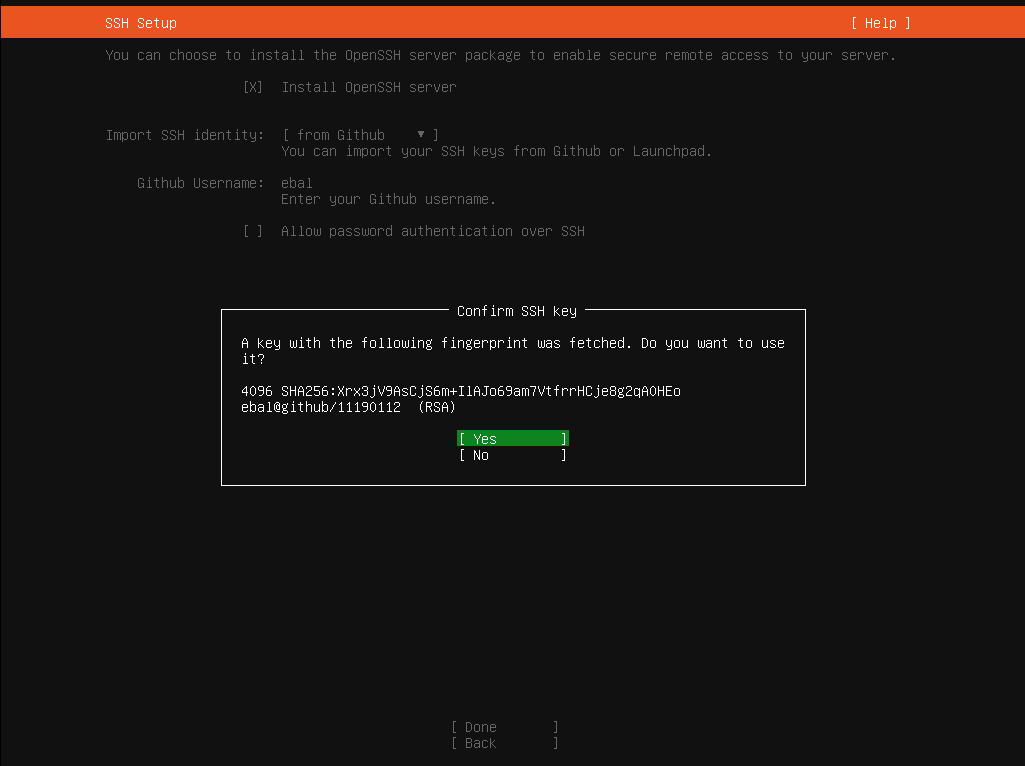
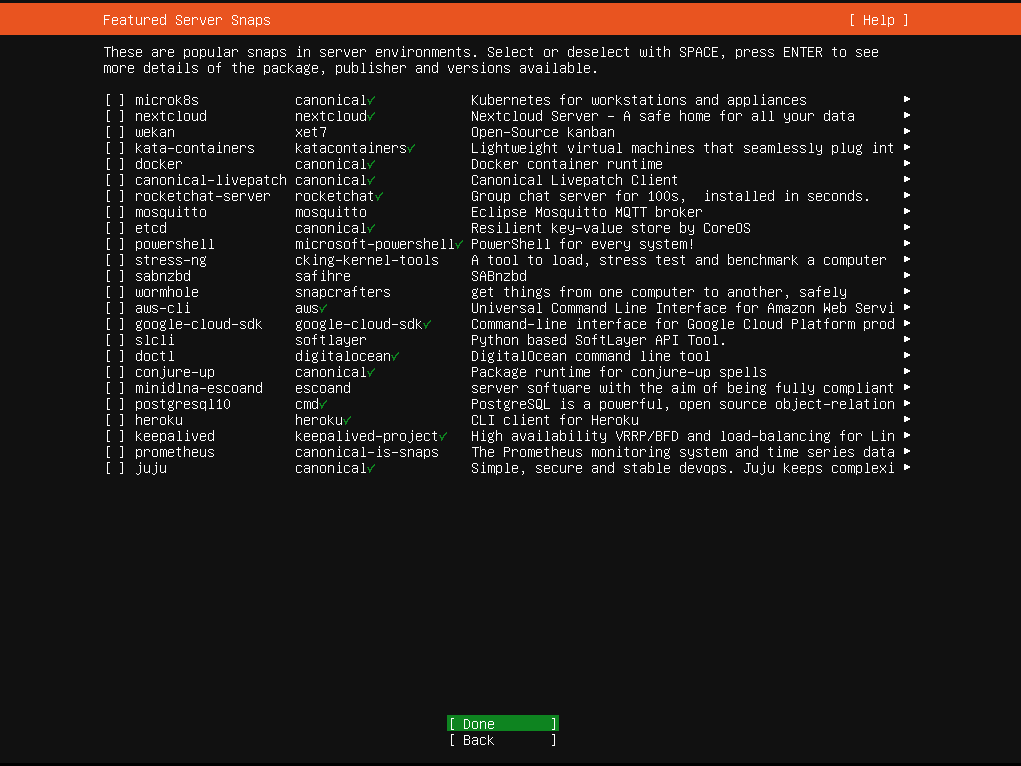
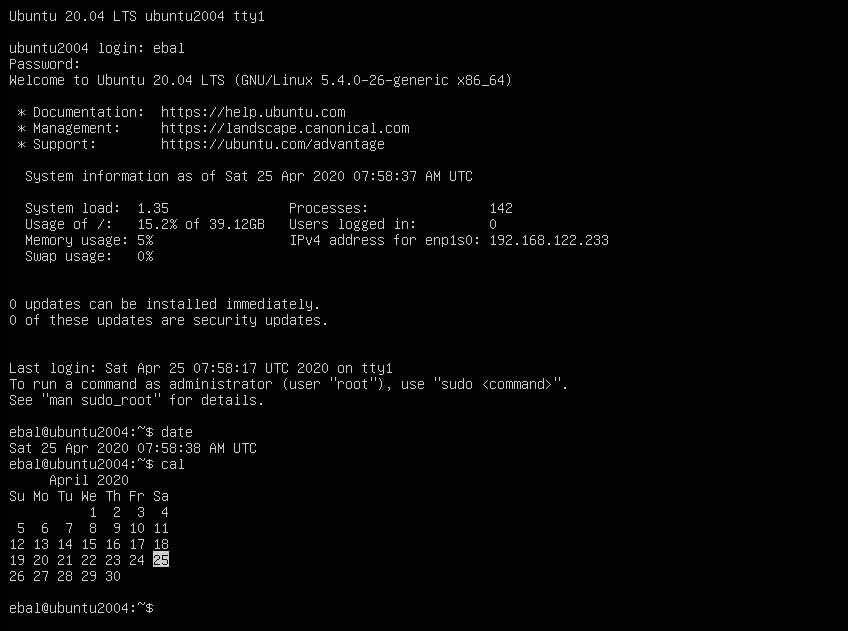
Personal notes on hardening an new ubuntu 24.04 LTS ssh daemon setup for incoming ssh traffic.
Port <12345>

PasswordAuthentication no
KbdInteractiveAuthentication no
UsePAM yes
X11Forwarding no
PrintMotd no
UseDNS no

KexAlgorithms sntrup761x25519-sha512@openssh.com,curve25519-sha256,curve25519-sha256@libssh.org,diffie-hellman-group-exchange-sha256,diffie-hellman-group16-sha512,diffie-hellman-group18-sha512,diffie-hellman-group14-sha256

HostKeyAlgorithms ssh-ed25519-cert-v01@openssh.com,ecdsa-sha2-nistp256-cert-v01@openssh.com,ecdsa-sha2-nistp384-cert-v01@openssh.com,ecdsa-sha2-nistp521-cert-v01@openssh.com,sk-ssh-ed25519-cert-v01@openssh.com,sk-ecdsa-sha2-nistp256-cert-v01@openssh.com,rsa-sha2-512-cert-v01@openssh.com,rsa-sha2-256-cert-v01@openssh.com,ssh-ed25519,ecdsa-sha2-nistp384,ecdsa-sha2-nistp521,sk-ssh-ed25519@openssh.com,sk-ecdsa-sha2-nistp256@openssh.com,rsa-sha2-512,rsa-sha2-256

MACs umac-128-etm@openssh.com,hmac-sha2-256-etm@openssh.com,hmac-sha2-512-etm@openssh.com,umac-128@openssh.com,hmac-sha2-256,hmac-sha2-512

AcceptEnv LANG LC_*
AllowUsers <username>

Subsystem       sftp    /usr/lib/openssh/sftp-server
testing with https://sshcheck.com/
Personal notes on hardening an new ubuntu 24.04 LTS postfix setup for incoming smtp TLS traffic.
Create a Diffie–Hellman key exchange
openssl dhparam -out /etc/postfix/dh2048.pem 2048for offering a new random DH group.
SMTPD - Incoming Traffic
# SMTPD - Incoming Traffic

postscreen_dnsbl_action = drop
postscreen_dnsbl_sites =
        bl.spamcop.net,
        zen.spamhaus.org

smtpd_banner = <put your banner here>

smtpd_helo_required = yes
smtpd_starttls_timeout = 30s

smtpd_tls_CApath = /etc/ssl/certs
smtpd_tls_cert_file = /root/.acme.sh/<your_domain>/fullchain.cer
smtpd_tls_key_file = /root/.acme.sh/<your_domain>/<your_domain>.key

smtpd_tls_dh1024_param_file = ${config_directory}/dh2048.pem
smtpd_tls_ciphers = HIGH

# Wick ciphers
smtpd_tls_exclude_ciphers =
        3DES,
        AES128-GCM-SHA256,
        AES128-SHA,
        AES128-SHA256,
        AES256-GCM-SHA384,
        AES256-SHA,
        AES256-SHA256,
        CAMELLIA128-SHA,
        CAMELLIA256-SHA,
        DES-CBC3-SHA,
        DHE-RSA-DES-CBC3-SHA,
        aNULL,
        eNULL,
        CBC

smtpd_tls_loglevel = 1
smtpd_tls_mandatory_ciphers = HIGH
smtpd_tls_protocols = !SSLv2, !SSLv3, !TLSv1, !TLSv1.1
smtpd_tls_security_level = may
smtpd_tls_session_cache_database = btree:${data_directory}/smtpd_scache
smtpd_use_tls = yes
tls_preempt_cipherlist = yes

unknown_local_recipient_reject_code = 550
Local Testing
testssl -t smtp <your_domain>.:25
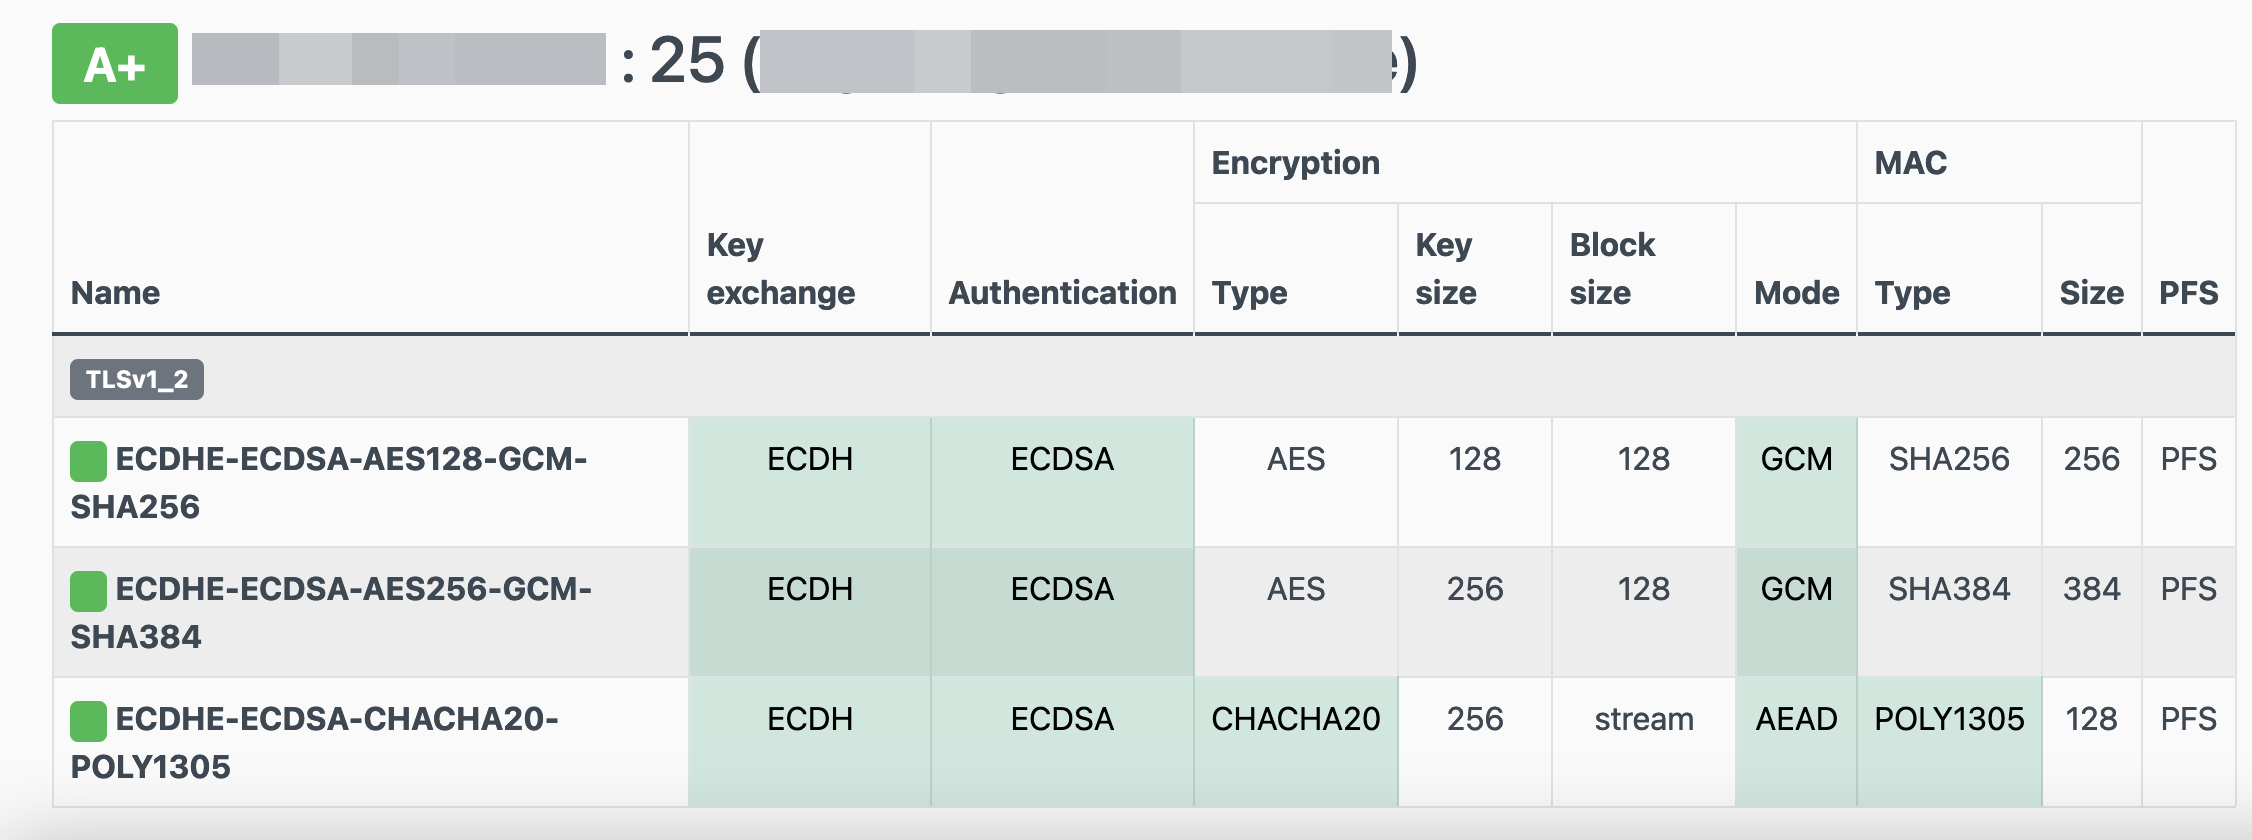
Online Testing
result
In this blog post, I’ll try to share my personal notes on how to setup a kubernetes cluster with kubeadm on ubuntu 22.04 LTS Virtual Machines.
I am going to use three (3) Virtual Machines in my local lab. My home lab is based on libvirt Qemu/KVM (Kernel-based Virtual Machine) and I run Terraform as the infrastructure provision tool.
There is a copy of this blog post to github.
https://github.com/ebal/k8s_cluster
If you notice something wrong you can either contact me via the contact page, or open a PR in the github project.
you can also follow me at twitter: https://twitter.com/ebalaskas
Kubernetes, also known as K8s, is an open-source system for automating deployment, scaling, and management of containerized applications.
- Prerequisites
- Git Terraform Code for the kubernetes cluster
- Control-Plane Node
- Ports on the control-plane node
- Firewall on the control-plane node
- Hosts file in the control-plane node
- No Swap on the control-plane node
- Kernel modules on the control-plane node
- NeedRestart on the control-plane node
- Installing a Container Runtime on the control-plane node
- Installing kubeadm, kubelet and kubectl on the control-plane node
- Initializing the control-plane node
- Create user access config to the k8s control-plane node
- Verify the control-plane node
- Install an overlay network provider on the control-plane node
- Verify CoreDNS is running on the control-plane node
- Worker Nodes
- Ports on the worker nodes
- Firewall on the worker nodes
- Hosts file in the worker node
- No Swap on the worker node
- Kernel modules on the worker node
- NeedRestart on the worker node
- Installing a Container Runtime on the worker node
- Installing kubeadm, kubelet and kubectl on the worker node
- Get Token from the control-plane node
- Get Certificate Hash from the control-plane node
- Join Workers to the kubernetes cluster
- Is the kubernetes cluster running ?
- Kubernetes Dashboard
- Install kubernetes dashboard
- Add a Node Port to kubernetes dashboard
- Patch kubernetes-dashboard
- Edit kubernetes-dashboard Service
- Accessing Kubernetes Dashboard
- Create An Authentication Token (RBAC)
- Creating a Service Account
- Creating a ClusterRoleBinding
- Getting a Bearer Token
- Browsing Kubernetes Dashboard
- Nginx App
- That’s it !
Prerequisites
- at least 3 Virtual Machines of Ubuntu 22.04 (one for control-plane, two for worker nodes)
- 2GB (or more) of RAM on each Virtual Machine
- 2 CPUs (or more) on each Virtual Machine
- 20Gb of hard disk on each Virtual Machine
- No SWAP partition/image/file on each Virtual Machine
Git Terraform Code for the kubernetes cluster
I prefer to have a reproducible infrastructure, so I can very fast create and destroy my test lab. My preferable way of doing things is testing on each step, so I pretty much destroy everything, coping and pasting commands and keep on. I use terraform for the create the infrastructure. You can find the code for the entire kubernetes cluster here: k8s cluster - Terraform code.
If you do not use terraform, skip this step!
You can git clone the repo to review and edit it according to your needs.
git clone https://github.com/ebal/k8s_cluster.git
cd tf_libvirt
You will need to make appropriate changes. Open Variables.tf for that. The most important option to change, is the User option. Change it to your github username and it will download and setup the VMs with your public key, instead of mine!
But pretty much, everything else should work out of the box. Change the vmem and vcpu settings to your needs.
Init terraform before running the below shell script.
terraform init
and then run
./start.sh
output should be something like:
...
Apply complete! Resources: 16 added, 0 changed, 0 destroyed.

Outputs:

VMs = [
  "192.168.122.169  k8scpnode",
  "192.168.122.40   k8wrknode1",
  "192.168.122.8    k8wrknode2",
]
Verify that you have ssh access to the VMs
eg.
ssh -l ubuntu 192.168.122.169
replace the IP with what the output gave you.
Ubuntu 22.04 Image
If you noticed in the terraform code, I have the below declaration as the cloud image:
../jammy-server-cloudimg-amd64.img
that means, I’ve already downloaded it, in the upper directory to speed things up!
cd ../
curl -sLO https://cloud-images.ubuntu.com/jammy/current/focal-server-cloudimg-amd64.img
cd -
Control-Plane Node
Let’s us now start the configure of the k8s control-plane node.
Ports on the control-plane node
Kubernetes runs a few services that needs to be accessable from the worker nodes.
| Protocol | Direction | Port Range | Purpose | Used By |
|---|---|---|---|---|
| TCP | Inbound | 6443 | Kubernetes API server | All |
| TCP | Inbound | 2379-2380 | etcd server client API | kube-apiserver, etcd |
| TCP | Inbound | 10250 | Kubelet API | Self, Control plane |
| TCP | Inbound | 10259 | kube-scheduler | Self |
| TCP | Inbound | 10257 | kube-controller-manager | Self |
Although etcd ports are included in control plane section, you can also host your
own etcd cluster externally or on custom ports.
Firewall on the control-plane node
We need to open the necessary ports on the CP’s (control-plane node) firewall.
sudo ufw allow 6443/tcp
sudo ufw allow 2379:2380/tcp
sudo ufw allow 10250/tcp
sudo ufw allow 10259/tcp
sudo ufw allow 10257/tcp

#sudo ufw disable
sudo ufw status
the output should be
To                         Action      From
--                         ------      ----
22/tcp                     ALLOW       Anywhere
6443/tcp                   ALLOW       Anywhere
2379:2380/tcp              ALLOW       Anywhere
10250/tcp                  ALLOW       Anywhere
10259/tcp                  ALLOW       Anywhere
10257/tcp                  ALLOW       Anywhere
22/tcp (v6)                ALLOW       Anywhere (v6)
6443/tcp (v6)              ALLOW       Anywhere (v6)
2379:2380/tcp (v6)         ALLOW       Anywhere (v6)
10250/tcp (v6)             ALLOW       Anywhere (v6)
10259/tcp (v6)             ALLOW       Anywhere (v6)
10257/tcp (v6)             ALLOW       Anywhere (v6)
Hosts file in the control-plane node
We need to update the /etc/hosts with the internal IP and hostname.
This will help when it is time to join the worker nodes.
echo $(hostname -I) $(hostname) | sudo tee -a /etc/hosts
Just a reminder: we need to update the hosts file to all the VMs.
To include all the VMs’ IPs and hostnames.
If you already know them, then your /etc/hosts file should look like this:
192.168.122.169  k8scpnode
192.168.122.40   k8wrknode1
192.168.122.8    k8wrknode2
replace the IPs to yours.
No Swap on the control-plane node
Be sure that SWAP is disabled in all virtual machines!
sudo swapoff -a
and the fstab file should not have any swap entry.
The below command should return nothing.
sudo grep -i swap /etc/fstab
If not, edit the /etc/fstab and remove the swap entry.
If you follow my terraform k8s code example from the above github repo,
you will notice that there isn’t any swap entry in the cloud init (user-data) file.
Nevertheless it is always a good thing to douple check.
Kernel modules on the control-plane node
We need to load the below kernel modules on all k8s nodes, so k8s can create some network magic!
- overlay
- br_netfilter
Run the below bash snippet that will do that, and also will enable the forwarding features of the network.
sudo tee /etc/modules-load.d/kubernetes.conf <<EOF
overlay
br_netfilter
EOF

sudo modprobe overlay
sudo modprobe br_netfilter

sudo lsmod | grep netfilter

sudo tee /etc/sysctl.d/kubernetes.conf <<EOF
net.bridge.bridge-nf-call-ip6tables = 1
net.bridge.bridge-nf-call-iptables = 1
net.ipv4.ip_forward = 1
EOF

sudo sysctl --system
NeedRestart on the control-plane node
Before installing any software, we need to make a tiny change to needrestart program. This will help with the automation of installing packages and will stop asking -via dialog- if we would like to restart the services!
echo "\$nrconf{restart} = 'a';" | sudo tee -a /etc/needrestart/needrestart.conf
Installing a Container Runtime on the control-plane node
It is time to choose which container runtime we are going to use on our k8s cluster. There are a few container runtimes for k8s and in the past docker were used to. Nowadays the most common runtime is the containerd that can also uses the cgroup v2 kernel features. There is also a docker-engine runtime via CRI. Read here for more details on the subject.
curl -sL https://download.docker.com/linux/ubuntu/gpg | sudo gpg --dearmor -o /etc/apt/trusted.gpg.d/docker-keyring.gpg

sudo apt-add-repository -y "deb https://download.docker.com/linux/ubuntu jammy stable"

sleep 5

sudo apt -y install containerd.io

containerd config default                              \
 | sed 's/SystemdCgroup = false/SystemdCgroup = true/' \
 | sudo tee /etc/containerd/config.toml

sudo systemctl restart containerd.service
We have also enabled the
systemd cgroup driverso the control-plane node can use the cgroup v2 features.
Installing kubeadm, kubelet and kubectl on the control-plane node
Install the kubernetes packages (kubedam, kubelet and kubectl) by first adding the k8s repository on our virtual machine. To speed up the next step, we will also download the configuration container images.
sudo curl -sLo /etc/apt/trusted.gpg.d/kubernetes-keyring.gpg https://packages.cloud.google.com/apt/doc/apt-key.gpg

sudo apt-add-repository -y "deb http://apt.kubernetes.io/ kubernetes-xenial main"

sleep 5

sudo apt install -y kubelet kubeadm kubectl

sudo kubeadm config images pull
Initializing the control-plane node
We can now initialize our control-plane node for our kubernetes cluster.
There are a few things we need to be careful about:
- We can specify the control-plane-endpoint if we are planning to have a high available k8s cluster. (we will skip this for now),
- Choose a Pod network add-on (next section) but be aware that CoreDNS (DNS and Service Discovery) will not run till then (later),
- define where is our container runtime socket (we will skip it)
- advertise the API server (we will skip it)
But we will define our Pod Network CIDR to the default value of the Pod network add-on so everything will go smoothly later on.
sudo kubeadm init --pod-network-cidr=10.244.0.0/16
Keep the output in a notepad.
Create user access config to the k8s control-plane node
Our k8s control-plane node is running, so we need to have credentials to access it.
The kubectl reads a configuration file (that has the token), so we copying this from k8s admin.
rm -rf $HOME/.kube

mkdir -p $HOME/.kube

sudo cp -i /etc/kubernetes/admin.conf $HOME/.kube/config

sudo chown $(id -u):$(id -g) $HOME/.kube/config

ls -la $HOME/.kube/config

alias k="kubectl"
Verify the control-plane node
Verify that the kubernets is running.
That means we have a k8s cluster - but only the control-plane node is running.
kubectl cluster-info
#kubectl cluster-info dump

k get nodes -o wide; k get pods  -A -o wide
Install an overlay network provider on the control-plane node
As I mentioned above, in order to use the DNS and Service Discovery services in the kubernetes (CoreDNS) we need to install a Container Network Interface (CNI) based Pod network add-on so that your Pods can communicate with each other.
We will use flannel as the simplest of them.
k apply -f https://raw.githubusercontent.com/coreos/flannel/master/Documentation/kube-flannel.yml
Verify CoreDNS is running on the control-plane node
Verify that the control-plane node is Up & Running and the control-plane pods (as coredns pods) are also running
$ k get nodes -o wide

NAME        STATUS   ROLES           AGE   VERSION   INTERNAL-IP       EXTERNAL-IP   OS-IMAGE             KERNEL-VERSION      CONTAINER-RUNTIME
k8scpnode   Ready    control-plane   54s   v1.25.0   192.168.122.169   <none>        Ubuntu 22.04.1 LTS   5.15.0-46-generic   containerd://1.6.8
$ k get pods -A -o wide

NAMESPACE    NAME                              READY STATUS  RESTARTS AGE IP              NODE      NOMINATED NODE READINESS GATES
kube-flannel kube-flannel-ds-zqv2b             1/1   Running 0        36s 192.168.122.169 k8scpnode <none>         <none>
kube-system  coredns-565d847f94-lg54q          1/1   Running 0        38s 10.244.0.2      k8scpnode <none>         <none>
kube-system  coredns-565d847f94-ms8zk          1/1   Running 0        38s 10.244.0.3      k8scpnode <none>         <none>
kube-system  etcd-k8scpnode                    1/1   Running 0        50s 192.168.122.169 k8scpnode <none>         <none>
kube-system  kube-apiserver-k8scpnode          1/1   Running 0        50s 192.168.122.169 k8scpnode <none>         <none>
kube-system  kube-controller-manager-k8scpnode 1/1   Running 0        50s 192.168.122.169 k8scpnode <none>         <none>
kube-system  kube-proxy-pv7tj                  1/1   Running 0        39s 192.168.122.169 k8scpnode <none>         <none>
kube-system  kube-scheduler-k8scpnode          1/1   Running 0        50s 192.168.122.169 k8scpnode <none>         <none>
That’s it with the control-plane node !
Worker Nodes
The below instructions works pretty much the same on both worker nodes.
I will document the steps for the worker1 node but do the same for the worker2 node.
Ports on the worker nodes
As we learned above on the control-plane section, kubernetes runs a few services
| Protocol | Direction | Port Range | Purpose | Used By |
|---|---|---|---|---|
| TCP | Inbound | 10250 | Kubelet API | Self, Control plane |
| TCP | Inbound | 30000-32767 | NodePort Services | All |
Firewall on the worker nodes
so we need to open the necessary ports on the worker nodes too.
sudo ufw allow 10250/tcp
sudo ufw allow 30000:32767/tcp

sudo ufw status
output should look like
To                         Action      From
--                         ------      ----
22/tcp                     ALLOW       Anywhere
10250/tcp                  ALLOW       Anywhere
30000:32767/tcp            ALLOW       Anywhere
22/tcp (v6)                ALLOW       Anywhere (v6)
10250/tcp (v6)             ALLOW       Anywhere (v6)
30000:32767/tcp (v6)       ALLOW       Anywhere (v6)
The next few steps are pretty much exactly the same as in the control-plane node.
In order to keep this documentation short, I’ll just copy/paste the commands.
Hosts file in the worker node
Update the /etc/hosts file to include the IPs and hostname of all VMs.
192.168.122.169  k8scpnode
192.168.122.40   k8wrknode1
192.168.122.8    k8wrknode2
No Swap on the worker node
sudo swapoff -a
Kernel modules on the worker node
sudo tee /etc/modules-load.d/kubernetes.conf <<EOF
overlay
br_netfilter
EOF

sudo modprobe overlay
sudo modprobe br_netfilter

sudo lsmod | grep netfilter

sudo tee /etc/sysctl.d/kubernetes.conf <<EOF
net.bridge.bridge-nf-call-ip6tables = 1
net.bridge.bridge-nf-call-iptables = 1
net.ipv4.ip_forward = 1
EOF

sudo sysctl --system
NeedRestart on the worker node
echo "\$nrconf{restart} = 'a';" | sudo tee -a /etc/needrestart/needrestart.conf
Installing a Container Runtime on the worker node
curl -sL https://download.docker.com/linux/ubuntu/gpg | sudo gpg --dearmor -o /etc/apt/trusted.gpg.d/docker-keyring.gpg

sudo apt-add-repository -y "deb https://download.docker.com/linux/ubuntu jammy stable"

sleep 5

sudo apt -y install containerd.io

containerd config default                              \
 | sed 's/SystemdCgroup = false/SystemdCgroup = true/' \
 | sudo tee /etc/containerd/config.toml

sudo systemctl restart containerd.service
Installing kubeadm, kubelet and kubectl on the worker node
sudo curl -sLo /etc/apt/trusted.gpg.d/kubernetes-keyring.gpg https://packages.cloud.google.com/apt/doc/apt-key.gpg

sudo apt-add-repository -y "deb http://apt.kubernetes.io/ kubernetes-xenial main"

sleep 5

sudo apt install -y kubelet kubeadm kubectl

sudo kubeadm config images pull
Get Token from the control-plane node
To join nodes to the kubernetes cluster, we need to have a couple of things.
- a token from control-plane node
- the CA certificate hash from the contol-plane node.
If you didnt keep the output the initialization of the control-plane node, that’s okay.
Run the below command in the control-plane node.
sudo kubeadm token list
and we will get the initial token that expires after 24hours.
TOKEN                     TTL         EXPIRES                USAGES                   DESCRIPTION                                                EXTRA GROUPS
zt36bp.uht4cziweef1jo1h   23h         2022-08-31T18:38:16Z   authentication,signing   The default bootstrap token generated by 'kubeadm init'.   system:bootstrappers:kubeadm:default-node-token
In this case is the
zt36bp.uht4cziweef1jo1hGet Certificate Hash from the control-plane node
To get the CA certificate hash from the control-plane-node, we need to run a complicated command:
openssl x509 -pubkey -in /etc/kubernetes/pki/ca.crt | openssl rsa -pubin -outform der 2>/dev/null | openssl dgst -sha256 -hex | sed 's/^.* //'
and in my k8s cluster is:
a4833f8c82953370610efaa5ed93b791337232c3a948b710b2435d747889c085Join Workers to the kubernetes cluster
So now, we can Join our worker nodes to the kubernetes cluster.
Run the below command on both worker nodes:
sudo kubeadm join 192.168.122.169:6443 \
       --token zt36bp.uht4cziweef1jo1h \
       --discovery-token-ca-cert-hash sha256:a4833f8c82953370610efaa5ed93b791337232c3a948b710b2435d747889c085
we get this message
Run ‘kubectl get nodes’ on the control-plane to see this node join the cluster.
Is the kubernetes cluster running ?
We can verify that
kubectl get nodes   -o wide
kubectl get pods -A -o wide
NAME         STATUS   ROLES           AGE     VERSION   INTERNAL-IP       EXTERNAL-IP   OS-IMAGE             KERNEL-VERSION      CONTAINER-RUNTIME
k8scpnode    Ready    control-plane   64m     v1.25.0   192.168.122.169   <none>        Ubuntu 22.04.1 LTS   5.15.0-46-generic   containerd://1.6.8
k8wrknode1   Ready    <none>          2m32s   v1.25.0   192.168.122.40    <none>        Ubuntu 22.04.1 LTS   5.15.0-46-generic   containerd://1.6.8
k8wrknode2   Ready    <none>          2m28s   v1.25.0   192.168.122.8     <none>        Ubuntu 22.04.1 LTS   5.15.0-46-generic   containerd://1.6.8
NAMESPACE NAME READY STATUS RESTARTS AGE IP NODE NOMINATED NODE READINESS GATES
kube-flannel kube-flannel-ds-52g92 1/1 Running 0 2m32s 192.168.122.40 k8wrknode1 <none> <none>
kube-flannel kube-flannel-ds-7qlm7 1/1 Running 0 2m28s 192.168.122.8 k8wrknode2 <none> <none>
kube-flannel kube-flannel-ds-zqv2b 1/1 Running 0 64m 192.168.122.169 k8scpnode <none> <none>
kube-system coredns-565d847f94-lg54q 1/1 Running 0 64m 10.244.0.2 k8scpnode <none> <none>
kube-system coredns-565d847f94-ms8zk 1/1 Running 0 64m 10.244.0.3 k8scpnode <none> <none>
kube-system etcd-k8scpnode 1/1 Running 0 64m 192.168.122.169 k8scpnode <none> <none>
kube-system kube-apiserver-k8scpnode 1/1 Running 0 64m 192.168.122.169 k8scpnode <none> <none>
kube-system kube-controller-manager-k8scpnode 1/1 Running 1 (12m ago) 64m 192.168.122.169 k8scpnode <none> <none>
kube-system kube-proxy-4khw6 1/1 Running 0 2m32s 192.168.122.40 k8wrknode1 <none> <none>
kube-system kube-proxy-gm27l 1/1 Running 0 2m28s 192.168.122.8 k8wrknode2 <none> <none>
kube-system kube-proxy-pv7tj 1/1 Running 0 64m 192.168.122.169 k8scpnode <none> <none>
kube-system kube-scheduler-k8scpnode 1/1 Running 1 (12m ago) 64m 192.168.122.169 k8scpnode <none> <none>
That’s it !
Our k8s cluster is running.
Kubernetes Dashboard
is a general purpose, web-based UI for Kubernetes clusters. It allows users to manage applications running in the cluster and troubleshoot them, as well as manage the cluster itself.
We can proceed by installing a k8s dashboard to our k8s cluster.
Install kubernetes dashboard
One simple way to install the kubernetes-dashboard, is by applying the latest (as of this writing) yaml configuration file.
kubectl apply -f https://raw.githubusercontent.com/kubernetes/dashboard/v2.6.1/aio/deploy/recommended.yaml
the output of the above command should be something like
namespace/kubernetes-dashboard created
serviceaccount/kubernetes-dashboard created
service/kubernetes-dashboard created
secret/kubernetes-dashboard-certs created
secret/kubernetes-dashboard-csrf created
secret/kubernetes-dashboard-key-holder created
configmap/kubernetes-dashboard-settings created
role.rbac.authorization.k8s.io/kubernetes-dashboard created
clusterrole.rbac.authorization.k8s.io/kubernetes-dashboard created
rolebinding.rbac.authorization.k8s.io/kubernetes-dashboard created
clusterrolebinding.rbac.authorization.k8s.io/kubernetes-dashboard created
deployment.apps/kubernetes-dashboard created
service/dashboard-metrics-scraper created
deployment.apps/dashboard-metrics-scraper created
Verify the installation
kubectl get all -n kubernetes-dashboard
NAME                                             READY   STATUS    RESTARTS   AGE
pod/dashboard-metrics-scraper-64bcc67c9c-kvll7   1/1     Running   0          2m16s
pod/kubernetes-dashboard-66c887f759-rr4gn        1/1     Running   0          2m16s

NAME                                TYPE        CLUSTER-IP      EXTERNAL-IP   PORT(S)    AGE
service/dashboard-metrics-scraper   ClusterIP   10.110.25.61    <none>        8000/TCP   2m16s
service/kubernetes-dashboard        ClusterIP   10.100.65.122   <none>        443/TCP    2m16s

NAME                                        READY   UP-TO-DATE   AVAILABLE   AGE
deployment.apps/dashboard-metrics-scraper   1/1     1            1           2m16s
deployment.apps/kubernetes-dashboard        1/1     1            1           2m16s

NAME                                                   DESIRED   CURRENT   READY   AGE
replicaset.apps/dashboard-metrics-scraper-64bcc67c9c   1         1         1       2m16s
replicaset.apps/kubernetes-dashboard-66c887f759        1         1         1       2m16s
Add a Node Port to kubernetes dashboard
Kubernetes Dashboard by default runs on a internal 10.x.x.x IP.
To access the dashboard we need to have a NodePort in the kubernetes-dashboard service.
We can either Patch the service or edit the yaml file.
Patch kubernetes-dashboard
kubectl --namespace kubernetes-dashboard patch svc kubernetes-dashboard -p '{"spec": {"type": "NodePort"}}'
output
service/kubernetes-dashboard patched
verify the service
kubectl get svc -n kubernetes-dashboard
NAME                        TYPE        CLUSTER-IP      EXTERNAL-IP   PORT(S)         AGE
dashboard-metrics-scraper   ClusterIP   10.110.25.61    <none>        8000/TCP        11m
kubernetes-dashboard        NodePort    10.100.65.122   <none>        443:32709/TCP   11m
we can see the 30480 in the kubernetes-dashboard.
Edit kubernetes-dashboard Service
kubectl edit svc -n kubernetes-dashboard kubernetes-dashboard
and chaning the service type from
type: ClusterIPto
type: NodePortAccessing Kubernetes Dashboard
The kubernetes-dashboard has two (2) pods, one (1) for metrics, one (2) for the dashboard.
To access the dashboard, first we need to identify in which Node is running.
kubectl get pods -n kubernetes-dashboard -o wide
NAME                                         READY   STATUS    RESTARTS   AGE     IP           NODE         NOMINATED NODE   READINESS GATES
dashboard-metrics-scraper-64bcc67c9c-fs7pt   1/1     Running   0          2m43s   10.244.1.9   k8wrknode1   <none>           <none>
kubernetes-dashboard-66c887f759-pzt4z        1/1     Running   0          2m44s   10.244.2.9   k8wrknode2   <none>           <none>
In my setup the dashboard pod is running on the worker node 2 and from the /etc/hosts is on the 192.168.122.8 IP.
The NodePort is 32709
k get svc -n kubernetes-dashboard -o wide
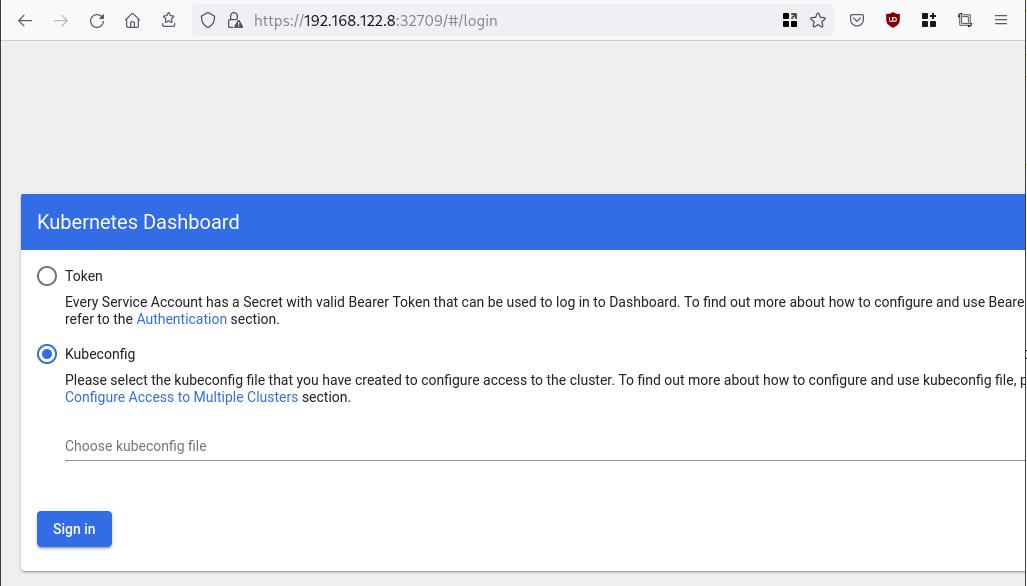
So, we can open a new tab on our browser and type:
https://192.168.122.8:32709
and accept the self-signed certificate!
Create An Authentication Token (RBAC)
Last step for the kubernetes-dashboard is to create an authentication token.
Creating a Service Account
Create a new yaml file, with kind: ServiceAccount that has access to kubernetes-dashboard namespace and has name: admin-user.
cat > kubernetes-dashboard.ServiceAccount.yaml <<EOF
apiVersion: v1
kind: ServiceAccount
metadata:
  name: admin-user
  namespace: kubernetes-dashboard

EOF
add this service account to the k8s cluster
kubectl apply -f kubernetes-dashboard.ServiceAccount.yaml
output
serviceaccount/admin-user createdCreating a ClusterRoleBinding
We need to bind the Service Account with the kubernetes-dashboard via Role-based access control.
cat > kubernetes-dashboard.ClusterRoleBinding.yaml <<EOF
apiVersion: rbac.authorization.k8s.io/v1
kind: ClusterRoleBinding
metadata:
  name: admin-user
roleRef:
  apiGroup: rbac.authorization.k8s.io
  kind: ClusterRole
  name: cluster-admin
subjects:
- kind: ServiceAccount
  name: admin-user
  namespace: kubernetes-dashboard

EOF
apply this yaml file
kubectl apply -f kubernetes-dashboard.ClusterRoleBinding.yaml
clusterrolebinding.rbac.authorization.k8s.io/admin-user created
That means, our Service Account User has all the necessary roles to access the kubernetes-dashboard.
Getting a Bearer Token
Final step is to create/get a token for our user.
kubectl -n kubernetes-dashboard create token admin-user
eyJhbGciOiJSUzI1NiIsImtpZCI6Im04M2JOY2k1Yk1hbFBhLVN2cjA4X1pkdktXNldqWkR4bjB6MGpTdFgtVHcifQ.eyJhdWQiOlsiaHR0cHM6Ly9rdWJlcm5ldGVzLmRlZmF1bHQuc3ZjLmNsdXN0ZXIubG9jYWwiXSwiZXhwIjoxNjYxOTU2NDQ1LCJpYXQiOjE2NjE5NTI4NDUsImlzcyI6Imh0dHBzOi8va3ViZXJuZXRlcy5kZWZhdWx0LnN2Yy5jbHVzdGVyLmxvY2FsIiwia3ViZXJuZXRlcy5pbyI6eyJuYW1lc3BhY2UiOiJrdWJlcm5ldGVzLWRhc2hib2FyZCIsInNlcnZpY2VhY2NvdW50Ijp7Im5hbWUiOiJhZG1pbi11c2VyIiwidWlkIjoiN2M4OWIyZDktMGIwYS00ZDg4LTk2Y2EtZDU3NjhjOWU2ZGYxIn19LCJuYmYiOjE2NjE5NTI4NDUsInN1YiI6InN5c3RlbTpzZXJ2aWNlYWNjb3VudDprdWJlcm5ldGVzLWRhc2hib2FyZDphZG1pbi11c2VyIn0.RMRQkZZhcoC5vCvck6hKfqXJ4dfN4JoQyAaClHZvOMI6JgQZEfB2-_Qsh5MfFApJUEit-0TX9r3CzW3JqvB7dmpTPxUQvHK68r82WGveBVp1wF37UyXu_IzxiCQzpCWYr3GcVGAGZVBbhhqNYm765FV02ZA_khHrW3WpB80ikhm_TNLkOS6Llq2UiLFZyHHmjl5pwvGzT7YXZe8s-llZSgc0UenEwPG-82eE279oOy6r4_NltoV1HB3uu0YjUJPlkqAPnHuSfAA7-8A3XAAVHhRQvFPea1qZLc4-oD24AcU0FjWqDMILEyE8zaD2ci8zEQBMoxcf2qmj0wn9cfbZwQ
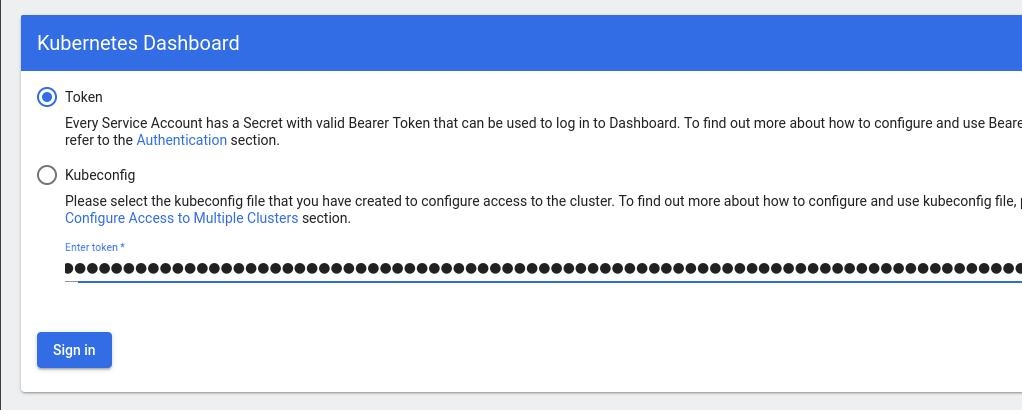
Add this token to the previous login page
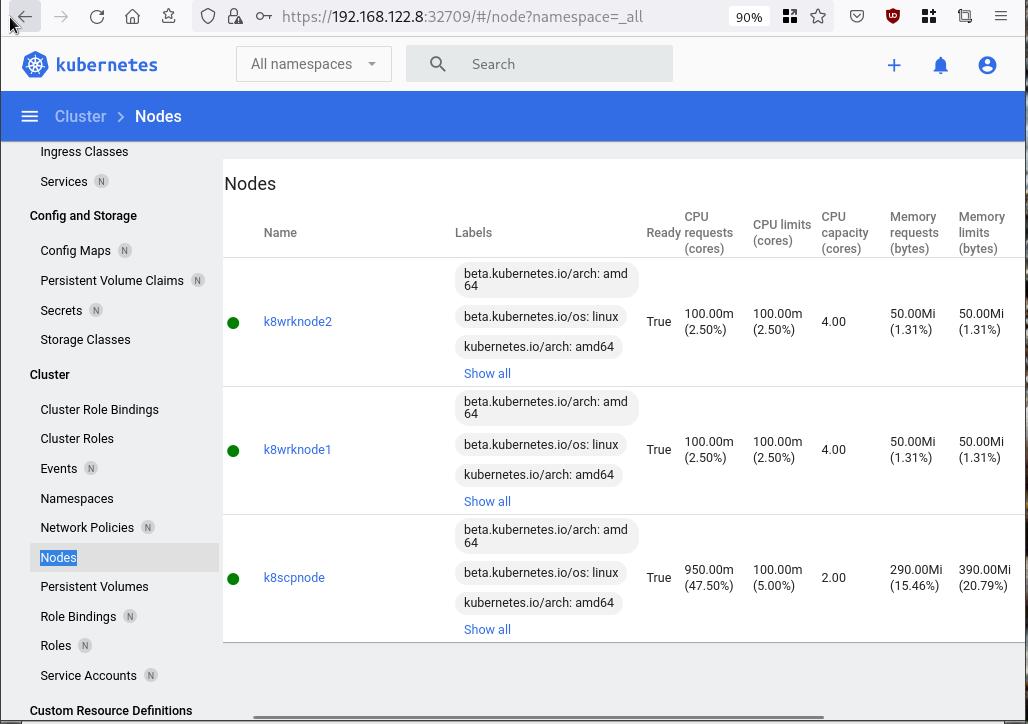
Browsing Kubernetes Dashboard
eg. Cluster –> Nodes
Nginx App
Before finishing this blog post, I would also like to share how to install a simple nginx-app as it is customary to do such thing in every new k8s cluster.
But plz excuse me, I will not get into much details.
You should be able to understand the below k8s commands.
Install nginx-app
kubectl create deployment nginx-app --image=nginx --replicas=2
deployment.apps/nginx-app createdGet Deployment
kubectl get deployment nginx-app -o wideNAME READY UP-TO-DATE AVAILABLE AGE CONTAINERS IMAGES SELECTOR
nginx-app 2/2 2 2 64s nginx nginx app=nginx-appExpose Nginx-App
kubectl expose deployment nginx-app --type=NodePort --port=80
service/nginx-app exposedVerify Service nginx-app
kubectl get svc nginx-app -o wide
NAME        TYPE       CLUSTER-IP      EXTERNAL-IP   PORT(S)        AGE   SELECTOR
nginx-app   NodePort   10.98.170.185   <none>        80:31761/TCP   27s   app=nginx-app
Describe Service nginx-app
kubectl describe svc nginx-app
Name:                     nginx-app
Namespace:                default
Labels:                   app=nginx-app
Annotations:              <none>
Selector:                 app=nginx-app
Type:                     NodePort
IP Family Policy:         SingleStack
IP Families:              IPv4
IP:                       10.98.170.185
IPs:                      10.98.170.185
Port:                     <unset>  80/TCP
TargetPort:               80/TCP
NodePort:                 <unset>  31761/TCP
Endpoints:                10.244.1.10:80,10.244.2.10:80
Session Affinity:         None
External Traffic Policy:  Cluster
Events:                   <none>
Curl Nginx-App
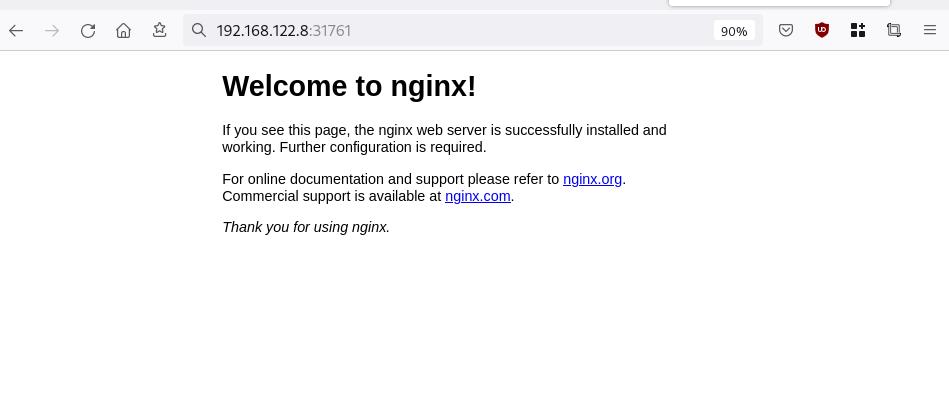
curl http://192.168.122.8:31761
<!DOCTYPE html>
<html>
<head>
<title>Welcome to nginx!</title>
<style>
html { color-scheme: light dark; }
body { width: 35em; margin: 0 auto;
font-family: Tahoma, Verdana, Arial, sans-serif; }
</style>
</head>
<body>
<h1>Welcome to nginx!</h1>
<p>If you see this page, the nginx web server is successfully installed and
working. Further configuration is required.</p>

<p>For online documentation and support please refer to
<a href="http://nginx.org/">nginx.org</a>.<br/>
Commercial support is available at
<a href="http://nginx.com/">nginx.com</a>.</p>

<p><em>Thank you for using nginx.</em></p>
</body>
</html>
Nginx-App from Browser
That’s it !
I hope you enjoyed this blog post.
-ebal
./destroy.sh...
libvirt_domain.domain-ubuntu["k8wrknode1"]: Destroying... [id=446cae2a-ce14-488f-b8e9-f44839091bce]
libvirt_domain.domain-ubuntu["k8scpnode"]: Destroying... [id=51e12abb-b14b-4ab8-b098-c1ce0b4073e3]
time_sleep.wait_for_cloud_init: Destroying... [id=2022-08-30T18:02:06Z]
libvirt_domain.domain-ubuntu["k8wrknode2"]: Destroying... [id=0767fb62-4600-4bc8-a94a-8e10c222b92e]
time_sleep.wait_for_cloud_init: Destruction complete after 0s
libvirt_domain.domain-ubuntu["k8wrknode1"]: Destruction complete after 1s
libvirt_domain.domain-ubuntu["k8scpnode"]: Destruction complete after 1s
libvirt_domain.domain-ubuntu["k8wrknode2"]: Destruction complete after 1s
libvirt_cloudinit_disk.cloud-init["k8wrknode1"]: Destroying... [id=/var/lib/libvirt/images/Jpw2Sg_cloud-init.iso;b8ddfa73-a770-46de-ad16-b0a5a08c8550]
libvirt_cloudinit_disk.cloud-init["k8wrknode2"]: Destroying... [id=/var/lib/libvirt/images/VdUklQ_cloud-init.iso;5511ed7f-a864-4d3f-985a-c4ac07eac233]
libvirt_volume.ubuntu-base["k8scpnode"]: Destroying... [id=/var/lib/libvirt/images/l5Rr1w_ubuntu-base]
libvirt_volume.ubuntu-base["k8wrknode2"]: Destroying... [id=/var/lib/libvirt/images/VdUklQ_ubuntu-base]
libvirt_cloudinit_disk.cloud-init["k8scpnode"]: Destroying... [id=/var/lib/libvirt/images/l5Rr1w_cloud-init.iso;11ef6bb7-a688-4c15-ae33-10690500705f]
libvirt_volume.ubuntu-base["k8wrknode1"]: Destroying... [id=/var/lib/libvirt/images/Jpw2Sg_ubuntu-base]
libvirt_cloudinit_disk.cloud-init["k8wrknode1"]: Destruction complete after 1s
libvirt_volume.ubuntu-base["k8wrknode2"]: Destruction complete after 1s
libvirt_cloudinit_disk.cloud-init["k8scpnode"]: Destruction complete after 1s
libvirt_cloudinit_disk.cloud-init["k8wrknode2"]: Destruction complete after 1s
libvirt_volume.ubuntu-base["k8wrknode1"]: Destruction complete after 1s
libvirt_volume.ubuntu-base["k8scpnode"]: Destruction complete after 2s
libvirt_volume.ubuntu-vol["k8wrknode1"]: Destroying... [id=/var/lib/libvirt/images/Jpw2Sg_ubuntu-vol]
libvirt_volume.ubuntu-vol["k8scpnode"]: Destroying... [id=/var/lib/libvirt/images/l5Rr1w_ubuntu-vol]
libvirt_volume.ubuntu-vol["k8wrknode2"]: Destroying... [id=/var/lib/libvirt/images/VdUklQ_ubuntu-vol]
libvirt_volume.ubuntu-vol["k8scpnode"]: Destruction complete after 0s
libvirt_volume.ubuntu-vol["k8wrknode2"]: Destruction complete after 0s
libvirt_volume.ubuntu-vol["k8wrknode1"]: Destruction complete after 0s
random_id.id["k8scpnode"]: Destroying... [id=l5Rr1w]
random_id.id["k8wrknode2"]: Destroying... [id=VdUklQ]
random_id.id["k8wrknode1"]: Destroying... [id=Jpw2Sg]
random_id.id["k8wrknode2"]: Destruction complete after 0s
random_id.id["k8scpnode"]: Destruction complete after 0s
random_id.id["k8wrknode1"]: Destruction complete after 0s
Destroy complete! Resources: 16 destroyed.
In this blog post, I’ll try to share my personal notes on how to setup a kubernetes cluster with kubeadm on ubuntu 22.04 LTS Virtual Machines.
I am going to use three (3) Virtual Machines in my local lab. My home lab is based on libvirt Qemu/KVM (Kernel-based Virtual Machine) and I run Terraform as the infrastructure provision tool.
There is a copy of this blog post to github.
https://github.com/ebal/k8s_cluster
If you notice something wrong you can either contact me via the contact page, or open a PR in the github project.
you can also follow me at twitter: https://twitter.com/ebalaskas
Kubernetes, also known as K8s, is an open-source system for automating deployment, scaling, and management of containerized applications.
- Prerequisites
- Git Terraform Code for the kubernetes cluster
- Control-Plane Node
- Ports on the control-plane node
- Firewall on the control-plane node
- Hosts file in the control-plane node
- No Swap on the control-plane node
- Kernel modules on the control-plane node
- NeedRestart on the control-plane node
- Installing a Container Runtime on the control-plane node
- Installing kubeadm, kubelet and kubectl on the control-plane node
- Initializing the control-plane node
- Create user access config to the k8s control-plane node
- Verify the control-plane node
- Install an overlay network provider on the control-plane node
- Verify CoreDNS is running on the control-plane node
- Worker Nodes
- Ports on the worker nodes
- Firewall on the worker nodes
- Hosts file in the worker node
- No Swap on the worker node
- Kernel modules on the worker node
- NeedRestart on the worker node
- Installing a Container Runtime on the worker node
- Installing kubeadm, kubelet and kubectl on the worker node
- Get Token from the control-plane node
- Get Certificate Hash from the control-plane node
- Join Workers to the kubernetes cluster
- Is the kubernetes cluster running ?
- Kubernetes Dashboard
- Install kubernetes dashboard
- Add a Node Port to kubernetes dashboard
- Patch kubernetes-dashboard
- Edit kubernetes-dashboard Service
- Accessing Kubernetes Dashboard
- Create An Authentication Token (RBAC)
- Creating a Service Account
- Creating a ClusterRoleBinding
- Getting a Bearer Token
- Browsing Kubernetes Dashboard
- Nginx App
- That’s it !
Prerequisites
- at least 3 Virtual Machines of Ubuntu 22.04 (one for control-plane, two for worker nodes)
- 2GB (or more) of RAM on each Virtual Machine
- 2 CPUs (or more) on each Virtual Machine
- 20Gb of hard disk on each Virtual Machine
- No SWAP partition/image/file on each Virtual Machine
Git Terraform Code for the kubernetes cluster
I prefer to have a reproducible infrastructure, so I can very fast create and destroy my test lab. My preferable way of doing things is testing on each step, so I pretty much destroy everything, coping and pasting commands and keep on. I use terraform for the create the infrastructure. You can find the code for the entire kubernetes cluster here: k8s cluster - Terraform code.
If you do not use terraform, skip this step!
You can git clone the repo to review and edit it according to your needs.
git clone https://github.com/ebal/k8s_cluster.git
cd tf_libvirt
You will need to make appropriate changes. Open Variables.tf for that. The most important option to change, is the User option. Change it to your github username and it will download and setup the VMs with your public key, instead of mine!
But pretty much, everything else should work out of the box. Change the vmem and vcpu settings to your needs.
Init terraform before running the below shell script.
terraform init
and then run
./start.sh
output should be something like:
...
Apply complete! Resources: 16 added, 0 changed, 0 destroyed.

Outputs:

VMs = [
  "192.168.122.169  k8scpnode",
  "192.168.122.40   k8wrknode1",
  "192.168.122.8    k8wrknode2",
]
Verify that you have ssh access to the VMs
eg.
ssh -l ubuntu 192.168.122.169
replace the IP with what the output gave you.
Ubuntu 22.04 Image
If you noticed in the terraform code, I have the below declaration as the cloud image:
../jammy-server-cloudimg-amd64.img
that means, I’ve already downloaded it, in the upper directory to speed things up!
cd ../
curl -sLO https://cloud-images.ubuntu.com/jammy/current/focal-server-cloudimg-amd64.img
cd -
Control-Plane Node
Let’s us now start the configure of the k8s control-plane node.
Ports on the control-plane node
Kubernetes runs a few services that needs to be accessable from the worker nodes.
| Protocol | Direction | Port Range | Purpose | Used By |
|---|---|---|---|---|
| TCP | Inbound | 6443 | Kubernetes API server | All |
| TCP | Inbound | 2379-2380 | etcd server client API | kube-apiserver, etcd |
| TCP | Inbound | 10250 | Kubelet API | Self, Control plane |
| TCP | Inbound | 10259 | kube-scheduler | Self |
| TCP | Inbound | 10257 | kube-controller-manager | Self |
Although etcd ports are included in control plane section, you can also host your
own etcd cluster externally or on custom ports.
Firewall on the control-plane node
We need to open the necessary ports on the CP’s (control-plane node) firewall.
sudo ufw allow 6443/tcp
sudo ufw allow 2379:2380/tcp
sudo ufw allow 10250/tcp
sudo ufw allow 10259/tcp
sudo ufw allow 10257/tcp

#sudo ufw disable
sudo ufw status
the output should be
To                         Action      From
--                         ------      ----
22/tcp                     ALLOW       Anywhere
6443/tcp                   ALLOW       Anywhere
2379:2380/tcp              ALLOW       Anywhere
10250/tcp                  ALLOW       Anywhere
10259/tcp                  ALLOW       Anywhere
10257/tcp                  ALLOW       Anywhere
22/tcp (v6)                ALLOW       Anywhere (v6)
6443/tcp (v6)              ALLOW       Anywhere (v6)
2379:2380/tcp (v6)         ALLOW       Anywhere (v6)
10250/tcp (v6)             ALLOW       Anywhere (v6)
10259/tcp (v6)             ALLOW       Anywhere (v6)
10257/tcp (v6)             ALLOW       Anywhere (v6)
Hosts file in the control-plane node
We need to update the /etc/hosts with the internal IP and hostname.
This will help when it is time to join the worker nodes.
echo $(hostname -I) $(hostname) | sudo tee -a /etc/hosts
Just a reminder: we need to update the hosts file to all the VMs.
To include all the VMs’ IPs and hostnames.
If you already know them, then your /etc/hosts file should look like this:
192.168.122.169  k8scpnode
192.168.122.40   k8wrknode1
192.168.122.8    k8wrknode2
replace the IPs to yours.
No Swap on the control-plane node
Be sure that SWAP is disabled in all virtual machines!
sudo swapoff -a
and the fstab file should not have any swap entry.
The below command should return nothing.
sudo grep -i swap /etc/fstab
If not, edit the /etc/fstab and remove the swap entry.
If you follow my terraform k8s code example from the above github repo,
you will notice that there isn’t any swap entry in the cloud init (user-data) file.
Nevertheless it is always a good thing to douple check.
Kernel modules on the control-plane node
We need to load the below kernel modules on all k8s nodes, so k8s can create some network magic!
- overlay
- br_netfilter
Run the below bash snippet that will do that, and also will enable the forwarding features of the network.
sudo tee /etc/modules-load.d/kubernetes.conf <<EOF
overlay
br_netfilter
EOF

sudo modprobe overlay
sudo modprobe br_netfilter

sudo lsmod | grep netfilter

sudo tee /etc/sysctl.d/kubernetes.conf <<EOF
net.bridge.bridge-nf-call-ip6tables = 1
net.bridge.bridge-nf-call-iptables = 1
net.ipv4.ip_forward = 1
EOF

sudo sysctl --system
NeedRestart on the control-plane node
Before installing any software, we need to make a tiny change to needrestart program. This will help with the automation of installing packages and will stop asking -via dialog- if we would like to restart the services!
echo "\$nrconf{restart} = 'a';" | sudo tee -a /etc/needrestart/needrestart.conf
Installing a Container Runtime on the control-plane node
It is time to choose which container runtime we are going to use on our k8s cluster. There are a few container runtimes for k8s and in the past docker were used to. Nowadays the most common runtime is the containerd that can also uses the cgroup v2 kernel features. There is also a docker-engine runtime via CRI. Read here for more details on the subject.
curl -sL https://download.docker.com/linux/ubuntu/gpg | sudo gpg --dearmor -o /etc/apt/trusted.gpg.d/docker-keyring.gpg

sudo apt-add-repository -y "deb https://download.docker.com/linux/ubuntu jammy stable"

sleep 5

sudo apt -y install containerd.io

containerd config default                              \
 | sed 's/SystemdCgroup = false/SystemdCgroup = true/' \
 | sudo tee /etc/containerd/config.toml

sudo systemctl restart containerd.service
We have also enabled the
systemd cgroup driverso the control-plane node can use the cgroup v2 features.
Installing kubeadm, kubelet and kubectl on the control-plane node
Install the kubernetes packages (kubedam, kubelet and kubectl) by first adding the k8s repository on our virtual machine. To speed up the next step, we will also download the configuration container images.
sudo curl -sLo /etc/apt/trusted.gpg.d/kubernetes-keyring.gpg https://packages.cloud.google.com/apt/doc/apt-key.gpg

sudo apt-add-repository -y "deb http://apt.kubernetes.io/ kubernetes-xenial main"

sleep 5

sudo apt install -y kubelet kubeadm kubectl

sudo kubeadm config images pull
Initializing the control-plane node
We can now initialize our control-plane node for our kubernetes cluster.
There are a few things we need to be careful about:
- We can specify the control-plane-endpoint if we are planning to have a high available k8s cluster. (we will skip this for now),
- Choose a Pod network add-on (next section) but be aware that CoreDNS (DNS and Service Discovery) will not run till then (later),
- define where is our container runtime socket (we will skip it)
- advertise the API server (we will skip it)
But we will define our Pod Network CIDR to the default value of the Pod network add-on so everything will go smoothly later on.
sudo kubeadm init --pod-network-cidr=10.244.0.0/16
Keep the output in a notepad.
Create user access config to the k8s control-plane node
Our k8s control-plane node is running, so we need to have credentials to access it.
The kubectl reads a configuration file (that has the token), so we copying this from k8s admin.
rm -rf $HOME/.kube

mkdir -p $HOME/.kube

sudo cp -i /etc/kubernetes/admin.conf $HOME/.kube/config

sudo chown $(id -u):$(id -g) $HOME/.kube/config

ls -la $HOME/.kube/config

alias k="kubectl"
Verify the control-plane node
Verify that the kubernets is running.
That means we have a k8s cluster - but only the control-plane node is running.
kubectl cluster-info
#kubectl cluster-info dump

k get nodes -o wide; k get pods  -A -o wide
Install an overlay network provider on the control-plane node
As I mentioned above, in order to use the DNS and Service Discovery services in the kubernetes (CoreDNS) we need to install a Container Network Interface (CNI) based Pod network add-on so that your Pods can communicate with each other.
We will use flannel as the simplest of them.
k apply -f https://raw.githubusercontent.com/coreos/flannel/master/Documentation/kube-flannel.yml
Verify CoreDNS is running on the control-plane node
Verify that the control-plane node is Up & Running and the control-plane pods (as coredns pods) are also running
$ k get nodes -o wide

NAME        STATUS   ROLES           AGE   VERSION   INTERNAL-IP       EXTERNAL-IP   OS-IMAGE             KERNEL-VERSION      CONTAINER-RUNTIME
k8scpnode   Ready    control-plane   54s   v1.25.0   192.168.122.169   <none>        Ubuntu 22.04.1 LTS   5.15.0-46-generic   containerd://1.6.8
$ k get pods -A -o wide

NAMESPACE    NAME                              READY STATUS  RESTARTS AGE IP              NODE      NOMINATED NODE READINESS GATES
kube-flannel kube-flannel-ds-zqv2b             1/1   Running 0        36s 192.168.122.169 k8scpnode <none>         <none>
kube-system  coredns-565d847f94-lg54q          1/1   Running 0        38s 10.244.0.2      k8scpnode <none>         <none>
kube-system  coredns-565d847f94-ms8zk          1/1   Running 0        38s 10.244.0.3      k8scpnode <none>         <none>
kube-system  etcd-k8scpnode                    1/1   Running 0        50s 192.168.122.169 k8scpnode <none>         <none>
kube-system  kube-apiserver-k8scpnode          1/1   Running 0        50s 192.168.122.169 k8scpnode <none>         <none>
kube-system  kube-controller-manager-k8scpnode 1/1   Running 0        50s 192.168.122.169 k8scpnode <none>         <none>
kube-system  kube-proxy-pv7tj                  1/1   Running 0        39s 192.168.122.169 k8scpnode <none>         <none>
kube-system  kube-scheduler-k8scpnode          1/1   Running 0        50s 192.168.122.169 k8scpnode <none>         <none>
That’s it with the control-plane node !
Worker Nodes
The below instructions works pretty much the same on both worker nodes.
I will document the steps for the worker1 node but do the same for the worker2 node.
Ports on the worker nodes
As we learned above on the control-plane section, kubernetes runs a few services
| Protocol | Direction | Port Range | Purpose | Used By |
|---|---|---|---|---|
| TCP | Inbound | 10250 | Kubelet API | Self, Control plane |
| TCP | Inbound | 30000-32767 | NodePort Services | All |
Firewall on the worker nodes
so we need to open the necessary ports on the worker nodes too.
sudo ufw allow 10250/tcp
sudo ufw allow 30000:32767/tcp

sudo ufw status
output should look like
To                         Action      From
--                         ------      ----
22/tcp                     ALLOW       Anywhere
10250/tcp                  ALLOW       Anywhere
30000:32767/tcp            ALLOW       Anywhere
22/tcp (v6)                ALLOW       Anywhere (v6)
10250/tcp (v6)             ALLOW       Anywhere (v6)
30000:32767/tcp (v6)       ALLOW       Anywhere (v6)
The next few steps are pretty much exactly the same as in the control-plane node.
In order to keep this documentation short, I’ll just copy/paste the commands.
Hosts file in the worker node
Update the /etc/hosts file to include the IPs and hostname of all VMs.
192.168.122.169  k8scpnode
192.168.122.40   k8wrknode1
192.168.122.8    k8wrknode2
No Swap on the worker node
sudo swapoff -a
Kernel modules on the worker node
sudo tee /etc/modules-load.d/kubernetes.conf <<EOF
overlay
br_netfilter
EOF

sudo modprobe overlay
sudo modprobe br_netfilter

sudo lsmod | grep netfilter

sudo tee /etc/sysctl.d/kubernetes.conf <<EOF
net.bridge.bridge-nf-call-ip6tables = 1
net.bridge.bridge-nf-call-iptables = 1
net.ipv4.ip_forward = 1
EOF

sudo sysctl --system
NeedRestart on the worker node
echo "\$nrconf{restart} = 'a';" | sudo tee -a /etc/needrestart/needrestart.conf
Installing a Container Runtime on the worker node
curl -sL https://download.docker.com/linux/ubuntu/gpg | sudo gpg --dearmor -o /etc/apt/trusted.gpg.d/docker-keyring.gpg

sudo apt-add-repository -y "deb https://download.docker.com/linux/ubuntu jammy stable"

sleep 5

sudo apt -y install containerd.io

containerd config default                              \
 | sed 's/SystemdCgroup = false/SystemdCgroup = true/' \
 | sudo tee /etc/containerd/config.toml

sudo systemctl restart containerd.service
Installing kubeadm, kubelet and kubectl on the worker node
sudo curl -sLo /etc/apt/trusted.gpg.d/kubernetes-keyring.gpg https://packages.cloud.google.com/apt/doc/apt-key.gpg

sudo apt-add-repository -y "deb http://apt.kubernetes.io/ kubernetes-xenial main"

sleep 5

sudo apt install -y kubelet kubeadm kubectl

sudo kubeadm config images pull
Get Token from the control-plane node
To join nodes to the kubernetes cluster, we need to have a couple of things.
- a token from control-plane node
- the CA certificate hash from the contol-plane node.
If you didnt keep the output the initialization of the control-plane node, that’s okay.
Run the below command in the control-plane node.
sudo kubeadm token list
and we will get the initial token that expires after 24hours.
TOKEN                     TTL         EXPIRES                USAGES                   DESCRIPTION                                                EXTRA GROUPS
zt36bp.uht4cziweef1jo1h   23h         2022-08-31T18:38:16Z   authentication,signing   The default bootstrap token generated by 'kubeadm init'.   system:bootstrappers:kubeadm:default-node-token
In this case is the
zt36bp.uht4cziweef1jo1hGet Certificate Hash from the control-plane node
To get the CA certificate hash from the control-plane-node, we need to run a complicated command:
openssl x509 -pubkey -in /etc/kubernetes/pki/ca.crt | openssl rsa -pubin -outform der 2>/dev/null | openssl dgst -sha256 -hex | sed 's/^.* //'
and in my k8s cluster is:
a4833f8c82953370610efaa5ed93b791337232c3a948b710b2435d747889c085Join Workers to the kubernetes cluster
So now, we can Join our worker nodes to the kubernetes cluster.
Run the below command on both worker nodes:
sudo kubeadm join 192.168.122.169:6443 \
       --token zt36bp.uht4cziweef1jo1h \
       --discovery-token-ca-cert-hash sha256:a4833f8c82953370610efaa5ed93b791337232c3a948b710b2435d747889c085
we get this message
Run ‘kubectl get nodes’ on the control-plane to see this node join the cluster.
Is the kubernetes cluster running ?
We can verify that
kubectl get nodes   -o wide
kubectl get pods -A -o wide
NAME         STATUS   ROLES           AGE     VERSION   INTERNAL-IP       EXTERNAL-IP   OS-IMAGE             KERNEL-VERSION      CONTAINER-RUNTIME
k8scpnode    Ready    control-plane   64m     v1.25.0   192.168.122.169   <none>        Ubuntu 22.04.1 LTS   5.15.0-46-generic   containerd://1.6.8
k8wrknode1   Ready    <none>          2m32s   v1.25.0   192.168.122.40    <none>        Ubuntu 22.04.1 LTS   5.15.0-46-generic   containerd://1.6.8
k8wrknode2   Ready    <none>          2m28s   v1.25.0   192.168.122.8     <none>        Ubuntu 22.04.1 LTS   5.15.0-46-generic   containerd://1.6.8
NAMESPACE NAME READY STATUS RESTARTS AGE IP NODE NOMINATED NODE READINESS GATES
kube-flannel kube-flannel-ds-52g92 1/1 Running 0 2m32s 192.168.122.40 k8wrknode1 <none> <none>
kube-flannel kube-flannel-ds-7qlm7 1/1 Running 0 2m28s 192.168.122.8 k8wrknode2 <none> <none>
kube-flannel kube-flannel-ds-zqv2b 1/1 Running 0 64m 192.168.122.169 k8scpnode <none> <none>
kube-system coredns-565d847f94-lg54q 1/1 Running 0 64m 10.244.0.2 k8scpnode <none> <none>
kube-system coredns-565d847f94-ms8zk 1/1 Running 0 64m 10.244.0.3 k8scpnode <none> <none>
kube-system etcd-k8scpnode 1/1 Running 0 64m 192.168.122.169 k8scpnode <none> <none>
kube-system kube-apiserver-k8scpnode 1/1 Running 0 64m 192.168.122.169 k8scpnode <none> <none>
kube-system kube-controller-manager-k8scpnode 1/1 Running 1 (12m ago) 64m 192.168.122.169 k8scpnode <none> <none>
kube-system kube-proxy-4khw6 1/1 Running 0 2m32s 192.168.122.40 k8wrknode1 <none> <none>
kube-system kube-proxy-gm27l 1/1 Running 0 2m28s 192.168.122.8 k8wrknode2 <none> <none>
kube-system kube-proxy-pv7tj 1/1 Running 0 64m 192.168.122.169 k8scpnode <none> <none>
kube-system kube-scheduler-k8scpnode 1/1 Running 1 (12m ago) 64m 192.168.122.169 k8scpnode <none> <none>
That’s it !
Our k8s cluster is running.
Kubernetes Dashboard
is a general purpose, web-based UI for Kubernetes clusters. It allows users to manage applications running in the cluster and troubleshoot them, as well as manage the cluster itself.
We can proceed by installing a k8s dashboard to our k8s cluster.
Install kubernetes dashboard
One simple way to install the kubernetes-dashboard, is by applying the latest (as of this writing) yaml configuration file.
kubectl apply -f https://raw.githubusercontent.com/kubernetes/dashboard/v2.6.1/aio/deploy/recommended.yaml
the output of the above command should be something like
namespace/kubernetes-dashboard created
serviceaccount/kubernetes-dashboard created
service/kubernetes-dashboard created
secret/kubernetes-dashboard-certs created
secret/kubernetes-dashboard-csrf created
secret/kubernetes-dashboard-key-holder created
configmap/kubernetes-dashboard-settings created
role.rbac.authorization.k8s.io/kubernetes-dashboard created
clusterrole.rbac.authorization.k8s.io/kubernetes-dashboard created
rolebinding.rbac.authorization.k8s.io/kubernetes-dashboard created
clusterrolebinding.rbac.authorization.k8s.io/kubernetes-dashboard created
deployment.apps/kubernetes-dashboard created
service/dashboard-metrics-scraper created
deployment.apps/dashboard-metrics-scraper created
Verify the installation
kubectl get all -n kubernetes-dashboard
NAME                                             READY   STATUS    RESTARTS   AGE
pod/dashboard-metrics-scraper-64bcc67c9c-kvll7   1/1     Running   0          2m16s
pod/kubernetes-dashboard-66c887f759-rr4gn        1/1     Running   0          2m16s

NAME                                TYPE        CLUSTER-IP      EXTERNAL-IP   PORT(S)    AGE
service/dashboard-metrics-scraper   ClusterIP   10.110.25.61    <none>        8000/TCP   2m16s
service/kubernetes-dashboard        ClusterIP   10.100.65.122   <none>        443/TCP    2m16s

NAME                                        READY   UP-TO-DATE   AVAILABLE   AGE
deployment.apps/dashboard-metrics-scraper   1/1     1            1           2m16s
deployment.apps/kubernetes-dashboard        1/1     1            1           2m16s

NAME                                                   DESIRED   CURRENT   READY   AGE
replicaset.apps/dashboard-metrics-scraper-64bcc67c9c   1         1         1       2m16s
replicaset.apps/kubernetes-dashboard-66c887f759        1         1         1       2m16s
Add a Node Port to kubernetes dashboard
Kubernetes Dashboard by default runs on a internal 10.x.x.x IP.
To access the dashboard we need to have a NodePort in the kubernetes-dashboard service.
We can either Patch the service or edit the yaml file.
Patch kubernetes-dashboard
kubectl --namespace kubernetes-dashboard patch svc kubernetes-dashboard -p '{"spec": {"type": "NodePort"}}'
output
service/kubernetes-dashboard patched
verify the service
kubectl get svc -n kubernetes-dashboard
NAME                        TYPE        CLUSTER-IP      EXTERNAL-IP   PORT(S)         AGE
dashboard-metrics-scraper   ClusterIP   10.110.25.61    <none>        8000/TCP        11m
kubernetes-dashboard        NodePort    10.100.65.122   <none>        443:32709/TCP   11m
we can see the 30480 in the kubernetes-dashboard.
Edit kubernetes-dashboard Service
kubectl edit svc -n kubernetes-dashboard kubernetes-dashboard
and chaning the service type from
type: ClusterIPto
type: NodePortAccessing Kubernetes Dashboard
The kubernetes-dashboard has two (2) pods, one (1) for metrics, one (2) for the dashboard.
To access the dashboard, first we need to identify in which Node is running.
kubectl get pods -n kubernetes-dashboard -o wide
NAME                                         READY   STATUS    RESTARTS   AGE     IP           NODE         NOMINATED NODE   READINESS GATES
dashboard-metrics-scraper-64bcc67c9c-fs7pt   1/1     Running   0          2m43s   10.244.1.9   k8wrknode1   <none>           <none>
kubernetes-dashboard-66c887f759-pzt4z        1/1     Running   0          2m44s   10.244.2.9   k8wrknode2   <none>           <none>
In my setup the dashboard pod is running on the worker node 2 and from the /etc/hosts is on the 192.168.122.8 IP.
The NodePort is 32709
k get svc -n kubernetes-dashboard -o wide
So, we can open a new tab on our browser and type:
https://192.168.122.8:32709
and accept the self-signed certificate!

Create An Authentication Token (RBAC)
Last step for the kubernetes-dashboard is to create an authentication token.
Creating a Service Account
Create a new yaml file, with kind: ServiceAccount that has access to kubernetes-dashboard namespace and has name: admin-user.
cat > kubernetes-dashboard.ServiceAccount.yaml <<EOF
apiVersion: v1
kind: ServiceAccount
metadata:
  name: admin-user
  namespace: kubernetes-dashboard

EOF
add this service account to the k8s cluster
kubectl apply -f kubernetes-dashboard.ServiceAccount.yaml
output
serviceaccount/admin-user createdCreating a ClusterRoleBinding
We need to bind the Service Account with the kubernetes-dashboard via Role-based access control.
cat > kubernetes-dashboard.ClusterRoleBinding.yaml <<EOF
apiVersion: rbac.authorization.k8s.io/v1
kind: ClusterRoleBinding
metadata:
  name: admin-user
roleRef:
  apiGroup: rbac.authorization.k8s.io
  kind: ClusterRole
  name: cluster-admin
subjects:
- kind: ServiceAccount
  name: admin-user
  namespace: kubernetes-dashboard

EOF
apply this yaml file
kubectl apply -f kubernetes-dashboard.ClusterRoleBinding.yaml
clusterrolebinding.rbac.authorization.k8s.io/admin-user created
That means, our Service Account User has all the necessary roles to access the kubernetes-dashboard.
Getting a Bearer Token
Final step is to create/get a token for our user.
kubectl -n kubernetes-dashboard create token admin-user
eyJhbGciOiJSUzI1NiIsImtpZCI6Im04M2JOY2k1Yk1hbFBhLVN2cjA4X1pkdktXNldqWkR4bjB6MGpTdFgtVHcifQ.eyJhdWQiOlsiaHR0cHM6Ly9rdWJlcm5ldGVzLmRlZmF1bHQuc3ZjLmNsdXN0ZXIubG9jYWwiXSwiZXhwIjoxNjYxOTU2NDQ1LCJpYXQiOjE2NjE5NTI4NDUsImlzcyI6Imh0dHBzOi8va3ViZXJuZXRlcy5kZWZhdWx0LnN2Yy5jbHVzdGVyLmxvY2FsIiwia3ViZXJuZXRlcy5pbyI6eyJuYW1lc3BhY2UiOiJrdWJlcm5ldGVzLWRhc2hib2FyZCIsInNlcnZpY2VhY2NvdW50Ijp7Im5hbWUiOiJhZG1pbi11c2VyIiwidWlkIjoiN2M4OWIyZDktMGIwYS00ZDg4LTk2Y2EtZDU3NjhjOWU2ZGYxIn19LCJuYmYiOjE2NjE5NTI4NDUsInN1YiI6InN5c3RlbTpzZXJ2aWNlYWNjb3VudDprdWJlcm5ldGVzLWRhc2hib2FyZDphZG1pbi11c2VyIn0.RMRQkZZhcoC5vCvck6hKfqXJ4dfN4JoQyAaClHZvOMI6JgQZEfB2-_Qsh5MfFApJUEit-0TX9r3CzW3JqvB7dmpTPxUQvHK68r82WGveBVp1wF37UyXu_IzxiCQzpCWYr3GcVGAGZVBbhhqNYm765FV02ZA_khHrW3WpB80ikhm_TNLkOS6Llq2UiLFZyHHmjl5pwvGzT7YXZe8s-llZSgc0UenEwPG-82eE279oOy6r4_NltoV1HB3uu0YjUJPlkqAPnHuSfAA7-8A3XAAVHhRQvFPea1qZLc4-oD24AcU0FjWqDMILEyE8zaD2ci8zEQBMoxcf2qmj0wn9cfbZwQ
Add this token to the previous login page

Browsing Kubernetes Dashboard
eg. Cluster –> Nodes

Nginx App
Before finishing this blog post, I would also like to share how to install a simple nginx-app as it is customary to do such thing in every new k8s cluster.
But plz excuse me, I will not get into much details.
You should be able to understand the below k8s commands.
Install nginx-app
kubectl create deployment nginx-app --image=nginx --replicas=2
deployment.apps/nginx-app createdGet Deployment
kubectl get deployment nginx-app -o wideNAME READY UP-TO-DATE AVAILABLE AGE CONTAINERS IMAGES SELECTOR
nginx-app 2/2 2 2 64s nginx nginx app=nginx-appExpose Nginx-App
kubectl expose deployment nginx-app --type=NodePort --port=80
service/nginx-app exposedVerify Service nginx-app
kubectl get svc nginx-app -o wide
NAME        TYPE       CLUSTER-IP      EXTERNAL-IP   PORT(S)        AGE   SELECTOR
nginx-app   NodePort   10.98.170.185   <none>        80:31761/TCP   27s   app=nginx-app
Describe Service nginx-app
kubectl describe svc nginx-app
Name:                     nginx-app
Namespace:                default
Labels:                   app=nginx-app
Annotations:              <none>
Selector:                 app=nginx-app
Type:                     NodePort
IP Family Policy:         SingleStack
IP Families:              IPv4
IP:                       10.98.170.185
IPs:                      10.98.170.185
Port:                     <unset>  80/TCP
TargetPort:               80/TCP
NodePort:                 <unset>  31761/TCP
Endpoints:                10.244.1.10:80,10.244.2.10:80
Session Affinity:         None
External Traffic Policy:  Cluster
Events:                   <none>
Curl Nginx-App
curl http://192.168.122.8:31761
<!DOCTYPE html>
<html>
<head>
<title>Welcome to nginx!</title>
<style>
html { color-scheme: light dark; }
body { width: 35em; margin: 0 auto;
font-family: Tahoma, Verdana, Arial, sans-serif; }
</style>
</head>
<body>
<h1>Welcome to nginx!</h1>
<p>If you see this page, the nginx web server is successfully installed and
working. Further configuration is required.</p>

<p>For online documentation and support please refer to
<a href="http://nginx.org/">nginx.org</a>.<br/>
Commercial support is available at
<a href="http://nginx.com/">nginx.com</a>.</p>

<p><em>Thank you for using nginx.</em></p>
</body>
</html>
Nginx-App from Browser

That’s it !
I hope you enjoyed this blog post.
-ebal
./destroy.sh...
libvirt_domain.domain-ubuntu["k8wrknode1"]: Destroying... [id=446cae2a-ce14-488f-b8e9-f44839091bce]
libvirt_domain.domain-ubuntu["k8scpnode"]: Destroying... [id=51e12abb-b14b-4ab8-b098-c1ce0b4073e3]
time_sleep.wait_for_cloud_init: Destroying... [id=2022-08-30T18:02:06Z]
libvirt_domain.domain-ubuntu["k8wrknode2"]: Destroying... [id=0767fb62-4600-4bc8-a94a-8e10c222b92e]
time_sleep.wait_for_cloud_init: Destruction complete after 0s
libvirt_domain.domain-ubuntu["k8wrknode1"]: Destruction complete after 1s
libvirt_domain.domain-ubuntu["k8scpnode"]: Destruction complete after 1s
libvirt_domain.domain-ubuntu["k8wrknode2"]: Destruction complete after 1s
libvirt_cloudinit_disk.cloud-init["k8wrknode1"]: Destroying... [id=/var/lib/libvirt/images/Jpw2Sg_cloud-init.iso;b8ddfa73-a770-46de-ad16-b0a5a08c8550]
libvirt_cloudinit_disk.cloud-init["k8wrknode2"]: Destroying... [id=/var/lib/libvirt/images/VdUklQ_cloud-init.iso;5511ed7f-a864-4d3f-985a-c4ac07eac233]
libvirt_volume.ubuntu-base["k8scpnode"]: Destroying... [id=/var/lib/libvirt/images/l5Rr1w_ubuntu-base]
libvirt_volume.ubuntu-base["k8wrknode2"]: Destroying... [id=/var/lib/libvirt/images/VdUklQ_ubuntu-base]
libvirt_cloudinit_disk.cloud-init["k8scpnode"]: Destroying... [id=/var/lib/libvirt/images/l5Rr1w_cloud-init.iso;11ef6bb7-a688-4c15-ae33-10690500705f]
libvirt_volume.ubuntu-base["k8wrknode1"]: Destroying... [id=/var/lib/libvirt/images/Jpw2Sg_ubuntu-base]
libvirt_cloudinit_disk.cloud-init["k8wrknode1"]: Destruction complete after 1s
libvirt_volume.ubuntu-base["k8wrknode2"]: Destruction complete after 1s
libvirt_cloudinit_disk.cloud-init["k8scpnode"]: Destruction complete after 1s
libvirt_cloudinit_disk.cloud-init["k8wrknode2"]: Destruction complete after 1s
libvirt_volume.ubuntu-base["k8wrknode1"]: Destruction complete after 1s
libvirt_volume.ubuntu-base["k8scpnode"]: Destruction complete after 2s
libvirt_volume.ubuntu-vol["k8wrknode1"]: Destroying... [id=/var/lib/libvirt/images/Jpw2Sg_ubuntu-vol]
libvirt_volume.ubuntu-vol["k8scpnode"]: Destroying... [id=/var/lib/libvirt/images/l5Rr1w_ubuntu-vol]
libvirt_volume.ubuntu-vol["k8wrknode2"]: Destroying... [id=/var/lib/libvirt/images/VdUklQ_ubuntu-vol]
libvirt_volume.ubuntu-vol["k8scpnode"]: Destruction complete after 0s
libvirt_volume.ubuntu-vol["k8wrknode2"]: Destruction complete after 0s
libvirt_volume.ubuntu-vol["k8wrknode1"]: Destruction complete after 0s
random_id.id["k8scpnode"]: Destroying... [id=l5Rr1w]
random_id.id["k8wrknode2"]: Destroying... [id=VdUklQ]
random_id.id["k8wrknode1"]: Destroying... [id=Jpw2Sg]
random_id.id["k8wrknode2"]: Destruction complete after 0s
random_id.id["k8scpnode"]: Destruction complete after 0s
random_id.id["k8wrknode1"]: Destruction complete after 0s
Destroy complete! Resources: 16 destroyed.
In this blog post, I’ll try to share my personal notes on how to setup a kubernetes cluster with kubeadm on ubuntu 22.04 LTS Virtual Machines.
I am going to use three (3) Virtual Machines in my local lab. My home lab is based on libvirt Qemu/KVM (Kernel-based Virtual Machine) and I run Terraform as the infrastructure provision tool.
There is a copy of this blog post to github.
https://github.com/ebal/k8s_cluster
If you notice something wrong you can either contact me via the contact page, or open a PR in the github project.
you can also follow me at twitter: https://twitter.com/ebalaskas
Kubernetes, also known as K8s, is an open-source system for automating deployment, scaling, and management of containerized applications.
- Prerequisites
- Git Terraform Code for the kubernetes cluster
- Control-Plane Node
- Ports on the control-plane node
- Firewall on the control-plane node
- Hosts file in the control-plane node
- No Swap on the control-plane node
- Kernel modules on the control-plane node
- NeedRestart on the control-plane node
- Installing a Container Runtime on the control-plane node
- Installing kubeadm, kubelet and kubectl on the control-plane node
- Initializing the control-plane node
- Create user access config to the k8s control-plane node
- Verify the control-plane node
- Install an overlay network provider on the control-plane node
- Verify CoreDNS is running on the control-plane node
- Worker Nodes
- Ports on the worker nodes
- Firewall on the worker nodes
- Hosts file in the worker node
- No Swap on the worker node
- Kernel modules on the worker node
- NeedRestart on the worker node
- Installing a Container Runtime on the worker node
- Installing kubeadm, kubelet and kubectl on the worker node
- Get Token from the control-plane node
- Get Certificate Hash from the control-plane node
- Join Workers to the kubernetes cluster
- Is the kubernetes cluster running ?
- Kubernetes Dashboard
- Install kubernetes dashboard
- Add a Node Port to kubernetes dashboard
- Patch kubernetes-dashboard
- Edit kubernetes-dashboard Service
- Accessing Kubernetes Dashboard
- Create An Authentication Token (RBAC)
- Creating a Service Account
- Creating a ClusterRoleBinding
- Getting a Bearer Token
- Browsing Kubernetes Dashboard
- Nginx App
- That’s it !
Prerequisites
- at least 3 Virtual Machines of Ubuntu 22.04 (one for control-plane, two for worker nodes)
- 2GB (or more) of RAM on each Virtual Machine
- 2 CPUs (or more) on each Virtual Machine
- 20Gb of hard disk on each Virtual Machine
- No SWAP partition/image/file on each Virtual Machine
Git Terraform Code for the kubernetes cluster
I prefer to have a reproducible infrastructure, so I can very fast create and destroy my test lab. My preferable way of doing things is testing on each step, so I pretty much destroy everything, coping and pasting commands and keep on. I use terraform for the create the infrastructure. You can find the code for the entire kubernetes cluster here: k8s cluster - Terraform code.
If you do not use terraform, skip this step!
You can git clone the repo to review and edit it according to your needs.
git clone https://github.com/ebal/k8s_cluster.git
cd tf_libvirt
You will need to make appropriate changes. Open Variables.tf for that. The most important option to change, is the User option. Change it to your github username and it will download and setup the VMs with your public key, instead of mine!
But pretty much, everything else should work out of the box. Change the vmem and vcpu settings to your needs.
Init terraform before running the below shell script.
terraform init
and then run
./start.sh
output should be something like:
...
Apply complete! Resources: 16 added, 0 changed, 0 destroyed.

Outputs:

VMs = [
  "192.168.122.169  k8scpnode",
  "192.168.122.40   k8wrknode1",
  "192.168.122.8    k8wrknode2",
]
Verify that you have ssh access to the VMs
eg.
ssh -l ubuntu 192.168.122.169
replace the IP with what the output gave you.
Ubuntu 22.04 Image
If you noticed in the terraform code, I have the below declaration as the cloud image:
../jammy-server-cloudimg-amd64.img
that means, I’ve already downloaded it, in the upper directory to speed things up!
cd ../
curl -sLO https://cloud-images.ubuntu.com/jammy/current/focal-server-cloudimg-amd64.img
cd -
Control-Plane Node
Let’s us now start the configure of the k8s control-plane node.
Ports on the control-plane node
Kubernetes runs a few services that needs to be accessable from the worker nodes.
| Protocol | Direction | Port Range | Purpose | Used By |
|---|---|---|---|---|
| TCP | Inbound | 6443 | Kubernetes API server | All |
| TCP | Inbound | 2379-2380 | etcd server client API | kube-apiserver, etcd |
| TCP | Inbound | 10250 | Kubelet API | Self, Control plane |
| TCP | Inbound | 10259 | kube-scheduler | Self |
| TCP | Inbound | 10257 | kube-controller-manager | Self |
Although etcd ports are included in control plane section, you can also host your
own etcd cluster externally or on custom ports.
Firewall on the control-plane node
We need to open the necessary ports on the CP’s (control-plane node) firewall.
sudo ufw allow 6443/tcp
sudo ufw allow 2379:2380/tcp
sudo ufw allow 10250/tcp
sudo ufw allow 10259/tcp
sudo ufw allow 10257/tcp

#sudo ufw disable
sudo ufw status
the output should be
To                         Action      From
--                         ------      ----
22/tcp                     ALLOW       Anywhere
6443/tcp                   ALLOW       Anywhere
2379:2380/tcp              ALLOW       Anywhere
10250/tcp                  ALLOW       Anywhere
10259/tcp                  ALLOW       Anywhere
10257/tcp                  ALLOW       Anywhere
22/tcp (v6)                ALLOW       Anywhere (v6)
6443/tcp (v6)              ALLOW       Anywhere (v6)
2379:2380/tcp (v6)         ALLOW       Anywhere (v6)
10250/tcp (v6)             ALLOW       Anywhere (v6)
10259/tcp (v6)             ALLOW       Anywhere (v6)
10257/tcp (v6)             ALLOW       Anywhere (v6)
Hosts file in the control-plane node
We need to update the /etc/hosts with the internal IP and hostname.
This will help when it is time to join the worker nodes.
echo $(hostname -I) $(hostname) | sudo tee -a /etc/hosts
Just a reminder: we need to update the hosts file to all the VMs.
To include all the VMs’ IPs and hostnames.
If you already know them, then your /etc/hosts file should look like this:
192.168.122.169  k8scpnode
192.168.122.40   k8wrknode1
192.168.122.8    k8wrknode2
replace the IPs to yours.
No Swap on the control-plane node
Be sure that SWAP is disabled in all virtual machines!
sudo swapoff -a
and the fstab file should not have any swap entry.
The below command should return nothing.
sudo grep -i swap /etc/fstab
If not, edit the /etc/fstab and remove the swap entry.
If you follow my terraform k8s code example from the above github repo,
you will notice that there isn’t any swap entry in the cloud init (user-data) file.
Nevertheless it is always a good thing to douple check.
Kernel modules on the control-plane node
We need to load the below kernel modules on all k8s nodes, so k8s can create some network magic!
- overlay
- br_netfilter
Run the below bash snippet that will do that, and also will enable the forwarding features of the network.
sudo tee /etc/modules-load.d/kubernetes.conf <<EOF
overlay
br_netfilter
EOF

sudo modprobe overlay
sudo modprobe br_netfilter

sudo lsmod | grep netfilter

sudo tee /etc/sysctl.d/kubernetes.conf <<EOF
net.bridge.bridge-nf-call-ip6tables = 1
net.bridge.bridge-nf-call-iptables = 1
net.ipv4.ip_forward = 1
EOF

sudo sysctl --system
NeedRestart on the control-plane node
Before installing any software, we need to make a tiny change to needrestart program. This will help with the automation of installing packages and will stop asking -via dialog- if we would like to restart the services!
echo "\$nrconf{restart} = 'a';" | sudo tee -a /etc/needrestart/needrestart.conf
Installing a Container Runtime on the control-plane node
It is time to choose which container runtime we are going to use on our k8s cluster. There are a few container runtimes for k8s and in the past docker were used to. Nowadays the most common runtime is the containerd that can also uses the cgroup v2 kernel features. There is also a docker-engine runtime via CRI. Read here for more details on the subject.
curl -sL https://download.docker.com/linux/ubuntu/gpg | sudo gpg --dearmor -o /etc/apt/trusted.gpg.d/docker-keyring.gpg

sudo apt-add-repository -y "deb https://download.docker.com/linux/ubuntu jammy stable"

sleep 5

sudo apt -y install containerd.io

containerd config default                              \
 | sed 's/SystemdCgroup = false/SystemdCgroup = true/' \
 | sudo tee /etc/containerd/config.toml

sudo systemctl restart containerd.service
We have also enabled the
systemd cgroup driverso the control-plane node can use the cgroup v2 features.
Installing kubeadm, kubelet and kubectl on the control-plane node
Install the kubernetes packages (kubedam, kubelet and kubectl) by first adding the k8s repository on our virtual machine. To speed up the next step, we will also download the configuration container images.
sudo curl -sLo /etc/apt/trusted.gpg.d/kubernetes-keyring.gpg https://packages.cloud.google.com/apt/doc/apt-key.gpg

sudo apt-add-repository -y "deb http://apt.kubernetes.io/ kubernetes-xenial main"

sleep 5

sudo apt install -y kubelet kubeadm kubectl

sudo kubeadm config images pull
Initializing the control-plane node
We can now initialize our control-plane node for our kubernetes cluster.
There are a few things we need to be careful about:
- We can specify the control-plane-endpoint if we are planning to have a high available k8s cluster. (we will skip this for now),
- Choose a Pod network add-on (next section) but be aware that CoreDNS (DNS and Service Discovery) will not run till then (later),
- define where is our container runtime socket (we will skip it)
- advertise the API server (we will skip it)
But we will define our Pod Network CIDR to the default value of the Pod network add-on so everything will go smoothly later on.
sudo kubeadm init --pod-network-cidr=10.244.0.0/16
Keep the output in a notepad.
Create user access config to the k8s control-plane node
Our k8s control-plane node is running, so we need to have credentials to access it.
The kubectl reads a configuration file (that has the token), so we copying this from k8s admin.
rm -rf $HOME/.kube

mkdir -p $HOME/.kube

sudo cp -i /etc/kubernetes/admin.conf $HOME/.kube/config

sudo chown $(id -u):$(id -g) $HOME/.kube/config

ls -la $HOME/.kube/config

alias k="kubectl"
Verify the control-plane node
Verify that the kubernets is running.
That means we have a k8s cluster - but only the control-plane node is running.
kubectl cluster-info
#kubectl cluster-info dump

k get nodes -o wide; k get pods  -A -o wide
Install an overlay network provider on the control-plane node
As I mentioned above, in order to use the DNS and Service Discovery services in the kubernetes (CoreDNS) we need to install a Container Network Interface (CNI) based Pod network add-on so that your Pods can communicate with each other.
We will use flannel as the simplest of them.
k apply -f https://raw.githubusercontent.com/coreos/flannel/master/Documentation/kube-flannel.yml
Verify CoreDNS is running on the control-plane node
Verify that the control-plane node is Up & Running and the control-plane pods (as coredns pods) are also running
$ k get nodes -o wide

NAME        STATUS   ROLES           AGE   VERSION   INTERNAL-IP       EXTERNAL-IP   OS-IMAGE             KERNEL-VERSION      CONTAINER-RUNTIME
k8scpnode   Ready    control-plane   54s   v1.25.0   192.168.122.169   <none>        Ubuntu 22.04.1 LTS   5.15.0-46-generic   containerd://1.6.8
$ k get pods -A -o wide

NAMESPACE    NAME                              READY STATUS  RESTARTS AGE IP              NODE      NOMINATED NODE READINESS GATES
kube-flannel kube-flannel-ds-zqv2b             1/1   Running 0        36s 192.168.122.169 k8scpnode <none>         <none>
kube-system  coredns-565d847f94-lg54q          1/1   Running 0        38s 10.244.0.2      k8scpnode <none>         <none>
kube-system  coredns-565d847f94-ms8zk          1/1   Running 0        38s 10.244.0.3      k8scpnode <none>         <none>
kube-system  etcd-k8scpnode                    1/1   Running 0        50s 192.168.122.169 k8scpnode <none>         <none>
kube-system  kube-apiserver-k8scpnode          1/1   Running 0        50s 192.168.122.169 k8scpnode <none>         <none>
kube-system  kube-controller-manager-k8scpnode 1/1   Running 0        50s 192.168.122.169 k8scpnode <none>         <none>
kube-system  kube-proxy-pv7tj                  1/1   Running 0        39s 192.168.122.169 k8scpnode <none>         <none>
kube-system  kube-scheduler-k8scpnode          1/1   Running 0        50s 192.168.122.169 k8scpnode <none>         <none>
That’s it with the control-plane node !
Worker Nodes
The below instructions works pretty much the same on both worker nodes.
I will document the steps for the worker1 node but do the same for the worker2 node.
Ports on the worker nodes
As we learned above on the control-plane section, kubernetes runs a few services
| Protocol | Direction | Port Range | Purpose | Used By |
|---|---|---|---|---|
| TCP | Inbound | 10250 | Kubelet API | Self, Control plane |
| TCP | Inbound | 30000-32767 | NodePort Services | All |
Firewall on the worker nodes
so we need to open the necessary ports on the worker nodes too.
sudo ufw allow 10250/tcp
sudo ufw allow 30000:32767/tcp

sudo ufw status
output should look like
To                         Action      From
--                         ------      ----
22/tcp                     ALLOW       Anywhere
10250/tcp                  ALLOW       Anywhere
30000:32767/tcp            ALLOW       Anywhere
22/tcp (v6)                ALLOW       Anywhere (v6)
10250/tcp (v6)             ALLOW       Anywhere (v6)
30000:32767/tcp (v6)       ALLOW       Anywhere (v6)
The next few steps are pretty much exactly the same as in the control-plane node.
In order to keep this documentation short, I’ll just copy/paste the commands.
Hosts file in the worker node
Update the /etc/hosts file to include the IPs and hostname of all VMs.
192.168.122.169  k8scpnode
192.168.122.40   k8wrknode1
192.168.122.8    k8wrknode2
No Swap on the worker node
sudo swapoff -a
Kernel modules on the worker node
sudo tee /etc/modules-load.d/kubernetes.conf <<EOF
overlay
br_netfilter
EOF

sudo modprobe overlay
sudo modprobe br_netfilter

sudo lsmod | grep netfilter

sudo tee /etc/sysctl.d/kubernetes.conf <<EOF
net.bridge.bridge-nf-call-ip6tables = 1
net.bridge.bridge-nf-call-iptables = 1
net.ipv4.ip_forward = 1
EOF

sudo sysctl --system
NeedRestart on the worker node
echo "\$nrconf{restart} = 'a';" | sudo tee -a /etc/needrestart/needrestart.conf
Installing a Container Runtime on the worker node
curl -sL https://download.docker.com/linux/ubuntu/gpg | sudo gpg --dearmor -o /etc/apt/trusted.gpg.d/docker-keyring.gpg

sudo apt-add-repository -y "deb https://download.docker.com/linux/ubuntu jammy stable"

sleep 5

sudo apt -y install containerd.io

containerd config default                              \
 | sed 's/SystemdCgroup = false/SystemdCgroup = true/' \
 | sudo tee /etc/containerd/config.toml

sudo systemctl restart containerd.service
Installing kubeadm, kubelet and kubectl on the worker node
sudo curl -sLo /etc/apt/trusted.gpg.d/kubernetes-keyring.gpg https://packages.cloud.google.com/apt/doc/apt-key.gpg

sudo apt-add-repository -y "deb http://apt.kubernetes.io/ kubernetes-xenial main"

sleep 5

sudo apt install -y kubelet kubeadm kubectl

sudo kubeadm config images pull
Get Token from the control-plane node
To join nodes to the kubernetes cluster, we need to have a couple of things.
- a token from control-plane node
- the CA certificate hash from the contol-plane node.
If you didnt keep the output the initialization of the control-plane node, that’s okay.
Run the below command in the control-plane node.
sudo kubeadm token list
and we will get the initial token that expires after 24hours.
TOKEN                     TTL         EXPIRES                USAGES                   DESCRIPTION                                                EXTRA GROUPS
zt36bp.uht4cziweef1jo1h   23h         2022-08-31T18:38:16Z   authentication,signing   The default bootstrap token generated by 'kubeadm init'.   system:bootstrappers:kubeadm:default-node-token
In this case is the
zt36bp.uht4cziweef1jo1hGet Certificate Hash from the control-plane node
To get the CA certificate hash from the control-plane-node, we need to run a complicated command:
openssl x509 -pubkey -in /etc/kubernetes/pki/ca.crt | openssl rsa -pubin -outform der 2>/dev/null | openssl dgst -sha256 -hex | sed 's/^.* //'
and in my k8s cluster is:
a4833f8c82953370610efaa5ed93b791337232c3a948b710b2435d747889c085Join Workers to the kubernetes cluster
So now, we can Join our worker nodes to the kubernetes cluster.
Run the below command on both worker nodes:
sudo kubeadm join 192.168.122.169:6443 \
       --token zt36bp.uht4cziweef1jo1h \
       --discovery-token-ca-cert-hash sha256:a4833f8c82953370610efaa5ed93b791337232c3a948b710b2435d747889c085
we get this message
Run ‘kubectl get nodes’ on the control-plane to see this node join the cluster.
Is the kubernetes cluster running ?
We can verify that
kubectl get nodes   -o wide
kubectl get pods -A -o wide
NAME         STATUS   ROLES           AGE     VERSION   INTERNAL-IP       EXTERNAL-IP   OS-IMAGE             KERNEL-VERSION      CONTAINER-RUNTIME
k8scpnode    Ready    control-plane   64m     v1.25.0   192.168.122.169   <none>        Ubuntu 22.04.1 LTS   5.15.0-46-generic   containerd://1.6.8
k8wrknode1   Ready    <none>          2m32s   v1.25.0   192.168.122.40    <none>        Ubuntu 22.04.1 LTS   5.15.0-46-generic   containerd://1.6.8
k8wrknode2   Ready    <none>          2m28s   v1.25.0   192.168.122.8     <none>        Ubuntu 22.04.1 LTS   5.15.0-46-generic   containerd://1.6.8
NAMESPACE NAME READY STATUS RESTARTS AGE IP NODE NOMINATED NODE READINESS GATES
kube-flannel kube-flannel-ds-52g92 1/1 Running 0 2m32s 192.168.122.40 k8wrknode1 <none> <none>
kube-flannel kube-flannel-ds-7qlm7 1/1 Running 0 2m28s 192.168.122.8 k8wrknode2 <none> <none>
kube-flannel kube-flannel-ds-zqv2b 1/1 Running 0 64m 192.168.122.169 k8scpnode <none> <none>
kube-system coredns-565d847f94-lg54q 1/1 Running 0 64m 10.244.0.2 k8scpnode <none> <none>
kube-system coredns-565d847f94-ms8zk 1/1 Running 0 64m 10.244.0.3 k8scpnode <none> <none>
kube-system etcd-k8scpnode 1/1 Running 0 64m 192.168.122.169 k8scpnode <none> <none>
kube-system kube-apiserver-k8scpnode 1/1 Running 0 64m 192.168.122.169 k8scpnode <none> <none>
kube-system kube-controller-manager-k8scpnode 1/1 Running 1 (12m ago) 64m 192.168.122.169 k8scpnode <none> <none>
kube-system kube-proxy-4khw6 1/1 Running 0 2m32s 192.168.122.40 k8wrknode1 <none> <none>
kube-system kube-proxy-gm27l 1/1 Running 0 2m28s 192.168.122.8 k8wrknode2 <none> <none>
kube-system kube-proxy-pv7tj 1/1 Running 0 64m 192.168.122.169 k8scpnode <none> <none>
kube-system kube-scheduler-k8scpnode 1/1 Running 1 (12m ago) 64m 192.168.122.169 k8scpnode <none> <none>
That’s it !
Our k8s cluster is running.
Kubernetes Dashboard
is a general purpose, web-based UI for Kubernetes clusters. It allows users to manage applications running in the cluster and troubleshoot them, as well as manage the cluster itself.
We can proceed by installing a k8s dashboard to our k8s cluster.
Install kubernetes dashboard
One simple way to install the kubernetes-dashboard, is by applying the latest (as of this writing) yaml configuration file.
kubectl apply -f https://raw.githubusercontent.com/kubernetes/dashboard/v2.6.1/aio/deploy/recommended.yaml
the output of the above command should be something like
namespace/kubernetes-dashboard created
serviceaccount/kubernetes-dashboard created
service/kubernetes-dashboard created
secret/kubernetes-dashboard-certs created
secret/kubernetes-dashboard-csrf created
secret/kubernetes-dashboard-key-holder created
configmap/kubernetes-dashboard-settings created
role.rbac.authorization.k8s.io/kubernetes-dashboard created
clusterrole.rbac.authorization.k8s.io/kubernetes-dashboard created
rolebinding.rbac.authorization.k8s.io/kubernetes-dashboard created
clusterrolebinding.rbac.authorization.k8s.io/kubernetes-dashboard created
deployment.apps/kubernetes-dashboard created
service/dashboard-metrics-scraper created
deployment.apps/dashboard-metrics-scraper created
Verify the installation
kubectl get all -n kubernetes-dashboard
NAME                                             READY   STATUS    RESTARTS   AGE
pod/dashboard-metrics-scraper-64bcc67c9c-kvll7   1/1     Running   0          2m16s
pod/kubernetes-dashboard-66c887f759-rr4gn        1/1     Running   0          2m16s

NAME                                TYPE        CLUSTER-IP      EXTERNAL-IP   PORT(S)    AGE
service/dashboard-metrics-scraper   ClusterIP   10.110.25.61    <none>        8000/TCP   2m16s
service/kubernetes-dashboard        ClusterIP   10.100.65.122   <none>        443/TCP    2m16s

NAME                                        READY   UP-TO-DATE   AVAILABLE   AGE
deployment.apps/dashboard-metrics-scraper   1/1     1            1           2m16s
deployment.apps/kubernetes-dashboard        1/1     1            1           2m16s

NAME                                                   DESIRED   CURRENT   READY   AGE
replicaset.apps/dashboard-metrics-scraper-64bcc67c9c   1         1         1       2m16s
replicaset.apps/kubernetes-dashboard-66c887f759        1         1         1       2m16s
Add a Node Port to kubernetes dashboard
Kubernetes Dashboard by default runs on a internal 10.x.x.x IP.
To access the dashboard we need to have a NodePort in the kubernetes-dashboard service.
We can either Patch the service or edit the yaml file.
Patch kubernetes-dashboard
kubectl --namespace kubernetes-dashboard patch svc kubernetes-dashboard -p '{"spec": {"type": "NodePort"}}'
output
service/kubernetes-dashboard patched
verify the service
kubectl get svc -n kubernetes-dashboard
NAME                        TYPE        CLUSTER-IP      EXTERNAL-IP   PORT(S)         AGE
dashboard-metrics-scraper   ClusterIP   10.110.25.61    <none>        8000/TCP        11m
kubernetes-dashboard        NodePort    10.100.65.122   <none>        443:32709/TCP   11m
we can see the 30480 in the kubernetes-dashboard.
Edit kubernetes-dashboard Service
kubectl edit svc -n kubernetes-dashboard kubernetes-dashboard
and chaning the service type from
type: ClusterIPto
type: NodePortAccessing Kubernetes Dashboard
The kubernetes-dashboard has two (2) pods, one (1) for metrics, one (2) for the dashboard.
To access the dashboard, first we need to identify in which Node is running.
kubectl get pods -n kubernetes-dashboard -o wide
NAME                                         READY   STATUS    RESTARTS   AGE     IP           NODE         NOMINATED NODE   READINESS GATES
dashboard-metrics-scraper-64bcc67c9c-fs7pt   1/1     Running   0          2m43s   10.244.1.9   k8wrknode1   <none>           <none>
kubernetes-dashboard-66c887f759-pzt4z        1/1     Running   0          2m44s   10.244.2.9   k8wrknode2   <none>           <none>
In my setup the dashboard pod is running on the worker node 2 and from the /etc/hosts is on the 192.168.122.8 IP.
The NodePort is 32709
k get svc -n kubernetes-dashboard -o wide
So, we can open a new tab on our browser and type:
https://192.168.122.8:32709
and accept the self-signed certificate!

Create An Authentication Token (RBAC)
Last step for the kubernetes-dashboard is to create an authentication token.
Creating a Service Account
Create a new yaml file, with kind: ServiceAccount that has access to kubernetes-dashboard namespace and has name: admin-user.
cat > kubernetes-dashboard.ServiceAccount.yaml <<EOF
apiVersion: v1
kind: ServiceAccount
metadata:
  name: admin-user
  namespace: kubernetes-dashboard

EOF
add this service account to the k8s cluster
kubectl apply -f kubernetes-dashboard.ServiceAccount.yaml
output
serviceaccount/admin-user createdCreating a ClusterRoleBinding
We need to bind the Service Account with the kubernetes-dashboard via Role-based access control.
cat > kubernetes-dashboard.ClusterRoleBinding.yaml <<EOF
apiVersion: rbac.authorization.k8s.io/v1
kind: ClusterRoleBinding
metadata:
  name: admin-user
roleRef:
  apiGroup: rbac.authorization.k8s.io
  kind: ClusterRole
  name: cluster-admin
subjects:
- kind: ServiceAccount
  name: admin-user
  namespace: kubernetes-dashboard

EOF
apply this yaml file
kubectl apply -f kubernetes-dashboard.ClusterRoleBinding.yaml
clusterrolebinding.rbac.authorization.k8s.io/admin-user created
That means, our Service Account User has all the necessary roles to access the kubernetes-dashboard.
Getting a Bearer Token
Final step is to create/get a token for our user.
kubectl -n kubernetes-dashboard create token admin-user
eyJhbGciOiJSUzI1NiIsImtpZCI6Im04M2JOY2k1Yk1hbFBhLVN2cjA4X1pkdktXNldqWkR4bjB6MGpTdFgtVHcifQ.eyJhdWQiOlsiaHR0cHM6Ly9rdWJlcm5ldGVzLmRlZmF1bHQuc3ZjLmNsdXN0ZXIubG9jYWwiXSwiZXhwIjoxNjYxOTU2NDQ1LCJpYXQiOjE2NjE5NTI4NDUsImlzcyI6Imh0dHBzOi8va3ViZXJuZXRlcy5kZWZhdWx0LnN2Yy5jbHVzdGVyLmxvY2FsIiwia3ViZXJuZXRlcy5pbyI6eyJuYW1lc3BhY2UiOiJrdWJlcm5ldGVzLWRhc2hib2FyZCIsInNlcnZpY2VhY2NvdW50Ijp7Im5hbWUiOiJhZG1pbi11c2VyIiwidWlkIjoiN2M4OWIyZDktMGIwYS00ZDg4LTk2Y2EtZDU3NjhjOWU2ZGYxIn19LCJuYmYiOjE2NjE5NTI4NDUsInN1YiI6InN5c3RlbTpzZXJ2aWNlYWNjb3VudDprdWJlcm5ldGVzLWRhc2hib2FyZDphZG1pbi11c2VyIn0.RMRQkZZhcoC5vCvck6hKfqXJ4dfN4JoQyAaClHZvOMI6JgQZEfB2-_Qsh5MfFApJUEit-0TX9r3CzW3JqvB7dmpTPxUQvHK68r82WGveBVp1wF37UyXu_IzxiCQzpCWYr3GcVGAGZVBbhhqNYm765FV02ZA_khHrW3WpB80ikhm_TNLkOS6Llq2UiLFZyHHmjl5pwvGzT7YXZe8s-llZSgc0UenEwPG-82eE279oOy6r4_NltoV1HB3uu0YjUJPlkqAPnHuSfAA7-8A3XAAVHhRQvFPea1qZLc4-oD24AcU0FjWqDMILEyE8zaD2ci8zEQBMoxcf2qmj0wn9cfbZwQ
Add this token to the previous login page

Browsing Kubernetes Dashboard
eg. Cluster –> Nodes

Nginx App
Before finishing this blog post, I would also like to share how to install a simple nginx-app as it is customary to do such thing in every new k8s cluster.
But plz excuse me, I will not get into much details.
You should be able to understand the below k8s commands.
Install nginx-app
kubectl create deployment nginx-app --image=nginx --replicas=2
deployment.apps/nginx-app createdGet Deployment
kubectl get deployment nginx-app -o wideNAME READY UP-TO-DATE AVAILABLE AGE CONTAINERS IMAGES SELECTOR
nginx-app 2/2 2 2 64s nginx nginx app=nginx-appExpose Nginx-App
kubectl expose deployment nginx-app --type=NodePort --port=80
service/nginx-app exposedVerify Service nginx-app
kubectl get svc nginx-app -o wide
NAME        TYPE       CLUSTER-IP      EXTERNAL-IP   PORT(S)        AGE   SELECTOR
nginx-app   NodePort   10.98.170.185   <none>        80:31761/TCP   27s   app=nginx-app
Describe Service nginx-app
kubectl describe svc nginx-app
Name:                     nginx-app
Namespace:                default
Labels:                   app=nginx-app
Annotations:              <none>
Selector:                 app=nginx-app
Type:                     NodePort
IP Family Policy:         SingleStack
IP Families:              IPv4
IP:                       10.98.170.185
IPs:                      10.98.170.185
Port:                     <unset>  80/TCP
TargetPort:               80/TCP
NodePort:                 <unset>  31761/TCP
Endpoints:                10.244.1.10:80,10.244.2.10:80
Session Affinity:         None
External Traffic Policy:  Cluster
Events:                   <none>
Curl Nginx-App
curl http://192.168.122.8:31761
<!DOCTYPE html>
<html>
<head>
<title>Welcome to nginx!</title>
<style>
html { color-scheme: light dark; }
body { width: 35em; margin: 0 auto;
font-family: Tahoma, Verdana, Arial, sans-serif; }
</style>
</head>
<body>
<h1>Welcome to nginx!</h1>
<p>If you see this page, the nginx web server is successfully installed and
working. Further configuration is required.</p>

<p>For online documentation and support please refer to
<a href="http://nginx.org/">nginx.org</a>.<br/>
Commercial support is available at
<a href="http://nginx.com/">nginx.com</a>.</p>

<p><em>Thank you for using nginx.</em></p>
</body>
</html>
Nginx-App from Browser

That’s it !
I hope you enjoyed this blog post.
-ebal
./destroy.sh...
libvirt_domain.domain-ubuntu["k8wrknode1"]: Destroying... [id=446cae2a-ce14-488f-b8e9-f44839091bce]
libvirt_domain.domain-ubuntu["k8scpnode"]: Destroying... [id=51e12abb-b14b-4ab8-b098-c1ce0b4073e3]
time_sleep.wait_for_cloud_init: Destroying... [id=2022-08-30T18:02:06Z]
libvirt_domain.domain-ubuntu["k8wrknode2"]: Destroying... [id=0767fb62-4600-4bc8-a94a-8e10c222b92e]
time_sleep.wait_for_cloud_init: Destruction complete after 0s
libvirt_domain.domain-ubuntu["k8wrknode1"]: Destruction complete after 1s
libvirt_domain.domain-ubuntu["k8scpnode"]: Destruction complete after 1s
libvirt_domain.domain-ubuntu["k8wrknode2"]: Destruction complete after 1s
libvirt_cloudinit_disk.cloud-init["k8wrknode1"]: Destroying... [id=/var/lib/libvirt/images/Jpw2Sg_cloud-init.iso;b8ddfa73-a770-46de-ad16-b0a5a08c8550]
libvirt_cloudinit_disk.cloud-init["k8wrknode2"]: Destroying... [id=/var/lib/libvirt/images/VdUklQ_cloud-init.iso;5511ed7f-a864-4d3f-985a-c4ac07eac233]
libvirt_volume.ubuntu-base["k8scpnode"]: Destroying... [id=/var/lib/libvirt/images/l5Rr1w_ubuntu-base]
libvirt_volume.ubuntu-base["k8wrknode2"]: Destroying... [id=/var/lib/libvirt/images/VdUklQ_ubuntu-base]
libvirt_cloudinit_disk.cloud-init["k8scpnode"]: Destroying... [id=/var/lib/libvirt/images/l5Rr1w_cloud-init.iso;11ef6bb7-a688-4c15-ae33-10690500705f]
libvirt_volume.ubuntu-base["k8wrknode1"]: Destroying... [id=/var/lib/libvirt/images/Jpw2Sg_ubuntu-base]
libvirt_cloudinit_disk.cloud-init["k8wrknode1"]: Destruction complete after 1s
libvirt_volume.ubuntu-base["k8wrknode2"]: Destruction complete after 1s
libvirt_cloudinit_disk.cloud-init["k8scpnode"]: Destruction complete after 1s
libvirt_cloudinit_disk.cloud-init["k8wrknode2"]: Destruction complete after 1s
libvirt_volume.ubuntu-base["k8wrknode1"]: Destruction complete after 1s
libvirt_volume.ubuntu-base["k8scpnode"]: Destruction complete after 2s
libvirt_volume.ubuntu-vol["k8wrknode1"]: Destroying... [id=/var/lib/libvirt/images/Jpw2Sg_ubuntu-vol]
libvirt_volume.ubuntu-vol["k8scpnode"]: Destroying... [id=/var/lib/libvirt/images/l5Rr1w_ubuntu-vol]
libvirt_volume.ubuntu-vol["k8wrknode2"]: Destroying... [id=/var/lib/libvirt/images/VdUklQ_ubuntu-vol]
libvirt_volume.ubuntu-vol["k8scpnode"]: Destruction complete after 0s
libvirt_volume.ubuntu-vol["k8wrknode2"]: Destruction complete after 0s
libvirt_volume.ubuntu-vol["k8wrknode1"]: Destruction complete after 0s
random_id.id["k8scpnode"]: Destroying... [id=l5Rr1w]
random_id.id["k8wrknode2"]: Destroying... [id=VdUklQ]
random_id.id["k8wrknode1"]: Destroying... [id=Jpw2Sg]
random_id.id["k8wrknode2"]: Destruction complete after 0s
random_id.id["k8scpnode"]: Destruction complete after 0s
random_id.id["k8wrknode1"]: Destruction complete after 0s
Destroy complete! Resources: 16 destroyed.
In this blog post, I’ll try to share my personal notes on how to setup a kubernetes cluster with kubeadm on ubuntu 22.04 LTS Virtual Machines.
I am going to use three (3) Virtual Machines in my local lab. My home lab is based on libvirt Qemu/KVM (Kernel-based Virtual Machine) and I run Terraform as the infrastructure provision tool.
There is a copy of this blog post to github.
https://github.com/ebal/k8s_cluster
If you notice something wrong you can either contact me via the contact page, or open a PR in the github project.
you can also follow me at twitter: https://twitter.com/ebalaskas
Kubernetes, also known as K8s, is an open-source system for automating deployment, scaling, and management of containerized applications.
- Prerequisites
- Git Terraform Code for the kubernetes cluster
- Control-Plane Node
- Ports on the control-plane node
- Firewall on the control-plane node
- Hosts file in the control-plane node
- No Swap on the control-plane node
- Kernel modules on the control-plane node
- NeedRestart on the control-plane node
- Installing a Container Runtime on the control-plane node
- Installing kubeadm, kubelet and kubectl on the control-plane node
- Initializing the control-plane node
- Create user access config to the k8s control-plane node
- Verify the control-plane node
- Install an overlay network provider on the control-plane node
- Verify CoreDNS is running on the control-plane node
- Worker Nodes
- Ports on the worker nodes
- Firewall on the worker nodes
- Hosts file in the worker node
- No Swap on the worker node
- Kernel modules on the worker node
- NeedRestart on the worker node
- Installing a Container Runtime on the worker node
- Installing kubeadm, kubelet and kubectl on the worker node
- Get Token from the control-plane node
- Get Certificate Hash from the control-plane node
- Join Workers to the kubernetes cluster
- Is the kubernetes cluster running ?
- Kubernetes Dashboard
- Install kubernetes dashboard
- Add a Node Port to kubernetes dashboard
- Patch kubernetes-dashboard
- Edit kubernetes-dashboard Service
- Accessing Kubernetes Dashboard
- Create An Authentication Token (RBAC)
- Creating a Service Account
- Creating a ClusterRoleBinding
- Getting a Bearer Token
- Browsing Kubernetes Dashboard
- Nginx App
- That’s it !
Prerequisites
- at least 3 Virtual Machines of Ubuntu 22.04 (one for control-plane, two for worker nodes)
- 2GB (or more) of RAM on each Virtual Machine
- 2 CPUs (or more) on each Virtual Machine
- 20Gb of hard disk on each Virtual Machine
- No SWAP partition/image/file on each Virtual Machine
Git Terraform Code for the kubernetes cluster
I prefer to have a reproducible infrastructure, so I can very fast create and destroy my test lab. My preferable way of doing things is testing on each step, so I pretty much destroy everything, coping and pasting commands and keep on. I use terraform for the create the infrastructure. You can find the code for the entire kubernetes cluster here: k8s cluster - Terraform code.
If you do not use terraform, skip this step!
You can git clone the repo to review and edit it according to your needs.
git clone https://github.com/ebal/k8s_cluster.git
cd tf_libvirt
You will need to make appropriate changes. Open Variables.tf for that. The most important option to change, is the User option. Change it to your github username and it will download and setup the VMs with your public key, instead of mine!
But pretty much, everything else should work out of the box. Change the vmem and vcpu settings to your needs.
Init terraform before running the below shell script.
terraform init
and then run
./start.sh
output should be something like:
...
Apply complete! Resources: 16 added, 0 changed, 0 destroyed.

Outputs:

VMs = [
  "192.168.122.169  k8scpnode",
  "192.168.122.40   k8wrknode1",
  "192.168.122.8    k8wrknode2",
]
Verify that you have ssh access to the VMs
eg.
ssh -l ubuntu 192.168.122.169
replace the IP with what the output gave you.
Ubuntu 22.04 Image
If you noticed in the terraform code, I have the below declaration as the cloud image:
../jammy-server-cloudimg-amd64.img
that means, I’ve already downloaded it, in the upper directory to speed things up!
cd ../
curl -sLO https://cloud-images.ubuntu.com/jammy/current/focal-server-cloudimg-amd64.img
cd -
Control-Plane Node
Let’s us now start the configure of the k8s control-plane node.
Ports on the control-plane node
Kubernetes runs a few services that needs to be accessable from the worker nodes.
| Protocol | Direction | Port Range | Purpose | Used By |
|---|---|---|---|---|
| TCP | Inbound | 6443 | Kubernetes API server | All |
| TCP | Inbound | 2379-2380 | etcd server client API | kube-apiserver, etcd |
| TCP | Inbound | 10250 | Kubelet API | Self, Control plane |
| TCP | Inbound | 10259 | kube-scheduler | Self |
| TCP | Inbound | 10257 | kube-controller-manager | Self |
Although etcd ports are included in control plane section, you can also host your
own etcd cluster externally or on custom ports.
Firewall on the control-plane node
We need to open the necessary ports on the CP’s (control-plane node) firewall.
sudo ufw allow 6443/tcp
sudo ufw allow 2379:2380/tcp
sudo ufw allow 10250/tcp
sudo ufw allow 10259/tcp
sudo ufw allow 10257/tcp

#sudo ufw disable
sudo ufw status
the output should be
To                         Action      From
--                         ------      ----
22/tcp                     ALLOW       Anywhere
6443/tcp                   ALLOW       Anywhere
2379:2380/tcp              ALLOW       Anywhere
10250/tcp                  ALLOW       Anywhere
10259/tcp                  ALLOW       Anywhere
10257/tcp                  ALLOW       Anywhere
22/tcp (v6)                ALLOW       Anywhere (v6)
6443/tcp (v6)              ALLOW       Anywhere (v6)
2379:2380/tcp (v6)         ALLOW       Anywhere (v6)
10250/tcp (v6)             ALLOW       Anywhere (v6)
10259/tcp (v6)             ALLOW       Anywhere (v6)
10257/tcp (v6)             ALLOW       Anywhere (v6)
Hosts file in the control-plane node
We need to update the /etc/hosts with the internal IP and hostname.
This will help when it is time to join the worker nodes.
echo $(hostname -I) $(hostname) | sudo tee -a /etc/hosts
Just a reminder: we need to update the hosts file to all the VMs.
To include all the VMs’ IPs and hostnames.
If you already know them, then your /etc/hosts file should look like this:
192.168.122.169  k8scpnode
192.168.122.40   k8wrknode1
192.168.122.8    k8wrknode2
replace the IPs to yours.
No Swap on the control-plane node
Be sure that SWAP is disabled in all virtual machines!
sudo swapoff -a
and the fstab file should not have any swap entry.
The below command should return nothing.
sudo grep -i swap /etc/fstab
If not, edit the /etc/fstab and remove the swap entry.
If you follow my terraform k8s code example from the above github repo,
you will notice that there isn’t any swap entry in the cloud init (user-data) file.
Nevertheless it is always a good thing to douple check.
Kernel modules on the control-plane node
We need to load the below kernel modules on all k8s nodes, so k8s can create some network magic!
- overlay
- br_netfilter
Run the below bash snippet that will do that, and also will enable the forwarding features of the network.
sudo tee /etc/modules-load.d/kubernetes.conf <<EOF
overlay
br_netfilter
EOF

sudo modprobe overlay
sudo modprobe br_netfilter

sudo lsmod | grep netfilter

sudo tee /etc/sysctl.d/kubernetes.conf <<EOF
net.bridge.bridge-nf-call-ip6tables = 1
net.bridge.bridge-nf-call-iptables = 1
net.ipv4.ip_forward = 1
EOF

sudo sysctl --system
NeedRestart on the control-plane node
Before installing any software, we need to make a tiny change to needrestart program. This will help with the automation of installing packages and will stop asking -via dialog- if we would like to restart the services!
echo "\$nrconf{restart} = 'a';" | sudo tee -a /etc/needrestart/needrestart.conf
Installing a Container Runtime on the control-plane node
It is time to choose which container runtime we are going to use on our k8s cluster. There are a few container runtimes for k8s and in the past docker were used to. Nowadays the most common runtime is the containerd that can also uses the cgroup v2 kernel features. There is also a docker-engine runtime via CRI. Read here for more details on the subject.
curl -sL https://download.docker.com/linux/ubuntu/gpg | sudo gpg --dearmor -o /etc/apt/trusted.gpg.d/docker-keyring.gpg

sudo apt-add-repository -y "deb https://download.docker.com/linux/ubuntu jammy stable"

sleep 5

sudo apt -y install containerd.io

containerd config default                              \
 | sed 's/SystemdCgroup = false/SystemdCgroup = true/' \
 | sudo tee /etc/containerd/config.toml

sudo systemctl restart containerd.service
We have also enabled the
systemd cgroup driverso the control-plane node can use the cgroup v2 features.
Installing kubeadm, kubelet and kubectl on the control-plane node
Install the kubernetes packages (kubedam, kubelet and kubectl) by first adding the k8s repository on our virtual machine. To speed up the next step, we will also download the configuration container images.
sudo curl -sLo /etc/apt/trusted.gpg.d/kubernetes-keyring.gpg https://packages.cloud.google.com/apt/doc/apt-key.gpg

sudo apt-add-repository -y "deb http://apt.kubernetes.io/ kubernetes-xenial main"

sleep 5

sudo apt install -y kubelet kubeadm kubectl

sudo kubeadm config images pull
Initializing the control-plane node
We can now initialize our control-plane node for our kubernetes cluster.
There are a few things we need to be careful about:
- We can specify the control-plane-endpoint if we are planning to have a high available k8s cluster. (we will skip this for now),
- Choose a Pod network add-on (next section) but be aware that CoreDNS (DNS and Service Discovery) will not run till then (later),
- define where is our container runtime socket (we will skip it)
- advertise the API server (we will skip it)
But we will define our Pod Network CIDR to the default value of the Pod network add-on so everything will go smoothly later on.
sudo kubeadm init --pod-network-cidr=10.244.0.0/16
Keep the output in a notepad.
Create user access config to the k8s control-plane node
Our k8s control-plane node is running, so we need to have credentials to access it.
The kubectl reads a configuration file (that has the token), so we copying this from k8s admin.
rm -rf $HOME/.kube

mkdir -p $HOME/.kube

sudo cp -i /etc/kubernetes/admin.conf $HOME/.kube/config

sudo chown $(id -u):$(id -g) $HOME/.kube/config

ls -la $HOME/.kube/config

alias k="kubectl"
Verify the control-plane node
Verify that the kubernets is running.
That means we have a k8s cluster - but only the control-plane node is running.
kubectl cluster-info
#kubectl cluster-info dump

k get nodes -o wide; k get pods  -A -o wide
Install an overlay network provider on the control-plane node
As I mentioned above, in order to use the DNS and Service Discovery services in the kubernetes (CoreDNS) we need to install a Container Network Interface (CNI) based Pod network add-on so that your Pods can communicate with each other.
We will use flannel as the simplest of them.
k apply -f https://raw.githubusercontent.com/coreos/flannel/master/Documentation/kube-flannel.yml
Verify CoreDNS is running on the control-plane node
Verify that the control-plane node is Up & Running and the control-plane pods (as coredns pods) are also running
$ k get nodes -o wide

NAME        STATUS   ROLES           AGE   VERSION   INTERNAL-IP       EXTERNAL-IP   OS-IMAGE             KERNEL-VERSION      CONTAINER-RUNTIME
k8scpnode   Ready    control-plane   54s   v1.25.0   192.168.122.169   <none>        Ubuntu 22.04.1 LTS   5.15.0-46-generic   containerd://1.6.8
$ k get pods -A -o wide

NAMESPACE    NAME                              READY STATUS  RESTARTS AGE IP              NODE      NOMINATED NODE READINESS GATES
kube-flannel kube-flannel-ds-zqv2b             1/1   Running 0        36s 192.168.122.169 k8scpnode <none>         <none>
kube-system  coredns-565d847f94-lg54q          1/1   Running 0        38s 10.244.0.2      k8scpnode <none>         <none>
kube-system  coredns-565d847f94-ms8zk          1/1   Running 0        38s 10.244.0.3      k8scpnode <none>         <none>
kube-system  etcd-k8scpnode                    1/1   Running 0        50s 192.168.122.169 k8scpnode <none>         <none>
kube-system  kube-apiserver-k8scpnode          1/1   Running 0        50s 192.168.122.169 k8scpnode <none>         <none>
kube-system  kube-controller-manager-k8scpnode 1/1   Running 0        50s 192.168.122.169 k8scpnode <none>         <none>
kube-system  kube-proxy-pv7tj                  1/1   Running 0        39s 192.168.122.169 k8scpnode <none>         <none>
kube-system  kube-scheduler-k8scpnode          1/1   Running 0        50s 192.168.122.169 k8scpnode <none>         <none>
That’s it with the control-plane node !
Worker Nodes
The below instructions works pretty much the same on both worker nodes.
I will document the steps for the worker1 node but do the same for the worker2 node.
Ports on the worker nodes
As we learned above on the control-plane section, kubernetes runs a few services
| Protocol | Direction | Port Range | Purpose | Used By |
|---|---|---|---|---|
| TCP | Inbound | 10250 | Kubelet API | Self, Control plane |
| TCP | Inbound | 30000-32767 | NodePort Services | All |
Firewall on the worker nodes
so we need to open the necessary ports on the worker nodes too.
sudo ufw allow 10250/tcp
sudo ufw allow 30000:32767/tcp

sudo ufw status
output should look like
To                         Action      From
--                         ------      ----
22/tcp                     ALLOW       Anywhere
10250/tcp                  ALLOW       Anywhere
30000:32767/tcp            ALLOW       Anywhere
22/tcp (v6)                ALLOW       Anywhere (v6)
10250/tcp (v6)             ALLOW       Anywhere (v6)
30000:32767/tcp (v6)       ALLOW       Anywhere (v6)
The next few steps are pretty much exactly the same as in the control-plane node.
In order to keep this documentation short, I’ll just copy/paste the commands.
Hosts file in the worker node
Update the /etc/hosts file to include the IPs and hostname of all VMs.
192.168.122.169  k8scpnode
192.168.122.40   k8wrknode1
192.168.122.8    k8wrknode2
No Swap on the worker node
sudo swapoff -a
Kernel modules on the worker node
sudo tee /etc/modules-load.d/kubernetes.conf <<EOF
overlay
br_netfilter
EOF

sudo modprobe overlay
sudo modprobe br_netfilter

sudo lsmod | grep netfilter

sudo tee /etc/sysctl.d/kubernetes.conf <<EOF
net.bridge.bridge-nf-call-ip6tables = 1
net.bridge.bridge-nf-call-iptables = 1
net.ipv4.ip_forward = 1
EOF

sudo sysctl --system
NeedRestart on the worker node
echo "\$nrconf{restart} = 'a';" | sudo tee -a /etc/needrestart/needrestart.conf
Installing a Container Runtime on the worker node
curl -sL https://download.docker.com/linux/ubuntu/gpg | sudo gpg --dearmor -o /etc/apt/trusted.gpg.d/docker-keyring.gpg

sudo apt-add-repository -y "deb https://download.docker.com/linux/ubuntu jammy stable"

sleep 5

sudo apt -y install containerd.io

containerd config default                              \
 | sed 's/SystemdCgroup = false/SystemdCgroup = true/' \
 | sudo tee /etc/containerd/config.toml

sudo systemctl restart containerd.service
Installing kubeadm, kubelet and kubectl on the worker node
sudo curl -sLo /etc/apt/trusted.gpg.d/kubernetes-keyring.gpg https://packages.cloud.google.com/apt/doc/apt-key.gpg

sudo apt-add-repository -y "deb http://apt.kubernetes.io/ kubernetes-xenial main"

sleep 5

sudo apt install -y kubelet kubeadm kubectl

sudo kubeadm config images pull
Get Token from the control-plane node
To join nodes to the kubernetes cluster, we need to have a couple of things.
- a token from control-plane node
- the CA certificate hash from the contol-plane node.
If you didnt keep the output the initialization of the control-plane node, that’s okay.
Run the below command in the control-plane node.
sudo kubeadm token list
and we will get the initial token that expires after 24hours.
TOKEN                     TTL         EXPIRES                USAGES                   DESCRIPTION                                                EXTRA GROUPS
zt36bp.uht4cziweef1jo1h   23h         2022-08-31T18:38:16Z   authentication,signing   The default bootstrap token generated by 'kubeadm init'.   system:bootstrappers:kubeadm:default-node-token
In this case is the
zt36bp.uht4cziweef1jo1hGet Certificate Hash from the control-plane node
To get the CA certificate hash from the control-plane-node, we need to run a complicated command:
openssl x509 -pubkey -in /etc/kubernetes/pki/ca.crt | openssl rsa -pubin -outform der 2>/dev/null | openssl dgst -sha256 -hex | sed 's/^.* //'
and in my k8s cluster is:
a4833f8c82953370610efaa5ed93b791337232c3a948b710b2435d747889c085Join Workers to the kubernetes cluster
So now, we can Join our worker nodes to the kubernetes cluster.
Run the below command on both worker nodes:
sudo kubeadm join 192.168.122.169:6443 \
       --token zt36bp.uht4cziweef1jo1h \
       --discovery-token-ca-cert-hash sha256:a4833f8c82953370610efaa5ed93b791337232c3a948b710b2435d747889c085
we get this message
Run ‘kubectl get nodes’ on the control-plane to see this node join the cluster.
Is the kubernetes cluster running ?
We can verify that
kubectl get nodes   -o wide
kubectl get pods -A -o wide
NAME         STATUS   ROLES           AGE     VERSION   INTERNAL-IP       EXTERNAL-IP   OS-IMAGE             KERNEL-VERSION      CONTAINER-RUNTIME
k8scpnode    Ready    control-plane   64m     v1.25.0   192.168.122.169   <none>        Ubuntu 22.04.1 LTS   5.15.0-46-generic   containerd://1.6.8
k8wrknode1   Ready    <none>          2m32s   v1.25.0   192.168.122.40    <none>        Ubuntu 22.04.1 LTS   5.15.0-46-generic   containerd://1.6.8
k8wrknode2   Ready    <none>          2m28s   v1.25.0   192.168.122.8     <none>        Ubuntu 22.04.1 LTS   5.15.0-46-generic   containerd://1.6.8
NAMESPACE NAME READY STATUS RESTARTS AGE IP NODE NOMINATED NODE READINESS GATES
kube-flannel kube-flannel-ds-52g92 1/1 Running 0 2m32s 192.168.122.40 k8wrknode1 <none> <none>
kube-flannel kube-flannel-ds-7qlm7 1/1 Running 0 2m28s 192.168.122.8 k8wrknode2 <none> <none>
kube-flannel kube-flannel-ds-zqv2b 1/1 Running 0 64m 192.168.122.169 k8scpnode <none> <none>
kube-system coredns-565d847f94-lg54q 1/1 Running 0 64m 10.244.0.2 k8scpnode <none> <none>
kube-system coredns-565d847f94-ms8zk 1/1 Running 0 64m 10.244.0.3 k8scpnode <none> <none>
kube-system etcd-k8scpnode 1/1 Running 0 64m 192.168.122.169 k8scpnode <none> <none>
kube-system kube-apiserver-k8scpnode 1/1 Running 0 64m 192.168.122.169 k8scpnode <none> <none>
kube-system kube-controller-manager-k8scpnode 1/1 Running 1 (12m ago) 64m 192.168.122.169 k8scpnode <none> <none>
kube-system kube-proxy-4khw6 1/1 Running 0 2m32s 192.168.122.40 k8wrknode1 <none> <none>
kube-system kube-proxy-gm27l 1/1 Running 0 2m28s 192.168.122.8 k8wrknode2 <none> <none>
kube-system kube-proxy-pv7tj 1/1 Running 0 64m 192.168.122.169 k8scpnode <none> <none>
kube-system kube-scheduler-k8scpnode 1/1 Running 1 (12m ago) 64m 192.168.122.169 k8scpnode <none> <none>
That’s it !
Our k8s cluster is running.
Kubernetes Dashboard
is a general purpose, web-based UI for Kubernetes clusters. It allows users to manage applications running in the cluster and troubleshoot them, as well as manage the cluster itself.
We can proceed by installing a k8s dashboard to our k8s cluster.
Install kubernetes dashboard
One simple way to install the kubernetes-dashboard, is by applying the latest (as of this writing) yaml configuration file.
kubectl apply -f https://raw.githubusercontent.com/kubernetes/dashboard/v2.6.1/aio/deploy/recommended.yaml
the output of the above command should be something like
namespace/kubernetes-dashboard created
serviceaccount/kubernetes-dashboard created
service/kubernetes-dashboard created
secret/kubernetes-dashboard-certs created
secret/kubernetes-dashboard-csrf created
secret/kubernetes-dashboard-key-holder created
configmap/kubernetes-dashboard-settings created
role.rbac.authorization.k8s.io/kubernetes-dashboard created
clusterrole.rbac.authorization.k8s.io/kubernetes-dashboard created
rolebinding.rbac.authorization.k8s.io/kubernetes-dashboard created
clusterrolebinding.rbac.authorization.k8s.io/kubernetes-dashboard created
deployment.apps/kubernetes-dashboard created
service/dashboard-metrics-scraper created
deployment.apps/dashboard-metrics-scraper created
Verify the installation
kubectl get all -n kubernetes-dashboard
NAME                                             READY   STATUS    RESTARTS   AGE
pod/dashboard-metrics-scraper-64bcc67c9c-kvll7   1/1     Running   0          2m16s
pod/kubernetes-dashboard-66c887f759-rr4gn        1/1     Running   0          2m16s

NAME                                TYPE        CLUSTER-IP      EXTERNAL-IP   PORT(S)    AGE
service/dashboard-metrics-scraper   ClusterIP   10.110.25.61    <none>        8000/TCP   2m16s
service/kubernetes-dashboard        ClusterIP   10.100.65.122   <none>        443/TCP    2m16s

NAME                                        READY   UP-TO-DATE   AVAILABLE   AGE
deployment.apps/dashboard-metrics-scraper   1/1     1            1           2m16s
deployment.apps/kubernetes-dashboard        1/1     1            1           2m16s

NAME                                                   DESIRED   CURRENT   READY   AGE
replicaset.apps/dashboard-metrics-scraper-64bcc67c9c   1         1         1       2m16s
replicaset.apps/kubernetes-dashboard-66c887f759        1         1         1       2m16s
Add a Node Port to kubernetes dashboard
Kubernetes Dashboard by default runs on a internal 10.x.x.x IP.
To access the dashboard we need to have a NodePort in the kubernetes-dashboard service.
We can either Patch the service or edit the yaml file.
Patch kubernetes-dashboard
kubectl --namespace kubernetes-dashboard patch svc kubernetes-dashboard -p '{"spec": {"type": "NodePort"}}'
output
service/kubernetes-dashboard patched
verify the service
kubectl get svc -n kubernetes-dashboard
NAME                        TYPE        CLUSTER-IP      EXTERNAL-IP   PORT(S)         AGE
dashboard-metrics-scraper   ClusterIP   10.110.25.61    <none>        8000/TCP        11m
kubernetes-dashboard        NodePort    10.100.65.122   <none>        443:32709/TCP   11m
we can see the 30480 in the kubernetes-dashboard.
Edit kubernetes-dashboard Service
kubectl edit svc -n kubernetes-dashboard kubernetes-dashboard
and chaning the service type from
type: ClusterIPto
type: NodePortAccessing Kubernetes Dashboard
The kubernetes-dashboard has two (2) pods, one (1) for metrics, one (2) for the dashboard.
To access the dashboard, first we need to identify in which Node is running.
kubectl get pods -n kubernetes-dashboard -o wide
NAME                                         READY   STATUS    RESTARTS   AGE     IP           NODE         NOMINATED NODE   READINESS GATES
dashboard-metrics-scraper-64bcc67c9c-fs7pt   1/1     Running   0          2m43s   10.244.1.9   k8wrknode1   <none>           <none>
kubernetes-dashboard-66c887f759-pzt4z        1/1     Running   0          2m44s   10.244.2.9   k8wrknode2   <none>           <none>
In my setup the dashboard pod is running on the worker node 2 and from the /etc/hosts is on the 192.168.122.8 IP.
The NodePort is 32709
k get svc -n kubernetes-dashboard -o wide
So, we can open a new tab on our browser and type:
https://192.168.122.8:32709
and accept the self-signed certificate!

Create An Authentication Token (RBAC)
Last step for the kubernetes-dashboard is to create an authentication token.
Creating a Service Account
Create a new yaml file, with kind: ServiceAccount that has access to kubernetes-dashboard namespace and has name: admin-user.
cat > kubernetes-dashboard.ServiceAccount.yaml <<EOF
apiVersion: v1
kind: ServiceAccount
metadata:
  name: admin-user
  namespace: kubernetes-dashboard

EOF
add this service account to the k8s cluster
kubectl apply -f kubernetes-dashboard.ServiceAccount.yaml
output
serviceaccount/admin-user createdCreating a ClusterRoleBinding
We need to bind the Service Account with the kubernetes-dashboard via Role-based access control.
cat > kubernetes-dashboard.ClusterRoleBinding.yaml <<EOF
apiVersion: rbac.authorization.k8s.io/v1
kind: ClusterRoleBinding
metadata:
  name: admin-user
roleRef:
  apiGroup: rbac.authorization.k8s.io
  kind: ClusterRole
  name: cluster-admin
subjects:
- kind: ServiceAccount
  name: admin-user
  namespace: kubernetes-dashboard

EOF
apply this yaml file
kubectl apply -f kubernetes-dashboard.ClusterRoleBinding.yaml
clusterrolebinding.rbac.authorization.k8s.io/admin-user created
That means, our Service Account User has all the necessary roles to access the kubernetes-dashboard.
Getting a Bearer Token
Final step is to create/get a token for our user.
kubectl -n kubernetes-dashboard create token admin-user
eyJhbGciOiJSUzI1NiIsImtpZCI6Im04M2JOY2k1Yk1hbFBhLVN2cjA4X1pkdktXNldqWkR4bjB6MGpTdFgtVHcifQ.eyJhdWQiOlsiaHR0cHM6Ly9rdWJlcm5ldGVzLmRlZmF1bHQuc3ZjLmNsdXN0ZXIubG9jYWwiXSwiZXhwIjoxNjYxOTU2NDQ1LCJpYXQiOjE2NjE5NTI4NDUsImlzcyI6Imh0dHBzOi8va3ViZXJuZXRlcy5kZWZhdWx0LnN2Yy5jbHVzdGVyLmxvY2FsIiwia3ViZXJuZXRlcy5pbyI6eyJuYW1lc3BhY2UiOiJrdWJlcm5ldGVzLWRhc2hib2FyZCIsInNlcnZpY2VhY2NvdW50Ijp7Im5hbWUiOiJhZG1pbi11c2VyIiwidWlkIjoiN2M4OWIyZDktMGIwYS00ZDg4LTk2Y2EtZDU3NjhjOWU2ZGYxIn19LCJuYmYiOjE2NjE5NTI4NDUsInN1YiI6InN5c3RlbTpzZXJ2aWNlYWNjb3VudDprdWJlcm5ldGVzLWRhc2hib2FyZDphZG1pbi11c2VyIn0.RMRQkZZhcoC5vCvck6hKfqXJ4dfN4JoQyAaClHZvOMI6JgQZEfB2-_Qsh5MfFApJUEit-0TX9r3CzW3JqvB7dmpTPxUQvHK68r82WGveBVp1wF37UyXu_IzxiCQzpCWYr3GcVGAGZVBbhhqNYm765FV02ZA_khHrW3WpB80ikhm_TNLkOS6Llq2UiLFZyHHmjl5pwvGzT7YXZe8s-llZSgc0UenEwPG-82eE279oOy6r4_NltoV1HB3uu0YjUJPlkqAPnHuSfAA7-8A3XAAVHhRQvFPea1qZLc4-oD24AcU0FjWqDMILEyE8zaD2ci8zEQBMoxcf2qmj0wn9cfbZwQ
Add this token to the previous login page

Browsing Kubernetes Dashboard
eg. Cluster –> Nodes

Nginx App
Before finishing this blog post, I would also like to share how to install a simple nginx-app as it is customary to do such thing in every new k8s cluster.
But plz excuse me, I will not get into much details.
You should be able to understand the below k8s commands.
Install nginx-app
kubectl create deployment nginx-app --image=nginx --replicas=2
deployment.apps/nginx-app createdGet Deployment
kubectl get deployment nginx-app -o wideNAME READY UP-TO-DATE AVAILABLE AGE CONTAINERS IMAGES SELECTOR
nginx-app 2/2 2 2 64s nginx nginx app=nginx-appExpose Nginx-App
kubectl expose deployment nginx-app --type=NodePort --port=80
service/nginx-app exposedVerify Service nginx-app
kubectl get svc nginx-app -o wide
NAME        TYPE       CLUSTER-IP      EXTERNAL-IP   PORT(S)        AGE   SELECTOR
nginx-app   NodePort   10.98.170.185   <none>        80:31761/TCP   27s   app=nginx-app
Describe Service nginx-app
kubectl describe svc nginx-app
Name:                     nginx-app
Namespace:                default
Labels:                   app=nginx-app
Annotations:              <none>
Selector:                 app=nginx-app
Type:                     NodePort
IP Family Policy:         SingleStack
IP Families:              IPv4
IP:                       10.98.170.185
IPs:                      10.98.170.185
Port:                     <unset>  80/TCP
TargetPort:               80/TCP
NodePort:                 <unset>  31761/TCP
Endpoints:                10.244.1.10:80,10.244.2.10:80
Session Affinity:         None
External Traffic Policy:  Cluster
Events:                   <none>
Curl Nginx-App
curl http://192.168.122.8:31761
<!DOCTYPE html>
<html>
<head>
<title>Welcome to nginx!</title>
<style>
html { color-scheme: light dark; }
body { width: 35em; margin: 0 auto;
font-family: Tahoma, Verdana, Arial, sans-serif; }
</style>
</head>
<body>
<h1>Welcome to nginx!</h1>
<p>If you see this page, the nginx web server is successfully installed and
working. Further configuration is required.</p>

<p>For online documentation and support please refer to
<a href="http://nginx.org/">nginx.org</a>.<br/>
Commercial support is available at
<a href="http://nginx.com/">nginx.com</a>.</p>

<p><em>Thank you for using nginx.</em></p>
</body>
</html>
Nginx-App from Browser

That’s it !
I hope you enjoyed this blog post.
-ebal
./destroy.sh...
libvirt_domain.domain-ubuntu["k8wrknode1"]: Destroying... [id=446cae2a-ce14-488f-b8e9-f44839091bce]
libvirt_domain.domain-ubuntu["k8scpnode"]: Destroying... [id=51e12abb-b14b-4ab8-b098-c1ce0b4073e3]
time_sleep.wait_for_cloud_init: Destroying... [id=2022-08-30T18:02:06Z]
libvirt_domain.domain-ubuntu["k8wrknode2"]: Destroying... [id=0767fb62-4600-4bc8-a94a-8e10c222b92e]
time_sleep.wait_for_cloud_init: Destruction complete after 0s
libvirt_domain.domain-ubuntu["k8wrknode1"]: Destruction complete after 1s
libvirt_domain.domain-ubuntu["k8scpnode"]: Destruction complete after 1s
libvirt_domain.domain-ubuntu["k8wrknode2"]: Destruction complete after 1s
libvirt_cloudinit_disk.cloud-init["k8wrknode1"]: Destroying... [id=/var/lib/libvirt/images/Jpw2Sg_cloud-init.iso;b8ddfa73-a770-46de-ad16-b0a5a08c8550]
libvirt_cloudinit_disk.cloud-init["k8wrknode2"]: Destroying... [id=/var/lib/libvirt/images/VdUklQ_cloud-init.iso;5511ed7f-a864-4d3f-985a-c4ac07eac233]
libvirt_volume.ubuntu-base["k8scpnode"]: Destroying... [id=/var/lib/libvirt/images/l5Rr1w_ubuntu-base]
libvirt_volume.ubuntu-base["k8wrknode2"]: Destroying... [id=/var/lib/libvirt/images/VdUklQ_ubuntu-base]
libvirt_cloudinit_disk.cloud-init["k8scpnode"]: Destroying... [id=/var/lib/libvirt/images/l5Rr1w_cloud-init.iso;11ef6bb7-a688-4c15-ae33-10690500705f]
libvirt_volume.ubuntu-base["k8wrknode1"]: Destroying... [id=/var/lib/libvirt/images/Jpw2Sg_ubuntu-base]
libvirt_cloudinit_disk.cloud-init["k8wrknode1"]: Destruction complete after 1s
libvirt_volume.ubuntu-base["k8wrknode2"]: Destruction complete after 1s
libvirt_cloudinit_disk.cloud-init["k8scpnode"]: Destruction complete after 1s
libvirt_cloudinit_disk.cloud-init["k8wrknode2"]: Destruction complete after 1s
libvirt_volume.ubuntu-base["k8wrknode1"]: Destruction complete after 1s
libvirt_volume.ubuntu-base["k8scpnode"]: Destruction complete after 2s
libvirt_volume.ubuntu-vol["k8wrknode1"]: Destroying... [id=/var/lib/libvirt/images/Jpw2Sg_ubuntu-vol]
libvirt_volume.ubuntu-vol["k8scpnode"]: Destroying... [id=/var/lib/libvirt/images/l5Rr1w_ubuntu-vol]
libvirt_volume.ubuntu-vol["k8wrknode2"]: Destroying... [id=/var/lib/libvirt/images/VdUklQ_ubuntu-vol]
libvirt_volume.ubuntu-vol["k8scpnode"]: Destruction complete after 0s
libvirt_volume.ubuntu-vol["k8wrknode2"]: Destruction complete after 0s
libvirt_volume.ubuntu-vol["k8wrknode1"]: Destruction complete after 0s
random_id.id["k8scpnode"]: Destroying... [id=l5Rr1w]
random_id.id["k8wrknode2"]: Destroying... [id=VdUklQ]
random_id.id["k8wrknode1"]: Destroying... [id=Jpw2Sg]
random_id.id["k8wrknode2"]: Destruction complete after 0s
random_id.id["k8scpnode"]: Destruction complete after 0s
random_id.id["k8wrknode1"]: Destruction complete after 0s
Destroy complete! Resources: 16 destroyed.
In this blog post, I’ll try to share my personal notes on how to setup a kubernetes cluster with kubeadm on ubuntu 22.04 LTS Virtual Machines.
I am going to use three (3) Virtual Machines in my local lab. My home lab is based on libvirt Qemu/KVM (Kernel-based Virtual Machine) and I run Terraform as the infrastructure provision tool.
There is a copy of this blog post to github.
https://github.com/ebal/k8s_cluster
If you notice something wrong you can either contact me via the contact page, or open a PR in the github project.
you can also follow me at twitter: https://twitter.com/ebalaskas
Kubernetes, also known as K8s, is an open-source system for automating deployment, scaling, and management of containerized applications.
- Prerequisites
- Git Terraform Code for the kubernetes cluster
- Control-Plane Node
- Ports on the control-plane node
- Firewall on the control-plane node
- Hosts file in the control-plane node
- No Swap on the control-plane node
- Kernel modules on the control-plane node
- NeedRestart on the control-plane node
- Installing a Container Runtime on the control-plane node
- Installing kubeadm, kubelet and kubectl on the control-plane node
- Initializing the control-plane node
- Create user access config to the k8s control-plane node
- Verify the control-plane node
- Install an overlay network provider on the control-plane node
- Verify CoreDNS is running on the control-plane node
- Worker Nodes
- Ports on the worker nodes
- Firewall on the worker nodes
- Hosts file in the worker node
- No Swap on the worker node
- Kernel modules on the worker node
- NeedRestart on the worker node
- Installing a Container Runtime on the worker node
- Installing kubeadm, kubelet and kubectl on the worker node
- Get Token from the control-plane node
- Get Certificate Hash from the control-plane node
- Join Workers to the kubernetes cluster
- Is the kubernetes cluster running ?
- Kubernetes Dashboard
- Install kubernetes dashboard
- Add a Node Port to kubernetes dashboard
- Patch kubernetes-dashboard
- Edit kubernetes-dashboard Service
- Accessing Kubernetes Dashboard
- Create An Authentication Token (RBAC)
- Creating a Service Account
- Creating a ClusterRoleBinding
- Getting a Bearer Token
- Browsing Kubernetes Dashboard
- Nginx App
- That’s it !
Prerequisites
- at least 3 Virtual Machines of Ubuntu 22.04 (one for control-plane, two for worker nodes)
- 2GB (or more) of RAM on each Virtual Machine
- 2 CPUs (or more) on each Virtual Machine
- 20Gb of hard disk on each Virtual Machine
- No SWAP partition/image/file on each Virtual Machine
Git Terraform Code for the kubernetes cluster
I prefer to have a reproducible infrastructure, so I can very fast create and destroy my test lab. My preferable way of doing things is testing on each step, so I pretty much destroy everything, coping and pasting commands and keep on. I use terraform for the create the infrastructure. You can find the code for the entire kubernetes cluster here: k8s cluster - Terraform code.
If you do not use terraform, skip this step!
You can git clone the repo to review and edit it according to your needs.
git clone https://github.com/ebal/k8s_cluster.git
cd tf_libvirt
You will need to make appropriate changes. Open Variables.tf for that. The most important option to change, is the User option. Change it to your github username and it will download and setup the VMs with your public key, instead of mine!
But pretty much, everything else should work out of the box. Change the vmem and vcpu settings to your needs.
Init terraform before running the below shell script.
terraform init
and then run
./start.sh
output should be something like:
...
Apply complete! Resources: 16 added, 0 changed, 0 destroyed.

Outputs:

VMs = [
  "192.168.122.169  k8scpnode",
  "192.168.122.40   k8wrknode1",
  "192.168.122.8    k8wrknode2",
]
Verify that you have ssh access to the VMs
eg.
ssh -l ubuntu 192.168.122.169
replace the IP with what the output gave you.
Ubuntu 22.04 Image
If you noticed in the terraform code, I have the below declaration as the cloud image:
../jammy-server-cloudimg-amd64.img
that means, I’ve already downloaded it, in the upper directory to speed things up!
cd ../
curl -sLO https://cloud-images.ubuntu.com/jammy/current/focal-server-cloudimg-amd64.img
cd -
Control-Plane Node
Let’s us now start the configure of the k8s control-plane node.
Ports on the control-plane node
Kubernetes runs a few services that needs to be accessable from the worker nodes.
| Protocol | Direction | Port Range | Purpose | Used By |
|---|---|---|---|---|
| TCP | Inbound | 6443 | Kubernetes API server | All |
| TCP | Inbound | 2379-2380 | etcd server client API | kube-apiserver, etcd |
| TCP | Inbound | 10250 | Kubelet API | Self, Control plane |
| TCP | Inbound | 10259 | kube-scheduler | Self |
| TCP | Inbound | 10257 | kube-controller-manager | Self |
Although etcd ports are included in control plane section, you can also host your
own etcd cluster externally or on custom ports.
Firewall on the control-plane node
We need to open the necessary ports on the CP’s (control-plane node) firewall.
sudo ufw allow 6443/tcp
sudo ufw allow 2379:2380/tcp
sudo ufw allow 10250/tcp
sudo ufw allow 10259/tcp
sudo ufw allow 10257/tcp

#sudo ufw disable
sudo ufw status
the output should be
To                         Action      From
--                         ------      ----
22/tcp                     ALLOW       Anywhere
6443/tcp                   ALLOW       Anywhere
2379:2380/tcp              ALLOW       Anywhere
10250/tcp                  ALLOW       Anywhere
10259/tcp                  ALLOW       Anywhere
10257/tcp                  ALLOW       Anywhere
22/tcp (v6)                ALLOW       Anywhere (v6)
6443/tcp (v6)              ALLOW       Anywhere (v6)
2379:2380/tcp (v6)         ALLOW       Anywhere (v6)
10250/tcp (v6)             ALLOW       Anywhere (v6)
10259/tcp (v6)             ALLOW       Anywhere (v6)
10257/tcp (v6)             ALLOW       Anywhere (v6)
Hosts file in the control-plane node
We need to update the /etc/hosts with the internal IP and hostname.
This will help when it is time to join the worker nodes.
echo $(hostname -I) $(hostname) | sudo tee -a /etc/hosts
Just a reminder: we need to update the hosts file to all the VMs.
To include all the VMs’ IPs and hostnames.
If you already know them, then your /etc/hosts file should look like this:
192.168.122.169  k8scpnode
192.168.122.40   k8wrknode1
192.168.122.8    k8wrknode2
replace the IPs to yours.
No Swap on the control-plane node
Be sure that SWAP is disabled in all virtual machines!
sudo swapoff -a
and the fstab file should not have any swap entry.
The below command should return nothing.
sudo grep -i swap /etc/fstab
If not, edit the /etc/fstab and remove the swap entry.
If you follow my terraform k8s code example from the above github repo,
you will notice that there isn’t any swap entry in the cloud init (user-data) file.
Nevertheless it is always a good thing to douple check.
Kernel modules on the control-plane node
We need to load the below kernel modules on all k8s nodes, so k8s can create some network magic!
- overlay
- br_netfilter
Run the below bash snippet that will do that, and also will enable the forwarding features of the network.
sudo tee /etc/modules-load.d/kubernetes.conf <<EOF
overlay
br_netfilter
EOF

sudo modprobe overlay
sudo modprobe br_netfilter

sudo lsmod | grep netfilter

sudo tee /etc/sysctl.d/kubernetes.conf <<EOF
net.bridge.bridge-nf-call-ip6tables = 1
net.bridge.bridge-nf-call-iptables = 1
net.ipv4.ip_forward = 1
EOF

sudo sysctl --system
NeedRestart on the control-plane node
Before installing any software, we need to make a tiny change to needrestart program. This will help with the automation of installing packages and will stop asking -via dialog- if we would like to restart the services!
echo "\$nrconf{restart} = 'a';" | sudo tee -a /etc/needrestart/needrestart.conf
Installing a Container Runtime on the control-plane node
It is time to choose which container runtime we are going to use on our k8s cluster. There are a few container runtimes for k8s and in the past docker were used to. Nowadays the most common runtime is the containerd that can also uses the cgroup v2 kernel features. There is also a docker-engine runtime via CRI. Read here for more details on the subject.
curl -sL https://download.docker.com/linux/ubuntu/gpg | sudo gpg --dearmor -o /etc/apt/trusted.gpg.d/docker-keyring.gpg

sudo apt-add-repository -y "deb https://download.docker.com/linux/ubuntu jammy stable"

sleep 5

sudo apt -y install containerd.io

containerd config default                              \
 | sed 's/SystemdCgroup = false/SystemdCgroup = true/' \
 | sudo tee /etc/containerd/config.toml

sudo systemctl restart containerd.service
We have also enabled the
systemd cgroup driverso the control-plane node can use the cgroup v2 features.
Installing kubeadm, kubelet and kubectl on the control-plane node
Install the kubernetes packages (kubedam, kubelet and kubectl) by first adding the k8s repository on our virtual machine. To speed up the next step, we will also download the configuration container images.
sudo curl -sLo /etc/apt/trusted.gpg.d/kubernetes-keyring.gpg https://packages.cloud.google.com/apt/doc/apt-key.gpg

sudo apt-add-repository -y "deb http://apt.kubernetes.io/ kubernetes-xenial main"

sleep 5

sudo apt install -y kubelet kubeadm kubectl

sudo kubeadm config images pull
Initializing the control-plane node
We can now initialize our control-plane node for our kubernetes cluster.
There are a few things we need to be careful about:
- We can specify the control-plane-endpoint if we are planning to have a high available k8s cluster. (we will skip this for now),
- Choose a Pod network add-on (next section) but be aware that CoreDNS (DNS and Service Discovery) will not run till then (later),
- define where is our container runtime socket (we will skip it)
- advertise the API server (we will skip it)
But we will define our Pod Network CIDR to the default value of the Pod network add-on so everything will go smoothly later on.
sudo kubeadm init --pod-network-cidr=10.244.0.0/16
Keep the output in a notepad.
Create user access config to the k8s control-plane node
Our k8s control-plane node is running, so we need to have credentials to access it.
The kubectl reads a configuration file (that has the token), so we copying this from k8s admin.
rm -rf $HOME/.kube

mkdir -p $HOME/.kube

sudo cp -i /etc/kubernetes/admin.conf $HOME/.kube/config

sudo chown $(id -u):$(id -g) $HOME/.kube/config

ls -la $HOME/.kube/config

alias k="kubectl"
Verify the control-plane node
Verify that the kubernets is running.
That means we have a k8s cluster - but only the control-plane node is running.
kubectl cluster-info
#kubectl cluster-info dump

k get nodes -o wide; k get pods  -A -o wide
Install an overlay network provider on the control-plane node
As I mentioned above, in order to use the DNS and Service Discovery services in the kubernetes (CoreDNS) we need to install a Container Network Interface (CNI) based Pod network add-on so that your Pods can communicate with each other.
We will use flannel as the simplest of them.
k apply -f https://raw.githubusercontent.com/coreos/flannel/master/Documentation/kube-flannel.yml
Verify CoreDNS is running on the control-plane node
Verify that the control-plane node is Up & Running and the control-plane pods (as coredns pods) are also running
$ k get nodes -o wide

NAME        STATUS   ROLES           AGE   VERSION   INTERNAL-IP       EXTERNAL-IP   OS-IMAGE             KERNEL-VERSION      CONTAINER-RUNTIME
k8scpnode   Ready    control-plane   54s   v1.25.0   192.168.122.169   <none>        Ubuntu 22.04.1 LTS   5.15.0-46-generic   containerd://1.6.8
$ k get pods -A -o wide

NAMESPACE    NAME                              READY STATUS  RESTARTS AGE IP              NODE      NOMINATED NODE READINESS GATES
kube-flannel kube-flannel-ds-zqv2b             1/1   Running 0        36s 192.168.122.169 k8scpnode <none>         <none>
kube-system  coredns-565d847f94-lg54q          1/1   Running 0        38s 10.244.0.2      k8scpnode <none>         <none>
kube-system  coredns-565d847f94-ms8zk          1/1   Running 0        38s 10.244.0.3      k8scpnode <none>         <none>
kube-system  etcd-k8scpnode                    1/1   Running 0        50s 192.168.122.169 k8scpnode <none>         <none>
kube-system  kube-apiserver-k8scpnode          1/1   Running 0        50s 192.168.122.169 k8scpnode <none>         <none>
kube-system  kube-controller-manager-k8scpnode 1/1   Running 0        50s 192.168.122.169 k8scpnode <none>         <none>
kube-system  kube-proxy-pv7tj                  1/1   Running 0        39s 192.168.122.169 k8scpnode <none>         <none>
kube-system  kube-scheduler-k8scpnode          1/1   Running 0        50s 192.168.122.169 k8scpnode <none>         <none>
That’s it with the control-plane node !
Worker Nodes
The below instructions works pretty much the same on both worker nodes.
I will document the steps for the worker1 node but do the same for the worker2 node.
Ports on the worker nodes
As we learned above on the control-plane section, kubernetes runs a few services
| Protocol | Direction | Port Range | Purpose | Used By |
|---|---|---|---|---|
| TCP | Inbound | 10250 | Kubelet API | Self, Control plane |
| TCP | Inbound | 30000-32767 | NodePort Services | All |
Firewall on the worker nodes
so we need to open the necessary ports on the worker nodes too.
sudo ufw allow 10250/tcp
sudo ufw allow 30000:32767/tcp

sudo ufw status
output should look like
To                         Action      From
--                         ------      ----
22/tcp                     ALLOW       Anywhere
10250/tcp                  ALLOW       Anywhere
30000:32767/tcp            ALLOW       Anywhere
22/tcp (v6)                ALLOW       Anywhere (v6)
10250/tcp (v6)             ALLOW       Anywhere (v6)
30000:32767/tcp (v6)       ALLOW       Anywhere (v6)
The next few steps are pretty much exactly the same as in the control-plane node.
In order to keep this documentation short, I’ll just copy/paste the commands.
Hosts file in the worker node
Update the /etc/hosts file to include the IPs and hostname of all VMs.
192.168.122.169  k8scpnode
192.168.122.40   k8wrknode1
192.168.122.8    k8wrknode2
No Swap on the worker node
sudo swapoff -a
Kernel modules on the worker node
sudo tee /etc/modules-load.d/kubernetes.conf <<EOF
overlay
br_netfilter
EOF

sudo modprobe overlay
sudo modprobe br_netfilter

sudo lsmod | grep netfilter

sudo tee /etc/sysctl.d/kubernetes.conf <<EOF
net.bridge.bridge-nf-call-ip6tables = 1
net.bridge.bridge-nf-call-iptables = 1
net.ipv4.ip_forward = 1
EOF

sudo sysctl --system
NeedRestart on the worker node
echo "\$nrconf{restart} = 'a';" | sudo tee -a /etc/needrestart/needrestart.conf
Installing a Container Runtime on the worker node
curl -sL https://download.docker.com/linux/ubuntu/gpg | sudo gpg --dearmor -o /etc/apt/trusted.gpg.d/docker-keyring.gpg

sudo apt-add-repository -y "deb https://download.docker.com/linux/ubuntu jammy stable"

sleep 5

sudo apt -y install containerd.io

containerd config default                              \
 | sed 's/SystemdCgroup = false/SystemdCgroup = true/' \
 | sudo tee /etc/containerd/config.toml

sudo systemctl restart containerd.service
Installing kubeadm, kubelet and kubectl on the worker node
sudo curl -sLo /etc/apt/trusted.gpg.d/kubernetes-keyring.gpg https://packages.cloud.google.com/apt/doc/apt-key.gpg

sudo apt-add-repository -y "deb http://apt.kubernetes.io/ kubernetes-xenial main"

sleep 5

sudo apt install -y kubelet kubeadm kubectl

sudo kubeadm config images pull
Get Token from the control-plane node
To join nodes to the kubernetes cluster, we need to have a couple of things.
- a token from control-plane node
- the CA certificate hash from the contol-plane node.
If you didnt keep the output the initialization of the control-plane node, that’s okay.
Run the below command in the control-plane node.
sudo kubeadm token list
and we will get the initial token that expires after 24hours.
TOKEN                     TTL         EXPIRES                USAGES                   DESCRIPTION                                                EXTRA GROUPS
zt36bp.uht4cziweef1jo1h   23h         2022-08-31T18:38:16Z   authentication,signing   The default bootstrap token generated by 'kubeadm init'.   system:bootstrappers:kubeadm:default-node-token
In this case is the
zt36bp.uht4cziweef1jo1hGet Certificate Hash from the control-plane node
To get the CA certificate hash from the control-plane-node, we need to run a complicated command:
openssl x509 -pubkey -in /etc/kubernetes/pki/ca.crt | openssl rsa -pubin -outform der 2>/dev/null | openssl dgst -sha256 -hex | sed 's/^.* //'
and in my k8s cluster is:
a4833f8c82953370610efaa5ed93b791337232c3a948b710b2435d747889c085Join Workers to the kubernetes cluster
So now, we can Join our worker nodes to the kubernetes cluster.
Run the below command on both worker nodes:
sudo kubeadm join 192.168.122.169:6443 \
       --token zt36bp.uht4cziweef1jo1h \
       --discovery-token-ca-cert-hash sha256:a4833f8c82953370610efaa5ed93b791337232c3a948b710b2435d747889c085
we get this message
Run ‘kubectl get nodes’ on the control-plane to see this node join the cluster.
Is the kubernetes cluster running ?
We can verify that
kubectl get nodes   -o wide
kubectl get pods -A -o wide
NAME         STATUS   ROLES           AGE     VERSION   INTERNAL-IP       EXTERNAL-IP   OS-IMAGE             KERNEL-VERSION      CONTAINER-RUNTIME
k8scpnode    Ready    control-plane   64m     v1.25.0   192.168.122.169   <none>        Ubuntu 22.04.1 LTS   5.15.0-46-generic   containerd://1.6.8
k8wrknode1   Ready    <none>          2m32s   v1.25.0   192.168.122.40    <none>        Ubuntu 22.04.1 LTS   5.15.0-46-generic   containerd://1.6.8
k8wrknode2   Ready    <none>          2m28s   v1.25.0   192.168.122.8     <none>        Ubuntu 22.04.1 LTS   5.15.0-46-generic   containerd://1.6.8
NAMESPACE NAME READY STATUS RESTARTS AGE IP NODE NOMINATED NODE READINESS GATES
kube-flannel kube-flannel-ds-52g92 1/1 Running 0 2m32s 192.168.122.40 k8wrknode1 <none> <none>
kube-flannel kube-flannel-ds-7qlm7 1/1 Running 0 2m28s 192.168.122.8 k8wrknode2 <none> <none>
kube-flannel kube-flannel-ds-zqv2b 1/1 Running 0 64m 192.168.122.169 k8scpnode <none> <none>
kube-system coredns-565d847f94-lg54q 1/1 Running 0 64m 10.244.0.2 k8scpnode <none> <none>
kube-system coredns-565d847f94-ms8zk 1/1 Running 0 64m 10.244.0.3 k8scpnode <none> <none>
kube-system etcd-k8scpnode 1/1 Running 0 64m 192.168.122.169 k8scpnode <none> <none>
kube-system kube-apiserver-k8scpnode 1/1 Running 0 64m 192.168.122.169 k8scpnode <none> <none>
kube-system kube-controller-manager-k8scpnode 1/1 Running 1 (12m ago) 64m 192.168.122.169 k8scpnode <none> <none>
kube-system kube-proxy-4khw6 1/1 Running 0 2m32s 192.168.122.40 k8wrknode1 <none> <none>
kube-system kube-proxy-gm27l 1/1 Running 0 2m28s 192.168.122.8 k8wrknode2 <none> <none>
kube-system kube-proxy-pv7tj 1/1 Running 0 64m 192.168.122.169 k8scpnode <none> <none>
kube-system kube-scheduler-k8scpnode 1/1 Running 1 (12m ago) 64m 192.168.122.169 k8scpnode <none> <none>
That’s it !
Our k8s cluster is running.
Kubernetes Dashboard
is a general purpose, web-based UI for Kubernetes clusters. It allows users to manage applications running in the cluster and troubleshoot them, as well as manage the cluster itself.
We can proceed by installing a k8s dashboard to our k8s cluster.
Install kubernetes dashboard
One simple way to install the kubernetes-dashboard, is by applying the latest (as of this writing) yaml configuration file.
kubectl apply -f https://raw.githubusercontent.com/kubernetes/dashboard/v2.6.1/aio/deploy/recommended.yaml
the output of the above command should be something like
namespace/kubernetes-dashboard created
serviceaccount/kubernetes-dashboard created
service/kubernetes-dashboard created
secret/kubernetes-dashboard-certs created
secret/kubernetes-dashboard-csrf created
secret/kubernetes-dashboard-key-holder created
configmap/kubernetes-dashboard-settings created
role.rbac.authorization.k8s.io/kubernetes-dashboard created
clusterrole.rbac.authorization.k8s.io/kubernetes-dashboard created
rolebinding.rbac.authorization.k8s.io/kubernetes-dashboard created
clusterrolebinding.rbac.authorization.k8s.io/kubernetes-dashboard created
deployment.apps/kubernetes-dashboard created
service/dashboard-metrics-scraper created
deployment.apps/dashboard-metrics-scraper created
Verify the installation
kubectl get all -n kubernetes-dashboard
NAME                                             READY   STATUS    RESTARTS   AGE
pod/dashboard-metrics-scraper-64bcc67c9c-kvll7   1/1     Running   0          2m16s
pod/kubernetes-dashboard-66c887f759-rr4gn        1/1     Running   0          2m16s

NAME                                TYPE        CLUSTER-IP      EXTERNAL-IP   PORT(S)    AGE
service/dashboard-metrics-scraper   ClusterIP   10.110.25.61    <none>        8000/TCP   2m16s
service/kubernetes-dashboard        ClusterIP   10.100.65.122   <none>        443/TCP    2m16s

NAME                                        READY   UP-TO-DATE   AVAILABLE   AGE
deployment.apps/dashboard-metrics-scraper   1/1     1            1           2m16s
deployment.apps/kubernetes-dashboard        1/1     1            1           2m16s

NAME                                                   DESIRED   CURRENT   READY   AGE
replicaset.apps/dashboard-metrics-scraper-64bcc67c9c   1         1         1       2m16s
replicaset.apps/kubernetes-dashboard-66c887f759        1         1         1       2m16s
Add a Node Port to kubernetes dashboard
Kubernetes Dashboard by default runs on a internal 10.x.x.x IP.
To access the dashboard we need to have a NodePort in the kubernetes-dashboard service.
We can either Patch the service or edit the yaml file.
Patch kubernetes-dashboard
kubectl --namespace kubernetes-dashboard patch svc kubernetes-dashboard -p '{"spec": {"type": "NodePort"}}'
output
service/kubernetes-dashboard patched
verify the service
kubectl get svc -n kubernetes-dashboard
NAME                        TYPE        CLUSTER-IP      EXTERNAL-IP   PORT(S)         AGE
dashboard-metrics-scraper   ClusterIP   10.110.25.61    <none>        8000/TCP        11m
kubernetes-dashboard        NodePort    10.100.65.122   <none>        443:32709/TCP   11m
we can see the 30480 in the kubernetes-dashboard.
Edit kubernetes-dashboard Service
kubectl edit svc -n kubernetes-dashboard kubernetes-dashboard
and chaning the service type from
type: ClusterIPto
type: NodePortAccessing Kubernetes Dashboard
The kubernetes-dashboard has two (2) pods, one (1) for metrics, one (2) for the dashboard.
To access the dashboard, first we need to identify in which Node is running.
kubectl get pods -n kubernetes-dashboard -o wide
NAME                                         READY   STATUS    RESTARTS   AGE     IP           NODE         NOMINATED NODE   READINESS GATES
dashboard-metrics-scraper-64bcc67c9c-fs7pt   1/1     Running   0          2m43s   10.244.1.9   k8wrknode1   <none>           <none>
kubernetes-dashboard-66c887f759-pzt4z        1/1     Running   0          2m44s   10.244.2.9   k8wrknode2   <none>           <none>
In my setup the dashboard pod is running on the worker node 2 and from the /etc/hosts is on the 192.168.122.8 IP.
The NodePort is 32709
k get svc -n kubernetes-dashboard -o wide
So, we can open a new tab on our browser and type:
https://192.168.122.8:32709
and accept the self-signed certificate!

Create An Authentication Token (RBAC)
Last step for the kubernetes-dashboard is to create an authentication token.
Creating a Service Account
Create a new yaml file, with kind: ServiceAccount that has access to kubernetes-dashboard namespace and has name: admin-user.
cat > kubernetes-dashboard.ServiceAccount.yaml <<EOF
apiVersion: v1
kind: ServiceAccount
metadata:
  name: admin-user
  namespace: kubernetes-dashboard

EOF
add this service account to the k8s cluster
kubectl apply -f kubernetes-dashboard.ServiceAccount.yaml
output
serviceaccount/admin-user createdCreating a ClusterRoleBinding
We need to bind the Service Account with the kubernetes-dashboard via Role-based access control.
cat > kubernetes-dashboard.ClusterRoleBinding.yaml <<EOF
apiVersion: rbac.authorization.k8s.io/v1
kind: ClusterRoleBinding
metadata:
  name: admin-user
roleRef:
  apiGroup: rbac.authorization.k8s.io
  kind: ClusterRole
  name: cluster-admin
subjects:
- kind: ServiceAccount
  name: admin-user
  namespace: kubernetes-dashboard

EOF
apply this yaml file
kubectl apply -f kubernetes-dashboard.ClusterRoleBinding.yaml
clusterrolebinding.rbac.authorization.k8s.io/admin-user created
That means, our Service Account User has all the necessary roles to access the kubernetes-dashboard.
Getting a Bearer Token
Final step is to create/get a token for our user.
kubectl -n kubernetes-dashboard create token admin-user
eyJhbGciOiJSUzI1NiIsImtpZCI6Im04M2JOY2k1Yk1hbFBhLVN2cjA4X1pkdktXNldqWkR4bjB6MGpTdFgtVHcifQ.eyJhdWQiOlsiaHR0cHM6Ly9rdWJlcm5ldGVzLmRlZmF1bHQuc3ZjLmNsdXN0ZXIubG9jYWwiXSwiZXhwIjoxNjYxOTU2NDQ1LCJpYXQiOjE2NjE5NTI4NDUsImlzcyI6Imh0dHBzOi8va3ViZXJuZXRlcy5kZWZhdWx0LnN2Yy5jbHVzdGVyLmxvY2FsIiwia3ViZXJuZXRlcy5pbyI6eyJuYW1lc3BhY2UiOiJrdWJlcm5ldGVzLWRhc2hib2FyZCIsInNlcnZpY2VhY2NvdW50Ijp7Im5hbWUiOiJhZG1pbi11c2VyIiwidWlkIjoiN2M4OWIyZDktMGIwYS00ZDg4LTk2Y2EtZDU3NjhjOWU2ZGYxIn19LCJuYmYiOjE2NjE5NTI4NDUsInN1YiI6InN5c3RlbTpzZXJ2aWNlYWNjb3VudDprdWJlcm5ldGVzLWRhc2hib2FyZDphZG1pbi11c2VyIn0.RMRQkZZhcoC5vCvck6hKfqXJ4dfN4JoQyAaClHZvOMI6JgQZEfB2-_Qsh5MfFApJUEit-0TX9r3CzW3JqvB7dmpTPxUQvHK68r82WGveBVp1wF37UyXu_IzxiCQzpCWYr3GcVGAGZVBbhhqNYm765FV02ZA_khHrW3WpB80ikhm_TNLkOS6Llq2UiLFZyHHmjl5pwvGzT7YXZe8s-llZSgc0UenEwPG-82eE279oOy6r4_NltoV1HB3uu0YjUJPlkqAPnHuSfAA7-8A3XAAVHhRQvFPea1qZLc4-oD24AcU0FjWqDMILEyE8zaD2ci8zEQBMoxcf2qmj0wn9cfbZwQ
Add this token to the previous login page

Browsing Kubernetes Dashboard
eg. Cluster –> Nodes

Nginx App
Before finishing this blog post, I would also like to share how to install a simple nginx-app as it is customary to do such thing in every new k8s cluster.
But plz excuse me, I will not get into much details.
You should be able to understand the below k8s commands.
Install nginx-app
kubectl create deployment nginx-app --image=nginx --replicas=2
deployment.apps/nginx-app createdGet Deployment
kubectl get deployment nginx-app -o wideNAME READY UP-TO-DATE AVAILABLE AGE CONTAINERS IMAGES SELECTOR
nginx-app 2/2 2 2 64s nginx nginx app=nginx-appExpose Nginx-App
kubectl expose deployment nginx-app --type=NodePort --port=80
service/nginx-app exposedVerify Service nginx-app
kubectl get svc nginx-app -o wide
NAME        TYPE       CLUSTER-IP      EXTERNAL-IP   PORT(S)        AGE   SELECTOR
nginx-app   NodePort   10.98.170.185   <none>        80:31761/TCP   27s   app=nginx-app
Describe Service nginx-app
kubectl describe svc nginx-app
Name:                     nginx-app
Namespace:                default
Labels:                   app=nginx-app
Annotations:              <none>
Selector:                 app=nginx-app
Type:                     NodePort
IP Family Policy:         SingleStack
IP Families:              IPv4
IP:                       10.98.170.185
IPs:                      10.98.170.185
Port:                     <unset>  80/TCP
TargetPort:               80/TCP
NodePort:                 <unset>  31761/TCP
Endpoints:                10.244.1.10:80,10.244.2.10:80
Session Affinity:         None
External Traffic Policy:  Cluster
Events:                   <none>
Curl Nginx-App
curl http://192.168.122.8:31761
<!DOCTYPE html>
<html>
<head>
<title>Welcome to nginx!</title>
<style>
html { color-scheme: light dark; }
body { width: 35em; margin: 0 auto;
font-family: Tahoma, Verdana, Arial, sans-serif; }
</style>
</head>
<body>
<h1>Welcome to nginx!</h1>
<p>If you see this page, the nginx web server is successfully installed and
working. Further configuration is required.</p>

<p>For online documentation and support please refer to
<a href="http://nginx.org/">nginx.org</a>.<br/>
Commercial support is available at
<a href="http://nginx.com/">nginx.com</a>.</p>

<p><em>Thank you for using nginx.</em></p>
</body>
</html>
Nginx-App from Browser

That’s it !
I hope you enjoyed this blog post.
-ebal
./destroy.sh...
libvirt_domain.domain-ubuntu["k8wrknode1"]: Destroying... [id=446cae2a-ce14-488f-b8e9-f44839091bce]
libvirt_domain.domain-ubuntu["k8scpnode"]: Destroying... [id=51e12abb-b14b-4ab8-b098-c1ce0b4073e3]
time_sleep.wait_for_cloud_init: Destroying... [id=2022-08-30T18:02:06Z]
libvirt_domain.domain-ubuntu["k8wrknode2"]: Destroying... [id=0767fb62-4600-4bc8-a94a-8e10c222b92e]
time_sleep.wait_for_cloud_init: Destruction complete after 0s
libvirt_domain.domain-ubuntu["k8wrknode1"]: Destruction complete after 1s
libvirt_domain.domain-ubuntu["k8scpnode"]: Destruction complete after 1s
libvirt_domain.domain-ubuntu["k8wrknode2"]: Destruction complete after 1s
libvirt_cloudinit_disk.cloud-init["k8wrknode1"]: Destroying... [id=/var/lib/libvirt/images/Jpw2Sg_cloud-init.iso;b8ddfa73-a770-46de-ad16-b0a5a08c8550]
libvirt_cloudinit_disk.cloud-init["k8wrknode2"]: Destroying... [id=/var/lib/libvirt/images/VdUklQ_cloud-init.iso;5511ed7f-a864-4d3f-985a-c4ac07eac233]
libvirt_volume.ubuntu-base["k8scpnode"]: Destroying... [id=/var/lib/libvirt/images/l5Rr1w_ubuntu-base]
libvirt_volume.ubuntu-base["k8wrknode2"]: Destroying... [id=/var/lib/libvirt/images/VdUklQ_ubuntu-base]
libvirt_cloudinit_disk.cloud-init["k8scpnode"]: Destroying... [id=/var/lib/libvirt/images/l5Rr1w_cloud-init.iso;11ef6bb7-a688-4c15-ae33-10690500705f]
libvirt_volume.ubuntu-base["k8wrknode1"]: Destroying... [id=/var/lib/libvirt/images/Jpw2Sg_ubuntu-base]
libvirt_cloudinit_disk.cloud-init["k8wrknode1"]: Destruction complete after 1s
libvirt_volume.ubuntu-base["k8wrknode2"]: Destruction complete after 1s
libvirt_cloudinit_disk.cloud-init["k8scpnode"]: Destruction complete after 1s
libvirt_cloudinit_disk.cloud-init["k8wrknode2"]: Destruction complete after 1s
libvirt_volume.ubuntu-base["k8wrknode1"]: Destruction complete after 1s
libvirt_volume.ubuntu-base["k8scpnode"]: Destruction complete after 2s
libvirt_volume.ubuntu-vol["k8wrknode1"]: Destroying... [id=/var/lib/libvirt/images/Jpw2Sg_ubuntu-vol]
libvirt_volume.ubuntu-vol["k8scpnode"]: Destroying... [id=/var/lib/libvirt/images/l5Rr1w_ubuntu-vol]
libvirt_volume.ubuntu-vol["k8wrknode2"]: Destroying... [id=/var/lib/libvirt/images/VdUklQ_ubuntu-vol]
libvirt_volume.ubuntu-vol["k8scpnode"]: Destruction complete after 0s
libvirt_volume.ubuntu-vol["k8wrknode2"]: Destruction complete after 0s
libvirt_volume.ubuntu-vol["k8wrknode1"]: Destruction complete after 0s
random_id.id["k8scpnode"]: Destroying... [id=l5Rr1w]
random_id.id["k8wrknode2"]: Destroying... [id=VdUklQ]
random_id.id["k8wrknode1"]: Destroying... [id=Jpw2Sg]
random_id.id["k8wrknode2"]: Destruction complete after 0s
random_id.id["k8scpnode"]: Destruction complete after 0s
random_id.id["k8wrknode1"]: Destruction complete after 0s
Destroy complete! Resources: 16 destroyed.
many thanks to erethon for his help & support on this article.
Working on your home lab, it is quiet often that you need to spawn containers or virtual machines to test or develop something. I was doing this kind of testing with public cloud providers with minimal VMs and for short time of periods to reduce any costs. In this article I will try to explain how to use libvirt -that means kvm- with terraform and provide a simple way to run this on your linux machine.
Be aware this will be a (long) technical article and some experience is needed with kvm/libvirt & terraform but I will try to keep it simple so you can follow the instructions.
Terraform
Install Terraform v0.13 either from your distro or directly from hashicopr’s site.
$ terraform version
Terraform v0.13.2
Libvirt
same thing for libvirt
$ libvirtd --version
libvirtd (libvirt) 6.5.0

$ sudo systemctl is-active libvirtd
active
verify that you have access to libvirt
$ virsh -c qemu:///system version
Compiled against library: libvirt 6.5.0
Using library: libvirt 6.5.0
Using API: QEMU 6.5.0
Running hypervisor: QEMU 5.1.0
Terraform Libvirt Provider
To access the libvirt daemon via terraform, we need the terraform-libvirt provider.
Terraform provider to provision infrastructure with Linux’s KVM using libvirt
The official repo is on GitHub - dmacvicar/terraform-provider-libvirt and you can download a precompiled version for your distro from the repo, or you can download a generic version from my gitlab repo
ebal / terraform-provider-libvirt · GitLab
These are my instructions
mkdir -pv ~/.local/share/terraform/plugins/registry.terraform.io/dmacvicar/libvirt/0.6.2/linux_amd64/
curl -sLo ~/.local/share/terraform/plugins/registry.terraform.io/dmacvicar/libvirt/0.6.2/linux_amd64/terraform-provider-libvirt https://gitlab.com/terraform-provider/terraform-provider-libvirt/-/jobs/artifacts/master/raw/terraform-provider-libvirt/terraform-provider-libvirt?job=run-build
chmod +x ~/.local/share/terraform/plugins/registry.terraform.io/dmacvicar/libvirt/0.6.2/linux_amd64/terraform-provider-libvirt
Terraform Init
Let’s create a new directory and test that everything is fine.
mkdir -pv tf_libvirt
cd !$

cat > Provider.tf <<EOF
terraform {
 required_version = ">= 0.13"
 required_providers {
     libvirt = {
       source  = "dmacvicar/libvirt"
       version = "0.6.2"
     }
 }
}
EOF
$ terraform init

Initializing the backend...

Initializing provider plugins...
- Finding dmacvicar/libvirt versions matching "0.6.2"...
- Installing dmacvicar/libvirt v0.6.2...
- Installed dmacvicar/libvirt v0.6.2 (unauthenticated)

Terraform has been successfully initialized!

You may now begin working with Terraform. Try running "terraform plan" to see
any changes that are required for your infrastructure. All Terraform commands
should now work.

If you ever set or change modules or backend configuration for Terraform,
rerun this command to reinitialize your working directory. If you forget, other
commands will detect it and remind you to do so if necessary.
everything seems okay!
We can verify with tree or find
$ tree -a
.
├── Provider.tf
└── .terraform
    └── plugins
        ├── registry.terraform.io
        │   └── dmacvicar
        │       └── libvirt
        │           └── 0.6.2
        │               └── linux_amd64 -> /home/ebal/.local/share/terraform/plugins/registry.terraform.io/dmacvicar/libvirt/0.6.2/linux_amd64
        └── selections.json

7 directories, 2 files
Provider
but did we actually connect to libvirtd via terraform ?
Short answer: No.
We just told terraform to use this specific provider.
How to connect ?
We need to add the connection libvirt uri to the provider section:
provider "libvirt" {
    uri = "qemu:///system"
}
so our Provider.tf looks like this
terraform {
  required_version = ">= 0.13"
  required_providers {
    libvirt = {
      source  = "dmacvicar/libvirt"
      version = "0.6.2"
    }
  }
}

provider "libvirt" {
  uri = "qemu:///system"
}
Libvirt URI
libvirt is a virtualization api/toolkit that supports multiple drivers and thus you can use libvirt against the below virtualization platforms
- LXC - Linux Containers
- OpenVZ
- QEMU
- VirtualBox
- VMware ESX
- VMware Workstation/Player
- Xen
- Microsoft Hyper-V
- Virtuozzo
- Bhyve - The BSD Hypervisor
Libvirt also supports multiple authentication mechanisms like ssh
virsh -c qemu+ssh://username@host1.example.org/systemso it is really important to properly define the libvirt URI in terraform!
In this article, I will limit it to a local libvirt daemon, but keep in mind you can use a remote libvirt daemon as well.
Volume
Next thing, we need a disk volume!
Volume.tf
resource "libvirt_volume" "ubuntu-2004-vol" {
  name = "ubuntu-2004-vol"
  pool = "default"
  #source = "https://cloud-images.ubuntu.com/focal/current/focal-server-cloudimg-amd64-disk-kvm.img"
  source = "ubuntu-20.04.img"
  format = "qcow2"
}
I have already downloaded this image and verified its checksum, I will use this local image as the base image for my VM’s volume.
By running terraform plan we will see this output:
  # libvirt_volume.ubuntu-2004-vol will be created
  + resource "libvirt_volume" "ubuntu-2004-vol" {
      + format = "qcow2"
      + id     = (known after apply)
      + name   = "ubuntu-2004-vol"
      + pool   = "default"
      + size   = (known after apply)
      + source = "ubuntu-20.04.img"
    }
What we expect is to use this source image and create a new disk volume (copy) and put it to the default disk storage libvirt pool.
Let’s try to figure out what is happening here:
terraform plan -out terraform.out
terraform apply terraform.out
terraform show
# libvirt_volume.ubuntu-2004-vol:
resource "libvirt_volume" "ubuntu-2004-vol" {
format = "qcow2"
id = "/var/lib/libvirt/images/ubuntu-2004-vol"
name = "ubuntu-2004-vol"
pool = "default"
size = 2361393152
source = "ubuntu-20.04.img"
}
and
$ virsh -c qemu:///system vol-list default
Name Path
------------------------------------------------------------
ubuntu-2004-vol /var/lib/libvirt/images/ubuntu-2004-volVolume Size
BE Aware: by this declaration, the produced disk volume image will have the same size as the original source. In this case ~2G of disk.
We will show later in this article how to expand to something larger.
destroy volume
$ terraform destroy
libvirt_volume.ubuntu-2004-vol: Refreshing state... [id=/var/lib/libvirt/images/ubuntu-2004-vol]
An execution plan has been generated and is shown below.
Resource actions are indicated with the following symbols:
- destroy
Terraform will perform the following actions:
# libvirt_volume.ubuntu-2004-vol will be destroyed
- resource "libvirt_volume" "ubuntu-2004-vol" {
- format = "qcow2" -> null
- id = "/var/lib/libvirt/images/ubuntu-2004-vol" -> null
- name = "ubuntu-2004-vol" -> null
- pool = "default" -> null
- size = 2361393152 -> null
- source = "ubuntu-20.04.img" -> null
}
Plan: 0 to add, 0 to change, 1 to destroy.
Do you really want to destroy all resources?
Terraform will destroy all your managed infrastructure, as shown above.
There is no undo. Only 'yes' will be accepted to confirm.
Enter a value: yes
libvirt_volume.ubuntu-2004-vol: Destroying... [id=/var/lib/libvirt/images/ubuntu-2004-vol]
libvirt_volume.ubuntu-2004-vol: Destruction complete after 0s
Destroy complete! Resources: 1 destroyed.
verify
$ virsh -c qemu:///system vol-list default
Name Path
----------------------------------------------------------
reminder: always destroy!
Domain
Believe it or not, we are half way from our first VM!
We need to create a libvirt domain resource.
Domain.tf
cat > Domain.tf <<EOF
resource "libvirt_domain" "ubuntu-2004-vm" {
name = "ubuntu-2004-vm"
memory = "2048"
vcpu = 1
disk {
volume_id = libvirt_volume.ubuntu-2004-vol.id
}
}
EOFApply the new tf plan
terraform plan -out terraform.out
terraform apply terraform.out
$ terraform show
# libvirt_domain.ubuntu-2004-vm:
resource "libvirt_domain" "ubuntu-2004-vm" {
arch = "x86_64"
autostart = false
disk = [
{
block_device = ""
file = ""
scsi = false
url = ""
volume_id = "/var/lib/libvirt/images/ubuntu-2004-vol"
wwn = ""
},
]
emulator = "/usr/bin/qemu-system-x86_64"
fw_cfg_name = "opt/com.coreos/config"
id = "3a4a2b44-5ecd-433c-8645-9bccc831984f"
machine = "pc"
memory = 2048
name = "ubuntu-2004-vm"
qemu_agent = false
running = true
vcpu = 1
}
# libvirt_volume.ubuntu-2004-vol:
resource "libvirt_volume" "ubuntu-2004-vol" {
    format = "qcow2"
    id     = "/var/lib/libvirt/images/ubuntu-2004-vol"
    name   = "ubuntu-2004-vol"
    pool   = "default"
    size   = 2361393152
    source = "ubuntu-20.04.img"
}
Verify via virsh:
$ virsh -c qemu:///system list
Id Name State
--------------------------------
3 ubuntu-2004-vm running
Destroy them!
$ terraform destroy
Do you really want to destroy all resources?
Terraform will destroy all your managed infrastructure, as shown above.
There is no undo. Only 'yes' will be accepted to confirm.
Enter a value: yes
libvirt_domain.ubuntu-2004-vm: Destroying... [id=3a4a2b44-5ecd-433c-8645-9bccc831984f]
libvirt_domain.ubuntu-2004-vm: Destruction complete after 0s
libvirt_volume.ubuntu-2004-vol: Destroying... [id=/var/lib/libvirt/images/ubuntu-2004-vol]
libvirt_volume.ubuntu-2004-vol: Destruction complete after 0s
Destroy complete! Resources: 2 destroyed.
That’s it !
We have successfully created a new VM from a source image that runs on our libvirt environment.
But we can not connect/use or do anything with this instance. Not yet, we need to add a few more things. Like a network interface, a console output and a default cloud-init file to auto-configure the virtual machine.
Variables
Before continuing with the user-data (cloud-init), it is a good time to set up some terraform variables.
cat > Variables.tf <<EOF
variable "domain" {
description = "The domain/host name of the zone"
default = "ubuntu2004"
}
EOF
We are going to use this variable within the user-date yaml file.
Cloud-init
The best way to configure a newly created virtual machine, is via cloud-init and the ability of injecting a user-data.yml file into the virtual machine via terraform-libvirt.
user-data
#cloud-config
#disable_root: true
disable_root: false
chpasswd:
list: |
root:ping
expire: False
# Set TimeZone
timezone: Europe/Athens
hostname: "${hostname}"
# PostInstall
runcmd:
# Remove cloud-init
- apt-get -qqy autoremove --purge cloud-init lxc lxd snapd
- apt-get -y --purge autoremove
- apt -y autoclean
- apt -y clean all
cloud init disk
Terraform will create a new iso by reading the above template file and generate a proper user-data.yaml file. To use this cloud init iso, we need to configure it as a libvirt cloud-init resource.
Cloudinit.tf
data "template_file" "user_data" {
template = file("user-data.yml")
vars = {
hostname = var.domain
}
}
resource "libvirt_cloudinit_disk" "cloud-init" {
name = "cloud-init.iso"
user_data = data.template_file.user_data.rendered
}
and we need to modify our Domain.tf accordingly
cloudinit = libvirt_cloudinit_disk.cloud-init.idTerraform will create and upload this iso disk image into the default libvirt storage pool. And attach it to the virtual machine in the boot process.
At this moment the tf_libvirt directory should look like this:
$ ls -1
Cloudinit.tf
Domain.tf
Provider.tf
ubuntu-20.04.img
user-data.yml
Variables.tf
Volume.tf
To give you an idea, the abstract design is this:

apply
 terraform plan -out terraform.out
 terraform apply terraform.out
$ terraform show
# data.template_file.user_data:
data "template_file" "user_data" {
id = "cc82a7db4c6498aee21a883729fc4be7b84059d3dec69b92a210e046c67a9a00"
rendered = <<~EOT
#cloud-config
#disable_root: true
disable_root: false
chpasswd:
list: |
root:ping
expire: False
# Set TimeZone
timezone: Europe/Athens
hostname: "ubuntu2004"
# PostInstall
runcmd:
# Remove cloud-init
- apt-get -qqy autoremove --purge cloud-init lxc lxd snapd
- apt-get -y --purge autoremove
- apt -y autoclean
- apt -y clean all
EOT
template = <<~EOT
#cloud-config

#disable_root: true
disable_root: false
chpasswd:
  list: |
       root:ping
  expire: False

# Set TimeZone
timezone: Europe/Athens

hostname: "${hostname}"

# PostInstall
runcmd:
  # Remove cloud-init
  - apt-get -qqy autoremove --purge cloud-init lxc lxd snapd
  - apt-get -y --purge autoremove
  - apt -y autoclean
  - apt -y clean all
EOT
vars = {
"hostname" = "ubuntu2004"
}
}
# libvirt_cloudinit_disk.cloud-init:
resource "libvirt_cloudinit_disk" "cloud-init" {
id = "/var/lib/libvirt/images/cloud-init.iso;5f5cdc31-1d38-39cb-cc72-971e474ca539"
name = "cloud-init.iso"
pool = "default"
user_data = <<~EOT
#cloud-config
#disable_root: true
disable_root: false
chpasswd:
list: |
root:ping
expire: False
# Set TimeZone
timezone: Europe/Athens
hostname: "ubuntu2004"
# PostInstall
runcmd:
# Remove cloud-init
- apt-get -qqy autoremove --purge cloud-init lxc lxd snapd
- apt-get -y --purge autoremove
- apt -y autoclean
- apt -y clean all
EOT
}
# libvirt_domain.ubuntu-2004-vm:
resource "libvirt_domain" "ubuntu-2004-vm" {
arch = "x86_64"
autostart = false
cloudinit = "/var/lib/libvirt/images/cloud-init.iso;5f5ce077-9508-3b8c-273d-02d44443b79c"
disk = [
{
block_device = ""
file = ""
scsi = false
url = ""
volume_id = "/var/lib/libvirt/images/ubuntu-2004-vol"
wwn = ""
},
]
emulator = "/usr/bin/qemu-system-x86_64"
fw_cfg_name = "opt/com.coreos/config"
id = "3ade5c95-30d4-496b-9bcf-a12d63993cfa"
machine = "pc"
memory = 2048
name = "ubuntu-2004-vm"
qemu_agent = false
running = true
vcpu = 1
}
# libvirt_volume.ubuntu-2004-vol:
resource "libvirt_volume" "ubuntu-2004-vol" {
format = "qcow2"
id = "/var/lib/libvirt/images/ubuntu-2004-vol"
name = "ubuntu-2004-vol"
pool = "default"
size = 2361393152
source = "ubuntu-20.04.img"
}
Lots of output , but let me explain it really quick:
generate a user-data file from template, template is populated with variables, create an cloud-init iso, create a volume disk from source, create a virtual machine with this new volume disk and boot it with this cloud-init iso.
Pretty much, that’s it!!!
$ virsh -c qemu:///system vol-list --details default
Name Path Type Capacity Allocation
---------------------------------------------------------------------------------------------
cloud-init.iso /var/lib/libvirt/images/cloud-init.iso file 364.00 KiB 364.00 KiB
ubuntu-2004-vol /var/lib/libvirt/images/ubuntu-2004-vol file 2.20 GiB 537.94 MiB
$ virsh -c qemu:///system list
Id Name State
--------------------------------
1 ubuntu-2004-vm running
destroy
$ terraform destroy -auto-approve
data.template_file.user_data: Refreshing state... [id=cc82a7db4c6498aee21a883729fc4be7b84059d3dec69b92a210e046c67a9a00]
libvirt_volume.ubuntu-2004-vol: Refreshing state... [id=/var/lib/libvirt/images/ubuntu-2004-vol]
libvirt_cloudinit_disk.cloud-init: Refreshing state... [id=/var/lib/libvirt/images/cloud-init.iso;5f5cdc31-1d38-39cb-cc72-971e474ca539]
libvirt_domain.ubuntu-2004-vm: Refreshing state... [id=3ade5c95-30d4-496b-9bcf-a12d63993cfa]
libvirt_cloudinit_disk.cloud-init: Destroying... [id=/var/lib/libvirt/images/cloud-init.iso;5f5cdc31-1d38-39cb-cc72-971e474ca539]
libvirt_domain.ubuntu-2004-vm: Destroying... [id=3ade5c95-30d4-496b-9bcf-a12d63993cfa]
libvirt_cloudinit_disk.cloud-init: Destruction complete after 0s
libvirt_domain.ubuntu-2004-vm: Destruction complete after 0s
libvirt_volume.ubuntu-2004-vol: Destroying... [id=/var/lib/libvirt/images/ubuntu-2004-vol]
libvirt_volume.ubuntu-2004-vol: Destruction complete after 0s
Destroy complete! Resources: 3 destroyed.
Most important detail is:
Resources: 3 destroyed.
- cloud-init.iso
- ubuntu-2004-vol
- ubuntu-2004-vm
Console
but there are a few things still missing.
To add a console for starters so we can connect into this virtual machine!
To do that, we need to re-edit Domain.tf and add a console output:
console {
target_type = "serial"
type = "pty"
target_port = "0"
}
console {
target_type = "virtio"
type = "pty"
target_port = "1"
}
the full file should look like:
resource "libvirt_domain" "ubuntu-2004-vm" {
name = "ubuntu-2004-vm"
memory = "2048"
vcpu = 1
cloudinit = libvirt_cloudinit_disk.cloud-init.id
disk {
volume_id = libvirt_volume.ubuntu-2004-vol.id
}
console {
target_type = "serial"
type = "pty"
target_port = "0"
}
console {
target_type = "virtio"
type = "pty"
target_port = "1"
}
}
Create again the VM with
terraform plan -out terraform.out
terraform apply terraform.out
And test the console:
$ virsh -c qemu:///system console ubuntu-2004-vm
Connected to domain ubuntu-2004-vm
Escape character is ^] (Ctrl + ])
wow!
We have actually logged-in to this VM using the libvirt console!
Virtual Machine
some interesting details
root@ubuntu2004:~# df -h
Filesystem Size Used Avail Use% Mounted on
/dev/root 2.0G 916M 1.1G 46% /
devtmpfs 998M 0 998M 0% /dev
tmpfs 999M 0 999M 0% /dev/shm
tmpfs 200M 392K 200M 1% /run
tmpfs 5.0M 0 5.0M 0% /run/lock
tmpfs 999M 0 999M 0% /sys/fs/cgroup
/dev/vda15 105M 3.9M 101M 4% /boot/efi
tmpfs 200M 0 200M 0% /run/user/0
root@ubuntu2004:~# free -hm
total used free shared buff/cache available
Mem: 2.0Gi 73Mi 1.7Gi 0.0Ki 140Mi 1.8Gi
Swap: 0B 0B 0B
root@ubuntu2004:~# ip a
1: lo: <LOOPBACK,UP,LOWER_UP> mtu 65536 qdisc noqueue state UNKNOWN group default qlen 1000
link/loopback 00:00:00:00:00:00 brd 00:00:00:00:00:00
inet 127.0.0.1/8 scope host lo
valid_lft forever preferred_lft forever
inet6 ::1/128 scope host
valid_lft forever preferred_lft forever
2: tunl0@NONE: <NOARP> mtu 1480 qdisc noop state DOWN group default qlen 1000
link/ipip 0.0.0.0 brd 0.0.0.0
3: sit0@NONE: <NOARP> mtu 1480 qdisc noop state DOWN group default qlen 1000
link/sit 0.0.0.0 brd 0.0.0.0
Do not forget to destroy
$ terraform destroy -auto-approve
data.template_file.user_data: Refreshing state... [id=cc82a7db4c6498aee21a883729fc4be7b84059d3dec69b92a210e046c67a9a00]
libvirt_volume.ubuntu-2004-vol: Refreshing state... [id=/var/lib/libvirt/images/ubuntu-2004-vol]
libvirt_cloudinit_disk.cloud-init: Refreshing state... [id=/var/lib/libvirt/images/cloud-init.iso;5f5ce077-9508-3b8c-273d-02d44443b79c]
libvirt_domain.ubuntu-2004-vm: Refreshing state... [id=69f75b08-1e06-409d-9fd6-f45d82260b51]
libvirt_domain.ubuntu-2004-vm: Destroying... [id=69f75b08-1e06-409d-9fd6-f45d82260b51]
libvirt_domain.ubuntu-2004-vm: Destruction complete after 0s
libvirt_cloudinit_disk.cloud-init: Destroying... [id=/var/lib/libvirt/images/cloud-init.iso;5f5ce077-9508-3b8c-273d-02d44443b79c]
libvirt_volume.ubuntu-2004-vol: Destroying... [id=/var/lib/libvirt/images/ubuntu-2004-vol]
libvirt_cloudinit_disk.cloud-init: Destruction complete after 0s
libvirt_volume.ubuntu-2004-vol: Destruction complete after 0s
Destroy complete! Resources: 3 destroyed.
extend the volume disk
As mentioned above, the volume’s disk size is exactly as the origin source image.
In our case it’s 2G.
What we need to do, is to use the source image as a base for a new volume disk. In our new volume disk, we can declare the size we need.
I would like to make this a user variable: Variables.tf
variable "vol_size" {
description = "The mac & iP address for this VM"
# 10G
default = 10 * 1024 * 1024 * 1024
}
Arithmetic in terraform!!
So the Volume.tf should be:
resource "libvirt_volume" "ubuntu-2004-base" {
name = "ubuntu-2004-base"
pool = "default"
#source = "https://cloud-images.ubuntu.com/focal/current/focal-server-cloudimg-amd64-disk-kvm.img"
source = "ubuntu-20.04.img"
format = "qcow2"
}
resource "libvirt_volume" "ubuntu-2004-vol" {
name = "ubuntu-2004-vol"
pool = "default"
base_volume_id = libvirt_volume.ubuntu-2004-base.id
size = var.vol_size
}
base image –> volume image
test it
terraform plan -out terraform.out
terraform apply terraform.out
$ virsh -c qemu:///system console ubuntu-2004-vm
Connected to domain ubuntu-2004-vm
Escape character is ^] (Ctrl + ])
ubuntu2004 login: root
Password:
Welcome to Ubuntu 20.04.1 LTS (GNU/Linux 5.4.0-1021-kvm x86_64)
* Documentation: https://help.ubuntu.com
* Management: https://landscape.canonical.com
* Support: https://ubuntu.com/advantage
System information as of Sat Sep 12 18:27:46 EEST 2020
System load: 0.29 Memory usage: 6% Processes: 66
Usage of /: 9.3% of 9.52GB Swap usage: 0% Users logged in: 0
0 updates can be installed immediately.
0 of these updates are security updates.
Failed to connect to https://changelogs.ubuntu.com/meta-release-lts. Check your Internet connection or proxy settings
Last login: Sat Sep 12 18:26:37 EEST 2020 on ttyS0
root@ubuntu2004:~# df -h /
Filesystem Size Used Avail Use% Mounted on
/dev/root 9.6G 912M 8.7G 10% /
root@ubuntu2004:~#
10G !
destroy
terraform destroy -auto-approveSwap
I would like to have a swap partition and I will use cloud init to create a swap partition.
modify user-data.yml
# Create swap partition
swap:
filename: /swap.img
size: "auto"
maxsize: 2G
test it
terraform plan -out terraform.out && terraform apply terraform.out$ virsh -c qemu:///system console ubuntu-2004-vm
Connected to domain ubuntu-2004-vm
Escape character is ^] (Ctrl + ])
root@ubuntu2004:~# free -hm
total used free shared buff/cache available
Mem: 2.0Gi 86Mi 1.7Gi 0.0Ki 188Mi 1.8Gi
Swap: 2.0Gi 0B 2.0Gi
root@ubuntu2004:~#
success !!
terraform destroy -auto-approveNetwork
How about internet? network?
Yes, what about it ?
I guess you need to connect to the internets, okay then.
The easiest way is to add this your Domain.tf
network_interface {
network_name = "default"
}
This will use the default network libvirt resource
$ virsh -c qemu:///system net-list
Name State Autostart Persistent
----------------------------------------------------
default active yes yes
if you prefer to directly expose your VM to your local network (be very careful) then replace the above with a macvtap interface. If your ISP router provides dhcp, then your VM will take a random IP from your router.
network_interface {
macvtap = "eth0"
}
test it
terraform plan -out terraform.out && terraform apply terraform.out$ virsh -c qemu:///system console ubuntu-2004-vm
Connected to domain ubuntu-2004-vm
Escape character is ^] (Ctrl + ])
root@ubuntu2004:~#
root@ubuntu2004:~# ip a
1: lo: <LOOPBACK,UP,LOWER_UP> mtu 65536 qdisc noqueue state UNKNOWN group default qlen 1000
link/loopback 00:00:00:00:00:00 brd 00:00:00:00:00:00
inet 127.0.0.1/8 scope host lo
valid_lft forever preferred_lft forever
inet6 ::1/128 scope host
valid_lft forever preferred_lft forever
2: ens3: <BROADCAST,MULTICAST,UP,LOWER_UP> mtu 1500 qdisc pfifo_fast state UP group default qlen 1000
link/ether 52:54:00:36:66:96 brd ff:ff:ff:ff:ff:ff
inet 192.168.122.228/24 brd 192.168.122.255 scope global dynamic ens3
valid_lft 3544sec preferred_lft 3544sec
inet6 fe80::5054:ff:fe36:6696/64 scope link
valid_lft forever preferred_lft forever
3: tunl0@NONE: <NOARP> mtu 1480 qdisc noop state DOWN group default qlen 1000
link/ipip 0.0.0.0 brd 0.0.0.0
4: sit0@NONE: <NOARP> mtu 1480 qdisc noop state DOWN group default qlen 1000
link/sit 0.0.0.0 brd 0.0.0.0
root@ubuntu2004:~# ping -c 5 google.com
PING google.com (172.217.23.142) 56(84) bytes of data.
64 bytes from fra16s18-in-f142.1e100.net (172.217.23.142): icmp_seq=1 ttl=115 time=43.4 ms
64 bytes from fra16s18-in-f142.1e100.net (172.217.23.142): icmp_seq=2 ttl=115 time=43.9 ms
64 bytes from fra16s18-in-f142.1e100.net (172.217.23.142): icmp_seq=3 ttl=115 time=43.0 ms
64 bytes from fra16s18-in-f142.1e100.net (172.217.23.142): icmp_seq=4 ttl=115 time=43.1 ms
64 bytes from fra16s18-in-f142.1e100.net (172.217.23.142): icmp_seq=5 ttl=115 time=43.4 ms
--- google.com ping statistics ---
5 packets transmitted, 5 received, 0% packet loss, time 4005ms
rtt min/avg/max/mdev = 42.977/43.346/43.857/0.311 ms
root@ubuntu2004:~#
destroy
$ terraform destroy -auto-approve
Destroy complete! Resources: 4 destroyed.
SSH
Okay, now that we have network it is possible to setup ssh to our virtual machine and also auto create a user. I would like cloud-init to get my public key from github and setup my user.
disable_root: true
ssh_pwauth: no
users:
- name: ebal
ssh_import_id:
- gh:ebal
shell: /bin/bash
sudo: ALL=(ALL) NOPASSWD:ALL
write_files:
- path: /etc/ssh/sshd_config
content: |
AcceptEnv LANG LC_*
AllowUsers ebal
ChallengeResponseAuthentication no
Compression NO
MaxSessions 3
PasswordAuthentication no
PermitRootLogin no
Port "${sshdport}"
PrintMotd no
Subsystem sftp /usr/lib/openssh/sftp-server
UseDNS no
UsePAM yes
X11Forwarding no
Notice, I have added a new variable called sshdport
Variables.tf
variable "ssh_port" {
description = "The sshd port of the VM"
default = 12345
}
and do not forget to update your cloud-init tf
Cloudinit.tf
data "template_file" "user_data" {
template = file("user-data.yml")
vars = {
hostname = var.domain
sshdport = var.ssh_port
}
}
resource "libvirt_cloudinit_disk" "cloud-init" {
name = "cloud-init.iso"
user_data = data.template_file.user_data.rendered
}
Update VM
I would also like to update & install specific packages to this virtual machine:
# Install packages
packages:
- figlet
- mlocate
- python3-apt
- bash-completion
- ncdu
# Update/Upgrade & Reboot if necessary
package_update: true
package_upgrade: true
package_reboot_if_required: true
# PostInstall
runcmd:
- figlet ${hostname} > /etc/motd
- updatedb
# Firewall
- ufw allow "${sshdport}"/tcp && ufw enable
# Remove cloud-init
- apt-get -y autoremove --purge cloud-init lxc lxd snapd
- apt-get -y --purge autoremove
- apt -y autoclean
- apt -y clean all
Yes, I prefer to uninstall cloud-init at the end.
user-date.yaml
the entire user-date.yaml looks like this:
#cloud-config
disable_root: true
ssh_pwauth: no
users:
- name: ebal
ssh_import_id:
- gh:ebal
shell: /bin/bash
sudo: ALL=(ALL) NOPASSWD:ALL
write_files:
- path: /etc/ssh/sshd_config
content: |
AcceptEnv LANG LC_*
AllowUsers ebal
ChallengeResponseAuthentication no
Compression NO
MaxSessions 3
PasswordAuthentication no
PermitRootLogin no
Port "${sshdport}"
PrintMotd no
Subsystem sftp /usr/lib/openssh/sftp-server
UseDNS no
UsePAM yes
X11Forwarding no
# Set TimeZone
timezone: Europe/Athens
hostname: "${hostname}"
# Create swap partition
swap:
filename: /swap.img
size: "auto"
maxsize: 2G
# Install packages
packages:
- figlet
- mlocate
- python3-apt
- bash-completion
- ncdu
# Update/Upgrade & Reboot if necessary
package_update: true
package_upgrade: true
package_reboot_if_required: true
# PostInstall
runcmd:
- figlet ${hostname} > /etc/motd
- updatedb
# Firewall
- ufw allow "${sshdport}"/tcp && ufw enable
# Remove cloud-init
- apt-get -y autoremove --purge cloud-init lxc lxd snapd
- apt-get -y --purge autoremove
- apt -y autoclean
- apt -y clean all
Output
We need to know the IP to login so create a new terraform file to get the IP
Output.tf
output "IP" {
value = libvirt_domain.ubuntu-2004-vm.network_interface.0.addresses
}
but that means that we need to wait for the dhcp lease. Modify Domain.tf to tell terraform to wait.
network_interface {
network_name = "default"
wait_for_lease = true
}
Plan & Apply
$ terraform plan -out terraform.out && terraform apply terraform.out
Outputs:
IP = [
"192.168.122.79",
]
Verify
$ ssh 192.168.122.79 -p 12345 uptime
19:33:46 up 2 min, 0 users, load average: 0.95, 0.37, 0.14
$ ssh 192.168.122.79 -p 12345
Welcome to Ubuntu 20.04.1 LTS (GNU/Linux 5.4.0-1023-kvm x86_64)
* Documentation: https://help.ubuntu.com
* Management: https://landscape.canonical.com
* Support: https://ubuntu.com/advantage
System information as of Sat Sep 12 19:34:45 EEST 2020
System load: 0.31 Processes: 72
Usage of /: 33.1% of 9.52GB Users logged in: 0
Memory usage: 7% IPv4 address for ens3: 192.168.122.79
Swap usage: 0%
0 updates can be installed immediately.
0 of these updates are security updates.
_ _ ____ ___ ___ _ _
_ _| |__ _ _ _ __ | |_ _ _|___ / _ / _ | || |
| | | | '_ | | | | '_ | __| | | | __) | | | | | | | || |_
| |_| | |_) | |_| | | | | |_| |_| |/ __/| |_| | |_| |__ _|
__,_|_.__/ __,_|_| |_|__|__,_|_____|___/ ___/ |_|
Last login: Sat Sep 12 19:34:37 2020 from 192.168.122.1
ebal@ubuntu2004:~$
ebal@ubuntu2004:~$ df -h /
Filesystem Size Used Avail Use% Mounted on
/dev/root 9.6G 3.2G 6.4G 34% /
ebal@ubuntu2004:~$ free -hm
total used free shared buff/cache available
Mem: 2.0Gi 91Mi 1.7Gi 0.0Ki 197Mi 1.8Gi
Swap: 2.0Gi 0B 2.0Gi
ebal@ubuntu2004:~$ ping -c 5 libreops.cc
PING libreops.cc (185.199.108.153) 56(84) bytes of data.
64 bytes from 185.199.108.153 (185.199.108.153): icmp_seq=1 ttl=55 time=48.4 ms
64 bytes from 185.199.108.153 (185.199.108.153): icmp_seq=2 ttl=55 time=48.7 ms
64 bytes from 185.199.108.153 (185.199.108.153): icmp_seq=3 ttl=55 time=48.5 ms
64 bytes from 185.199.108.153 (185.199.108.153): icmp_seq=4 ttl=55 time=48.3 ms
64 bytes from 185.199.108.153 (185.199.108.153): icmp_seq=5 ttl=55 time=52.8 ms
--- libreops.cc ping statistics ---
5 packets transmitted, 5 received, 0% packet loss, time 4006ms
rtt min/avg/max/mdev = 48.266/49.319/52.794/1.743 ms
what !!!!
awesome
destroy
terraform destroy -auto-approveCustom Network
One last thing I would like to discuss is how to create a new network and provide a specific IP to your VM. This will separate your VMs/lab and it is cheap & easy to setup a new libvirt network.
Network.tf
resource "libvirt_network" "tf_net" {
name = "tf_net"
domain = "libvirt.local"
addresses = ["192.168.123.0/24"]
dhcp {
enabled = true
}
dns {
enabled = true
}
}
and replace network_interface in Domains.tf
network_interface {
network_id = libvirt_network.tf_net.id
network_name = "tf_net"
addresses = ["192.168.123.${var.IP_addr}"]
mac = "52:54:00:b2:2f:${var.IP_addr}"
wait_for_lease = true
}Closely look, there is a new terraform variable
Variables.tf
variable "IP_addr" {
description = "The mac & iP address for this VM"
default = 33
}$ terraform plan -out terraform.out && terraform apply terraform.out
Outputs:
IP = [
"192.168.123.33",
]
$ ssh 192.168.123.33 -p 12345
Welcome to Ubuntu 20.04.1 LTS (GNU/Linux 5.4.0-1021-kvm x86_64)
* Documentation: https://help.ubuntu.com
* Management: https://landscape.canonical.com
* Support: https://ubuntu.com/advantage
System information disabled due to load higher than 1.0
12 updates can be installed immediately.
8 of these updates are security updates.
To see these additional updates run: apt list --upgradable
Last login: Sat Sep 12 19:56:33 2020 from 192.168.123.1
ebal@ubuntu2004:~$ ip addr show ens3
2: ens3: <BROADCAST,MULTICAST,UP,LOWER_UP> mtu 1500 qdisc pfifo_fast state UP group default qlen 1000
link/ether 52:54:00:b2:2f:33 brd ff:ff:ff:ff:ff:ff
inet 192.168.123.33/24 brd 192.168.123.255 scope global dynamic ens3
valid_lft 3491sec preferred_lft 3491sec
inet6 fe80::5054:ff:feb2:2f33/64 scope link
valid_lft forever preferred_lft forever
ebal@ubuntu2004:~$
Terraform files
you can find every terraform example in my github repo
tf/0.13/libvirt/0.6.2/ubuntu/20.04 at master · ebal/tf · GitHub
That’s it!
If you like this article, consider following me on twitter ebalaskas.
Server Edition
disclaimer: at this moment there is not an “official” server version of an 20.04 LTS available, so we we will use the development 20.04 release.
Maintenance
If this is a production server, do not forget to inform customers/users/clients that this machine is under maintenance before you start.
backup
When was the last time you took a backup?
Now is a good time.
Try to verify your backup otherwise do not proceed.
Update you current system
Before continue with the dist upgrade to 20.04 LTS, we need to update & upgrade our current LTS version.
Login to your system:
~> ssh ubuntu1804
apt update
apt -y upgrade
reboot is necessary.
update
root@ubuntu:~# apt update
Hit:1 http://gr.archive.ubuntu.com/ubuntu bionic InRelease
Hit:2 http://gr.archive.ubuntu.com/ubuntu bionic-updates InRelease
Hit:3 http://gr.archive.ubuntu.com/ubuntu bionic-backports InRelease
Hit:4 http://gr.archive.ubuntu.com/ubuntu bionic-security InRelease
Reading package lists... Done
Building dependency tree
Reading state information... Done
51 packages can be upgraded. Run 'apt list --upgradable' to see them.
upgrade
# apt -y upgrade
Reading package lists... Done
Building dependency tree
Reading state information... Done
Calculating upgrade... Done
The following packages will be upgraded:
bsdutils distro-info-data dmidecode fdisk grub-common grub-pc grub-pc-bin grub2-common landscape-common libblkid1 libfdisk1 libmount1 libnss-systemd
libpam-systemd libsmartcols1 libsystemd0 libudev1 libuuid1 linux-firmware mount open-vm-tools python3-update-manager sosreport systemd systemd-sysv udev
unattended-upgrades update-manager-core util-linux uuid-runtime
51 upgraded, 0 newly installed, 0 to remove and 0 not upgraded.
Need to get 85.6 MB of archives.
After this operation, 751 kB of additional disk space will be used.
Get:1 http://gr.archive.ubuntu.com/ubuntu bionic-updates/main amd64 bsdutils amd64 1:2.31.1-0.4ubuntu3.6 [60.3 kB]
...
reboot
# rebootDo release upgrade
root@ubuntu:~# which do-release-upgrade
/usr/bin/do-release-upgrade
help
do-release-upgrade --helproot@ubuntu:~# do-release-upgrade --help
Usage: do-release-upgrade [options]
Options:
-h, --help show this help message and exit
-V, --version Show version and exit
-d, --devel-release If using the latest supported release, upgrade to the
development release
--data-dir=DATA_DIR Directory that contains the data files
-p, --proposed Try upgrading to the latest release using the upgrader
from $distro-proposed
-m MODE, --mode=MODE Run in a special upgrade mode. Currently 'desktop' for
regular upgrades of a desktop system and 'server' for
server systems are supported.
-f FRONTEND, --frontend=FRONTEND
Run the specified frontend
-c, --check-dist-upgrade-only
Check only if a new distribution release is available
and report the result via the exit code
--allow-third-party Try the upgrade with third party mirrors and
repositories enabled instead of commenting them out.
-q, --quiet
do-release-upgrade
# do-release-upgrade -m serverroot@ubuntu:~# do-release-upgrade -m server
Checking for a new Ubuntu release
There is no development version of an LTS available.
To upgrade to the latest non-LTS develoment release
set Prompt=normal in /etc/update-manager/release-upgrades.
server
do-release-upgrade -m server -droot@ubuntu:~# do-release-upgrade -m server -d
Checking for a new Ubuntu release
Get:1 Upgrade tool signature [1,554 B]
Get:2 Upgrade tool [1,344 kB]
Fetched 1,346 kB in 0s (0 B/s)
authenticate 'focal.tar.gz' against 'focal.tar.gz.gpg'
extracting 'focal.tar.gz'
at this moment, we will switch to a gnu/screen session
Reading cache
Checking package manager
Continue running under SSH?
This session appears to be running under ssh. It is not recommended
to perform a upgrade over ssh currently because in case of failure it
is harder to recover.
If you continue, an additional ssh daemon will be started at port
'1022'.
Do you want to continue?
Continue [yN]
Press: y
Starting additional sshd
To make recovery in case of failure easier, an additional sshd will
be started on port '1022'. If anything goes wrong with the running
ssh you can still connect to the additional one.
If you run a firewall, you may need to temporarily open this port. As
this is potentially dangerous it's not done automatically. You can
open the port with e.g.:
'iptables -I INPUT -p tcp --dport 1022 -j ACCEPT'
To continue please press [ENTER]
Press Enter
update repos
Reading package lists... Done
Building dependency tree
Reading state information... Done
Hit http://gr.archive.ubuntu.com/ubuntu bionic InRelease
Get:1 http://gr.archive.ubuntu.com/ubuntu bionic-updates InRelease [88.7 kB]
Get:2 http://gr.archive.ubuntu.com/ubuntu bionic-backports InRelease [74.6 kB]
Get:3 http://gr.archive.ubuntu.com/ubuntu bionic-security InRelease [88.7 kB]
Get:4 http://gr.archive.ubuntu.com/ubuntu bionic-updates/main amd64 Packages [916 kB]
Fetched 1,168 kB in 0s (0 B/s)
Reading package lists... Done
Building dependency tree
Reading state information... Done
Updating repository information
Get:1 http://gr.archive.ubuntu.com/ubuntu focal InRelease [265 kB]
...
…
...
Get:32 http://gr.archive.ubuntu.com/ubuntu focal-security/multiverse amd64 c-n-f Metadata [116 B]
Fetched 57.3 MB in 6s (1,247 kB/s)
Checking package manager
Reading package lists... Done
Building dependency tree
Reading state information... Done
Calculating the changes
Calculating the changes
Do you want to start the upgrade?
3 packages are going to be removed. 105 new packages are going to be
installed. 428 packages are going to be upgraded.
You have to download a total of 306 M. This download will take about
3 minutes with your connection.
Installing the upgrade can take several hours. Once the download has
finished, the process cannot be canceled.
Continue [yN] Details [d]
Press y
(or review by pressing d )
Fetching packages
Fetching
...
Get:3 http://gr.archive.ubuntu.com/ubuntu focal/main amd64 libcrypt1 amd64 1:4.4.10-10ubuntu4 [78.2 kB]
Get:4 http://gr.archive.ubuntu.com/ubuntu focal/main amd64 libc6 amd64 2.31-0ubuntu9 [2,713 kB]
...
services
at some point a question will pop:
- Restart services during package upgrade without asking ?
I answered Yes but you should answer this the way you prefer.

patience is a virtue
Get a coffee or tea. Read a magazine.
till you see a jumping animal.
resolved
Configuration file '/etc/systemd/resolved.conf'
==> Modified (by you or by a script) since installation.
==> Package distributor has shipped an updated version.
What would you like to do about it ? Your options are:
Y or I : install the package maintainer's version
N or O : keep your currently-installed version
D : show the differences between the versions
Z : start a shell to examine the situation
The default action is to keep your current version.
*** resolved.conf (Y/I/N/O/D/Z) [default=N] ?I answered this Y, I will change it later.
vim
same here
Configuration file '/etc/vim/vimrc'
==> Modified (by you or by a script) since installation.
==> Package distributor has shipped an updated version.
What would you like to do about it ? Your options are:
Y or I : install the package maintainer's version
N or O : keep your currently-installed version
D : show the differences between the versions
Z : start a shell to examine the situation
The default action is to keep your current version.
*** vimrc (Y/I/N/O/D/Z) [default=N] ? Y
ssh conf
Remove obsolete packages
and finally
Progress: [ 99%]
Updating certificates in /etc/ssl/certs...
0 added, 0 removed; done.
Running hooks in /etc/ca-certificates/update.d...
done.
Processing triggers for initramfs-tools (0.136ubuntu6) ...
update-initramfs: Generating /boot/initrd.img-5.4.0-26-generic
Processing triggers for dbus (1.12.16-2ubuntu2) ...
Reading package lists... Done
Building dependency tree
Reading state information... Done
Searching for obsolete software
Reading state information... Done
Remove obsolete packages?
59 packages are going to be removed.
Continue [yN] Details [d]
Press y to continue
Restart
are you ready to restart your machine ?
System upgrade is complete.
Restart required
To finish the upgrade, a restart is required.
If you select 'y' the system will be restarted.
Continue [yN]
Press y to restart
LTS 20.04
Welcome to Ubuntu 20.04 LTS (GNU/Linux 5.4.0-26-generic x86_64)
System information as of Sun 26 Apr 2020 10:34:43 AM UTC
System load: 0.52 Processes: 135
Usage of /: 24.9% of 19.56GB Users logged in: 0
Memory usage: 3% IPv4 address for enp1s0: 192.168.122.77
Swap usage: 0%
* Ubuntu 20.04 LTS is out, raising the bar on performance, security,
and optimisation for Intel, AMD, Nvidia, ARM64 and Z15 as well as
AWS, Azure and Google Cloud.
https://ubuntu.com/blog/ubuntu-20-04-lts-arrives
0 updates can be installed immediately.
0 of these updates are security updates.
Last login: Sun Apr 26 07:50:39 2020 from 192.168.122.1
$ cat /etc/os-release
NAME="Ubuntu"
VERSION="20.04 LTS (Focal Fossa)"
ID=ubuntu
ID_LIKE=debian
PRETTY_NAME="Ubuntu 20.04 LTS"
VERSION_ID="20.04"
HOME_URL="https://www.ubuntu.com/"
SUPPORT_URL="https://help.ubuntu.com/"
BUG_REPORT_URL="https://bugs.launchpad.net/ubuntu/"
PRIVACY_POLICY_URL="https://www.ubuntu.com/legal/terms-and-policies/privacy-policy"
VERSION_CODENAME=focal
UBUNTU_CODENAME=focal
Hardware Details
HP ProLiant MicroServer
AMD Turion(tm) II Neo N54L Dual-Core Processor
Memory Size: 2 GB - DIMM Speed: 1333 MT/s
Maximum Capacity: 8 GBRunning 24×7 from 23/08/2010, so nine years!
Prologue
The above server started it’s life on CentOS 5 and ext3. Re-formatting to run CentOS 6.x with ext4 on 4 x 1TB OEM Hard Disks with mdadm raid-5. That provided 3 TB storage with Fault tolerance 1-drive failure. And believe me, I used that setup to zeroing broken disks or replacing faulty disks.
As we are reaching the end of CentOS 6.x and there is no official dist-upgrade path for CentOS, and still waiting for CentOS 8.x, I made decision to switch to Ubuntu 18.04 LTS. At that point this would be the 3rd official OS re-installation of this server. I chose ubuntu so that I can dist-upgrade from LTS to LTS.
This is a backup server, no need for huge RAM, but for a reliable system. On that storage I have 2m files that in retrospect are not very big. So with the re-installation I chose to use xfs instead of ext4 filesystem.
I am also running an internal snapshot mechanism to have delta for every day and that pushed the storage usage to 87% of the 3Tb. If you do the math, 2m is about 1.2Tb usage, we need a full initial backup, so 2.4Tb (80%) and then the daily (rotate) incremental backups are ~210Mb per day. That gave me space for five (5) daily snapshots aka a work-week.
To remove this impediment, I also replaced the disks with WD Red Pro 6TB 7200rpm disks, and use raid-1 instead of raid-5. Usage is now ~45%
Problem
Frozen System
From time to time, this very new, very clean, very reliable system froze to death!
When attached monitor & keyboard no output. Strange enough I can ping the network interfaces but I can not ssh to the server or even telnet (nc) to ssh port. Awkward! Okay - hardware cold reboot then.
As this system is remote … in random times, I need to ask from someone to cold-reboot this machine. Awkward again.
Kernel Panic
If that was not enough, this machine also has random kernel panics.

Errors
Let’s start troubleshooting this system
# journalctl -p 3 -x
Important Errors
ERST: Failed to get Error Log Address Range.
APEI: Can not request [mem 0x7dfab650-0x7dfab6a3] for APEI BERT registers
ipmi_si dmi-ipmi-si.0: Could not set up I/O spaceand more important Errors:
INFO: task kswapd0:40 blocked for more than 120 seconds.
Not tainted 4.15.0-54-generic #58-Ubuntu
"echo 0 > /proc/sys/kernel/hung_task_timeout_secs" disables this message.
INFO: task xfsaild/dm-0:761 blocked for more than 120 seconds.
Not tainted 4.15.0-54-generic #58-Ubuntu
"echo 0 > /proc/sys/kernel/hung_task_timeout_secs" disables this message.
INFO: task kworker/u9:2:3612 blocked for more than 120 seconds.
Not tainted 4.15.0-54-generic #58-Ubuntu
"echo 0 > /proc/sys/kernel/hung_task_timeout_secs" disables this message.
INFO: task kworker/1:0:5327 blocked for more than 120 seconds.
Not tainted 4.15.0-54-generic #58-Ubuntu
"echo 0 > /proc/sys/kernel/hung_task_timeout_secs" disables this message.
INFO: task rm:5901 blocked for more than 120 seconds.
Not tainted 4.15.0-54-generic #58-Ubuntu
"echo 0 > /proc/sys/kernel/hung_task_timeout_secs" disables this message.
INFO: task kworker/u9:1:5902 blocked for more than 120 seconds.
Not tainted 4.15.0-54-generic #58-Ubuntu
"echo 0 > /proc/sys/kernel/hung_task_timeout_secs" disables this message.
INFO: task kworker/0:0:5906 blocked for more than 120 seconds.
Not tainted 4.15.0-54-generic #58-Ubuntu
"echo 0 > /proc/sys/kernel/hung_task_timeout_secs" disables this message.
INFO: task kswapd0:40 blocked for more than 120 seconds.
Not tainted 4.15.0-54-generic #58-Ubuntu
"echo 0 > /proc/sys/kernel/hung_task_timeout_secs" disables this message.
INFO: task xfsaild/dm-0:761 blocked for more than 120 seconds.
Not tainted 4.15.0-54-generic #58-Ubuntu
"echo 0 > /proc/sys/kernel/hung_task_timeout_secs" disables this message.
INFO: task kworker/u9:2:3612 blocked for more than 120 seconds.
Not tainted 4.15.0-54-generic #58-Ubuntu
"echo 0 > /proc/sys/kernel/hung_task_timeout_secs" disables this message.
First impressions ?

BootOptions
After a few (hours) of internet research the suggestion is to disable
- ACPI stands for Advanced Configuration and Power Interface.
- APIC stands for Advanced Programmable Interrupt Controller.
This site is very helpful for ubuntu, although Red Hat still has a huge advanced on describing kernel options better than canonical.
Grub
# vim /etc/default/grub
GRUB_CMDLINE_LINUX="noapic acpi=off"then
# update-grub
Sourcing file `/etc/default/grub'
Sourcing file `/etc/default/grub.d/50-curtin-settings.cfg'
Generating grub configuration file ...
Found linux image: /boot/vmlinuz-4.15.0-54-generic
Found initrd image: /boot/initrd.img-4.15.0-54-generic
Found linux image: /boot/vmlinuz-4.15.0-52-generic
Found initrd image: /boot/initrd.img-4.15.0-52-generic
doneVerify
# grep noapic /boot/grub/grub.cfg | head -1
linux /boot/vmlinuz-4.15.0-54-generic root=UUID=0c686739-e859-4da5-87a2-dfd5fcccde3d ro noapic acpi=off maybe-ubiquityreboot and check again:
# journalctl -p 3 -xb
-- Logs begin at Thu 2019-03-14 19:26:12 EET, end at Wed 2019-07-03 21:31:08 EEST. --
Jul 03 21:30:49 servertwo kernel: ipmi_si dmi-ipmi-si.0: Could not set up I/O spaceokay !!!
ipmi_si
Unfortunately I could not find anything useful regarding
# dmesg | grep -i ipm
[ 10.977914] ipmi message handler version 39.2
[ 11.188484] ipmi device interface
[ 11.203630] IPMI System Interface driver.
[ 11.203662] ipmi_si dmi-ipmi-si.0: ipmi_platform: probing via SMBIOS
[ 11.203665] ipmi_si: SMBIOS: mem 0x0 regsize 1 spacing 1 irq 0
[ 11.203667] ipmi_si: Adding SMBIOS-specified kcs state machine
[ 11.203729] ipmi_si: Trying SMBIOS-specified kcs state machine at mem address 0x0, slave address 0x20, irq 0
[ 11.203732] ipmi_si dmi-ipmi-si.0: Could not set up I/O space
# ipmitool list
Could not open device at /dev/ipmi0 or /dev/ipmi/0 or /dev/ipmidev/0: No such file or directory
# lsmod | grep -i ipmi
ipmi_si 61440 0
ipmi_devintf 20480 0
ipmi_msghandler 53248 2 ipmi_devintf,ipmi_si
blocked for more than 120 seconds.
But let’s try to fix the timeout warnings:
INFO: task kswapd0:40 blocked for more than 120 seconds.
Not tainted 4.15.0-54-generic #58-Ubuntu
"echo 0 > /proc/sys/kernel/hung_task_timeout_secs" disables this messageif you search online the above message, most of the sites will suggest to tweak dirty pages for your system.
This is the most common response across different sites:
This is a know bug. By default Linux uses up to 40% of the available memory for file system caching. After this mark has been reached the file system flushes all outstanding data to disk causing all following IOs going synchronous. For flushing out this data to disk this there is a time limit of 120 seconds by default. In the case here the IO subsystem is not fast enough to flush the data withing 120 seconds. This especially happens on systems with a lot of memory.
Okay this may be the problem but we do not have a lot of memory, only 2GB RAM and 2GB Swap. But even then, our vm.dirty_ratio = 20 setting is 20% instead of 40%.
But I have the ability to cross-check ubuntu 18.04 with CentOS 6.10 to compare notes:
ubuntu 18.04
# uname -r
4.15.0-54-generic
# sysctl -a | egrep -i 'swap|dirty|raid'|sort
dev.raid.speed_limit_max = 200000
dev.raid.speed_limit_min = 1000
vm.dirty_background_bytes = 0
vm.dirty_background_ratio = 10
vm.dirty_bytes = 0
vm.dirty_expire_centisecs = 3000
vm.dirty_ratio = 20
vm.dirtytime_expire_seconds = 43200
vm.dirty_writeback_centisecs = 500
vm.swappiness = 60
CentOS 6.11
# uname -r
2.6.32-754.15.3.el6.centos.plus.x86_64
# sysctl -a | egrep -i 'swap|dirty|raid'|sort
dev.raid.speed_limit_max = 200000
dev.raid.speed_limit_min = 1000
vm.dirty_background_bytes = 0
vm.dirty_background_ratio = 10
vm.dirty_bytes = 0
vm.dirty_expire_centisecs = 3000
vm.dirty_ratio = 20
vm.dirty_writeback_centisecs = 500
vm.swappiness = 60
Scheduler for Raid
This is the best online documentation on the
optimize raid
Comparing notes we see that both systems have the same settings, even when the kernel version is a lot different, 2.6.32 Vs 4.15.0 !!!
Researching on raid optimization there is a note of kernel scheduler.
Ubuntu 18.04
# for drive in {a..c}; do cat /sys/block/sd${drive}/queue/scheduler; done
noop deadline [cfq]
noop deadline [cfq]
noop deadline [cfq]
CentOS 6.11
# for drive in {a..d}; do cat /sys/block/sd${drive}/queue/scheduler; done
noop anticipatory deadline [cfq]
noop anticipatory deadline [cfq]
noop anticipatory deadline [cfq]
noop anticipatory deadline [cfq]
Anticipatory scheduling
CentOS supports Anticipatory scheduling on the hard disks but nowadays anticipatory scheduler is not supported in modern kernel versions.
That said, from the above output we can verify that both systems are running the default scheduler cfq.
Disks
Ubuntu 18.04
- Western Digital Red Pro WDC WD6003FFBX-6
# for i in sd{b..c} ; do hdparm -Tt /dev/$i; done
/dev/sdb:
Timing cached reads: 2344 MB in 2.00 seconds = 1171.76 MB/sec
Timing buffered disk reads: 738 MB in 3.00 seconds = 245.81 MB/sec
/dev/sdc:
Timing cached reads: 2264 MB in 2.00 seconds = 1131.40 MB/sec
Timing buffered disk reads: 774 MB in 3.00 seconds = 257.70 MB/secCentOS 6.11
- Seagate ST1000DX001
/dev/sdb:
Timing cached reads: 2490 MB in 2.00 seconds = 1244.86 MB/sec
Timing buffered disk reads: 536 MB in 3.01 seconds = 178.31 MB/sec
/dev/sdc:
Timing cached reads: 2524 MB in 2.00 seconds = 1262.21 MB/sec
Timing buffered disk reads: 538 MB in 3.00 seconds = 179.15 MB/sec
/dev/sdd:
Timing cached reads: 2452 MB in 2.00 seconds = 1226.15 MB/sec
Timing buffered disk reads: 546 MB in 3.01 seconds = 181.64 MB/sec
So what I am missing ?
My initial personal feeling was the low memory. But after running a manual rsync I’ve realized that:
cpu
was load average: 0.87, 0.46, 0.19
mem
was (on high load), when hit 40% of RAM, started to use swap.
KiB Mem : 2008464 total, 77528 free, 635900 used, 1295036 buff/cache
KiB Swap: 2097148 total, 2096624 free, 524 used. 1184220 avail Mem So I tweaked a bit the swapiness and reduce it from 60% to 40%
and run a local snapshot (that is a bit heavy on the disks) and doing an upgrade and trying to increase CPU load. Still everything is fine !
I will keep an eye on this story.

MariaDB Galera Cluster on Ubuntu 18.04.2 LTS
Last Edit: 2019 06 11
Thanks to Manolis Kartsonakis for the extra info.
Official Notes here:
MariaDB Galera Cluster
a Galera Cluster is a synchronous multi-master cluster setup. Each node can act as master. The XtraDB/InnoDB storage engine can sync its data using rsync. Each data transaction gets a Global unique Id and then using Write Set REPLication the nodes can sync data across each other. When a new node joins the cluster the State Snapshot Transfers (SSTs) synchronize full data but in Incremental State Transfers (ISTs) only the missing data are synced.
With this setup we can have:
- Data Redundancy
- Scalability
- Availability

Installation
In Ubuntu 18.04.2 LTS three packages should exist in every node.
So run the below commands in all of the nodes - change your internal IPs accordingly
as root
# apt -y install mariadb-server
# apt -y install galera-3
# apt -y install rsynchost file
as root
# echo 10.10.68.91 gal1 >> /etc/hosts
# echo 10.10.68.92 gal2 >> /etc/hosts
# echo 10.10.68.93 gal3 >> /etc/hosts
Storage Engine
Start the MariaDB/MySQL in one node and check the default storage engine. It should be
MariaDB [(none)]> show variables like 'default_storage_engine';or
echo "SHOW Variables like 'default_storage_engine';" | mysql+------------------------+--------+
| Variable_name | Value |
+------------------------+--------+
| default_storage_engine | InnoDB |
+------------------------+--------+
Architecture
A Galera Cluster should be behind a Load Balancer (proxy) and you should never talk with a node directly.

Galera Configuration
Now copy the below configuration file in all 3 nodes:
/etc/mysql/conf.d/galera.cnf[mysqld]
binlog_format=ROW
default-storage-engine=InnoDB
innodb_autoinc_lock_mode=2
bind-address=0.0.0.0
# Galera Provider Configuration
wsrep_on=ON
wsrep_provider=/usr/lib/galera/libgalera_smm.so
# Galera Cluster Configuration
wsrep_cluster_name="galera_cluster"
wsrep_cluster_address="gcomm://10.10.68.91,10.10.68.92,10.10.68.93"
# Galera Synchronization Configuration
wsrep_sst_method=rsync
# Galera Node Configuration
wsrep_node_address="10.10.68.91"
wsrep_node_name="gal1"Per Node
Be careful the last 2 lines should change to each node:
Node 01
# Galera Node Configuration
wsrep_node_address="10.10.68.91"
wsrep_node_name="gal1"Node 02
# Galera Node Configuration
wsrep_node_address="10.10.68.92"
wsrep_node_name="gal2"Node 03
# Galera Node Configuration
wsrep_node_address="10.10.68.93"
wsrep_node_name="gal3"
Galera New Cluster
We are ready to create our galera cluster:
galera_new_clusteror
mysqld --wsrep-new-clusterJournalCTL
Jun 10 15:01:20 gal1 systemd[1]: Starting MariaDB 10.1.40 database server...
Jun 10 15:01:24 gal1 sh[2724]: WSREP: Recovered position 00000000-0000-0000-0000-000000000000:-1
Jun 10 15:01:24 gal1 mysqld[2865]: 2019-06-10 15:01:24 139897056971904 [Note] /usr/sbin/mysqld (mysqld 10.1.40-MariaDB-0ubuntu0.18.04.1) starting as process 2865 ...
Jun 10 15:01:24 gal1 /etc/mysql/debian-start[2906]: Upgrading MySQL tables if necessary.
Jun 10 15:01:24 gal1 systemd[1]: Started MariaDB 10.1.40 database server.
Jun 10 15:01:24 gal1 /etc/mysql/debian-start[2909]: /usr/bin/mysql_upgrade: the '--basedir' option is always ignored
Jun 10 15:01:24 gal1 /etc/mysql/debian-start[2909]: Looking for 'mysql' as: /usr/bin/mysql
Jun 10 15:01:24 gal1 /etc/mysql/debian-start[2909]: Looking for 'mysqlcheck' as: /usr/bin/mysqlcheck
Jun 10 15:01:24 gal1 /etc/mysql/debian-start[2909]: This installation of MySQL is already upgraded to 10.1.40-MariaDB, use --force if you still need to run mysql_upgrade
Jun 10 15:01:24 gal1 /etc/mysql/debian-start[2918]: Checking for insecure root accounts.
Jun 10 15:01:24 gal1 /etc/mysql/debian-start[2922]: WARNING: mysql.user contains 4 root accounts without password or plugin!
Jun 10 15:01:24 gal1 /etc/mysql/debian-start[2923]: Triggering myisam-recover for all MyISAM tables and aria-recover for all Aria tables# ss -at '( sport = :mysql )'
State Recv-Q Send-Q Local Address:Port Peer Address:Port
LISTEN 0 80 127.0.0.1:mysql 0.0.0.0:* # echo "SHOW STATUS LIKE 'wsrep_%';" | mysql | egrep -i 'cluster|uuid|ready' | column -twsrep_cluster_conf_id 1
wsrep_cluster_size 1
wsrep_cluster_state_uuid 8abc6a1b-8adc-11e9-a42b-c6022ea4412c
wsrep_cluster_status Primary
wsrep_gcomm_uuid d67e5b7c-8b90-11e9-ba3d-23ea221848fd
wsrep_local_state_uuid 8abc6a1b-8adc-11e9-a42b-c6022ea4412c
wsrep_ready ON
Second Node
systemctl restart mariadb.serviceroot@gal2:~# echo "SHOW STATUS LIKE 'wsrep_%';" | mysql | egrep -i 'cluster|uuid|ready' | column -t
wsrep_cluster_conf_id 2
wsrep_cluster_size 2
wsrep_cluster_state_uuid 8abc6a1b-8adc-11e9-a42b-c6022ea4412c
wsrep_cluster_status Primary
wsrep_gcomm_uuid a5eaae3e-8b91-11e9-9662-0bbe68c7d690
wsrep_local_state_uuid 8abc6a1b-8adc-11e9-a42b-c6022ea4412c
wsrep_ready ON
Third Node
systemctl restart mariadb.serviceroot@gal3:~# echo "SHOW STATUS LIKE 'wsrep_%';" | mysql | egrep -i 'cluster|uuid|ready' | column -t
wsrep_cluster_conf_id 3
wsrep_cluster_size 3
wsrep_cluster_state_uuid 8abc6a1b-8adc-11e9-a42b-c6022ea4412c
wsrep_cluster_status Primary
wsrep_gcomm_uuid 013e1847-8b92-11e9-9055-7ac5e2e6b947
wsrep_local_state_uuid 8abc6a1b-8adc-11e9-a42b-c6022ea4412c
wsrep_ready ON
Primary Component (PC)
The last node in the cluster -in theory- has all the transactions. That means it should be the first to start next time from a power-off.
State
cat /var/lib/mysql/grastate.dateg.
# GALERA saved state
version: 2.1
uuid: 8abc6a1b-8adc-11e9-a42b-c6022ea4412c
seqno: -1
safe_to_bootstrap: 0if safe_to_bootstrap: 1 then you can bootstrap this node as Primary.
Common Mistakes
Sometimes DBAs want to setup a new cluster (lets say upgrade into a new scheme - non compatible with the previous) so they want a clean state/directory. The most common way is to move the current mysql directory
mv /var/lib/mysql /var/lib/mysql_BAKIf you try to start your galera node, it will fail:
# systemctl restart mariadbWSREP: Failed to start mysqld for wsrep recovery:
[Warning] Can't create test file /var/lib/mysql/gal1.lower-test
Failed to start MariaDB 10.1.40 database serverYou need to create and initialize the mysql directory first:
mkdir -pv /var/lib/mysql
chown -R mysql:mysql /var/lib/mysql
chmod 0755 /var/lib/mysql
mysql_install_db -u mysqlOn another node, cluster_size = 2
# echo "SHOW STATUS LIKE 'wsrep_%';" | mysql | egrep -i 'cluster|uuid|ready' | column -t
wsrep_cluster_conf_id 4
wsrep_cluster_size 2
wsrep_cluster_state_uuid 8abc6a1b-8adc-11e9-a42b-c6022ea4412c
wsrep_cluster_status Primary
wsrep_gcomm_uuid a5eaae3e-8b91-11e9-9662-0bbe68c7d690
wsrep_local_state_uuid 8abc6a1b-8adc-11e9-a42b-c6022ea4412c
wsrep_ready ONthen:
# systemctl restart mariadbrsync from the Primary:
Jun 10 15:19:00 gal1 rsyncd[3857]: rsyncd version 3.1.2 starting, listening on port 4444
Jun 10 15:19:01 gal1 rsyncd[3884]: connect from gal3 (192.168.122.93)
Jun 10 15:19:01 gal1 rsyncd[3884]: rsync to rsync_sst/ from gal3 (192.168.122.93)
Jun 10 15:19:01 gal1 rsyncd[3884]: receiving file list# echo "SHOW STATUS LIKE 'wsrep_%';" | mysql | egrep -i 'cluster|uuid|ready' | column -t
wsrep_cluster_conf_id 5
wsrep_cluster_size 3
wsrep_cluster_state_uuid 8abc6a1b-8adc-11e9-a42b-c6022ea4412c
wsrep_cluster_status Primary
wsrep_gcomm_uuid 12afa7bc-8b93-11e9-88fc-6f41be61a512
wsrep_local_state_uuid 8abc6a1b-8adc-11e9-a42b-c6022ea4412c
wsrep_ready ONBe Aware: Try to keep your DATA directory to a seperated storage disk
Adding new Nodes
A healthy Quorum has an odd number of nodes. So when you scale your galera gluster consider adding two (2) at every step!
# echo 10.10.68.94 gal4 >> /etc/hosts
# echo 10.10.68.95 gal5 >> /etc/hostsData Replication will lock your donor-node so it is best to put-off your donor-node from your Load Balancer:
Then explicit point your donor-node to your new nodes by adding the below line in your configuration file:
wsrep_sst_donor= gal3After the synchronization:
- comment-out the above line
- restart mysql service and
- put all three nodes behind the Local Balancer
Split Brain
Find the node with the max
SHOW STATUS LIKE 'wsrep_last_committed';
and set it as master by
SET GLOBAL wsrep_provider_options='pc.bootstrap=YES';
Weighted Quorum for Three Nodes
When configuring quorum weights for three nodes, use the following pattern:
node1: pc.weight = 4
node2: pc.weight = 3
node3: pc.weight = 2
node4: pc.weight = 1
node5: pc.weight = 0eg.
SET GLOBAL wsrep_provider_options="pc.weight=3";
In the same VPC setting up pc.weight will avoid a split brain situation. In different regions, you can setup something like this:
node1: pc.weight = 2
node2: pc.weight = 2
node3: pc.weight = 2
<->
node4: pc.weight = 1
node5: pc.weight = 1
node6: pc.weight = 1
WSREP_SST: [ERROR] Error while getting data from donor node
In cases that a specific node can not sync/join the cluster with the above error, we can use this workaround
Change wsrep_sst_method to rsync from xtrabackup , do a restart and check the logs.
Then revert the change back to xtrabackup
/etc/mysql/conf.d/galera.cnf:;wsrep_sst_method = rsync
/etc/mysql/conf.d/galera.cnf:wsrep_sst_method = xtrabackupSTATUS
echo "SHOW STATUS LIKE 'wsrep_%';" | mysql | grep -Ei 'cluster|uuid|ready|commit' | column -tGetting this error on Windows 10 [Ubuntu running on Windows Subsystem for Linux]
Go to
this PC –> Manage –> Services & Applications –> Services –> LXSSMANAGER
