Using Terraform for personal projects, is a good way to create your lab in a reproducible manner. Wherever your lab is, either in the “cloud” aka other’s people computers or in a self-hosted environment, you can run your Infrastructure as code (IaC) instead of performing manual tasks each time.
My preferable way is to use QEMU/KVM (Kernel Virtual Machine) on my libvirt (self-hosted) lab. You can quickly build a k8s cluster or test a few virtual machines with different software, without paying extra money to cloud providers.
Terraform uses a state file to store your entire infra in json format. This file will be the source of truth for your infrastructure. Any changes you make in the code, terraform will figure out what needs to add/destroy and run only what have changed.
Working in a single repository, terraform will create a local state file on your working directory. This is fast and reliable when working alone. When working with a team (either in an opensource project/service or it is something work related) you need to share the state with others. Eitherwise the result will be catastrophic as each person will have no idea of the infrastructure state of the service.
In this blog post, I will try to explain how to use GitLab to store the terraform state into a remote repository by using the tf backend: http which is REST.
Greate a new private GitLab Project
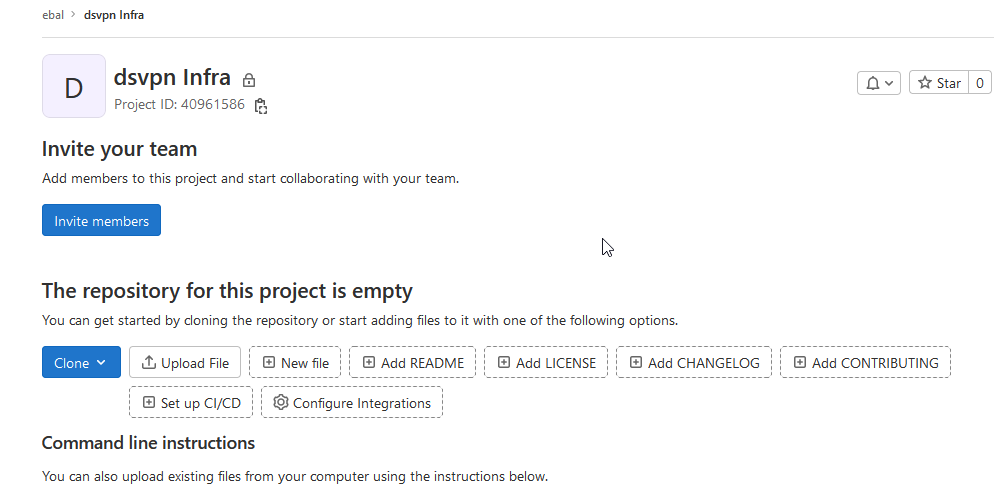
We need the Project ID which is under the project name in the top.
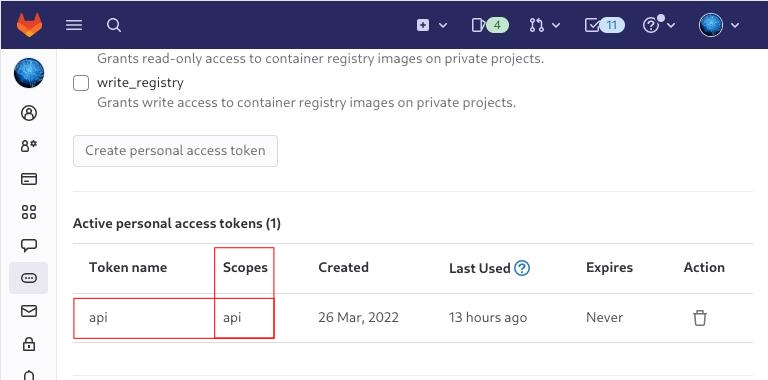
Create a new api token
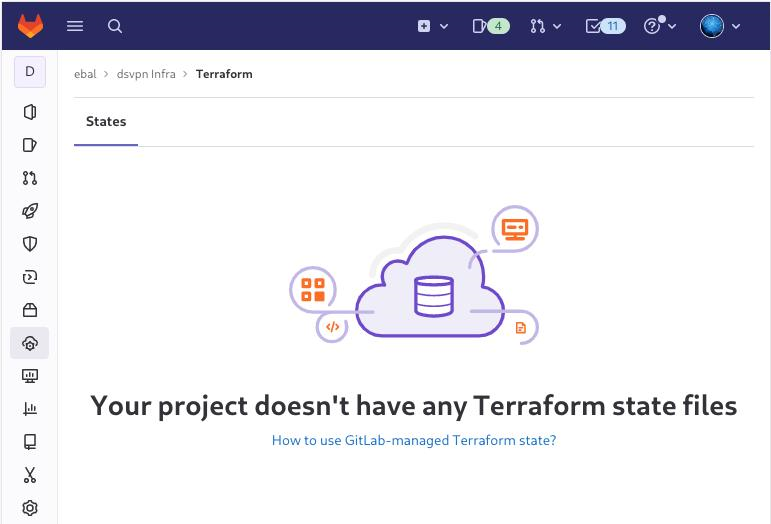
Verify that your Project has the ability to store terraform state files
You are ready to clone the git repository to your system.
Backend
Reading the documentation in the below links
seems that the only thing we need to do, is to expand our terraform project with this:
terraform {
  backend "http" {
  }
}
Doing that, we inform our IaC that our terraform backend should be a remote address.
Took me a while to figure this out, but after re-reading all the necessary documentation materials the idea is to declare your backend on gitlab and to do this, we need to initialize the http backend.
The only Required configuration setting is the remote address and should be something like this:
terraform {
  backend "http" {
    address = "https://gitlab.com/api/v4/projects/<PROJECT_ID>/terraform/state/<STATE_NAME>"
  }
}
Where PROJECT_ID and STATE_NAME are relative to your project.
In this article, we go with
GITLAB_PROJECT_ID="40961586"
GITLAB_TF_STATE_NAME="tf_state"
Terraform does not allow to use variables in the backend http, so the preferable way is to export them to our session.
and we -of course- need the address:
TF_HTTP_ADDRESS="https://gitlab.com/api/v4/projects/${GITLAB_PROJECT_ID}/terraform/state/${GITLAB_TF_STATE_NAME}"
For convience reasons, I will create a file named: terraform.config outside of this git repo
cat > ../terraform.config <<EOF
export -p GITLAB_PROJECT_ID="40961586"
export -p GITLAB_TF_STATE_NAME="tf_state"
export -p GITLAB_URL="https://gitlab.com/api/v4/projects"

# Address
export -p TF_HTTP_ADDRESS="${GITLAB_URL}/${GITLAB_PROJECT_ID}/terraform/state/${GITLAB_TF_STATE_NAME}"

EOF

source ../terraform.config
this should do the trick.
Authentication
In order to authenticate via tf against GitLab to store the tf remote state, we need to also set two additional variables:
# Authentication
TF_HTTP_USERNAME="api"
TF_HTTP_PASSWORD="<TOKEN>"
put them in the above terraform.config file.
Pretty much we are done!
Initialize Terraform
source ../terraform.config

terraform init
Initializing the backend...

Successfully configured the backend "http"! Terraform will automatically
use this backend unless the backend configuration changes.

Initializing provider plugins...
- Finding latest version of hashicorp/http...
- Finding latest version of hashicorp/random...
- Finding latest version of hashicorp/template...
- Finding dmacvicar/libvirt versions matching ">= 0.7.0"...
- Installing hashicorp/random v3.4.3...
- Installed hashicorp/random v3.4.3 (signed by HashiCorp)
- Installing hashicorp/template v2.2.0...
- Installed hashicorp/template v2.2.0 (signed by HashiCorp)
- Installing dmacvicar/libvirt v0.7.0...
- Installed dmacvicar/libvirt v0.7.0 (unauthenticated)
- Installing hashicorp/http v3.2.1...
- Installed hashicorp/http v3.2.1 (signed by HashiCorp)

Terraform has created a lock file .terraform.lock.hcl to record the provider
selections it made above. Include this file in your version control repository
so that Terraform can guarantee to make the same selections by default when
you run "terraform init" in the future.

...

Terraform has been successfully initialized!

You may now begin working with Terraform. Try running "terraform plan" to see
any changes that are required for your infrastructure. All Terraform commands
should now work.

If you ever set or change modules or backend configuration for Terraform,
rerun this command to reinitialize your working directory. If you forget, other
commands will detect it and remind you to do so if necessary.
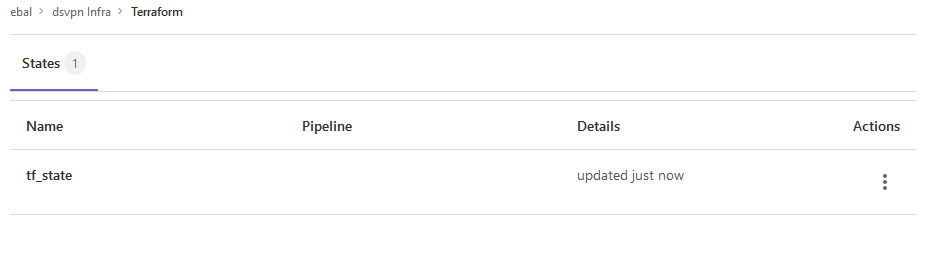
Remote state
by running
terraform plan
we can now see the remote terraform state in the gitlab
Opening Actions –> Copy terraform init command we can see the below configuration:
export GITLAB_ACCESS_TOKEN=<YOUR-ACCESS-TOKEN>

terraform init
    -backend-config="address=https://gitlab.com/api/v4/projects/40961586/terraform/state/tf_state"
    -backend-config="lock_address=https://gitlab.com/api/v4/projects/40961586/terraform/state/tf_state/lock"
    -backend-config="unlock_address=https://gitlab.com/api/v4/projects/40961586/terraform/state/tf_state/lock"
    -backend-config="username=api"
    -backend-config="password=$GITLAB_ACCESS_TOKEN"
    -backend-config="lock_method=POST"
    -backend-config="unlock_method=DELETE"
    -backend-config="retry_wait_min=5"
Update terraform backend configuration
I dislike running a “long” terraform init command, so we will put these settings to our tf code.
Separating the static changes from the dynamic, our Backend http config can become something like this:
terraform {
  backend "http" {
    lock_method    = "POST"
    unlock_method  = "DELETE"
    retry_wait_min = 5
  }
}
but we need to update our terraform.config once more, to include all the variables of the http backend configuration for locking and unlocking the state.
# Lock
export -p TF_HTTP_LOCK_ADDRESS="${TF_HTTP_ADDRESS}/lock"

# Unlock
export -p TF_HTTP_UNLOCK_ADDRESS="${TF_HTTP_ADDRESS}/lock"
Terraform Config
So here is our entire terraform config file
# GitLab

export -p GITLAB_URL="https://gitlab.com/api/v4/projects"
export -p GITLAB_PROJECT_ID="<>"
export -p GITLAB_TF_STATE_NAME="tf_state"

# Terraform

# Address
export -p TF_HTTP_ADDRESS="${GITLAB_URL}/${GITLAB_PROJECT_ID}/terraform/state/${GITLAB_TF_STATE_NAME}"

# Lock
export -p TF_HTTP_LOCK_ADDRESS="${TF_HTTP_ADDRESS}/lock"

# Unlock
export -p TF_HTTP_UNLOCK_ADDRESS="${TF_HTTP_ADDRESS}/lock"

# Authentication
export -p TF_HTTP_USERNAME="api"
export -p TF_HTTP_PASSWORD="<>"
And pretty much that’s it!
Other Colleagues
So in order our team mates/colleagues want to make changes to this specific gitlab repo (or even extended to include a pipeline) they need
- Git clone the repo
- Edit the terraform.config
- Initialize terraform (terraform init)
And terraform will use the remote state file.
In this blog post, I’ll try to share my personal notes on how to setup a kubernetes cluster with kubeadm on ubuntu 22.04 LTS Virtual Machines.
I am going to use three (3) Virtual Machines in my local lab. My home lab is based on libvirt Qemu/KVM (Kernel-based Virtual Machine) and I run Terraform as the infrastructure provision tool.
There is a copy of this blog post to github.
https://github.com/ebal/k8s_cluster
If you notice something wrong you can either contact me via the contact page, or open a PR in the github project.
you can also follow me at twitter: https://twitter.com/ebalaskas
Kubernetes, also known as K8s, is an open-source system for automating deployment, scaling, and management of containerized applications.
- Prerequisites
- Git Terraform Code for the kubernetes cluster
- Control-Plane Node
- Ports on the control-plane node
- Firewall on the control-plane node
- Hosts file in the control-plane node
- No Swap on the control-plane node
- Kernel modules on the control-plane node
- NeedRestart on the control-plane node
- Installing a Container Runtime on the control-plane node
- Installing kubeadm, kubelet and kubectl on the control-plane node
- Initializing the control-plane node
- Create user access config to the k8s control-plane node
- Verify the control-plane node
- Install an overlay network provider on the control-plane node
- Verify CoreDNS is running on the control-plane node
- Worker Nodes
- Ports on the worker nodes
- Firewall on the worker nodes
- Hosts file in the worker node
- No Swap on the worker node
- Kernel modules on the worker node
- NeedRestart on the worker node
- Installing a Container Runtime on the worker node
- Installing kubeadm, kubelet and kubectl on the worker node
- Get Token from the control-plane node
- Get Certificate Hash from the control-plane node
- Join Workers to the kubernetes cluster
- Is the kubernetes cluster running ?
- Kubernetes Dashboard
- Install kubernetes dashboard
- Add a Node Port to kubernetes dashboard
- Patch kubernetes-dashboard
- Edit kubernetes-dashboard Service
- Accessing Kubernetes Dashboard
- Create An Authentication Token (RBAC)
- Creating a Service Account
- Creating a ClusterRoleBinding
- Getting a Bearer Token
- Browsing Kubernetes Dashboard
- Nginx App
- That’s it !
Prerequisites
- at least 3 Virtual Machines of Ubuntu 22.04 (one for control-plane, two for worker nodes)
- 2GB (or more) of RAM on each Virtual Machine
- 2 CPUs (or more) on each Virtual Machine
- 20Gb of hard disk on each Virtual Machine
- No SWAP partition/image/file on each Virtual Machine
Git Terraform Code for the kubernetes cluster
I prefer to have a reproducible infrastructure, so I can very fast create and destroy my test lab. My preferable way of doing things is testing on each step, so I pretty much destroy everything, coping and pasting commands and keep on. I use terraform for the create the infrastructure. You can find the code for the entire kubernetes cluster here: k8s cluster - Terraform code.
If you do not use terraform, skip this step!
You can git clone the repo to review and edit it according to your needs.
git clone https://github.com/ebal/k8s_cluster.git
cd tf_libvirt
You will need to make appropriate changes. Open Variables.tf for that. The most important option to change, is the User option. Change it to your github username and it will download and setup the VMs with your public key, instead of mine!
But pretty much, everything else should work out of the box. Change the vmem and vcpu settings to your needs.
Init terraform before running the below shell script.
terraform init
and then run
./start.sh
output should be something like:
...
Apply complete! Resources: 16 added, 0 changed, 0 destroyed.

Outputs:

VMs = [
  "192.168.122.169  k8scpnode",
  "192.168.122.40   k8wrknode1",
  "192.168.122.8    k8wrknode2",
]
Verify that you have ssh access to the VMs
eg.
ssh -l ubuntu 192.168.122.169
replace the IP with what the output gave you.
Ubuntu 22.04 Image
If you noticed in the terraform code, I have the below declaration as the cloud image:
../jammy-server-cloudimg-amd64.img
that means, I’ve already downloaded it, in the upper directory to speed things up!
cd ../
curl -sLO https://cloud-images.ubuntu.com/jammy/current/focal-server-cloudimg-amd64.img
cd -
Control-Plane Node
Let’s us now start the configure of the k8s control-plane node.
Ports on the control-plane node
Kubernetes runs a few services that needs to be accessable from the worker nodes.
| Protocol | Direction | Port Range | Purpose | Used By |
|---|---|---|---|---|
| TCP | Inbound | 6443 | Kubernetes API server | All |
| TCP | Inbound | 2379-2380 | etcd server client API | kube-apiserver, etcd |
| TCP | Inbound | 10250 | Kubelet API | Self, Control plane |
| TCP | Inbound | 10259 | kube-scheduler | Self |
| TCP | Inbound | 10257 | kube-controller-manager | Self |
Although etcd ports are included in control plane section, you can also host your
own etcd cluster externally or on custom ports.
Firewall on the control-plane node
We need to open the necessary ports on the CP’s (control-plane node) firewall.
sudo ufw allow 6443/tcp
sudo ufw allow 2379:2380/tcp
sudo ufw allow 10250/tcp
sudo ufw allow 10259/tcp
sudo ufw allow 10257/tcp

#sudo ufw disable
sudo ufw status
the output should be
To                         Action      From
--                         ------      ----
22/tcp                     ALLOW       Anywhere
6443/tcp                   ALLOW       Anywhere
2379:2380/tcp              ALLOW       Anywhere
10250/tcp                  ALLOW       Anywhere
10259/tcp                  ALLOW       Anywhere
10257/tcp                  ALLOW       Anywhere
22/tcp (v6)                ALLOW       Anywhere (v6)
6443/tcp (v6)              ALLOW       Anywhere (v6)
2379:2380/tcp (v6)         ALLOW       Anywhere (v6)
10250/tcp (v6)             ALLOW       Anywhere (v6)
10259/tcp (v6)             ALLOW       Anywhere (v6)
10257/tcp (v6)             ALLOW       Anywhere (v6)
Hosts file in the control-plane node
We need to update the /etc/hosts with the internal IP and hostname.
This will help when it is time to join the worker nodes.
echo $(hostname -I) $(hostname) | sudo tee -a /etc/hosts
Just a reminder: we need to update the hosts file to all the VMs.
To include all the VMs’ IPs and hostnames.
If you already know them, then your /etc/hosts file should look like this:
192.168.122.169  k8scpnode
192.168.122.40   k8wrknode1
192.168.122.8    k8wrknode2
replace the IPs to yours.
No Swap on the control-plane node
Be sure that SWAP is disabled in all virtual machines!
sudo swapoff -a
and the fstab file should not have any swap entry.
The below command should return nothing.
sudo grep -i swap /etc/fstab
If not, edit the /etc/fstab and remove the swap entry.
If you follow my terraform k8s code example from the above github repo,
you will notice that there isn’t any swap entry in the cloud init (user-data) file.
Nevertheless it is always a good thing to douple check.
Kernel modules on the control-plane node
We need to load the below kernel modules on all k8s nodes, so k8s can create some network magic!
- overlay
- br_netfilter
Run the below bash snippet that will do that, and also will enable the forwarding features of the network.
sudo tee /etc/modules-load.d/kubernetes.conf <<EOF
overlay
br_netfilter
EOF

sudo modprobe overlay
sudo modprobe br_netfilter

sudo lsmod | grep netfilter

sudo tee /etc/sysctl.d/kubernetes.conf <<EOF
net.bridge.bridge-nf-call-ip6tables = 1
net.bridge.bridge-nf-call-iptables = 1
net.ipv4.ip_forward = 1
EOF

sudo sysctl --system
NeedRestart on the control-plane node
Before installing any software, we need to make a tiny change to needrestart program. This will help with the automation of installing packages and will stop asking -via dialog- if we would like to restart the services!
echo "\$nrconf{restart} = 'a';" | sudo tee -a /etc/needrestart/needrestart.conf
Installing a Container Runtime on the control-plane node
It is time to choose which container runtime we are going to use on our k8s cluster. There are a few container runtimes for k8s and in the past docker were used to. Nowadays the most common runtime is the containerd that can also uses the cgroup v2 kernel features. There is also a docker-engine runtime via CRI. Read here for more details on the subject.
curl -sL https://download.docker.com/linux/ubuntu/gpg | sudo gpg --dearmor -o /etc/apt/trusted.gpg.d/docker-keyring.gpg

sudo apt-add-repository -y "deb https://download.docker.com/linux/ubuntu jammy stable"

sleep 5

sudo apt -y install containerd.io

containerd config default                              \
 | sed 's/SystemdCgroup = false/SystemdCgroup = true/' \
 | sudo tee /etc/containerd/config.toml

sudo systemctl restart containerd.service
We have also enabled the
systemd cgroup driverso the control-plane node can use the cgroup v2 features.
Installing kubeadm, kubelet and kubectl on the control-plane node
Install the kubernetes packages (kubedam, kubelet and kubectl) by first adding the k8s repository on our virtual machine. To speed up the next step, we will also download the configuration container images.
sudo curl -sLo /etc/apt/trusted.gpg.d/kubernetes-keyring.gpg https://packages.cloud.google.com/apt/doc/apt-key.gpg

sudo apt-add-repository -y "deb http://apt.kubernetes.io/ kubernetes-xenial main"

sleep 5

sudo apt install -y kubelet kubeadm kubectl

sudo kubeadm config images pull
Initializing the control-plane node
We can now initialize our control-plane node for our kubernetes cluster.
There are a few things we need to be careful about:
- We can specify the control-plane-endpoint if we are planning to have a high available k8s cluster. (we will skip this for now),
- Choose a Pod network add-on (next section) but be aware that CoreDNS (DNS and Service Discovery) will not run till then (later),
- define where is our container runtime socket (we will skip it)
- advertise the API server (we will skip it)
But we will define our Pod Network CIDR to the default value of the Pod network add-on so everything will go smoothly later on.
sudo kubeadm init --pod-network-cidr=10.244.0.0/16
Keep the output in a notepad.
Create user access config to the k8s control-plane node
Our k8s control-plane node is running, so we need to have credentials to access it.
The kubectl reads a configuration file (that has the token), so we copying this from k8s admin.
rm -rf $HOME/.kube

mkdir -p $HOME/.kube

sudo cp -i /etc/kubernetes/admin.conf $HOME/.kube/config

sudo chown $(id -u):$(id -g) $HOME/.kube/config

ls -la $HOME/.kube/config

alias k="kubectl"
Verify the control-plane node
Verify that the kubernets is running.
That means we have a k8s cluster - but only the control-plane node is running.
kubectl cluster-info
#kubectl cluster-info dump

k get nodes -o wide; k get pods  -A -o wide
Install an overlay network provider on the control-plane node
As I mentioned above, in order to use the DNS and Service Discovery services in the kubernetes (CoreDNS) we need to install a Container Network Interface (CNI) based Pod network add-on so that your Pods can communicate with each other.
We will use flannel as the simplest of them.
k apply -f https://raw.githubusercontent.com/coreos/flannel/master/Documentation/kube-flannel.yml
Verify CoreDNS is running on the control-plane node
Verify that the control-plane node is Up & Running and the control-plane pods (as coredns pods) are also running
$ k get nodes -o wide

NAME        STATUS   ROLES           AGE   VERSION   INTERNAL-IP       EXTERNAL-IP   OS-IMAGE             KERNEL-VERSION      CONTAINER-RUNTIME
k8scpnode   Ready    control-plane   54s   v1.25.0   192.168.122.169   <none>        Ubuntu 22.04.1 LTS   5.15.0-46-generic   containerd://1.6.8
$ k get pods -A -o wide

NAMESPACE    NAME                              READY STATUS  RESTARTS AGE IP              NODE      NOMINATED NODE READINESS GATES
kube-flannel kube-flannel-ds-zqv2b             1/1   Running 0        36s 192.168.122.169 k8scpnode <none>         <none>
kube-system  coredns-565d847f94-lg54q          1/1   Running 0        38s 10.244.0.2      k8scpnode <none>         <none>
kube-system  coredns-565d847f94-ms8zk          1/1   Running 0        38s 10.244.0.3      k8scpnode <none>         <none>
kube-system  etcd-k8scpnode                    1/1   Running 0        50s 192.168.122.169 k8scpnode <none>         <none>
kube-system  kube-apiserver-k8scpnode          1/1   Running 0        50s 192.168.122.169 k8scpnode <none>         <none>
kube-system  kube-controller-manager-k8scpnode 1/1   Running 0        50s 192.168.122.169 k8scpnode <none>         <none>
kube-system  kube-proxy-pv7tj                  1/1   Running 0        39s 192.168.122.169 k8scpnode <none>         <none>
kube-system  kube-scheduler-k8scpnode          1/1   Running 0        50s 192.168.122.169 k8scpnode <none>         <none>
That’s it with the control-plane node !
Worker Nodes
The below instructions works pretty much the same on both worker nodes.
I will document the steps for the worker1 node but do the same for the worker2 node.
Ports on the worker nodes
As we learned above on the control-plane section, kubernetes runs a few services
| Protocol | Direction | Port Range | Purpose | Used By |
|---|---|---|---|---|
| TCP | Inbound | 10250 | Kubelet API | Self, Control plane |
| TCP | Inbound | 30000-32767 | NodePort Services | All |
Firewall on the worker nodes
so we need to open the necessary ports on the worker nodes too.
sudo ufw allow 10250/tcp
sudo ufw allow 30000:32767/tcp

sudo ufw status
output should look like
To                         Action      From
--                         ------      ----
22/tcp                     ALLOW       Anywhere
10250/tcp                  ALLOW       Anywhere
30000:32767/tcp            ALLOW       Anywhere
22/tcp (v6)                ALLOW       Anywhere (v6)
10250/tcp (v6)             ALLOW       Anywhere (v6)
30000:32767/tcp (v6)       ALLOW       Anywhere (v6)
The next few steps are pretty much exactly the same as in the control-plane node.
In order to keep this documentation short, I’ll just copy/paste the commands.
Hosts file in the worker node
Update the /etc/hosts file to include the IPs and hostname of all VMs.
192.168.122.169  k8scpnode
192.168.122.40   k8wrknode1
192.168.122.8    k8wrknode2
No Swap on the worker node
sudo swapoff -a
Kernel modules on the worker node
sudo tee /etc/modules-load.d/kubernetes.conf <<EOF
overlay
br_netfilter
EOF

sudo modprobe overlay
sudo modprobe br_netfilter

sudo lsmod | grep netfilter

sudo tee /etc/sysctl.d/kubernetes.conf <<EOF
net.bridge.bridge-nf-call-ip6tables = 1
net.bridge.bridge-nf-call-iptables = 1
net.ipv4.ip_forward = 1
EOF

sudo sysctl --system
NeedRestart on the worker node
echo "\$nrconf{restart} = 'a';" | sudo tee -a /etc/needrestart/needrestart.conf
Installing a Container Runtime on the worker node
curl -sL https://download.docker.com/linux/ubuntu/gpg | sudo gpg --dearmor -o /etc/apt/trusted.gpg.d/docker-keyring.gpg

sudo apt-add-repository -y "deb https://download.docker.com/linux/ubuntu jammy stable"

sleep 5

sudo apt -y install containerd.io

containerd config default                              \
 | sed 's/SystemdCgroup = false/SystemdCgroup = true/' \
 | sudo tee /etc/containerd/config.toml

sudo systemctl restart containerd.service
Installing kubeadm, kubelet and kubectl on the worker node
sudo curl -sLo /etc/apt/trusted.gpg.d/kubernetes-keyring.gpg https://packages.cloud.google.com/apt/doc/apt-key.gpg

sudo apt-add-repository -y "deb http://apt.kubernetes.io/ kubernetes-xenial main"

sleep 5

sudo apt install -y kubelet kubeadm kubectl

sudo kubeadm config images pull
Get Token from the control-plane node
To join nodes to the kubernetes cluster, we need to have a couple of things.
- a token from control-plane node
- the CA certificate hash from the contol-plane node.
If you didnt keep the output the initialization of the control-plane node, that’s okay.
Run the below command in the control-plane node.
sudo kubeadm token list
and we will get the initial token that expires after 24hours.
TOKEN                     TTL         EXPIRES                USAGES                   DESCRIPTION                                                EXTRA GROUPS
zt36bp.uht4cziweef1jo1h   23h         2022-08-31T18:38:16Z   authentication,signing   The default bootstrap token generated by 'kubeadm init'.   system:bootstrappers:kubeadm:default-node-token
In this case is the
zt36bp.uht4cziweef1jo1hGet Certificate Hash from the control-plane node
To get the CA certificate hash from the control-plane-node, we need to run a complicated command:
openssl x509 -pubkey -in /etc/kubernetes/pki/ca.crt | openssl rsa -pubin -outform der 2>/dev/null | openssl dgst -sha256 -hex | sed 's/^.* //'
and in my k8s cluster is:
a4833f8c82953370610efaa5ed93b791337232c3a948b710b2435d747889c085Join Workers to the kubernetes cluster
So now, we can Join our worker nodes to the kubernetes cluster.
Run the below command on both worker nodes:
sudo kubeadm join 192.168.122.169:6443 \
       --token zt36bp.uht4cziweef1jo1h \
       --discovery-token-ca-cert-hash sha256:a4833f8c82953370610efaa5ed93b791337232c3a948b710b2435d747889c085
we get this message
Run ‘kubectl get nodes’ on the control-plane to see this node join the cluster.
Is the kubernetes cluster running ?
We can verify that
kubectl get nodes   -o wide
kubectl get pods -A -o wide
NAME         STATUS   ROLES           AGE     VERSION   INTERNAL-IP       EXTERNAL-IP   OS-IMAGE             KERNEL-VERSION      CONTAINER-RUNTIME
k8scpnode    Ready    control-plane   64m     v1.25.0   192.168.122.169   <none>        Ubuntu 22.04.1 LTS   5.15.0-46-generic   containerd://1.6.8
k8wrknode1   Ready    <none>          2m32s   v1.25.0   192.168.122.40    <none>        Ubuntu 22.04.1 LTS   5.15.0-46-generic   containerd://1.6.8
k8wrknode2   Ready    <none>          2m28s   v1.25.0   192.168.122.8     <none>        Ubuntu 22.04.1 LTS   5.15.0-46-generic   containerd://1.6.8
NAMESPACE NAME READY STATUS RESTARTS AGE IP NODE NOMINATED NODE READINESS GATES
kube-flannel kube-flannel-ds-52g92 1/1 Running 0 2m32s 192.168.122.40 k8wrknode1 <none> <none>
kube-flannel kube-flannel-ds-7qlm7 1/1 Running 0 2m28s 192.168.122.8 k8wrknode2 <none> <none>
kube-flannel kube-flannel-ds-zqv2b 1/1 Running 0 64m 192.168.122.169 k8scpnode <none> <none>
kube-system coredns-565d847f94-lg54q 1/1 Running 0 64m 10.244.0.2 k8scpnode <none> <none>
kube-system coredns-565d847f94-ms8zk 1/1 Running 0 64m 10.244.0.3 k8scpnode <none> <none>
kube-system etcd-k8scpnode 1/1 Running 0 64m 192.168.122.169 k8scpnode <none> <none>
kube-system kube-apiserver-k8scpnode 1/1 Running 0 64m 192.168.122.169 k8scpnode <none> <none>
kube-system kube-controller-manager-k8scpnode 1/1 Running 1 (12m ago) 64m 192.168.122.169 k8scpnode <none> <none>
kube-system kube-proxy-4khw6 1/1 Running 0 2m32s 192.168.122.40 k8wrknode1 <none> <none>
kube-system kube-proxy-gm27l 1/1 Running 0 2m28s 192.168.122.8 k8wrknode2 <none> <none>
kube-system kube-proxy-pv7tj 1/1 Running 0 64m 192.168.122.169 k8scpnode <none> <none>
kube-system kube-scheduler-k8scpnode 1/1 Running 1 (12m ago) 64m 192.168.122.169 k8scpnode <none> <none>
That’s it !
Our k8s cluster is running.
Kubernetes Dashboard
is a general purpose, web-based UI for Kubernetes clusters. It allows users to manage applications running in the cluster and troubleshoot them, as well as manage the cluster itself.
We can proceed by installing a k8s dashboard to our k8s cluster.
Install kubernetes dashboard
One simple way to install the kubernetes-dashboard, is by applying the latest (as of this writing) yaml configuration file.
kubectl apply -f https://raw.githubusercontent.com/kubernetes/dashboard/v2.6.1/aio/deploy/recommended.yaml
the output of the above command should be something like
namespace/kubernetes-dashboard created
serviceaccount/kubernetes-dashboard created
service/kubernetes-dashboard created
secret/kubernetes-dashboard-certs created
secret/kubernetes-dashboard-csrf created
secret/kubernetes-dashboard-key-holder created
configmap/kubernetes-dashboard-settings created
role.rbac.authorization.k8s.io/kubernetes-dashboard created
clusterrole.rbac.authorization.k8s.io/kubernetes-dashboard created
rolebinding.rbac.authorization.k8s.io/kubernetes-dashboard created
clusterrolebinding.rbac.authorization.k8s.io/kubernetes-dashboard created
deployment.apps/kubernetes-dashboard created
service/dashboard-metrics-scraper created
deployment.apps/dashboard-metrics-scraper created
Verify the installation
kubectl get all -n kubernetes-dashboard
NAME                                             READY   STATUS    RESTARTS   AGE
pod/dashboard-metrics-scraper-64bcc67c9c-kvll7   1/1     Running   0          2m16s
pod/kubernetes-dashboard-66c887f759-rr4gn        1/1     Running   0          2m16s

NAME                                TYPE        CLUSTER-IP      EXTERNAL-IP   PORT(S)    AGE
service/dashboard-metrics-scraper   ClusterIP   10.110.25.61    <none>        8000/TCP   2m16s
service/kubernetes-dashboard        ClusterIP   10.100.65.122   <none>        443/TCP    2m16s

NAME                                        READY   UP-TO-DATE   AVAILABLE   AGE
deployment.apps/dashboard-metrics-scraper   1/1     1            1           2m16s
deployment.apps/kubernetes-dashboard        1/1     1            1           2m16s

NAME                                                   DESIRED   CURRENT   READY   AGE
replicaset.apps/dashboard-metrics-scraper-64bcc67c9c   1         1         1       2m16s
replicaset.apps/kubernetes-dashboard-66c887f759        1         1         1       2m16s
Add a Node Port to kubernetes dashboard
Kubernetes Dashboard by default runs on a internal 10.x.x.x IP.
To access the dashboard we need to have a NodePort in the kubernetes-dashboard service.
We can either Patch the service or edit the yaml file.
Patch kubernetes-dashboard
kubectl --namespace kubernetes-dashboard patch svc kubernetes-dashboard -p '{"spec": {"type": "NodePort"}}'
output
service/kubernetes-dashboard patched
verify the service
kubectl get svc -n kubernetes-dashboard
NAME                        TYPE        CLUSTER-IP      EXTERNAL-IP   PORT(S)         AGE
dashboard-metrics-scraper   ClusterIP   10.110.25.61    <none>        8000/TCP        11m
kubernetes-dashboard        NodePort    10.100.65.122   <none>        443:32709/TCP   11m
we can see the 30480 in the kubernetes-dashboard.
Edit kubernetes-dashboard Service
kubectl edit svc -n kubernetes-dashboard kubernetes-dashboard
and chaning the service type from
type: ClusterIPto
type: NodePortAccessing Kubernetes Dashboard
The kubernetes-dashboard has two (2) pods, one (1) for metrics, one (2) for the dashboard.
To access the dashboard, first we need to identify in which Node is running.
kubectl get pods -n kubernetes-dashboard -o wide
NAME                                         READY   STATUS    RESTARTS   AGE     IP           NODE         NOMINATED NODE   READINESS GATES
dashboard-metrics-scraper-64bcc67c9c-fs7pt   1/1     Running   0          2m43s   10.244.1.9   k8wrknode1   <none>           <none>
kubernetes-dashboard-66c887f759-pzt4z        1/1     Running   0          2m44s   10.244.2.9   k8wrknode2   <none>           <none>
In my setup the dashboard pod is running on the worker node 2 and from the /etc/hosts is on the 192.168.122.8 IP.
The NodePort is 32709
k get svc -n kubernetes-dashboard -o wide
So, we can open a new tab on our browser and type:
https://192.168.122.8:32709
and accept the self-signed certificate!
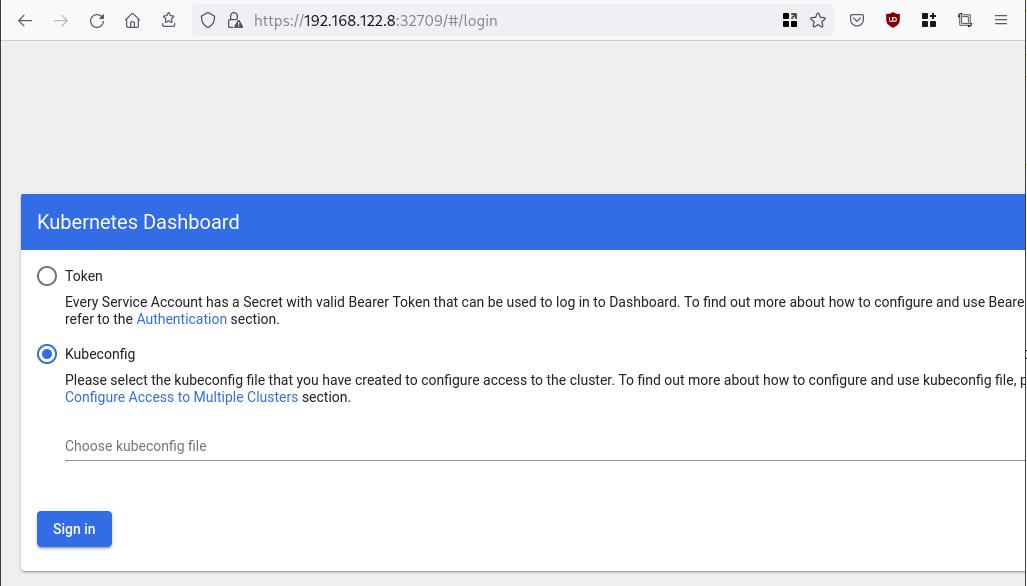
Create An Authentication Token (RBAC)
Last step for the kubernetes-dashboard is to create an authentication token.
Creating a Service Account
Create a new yaml file, with kind: ServiceAccount that has access to kubernetes-dashboard namespace and has name: admin-user.
cat > kubernetes-dashboard.ServiceAccount.yaml <<EOF
apiVersion: v1
kind: ServiceAccount
metadata:
  name: admin-user
  namespace: kubernetes-dashboard

EOF
add this service account to the k8s cluster
kubectl apply -f kubernetes-dashboard.ServiceAccount.yaml
output
serviceaccount/admin-user createdCreating a ClusterRoleBinding
We need to bind the Service Account with the kubernetes-dashboard via Role-based access control.
cat > kubernetes-dashboard.ClusterRoleBinding.yaml <<EOF
apiVersion: rbac.authorization.k8s.io/v1
kind: ClusterRoleBinding
metadata:
  name: admin-user
roleRef:
  apiGroup: rbac.authorization.k8s.io
  kind: ClusterRole
  name: cluster-admin
subjects:
- kind: ServiceAccount
  name: admin-user
  namespace: kubernetes-dashboard

EOF
apply this yaml file
kubectl apply -f kubernetes-dashboard.ClusterRoleBinding.yaml
clusterrolebinding.rbac.authorization.k8s.io/admin-user created
That means, our Service Account User has all the necessary roles to access the kubernetes-dashboard.
Getting a Bearer Token
Final step is to create/get a token for our user.
kubectl -n kubernetes-dashboard create token admin-user
eyJhbGciOiJSUzI1NiIsImtpZCI6Im04M2JOY2k1Yk1hbFBhLVN2cjA4X1pkdktXNldqWkR4bjB6MGpTdFgtVHcifQ.eyJhdWQiOlsiaHR0cHM6Ly9rdWJlcm5ldGVzLmRlZmF1bHQuc3ZjLmNsdXN0ZXIubG9jYWwiXSwiZXhwIjoxNjYxOTU2NDQ1LCJpYXQiOjE2NjE5NTI4NDUsImlzcyI6Imh0dHBzOi8va3ViZXJuZXRlcy5kZWZhdWx0LnN2Yy5jbHVzdGVyLmxvY2FsIiwia3ViZXJuZXRlcy5pbyI6eyJuYW1lc3BhY2UiOiJrdWJlcm5ldGVzLWRhc2hib2FyZCIsInNlcnZpY2VhY2NvdW50Ijp7Im5hbWUiOiJhZG1pbi11c2VyIiwidWlkIjoiN2M4OWIyZDktMGIwYS00ZDg4LTk2Y2EtZDU3NjhjOWU2ZGYxIn19LCJuYmYiOjE2NjE5NTI4NDUsInN1YiI6InN5c3RlbTpzZXJ2aWNlYWNjb3VudDprdWJlcm5ldGVzLWRhc2hib2FyZDphZG1pbi11c2VyIn0.RMRQkZZhcoC5vCvck6hKfqXJ4dfN4JoQyAaClHZvOMI6JgQZEfB2-_Qsh5MfFApJUEit-0TX9r3CzW3JqvB7dmpTPxUQvHK68r82WGveBVp1wF37UyXu_IzxiCQzpCWYr3GcVGAGZVBbhhqNYm765FV02ZA_khHrW3WpB80ikhm_TNLkOS6Llq2UiLFZyHHmjl5pwvGzT7YXZe8s-llZSgc0UenEwPG-82eE279oOy6r4_NltoV1HB3uu0YjUJPlkqAPnHuSfAA7-8A3XAAVHhRQvFPea1qZLc4-oD24AcU0FjWqDMILEyE8zaD2ci8zEQBMoxcf2qmj0wn9cfbZwQ
Add this token to the previous login page
Browsing Kubernetes Dashboard
eg. Cluster –> Nodes
Nginx App
Before finishing this blog post, I would also like to share how to install a simple nginx-app as it is customary to do such thing in every new k8s cluster.
But plz excuse me, I will not get into much details.
You should be able to understand the below k8s commands.
Install nginx-app
kubectl create deployment nginx-app --image=nginx --replicas=2
deployment.apps/nginx-app createdGet Deployment
kubectl get deployment nginx-app -o wideNAME READY UP-TO-DATE AVAILABLE AGE CONTAINERS IMAGES SELECTOR
nginx-app 2/2 2 2 64s nginx nginx app=nginx-appExpose Nginx-App
kubectl expose deployment nginx-app --type=NodePort --port=80
service/nginx-app exposedVerify Service nginx-app
kubectl get svc nginx-app -o wide
NAME        TYPE       CLUSTER-IP      EXTERNAL-IP   PORT(S)        AGE   SELECTOR
nginx-app   NodePort   10.98.170.185   <none>        80:31761/TCP   27s   app=nginx-app
Describe Service nginx-app
kubectl describe svc nginx-app
Name:                     nginx-app
Namespace:                default
Labels:                   app=nginx-app
Annotations:              <none>
Selector:                 app=nginx-app
Type:                     NodePort
IP Family Policy:         SingleStack
IP Families:              IPv4
IP:                       10.98.170.185
IPs:                      10.98.170.185
Port:                     <unset>  80/TCP
TargetPort:               80/TCP
NodePort:                 <unset>  31761/TCP
Endpoints:                10.244.1.10:80,10.244.2.10:80
Session Affinity:         None
External Traffic Policy:  Cluster
Events:                   <none>
Curl Nginx-App
curl http://192.168.122.8:31761
<!DOCTYPE html>
<html>
<head>
<title>Welcome to nginx!</title>
<style>
html { color-scheme: light dark; }
body { width: 35em; margin: 0 auto;
font-family: Tahoma, Verdana, Arial, sans-serif; }
</style>
</head>
<body>
<h1>Welcome to nginx!</h1>
<p>If you see this page, the nginx web server is successfully installed and
working. Further configuration is required.</p>

<p>For online documentation and support please refer to
<a href="http://nginx.org/">nginx.org</a>.<br/>
Commercial support is available at
<a href="http://nginx.com/">nginx.com</a>.</p>

<p><em>Thank you for using nginx.</em></p>
</body>
</html>
Nginx-App from Browser
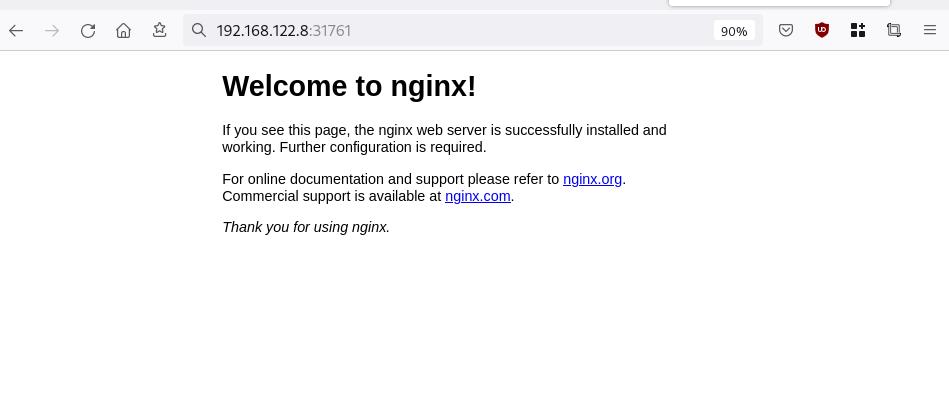
That’s it !
I hope you enjoyed this blog post.
-ebal
./destroy.sh...
libvirt_domain.domain-ubuntu["k8wrknode1"]: Destroying... [id=446cae2a-ce14-488f-b8e9-f44839091bce]
libvirt_domain.domain-ubuntu["k8scpnode"]: Destroying... [id=51e12abb-b14b-4ab8-b098-c1ce0b4073e3]
time_sleep.wait_for_cloud_init: Destroying... [id=2022-08-30T18:02:06Z]
libvirt_domain.domain-ubuntu["k8wrknode2"]: Destroying... [id=0767fb62-4600-4bc8-a94a-8e10c222b92e]
time_sleep.wait_for_cloud_init: Destruction complete after 0s
libvirt_domain.domain-ubuntu["k8wrknode1"]: Destruction complete after 1s
libvirt_domain.domain-ubuntu["k8scpnode"]: Destruction complete after 1s
libvirt_domain.domain-ubuntu["k8wrknode2"]: Destruction complete after 1s
libvirt_cloudinit_disk.cloud-init["k8wrknode1"]: Destroying... [id=/var/lib/libvirt/images/Jpw2Sg_cloud-init.iso;b8ddfa73-a770-46de-ad16-b0a5a08c8550]
libvirt_cloudinit_disk.cloud-init["k8wrknode2"]: Destroying... [id=/var/lib/libvirt/images/VdUklQ_cloud-init.iso;5511ed7f-a864-4d3f-985a-c4ac07eac233]
libvirt_volume.ubuntu-base["k8scpnode"]: Destroying... [id=/var/lib/libvirt/images/l5Rr1w_ubuntu-base]
libvirt_volume.ubuntu-base["k8wrknode2"]: Destroying... [id=/var/lib/libvirt/images/VdUklQ_ubuntu-base]
libvirt_cloudinit_disk.cloud-init["k8scpnode"]: Destroying... [id=/var/lib/libvirt/images/l5Rr1w_cloud-init.iso;11ef6bb7-a688-4c15-ae33-10690500705f]
libvirt_volume.ubuntu-base["k8wrknode1"]: Destroying... [id=/var/lib/libvirt/images/Jpw2Sg_ubuntu-base]
libvirt_cloudinit_disk.cloud-init["k8wrknode1"]: Destruction complete after 1s
libvirt_volume.ubuntu-base["k8wrknode2"]: Destruction complete after 1s
libvirt_cloudinit_disk.cloud-init["k8scpnode"]: Destruction complete after 1s
libvirt_cloudinit_disk.cloud-init["k8wrknode2"]: Destruction complete after 1s
libvirt_volume.ubuntu-base["k8wrknode1"]: Destruction complete after 1s
libvirt_volume.ubuntu-base["k8scpnode"]: Destruction complete after 2s
libvirt_volume.ubuntu-vol["k8wrknode1"]: Destroying... [id=/var/lib/libvirt/images/Jpw2Sg_ubuntu-vol]
libvirt_volume.ubuntu-vol["k8scpnode"]: Destroying... [id=/var/lib/libvirt/images/l5Rr1w_ubuntu-vol]
libvirt_volume.ubuntu-vol["k8wrknode2"]: Destroying... [id=/var/lib/libvirt/images/VdUklQ_ubuntu-vol]
libvirt_volume.ubuntu-vol["k8scpnode"]: Destruction complete after 0s
libvirt_volume.ubuntu-vol["k8wrknode2"]: Destruction complete after 0s
libvirt_volume.ubuntu-vol["k8wrknode1"]: Destruction complete after 0s
random_id.id["k8scpnode"]: Destroying... [id=l5Rr1w]
random_id.id["k8wrknode2"]: Destroying... [id=VdUklQ]
random_id.id["k8wrknode1"]: Destroying... [id=Jpw2Sg]
random_id.id["k8wrknode2"]: Destruction complete after 0s
random_id.id["k8scpnode"]: Destruction complete after 0s
random_id.id["k8wrknode1"]: Destruction complete after 0s
Destroy complete! Resources: 16 destroyed.
In this blog post, I’ll try to share my personal notes on how to setup a kubernetes cluster with kubeadm on ubuntu 22.04 LTS Virtual Machines.
I am going to use three (3) Virtual Machines in my local lab. My home lab is based on libvirt Qemu/KVM (Kernel-based Virtual Machine) and I run Terraform as the infrastructure provision tool.
There is a copy of this blog post to github.
https://github.com/ebal/k8s_cluster
If you notice something wrong you can either contact me via the contact page, or open a PR in the github project.
you can also follow me at twitter: https://twitter.com/ebalaskas
Kubernetes, also known as K8s, is an open-source system for automating deployment, scaling, and management of containerized applications.
- Prerequisites
- Git Terraform Code for the kubernetes cluster
- Control-Plane Node
- Ports on the control-plane node
- Firewall on the control-plane node
- Hosts file in the control-plane node
- No Swap on the control-plane node
- Kernel modules on the control-plane node
- NeedRestart on the control-plane node
- Installing a Container Runtime on the control-plane node
- Installing kubeadm, kubelet and kubectl on the control-plane node
- Initializing the control-plane node
- Create user access config to the k8s control-plane node
- Verify the control-plane node
- Install an overlay network provider on the control-plane node
- Verify CoreDNS is running on the control-plane node
- Worker Nodes
- Ports on the worker nodes
- Firewall on the worker nodes
- Hosts file in the worker node
- No Swap on the worker node
- Kernel modules on the worker node
- NeedRestart on the worker node
- Installing a Container Runtime on the worker node
- Installing kubeadm, kubelet and kubectl on the worker node
- Get Token from the control-plane node
- Get Certificate Hash from the control-plane node
- Join Workers to the kubernetes cluster
- Is the kubernetes cluster running ?
- Kubernetes Dashboard
- Install kubernetes dashboard
- Add a Node Port to kubernetes dashboard
- Patch kubernetes-dashboard
- Edit kubernetes-dashboard Service
- Accessing Kubernetes Dashboard
- Create An Authentication Token (RBAC)
- Creating a Service Account
- Creating a ClusterRoleBinding
- Getting a Bearer Token
- Browsing Kubernetes Dashboard
- Nginx App
- That’s it !
Prerequisites
- at least 3 Virtual Machines of Ubuntu 22.04 (one for control-plane, two for worker nodes)
- 2GB (or more) of RAM on each Virtual Machine
- 2 CPUs (or more) on each Virtual Machine
- 20Gb of hard disk on each Virtual Machine
- No SWAP partition/image/file on each Virtual Machine
Git Terraform Code for the kubernetes cluster
I prefer to have a reproducible infrastructure, so I can very fast create and destroy my test lab. My preferable way of doing things is testing on each step, so I pretty much destroy everything, coping and pasting commands and keep on. I use terraform for the create the infrastructure. You can find the code for the entire kubernetes cluster here: k8s cluster - Terraform code.
If you do not use terraform, skip this step!
You can git clone the repo to review and edit it according to your needs.
git clone https://github.com/ebal/k8s_cluster.git
cd tf_libvirt
You will need to make appropriate changes. Open Variables.tf for that. The most important option to change, is the User option. Change it to your github username and it will download and setup the VMs with your public key, instead of mine!
But pretty much, everything else should work out of the box. Change the vmem and vcpu settings to your needs.
Init terraform before running the below shell script.
terraform init
and then run
./start.sh
output should be something like:
...
Apply complete! Resources: 16 added, 0 changed, 0 destroyed.

Outputs:

VMs = [
  "192.168.122.169  k8scpnode",
  "192.168.122.40   k8wrknode1",
  "192.168.122.8    k8wrknode2",
]
Verify that you have ssh access to the VMs
eg.
ssh -l ubuntu 192.168.122.169
replace the IP with what the output gave you.
Ubuntu 22.04 Image
If you noticed in the terraform code, I have the below declaration as the cloud image:
../jammy-server-cloudimg-amd64.img
that means, I’ve already downloaded it, in the upper directory to speed things up!
cd ../
curl -sLO https://cloud-images.ubuntu.com/jammy/current/focal-server-cloudimg-amd64.img
cd -
Control-Plane Node
Let’s us now start the configure of the k8s control-plane node.
Ports on the control-plane node
Kubernetes runs a few services that needs to be accessable from the worker nodes.
| Protocol | Direction | Port Range | Purpose | Used By |
|---|---|---|---|---|
| TCP | Inbound | 6443 | Kubernetes API server | All |
| TCP | Inbound | 2379-2380 | etcd server client API | kube-apiserver, etcd |
| TCP | Inbound | 10250 | Kubelet API | Self, Control plane |
| TCP | Inbound | 10259 | kube-scheduler | Self |
| TCP | Inbound | 10257 | kube-controller-manager | Self |
Although etcd ports are included in control plane section, you can also host your
own etcd cluster externally or on custom ports.
Firewall on the control-plane node
We need to open the necessary ports on the CP’s (control-plane node) firewall.
sudo ufw allow 6443/tcp
sudo ufw allow 2379:2380/tcp
sudo ufw allow 10250/tcp
sudo ufw allow 10259/tcp
sudo ufw allow 10257/tcp

#sudo ufw disable
sudo ufw status
the output should be
To                         Action      From
--                         ------      ----
22/tcp                     ALLOW       Anywhere
6443/tcp                   ALLOW       Anywhere
2379:2380/tcp              ALLOW       Anywhere
10250/tcp                  ALLOW       Anywhere
10259/tcp                  ALLOW       Anywhere
10257/tcp                  ALLOW       Anywhere
22/tcp (v6)                ALLOW       Anywhere (v6)
6443/tcp (v6)              ALLOW       Anywhere (v6)
2379:2380/tcp (v6)         ALLOW       Anywhere (v6)
10250/tcp (v6)             ALLOW       Anywhere (v6)
10259/tcp (v6)             ALLOW       Anywhere (v6)
10257/tcp (v6)             ALLOW       Anywhere (v6)
Hosts file in the control-plane node
We need to update the /etc/hosts with the internal IP and hostname.
This will help when it is time to join the worker nodes.
echo $(hostname -I) $(hostname) | sudo tee -a /etc/hosts
Just a reminder: we need to update the hosts file to all the VMs.
To include all the VMs’ IPs and hostnames.
If you already know them, then your /etc/hosts file should look like this:
192.168.122.169  k8scpnode
192.168.122.40   k8wrknode1
192.168.122.8    k8wrknode2
replace the IPs to yours.
No Swap on the control-plane node
Be sure that SWAP is disabled in all virtual machines!
sudo swapoff -a
and the fstab file should not have any swap entry.
The below command should return nothing.
sudo grep -i swap /etc/fstab
If not, edit the /etc/fstab and remove the swap entry.
If you follow my terraform k8s code example from the above github repo,
you will notice that there isn’t any swap entry in the cloud init (user-data) file.
Nevertheless it is always a good thing to douple check.
Kernel modules on the control-plane node
We need to load the below kernel modules on all k8s nodes, so k8s can create some network magic!
- overlay
- br_netfilter
Run the below bash snippet that will do that, and also will enable the forwarding features of the network.
sudo tee /etc/modules-load.d/kubernetes.conf <<EOF
overlay
br_netfilter
EOF

sudo modprobe overlay
sudo modprobe br_netfilter

sudo lsmod | grep netfilter

sudo tee /etc/sysctl.d/kubernetes.conf <<EOF
net.bridge.bridge-nf-call-ip6tables = 1
net.bridge.bridge-nf-call-iptables = 1
net.ipv4.ip_forward = 1
EOF

sudo sysctl --system
NeedRestart on the control-plane node
Before installing any software, we need to make a tiny change to needrestart program. This will help with the automation of installing packages and will stop asking -via dialog- if we would like to restart the services!
echo "\$nrconf{restart} = 'a';" | sudo tee -a /etc/needrestart/needrestart.conf
Installing a Container Runtime on the control-plane node
It is time to choose which container runtime we are going to use on our k8s cluster. There are a few container runtimes for k8s and in the past docker were used to. Nowadays the most common runtime is the containerd that can also uses the cgroup v2 kernel features. There is also a docker-engine runtime via CRI. Read here for more details on the subject.
curl -sL https://download.docker.com/linux/ubuntu/gpg | sudo gpg --dearmor -o /etc/apt/trusted.gpg.d/docker-keyring.gpg

sudo apt-add-repository -y "deb https://download.docker.com/linux/ubuntu jammy stable"

sleep 5

sudo apt -y install containerd.io

containerd config default                              \
 | sed 's/SystemdCgroup = false/SystemdCgroup = true/' \
 | sudo tee /etc/containerd/config.toml

sudo systemctl restart containerd.service
We have also enabled the
systemd cgroup driverso the control-plane node can use the cgroup v2 features.
Installing kubeadm, kubelet and kubectl on the control-plane node
Install the kubernetes packages (kubedam, kubelet and kubectl) by first adding the k8s repository on our virtual machine. To speed up the next step, we will also download the configuration container images.
sudo curl -sLo /etc/apt/trusted.gpg.d/kubernetes-keyring.gpg https://packages.cloud.google.com/apt/doc/apt-key.gpg

sudo apt-add-repository -y "deb http://apt.kubernetes.io/ kubernetes-xenial main"

sleep 5

sudo apt install -y kubelet kubeadm kubectl

sudo kubeadm config images pull
Initializing the control-plane node
We can now initialize our control-plane node for our kubernetes cluster.
There are a few things we need to be careful about:
- We can specify the control-plane-endpoint if we are planning to have a high available k8s cluster. (we will skip this for now),
- Choose a Pod network add-on (next section) but be aware that CoreDNS (DNS and Service Discovery) will not run till then (later),
- define where is our container runtime socket (we will skip it)
- advertise the API server (we will skip it)
But we will define our Pod Network CIDR to the default value of the Pod network add-on so everything will go smoothly later on.
sudo kubeadm init --pod-network-cidr=10.244.0.0/16
Keep the output in a notepad.
Create user access config to the k8s control-plane node
Our k8s control-plane node is running, so we need to have credentials to access it.
The kubectl reads a configuration file (that has the token), so we copying this from k8s admin.
rm -rf $HOME/.kube

mkdir -p $HOME/.kube

sudo cp -i /etc/kubernetes/admin.conf $HOME/.kube/config

sudo chown $(id -u):$(id -g) $HOME/.kube/config

ls -la $HOME/.kube/config

alias k="kubectl"
Verify the control-plane node
Verify that the kubernets is running.
That means we have a k8s cluster - but only the control-plane node is running.
kubectl cluster-info
#kubectl cluster-info dump

k get nodes -o wide; k get pods  -A -o wide
Install an overlay network provider on the control-plane node
As I mentioned above, in order to use the DNS and Service Discovery services in the kubernetes (CoreDNS) we need to install a Container Network Interface (CNI) based Pod network add-on so that your Pods can communicate with each other.
We will use flannel as the simplest of them.
k apply -f https://raw.githubusercontent.com/coreos/flannel/master/Documentation/kube-flannel.yml
Verify CoreDNS is running on the control-plane node
Verify that the control-plane node is Up & Running and the control-plane pods (as coredns pods) are also running
$ k get nodes -o wide

NAME        STATUS   ROLES           AGE   VERSION   INTERNAL-IP       EXTERNAL-IP   OS-IMAGE             KERNEL-VERSION      CONTAINER-RUNTIME
k8scpnode   Ready    control-plane   54s   v1.25.0   192.168.122.169   <none>        Ubuntu 22.04.1 LTS   5.15.0-46-generic   containerd://1.6.8
$ k get pods -A -o wide

NAMESPACE    NAME                              READY STATUS  RESTARTS AGE IP              NODE      NOMINATED NODE READINESS GATES
kube-flannel kube-flannel-ds-zqv2b             1/1   Running 0        36s 192.168.122.169 k8scpnode <none>         <none>
kube-system  coredns-565d847f94-lg54q          1/1   Running 0        38s 10.244.0.2      k8scpnode <none>         <none>
kube-system  coredns-565d847f94-ms8zk          1/1   Running 0        38s 10.244.0.3      k8scpnode <none>         <none>
kube-system  etcd-k8scpnode                    1/1   Running 0        50s 192.168.122.169 k8scpnode <none>         <none>
kube-system  kube-apiserver-k8scpnode          1/1   Running 0        50s 192.168.122.169 k8scpnode <none>         <none>
kube-system  kube-controller-manager-k8scpnode 1/1   Running 0        50s 192.168.122.169 k8scpnode <none>         <none>
kube-system  kube-proxy-pv7tj                  1/1   Running 0        39s 192.168.122.169 k8scpnode <none>         <none>
kube-system  kube-scheduler-k8scpnode          1/1   Running 0        50s 192.168.122.169 k8scpnode <none>         <none>
That’s it with the control-plane node !
Worker Nodes
The below instructions works pretty much the same on both worker nodes.
I will document the steps for the worker1 node but do the same for the worker2 node.
Ports on the worker nodes
As we learned above on the control-plane section, kubernetes runs a few services
| Protocol | Direction | Port Range | Purpose | Used By |
|---|---|---|---|---|
| TCP | Inbound | 10250 | Kubelet API | Self, Control plane |
| TCP | Inbound | 30000-32767 | NodePort Services | All |
Firewall on the worker nodes
so we need to open the necessary ports on the worker nodes too.
sudo ufw allow 10250/tcp
sudo ufw allow 30000:32767/tcp

sudo ufw status
output should look like
To                         Action      From
--                         ------      ----
22/tcp                     ALLOW       Anywhere
10250/tcp                  ALLOW       Anywhere
30000:32767/tcp            ALLOW       Anywhere
22/tcp (v6)                ALLOW       Anywhere (v6)
10250/tcp (v6)             ALLOW       Anywhere (v6)
30000:32767/tcp (v6)       ALLOW       Anywhere (v6)
The next few steps are pretty much exactly the same as in the control-plane node.
In order to keep this documentation short, I’ll just copy/paste the commands.
Hosts file in the worker node
Update the /etc/hosts file to include the IPs and hostname of all VMs.
192.168.122.169  k8scpnode
192.168.122.40   k8wrknode1
192.168.122.8    k8wrknode2
No Swap on the worker node
sudo swapoff -a
Kernel modules on the worker node
sudo tee /etc/modules-load.d/kubernetes.conf <<EOF
overlay
br_netfilter
EOF

sudo modprobe overlay
sudo modprobe br_netfilter

sudo lsmod | grep netfilter

sudo tee /etc/sysctl.d/kubernetes.conf <<EOF
net.bridge.bridge-nf-call-ip6tables = 1
net.bridge.bridge-nf-call-iptables = 1
net.ipv4.ip_forward = 1
EOF

sudo sysctl --system
NeedRestart on the worker node
echo "\$nrconf{restart} = 'a';" | sudo tee -a /etc/needrestart/needrestart.conf
Installing a Container Runtime on the worker node
curl -sL https://download.docker.com/linux/ubuntu/gpg | sudo gpg --dearmor -o /etc/apt/trusted.gpg.d/docker-keyring.gpg

sudo apt-add-repository -y "deb https://download.docker.com/linux/ubuntu jammy stable"

sleep 5

sudo apt -y install containerd.io

containerd config default                              \
 | sed 's/SystemdCgroup = false/SystemdCgroup = true/' \
 | sudo tee /etc/containerd/config.toml

sudo systemctl restart containerd.service
Installing kubeadm, kubelet and kubectl on the worker node
sudo curl -sLo /etc/apt/trusted.gpg.d/kubernetes-keyring.gpg https://packages.cloud.google.com/apt/doc/apt-key.gpg

sudo apt-add-repository -y "deb http://apt.kubernetes.io/ kubernetes-xenial main"

sleep 5

sudo apt install -y kubelet kubeadm kubectl

sudo kubeadm config images pull
Get Token from the control-plane node
To join nodes to the kubernetes cluster, we need to have a couple of things.
- a token from control-plane node
- the CA certificate hash from the contol-plane node.
If you didnt keep the output the initialization of the control-plane node, that’s okay.
Run the below command in the control-plane node.
sudo kubeadm token list
and we will get the initial token that expires after 24hours.
TOKEN                     TTL         EXPIRES                USAGES                   DESCRIPTION                                                EXTRA GROUPS
zt36bp.uht4cziweef1jo1h   23h         2022-08-31T18:38:16Z   authentication,signing   The default bootstrap token generated by 'kubeadm init'.   system:bootstrappers:kubeadm:default-node-token
In this case is the
zt36bp.uht4cziweef1jo1hGet Certificate Hash from the control-plane node
To get the CA certificate hash from the control-plane-node, we need to run a complicated command:
openssl x509 -pubkey -in /etc/kubernetes/pki/ca.crt | openssl rsa -pubin -outform der 2>/dev/null | openssl dgst -sha256 -hex | sed 's/^.* //'
and in my k8s cluster is:
a4833f8c82953370610efaa5ed93b791337232c3a948b710b2435d747889c085Join Workers to the kubernetes cluster
So now, we can Join our worker nodes to the kubernetes cluster.
Run the below command on both worker nodes:
sudo kubeadm join 192.168.122.169:6443 \
       --token zt36bp.uht4cziweef1jo1h \
       --discovery-token-ca-cert-hash sha256:a4833f8c82953370610efaa5ed93b791337232c3a948b710b2435d747889c085
we get this message
Run ‘kubectl get nodes’ on the control-plane to see this node join the cluster.
Is the kubernetes cluster running ?
We can verify that
kubectl get nodes   -o wide
kubectl get pods -A -o wide
NAME         STATUS   ROLES           AGE     VERSION   INTERNAL-IP       EXTERNAL-IP   OS-IMAGE             KERNEL-VERSION      CONTAINER-RUNTIME
k8scpnode    Ready    control-plane   64m     v1.25.0   192.168.122.169   <none>        Ubuntu 22.04.1 LTS   5.15.0-46-generic   containerd://1.6.8
k8wrknode1   Ready    <none>          2m32s   v1.25.0   192.168.122.40    <none>        Ubuntu 22.04.1 LTS   5.15.0-46-generic   containerd://1.6.8
k8wrknode2   Ready    <none>          2m28s   v1.25.0   192.168.122.8     <none>        Ubuntu 22.04.1 LTS   5.15.0-46-generic   containerd://1.6.8
NAMESPACE NAME READY STATUS RESTARTS AGE IP NODE NOMINATED NODE READINESS GATES
kube-flannel kube-flannel-ds-52g92 1/1 Running 0 2m32s 192.168.122.40 k8wrknode1 <none> <none>
kube-flannel kube-flannel-ds-7qlm7 1/1 Running 0 2m28s 192.168.122.8 k8wrknode2 <none> <none>
kube-flannel kube-flannel-ds-zqv2b 1/1 Running 0 64m 192.168.122.169 k8scpnode <none> <none>
kube-system coredns-565d847f94-lg54q 1/1 Running 0 64m 10.244.0.2 k8scpnode <none> <none>
kube-system coredns-565d847f94-ms8zk 1/1 Running 0 64m 10.244.0.3 k8scpnode <none> <none>
kube-system etcd-k8scpnode 1/1 Running 0 64m 192.168.122.169 k8scpnode <none> <none>
kube-system kube-apiserver-k8scpnode 1/1 Running 0 64m 192.168.122.169 k8scpnode <none> <none>
kube-system kube-controller-manager-k8scpnode 1/1 Running 1 (12m ago) 64m 192.168.122.169 k8scpnode <none> <none>
kube-system kube-proxy-4khw6 1/1 Running 0 2m32s 192.168.122.40 k8wrknode1 <none> <none>
kube-system kube-proxy-gm27l 1/1 Running 0 2m28s 192.168.122.8 k8wrknode2 <none> <none>
kube-system kube-proxy-pv7tj 1/1 Running 0 64m 192.168.122.169 k8scpnode <none> <none>
kube-system kube-scheduler-k8scpnode 1/1 Running 1 (12m ago) 64m 192.168.122.169 k8scpnode <none> <none>
That’s it !
Our k8s cluster is running.
Kubernetes Dashboard
is a general purpose, web-based UI for Kubernetes clusters. It allows users to manage applications running in the cluster and troubleshoot them, as well as manage the cluster itself.
We can proceed by installing a k8s dashboard to our k8s cluster.
Install kubernetes dashboard
One simple way to install the kubernetes-dashboard, is by applying the latest (as of this writing) yaml configuration file.
kubectl apply -f https://raw.githubusercontent.com/kubernetes/dashboard/v2.6.1/aio/deploy/recommended.yaml
the output of the above command should be something like
namespace/kubernetes-dashboard created
serviceaccount/kubernetes-dashboard created
service/kubernetes-dashboard created
secret/kubernetes-dashboard-certs created
secret/kubernetes-dashboard-csrf created
secret/kubernetes-dashboard-key-holder created
configmap/kubernetes-dashboard-settings created
role.rbac.authorization.k8s.io/kubernetes-dashboard created
clusterrole.rbac.authorization.k8s.io/kubernetes-dashboard created
rolebinding.rbac.authorization.k8s.io/kubernetes-dashboard created
clusterrolebinding.rbac.authorization.k8s.io/kubernetes-dashboard created
deployment.apps/kubernetes-dashboard created
service/dashboard-metrics-scraper created
deployment.apps/dashboard-metrics-scraper created
Verify the installation
kubectl get all -n kubernetes-dashboard
NAME                                             READY   STATUS    RESTARTS   AGE
pod/dashboard-metrics-scraper-64bcc67c9c-kvll7   1/1     Running   0          2m16s
pod/kubernetes-dashboard-66c887f759-rr4gn        1/1     Running   0          2m16s

NAME                                TYPE        CLUSTER-IP      EXTERNAL-IP   PORT(S)    AGE
service/dashboard-metrics-scraper   ClusterIP   10.110.25.61    <none>        8000/TCP   2m16s
service/kubernetes-dashboard        ClusterIP   10.100.65.122   <none>        443/TCP    2m16s

NAME                                        READY   UP-TO-DATE   AVAILABLE   AGE
deployment.apps/dashboard-metrics-scraper   1/1     1            1           2m16s
deployment.apps/kubernetes-dashboard        1/1     1            1           2m16s

NAME                                                   DESIRED   CURRENT   READY   AGE
replicaset.apps/dashboard-metrics-scraper-64bcc67c9c   1         1         1       2m16s
replicaset.apps/kubernetes-dashboard-66c887f759        1         1         1       2m16s
Add a Node Port to kubernetes dashboard
Kubernetes Dashboard by default runs on a internal 10.x.x.x IP.
To access the dashboard we need to have a NodePort in the kubernetes-dashboard service.
We can either Patch the service or edit the yaml file.
Patch kubernetes-dashboard
kubectl --namespace kubernetes-dashboard patch svc kubernetes-dashboard -p '{"spec": {"type": "NodePort"}}'
output
service/kubernetes-dashboard patched
verify the service
kubectl get svc -n kubernetes-dashboard
NAME                        TYPE        CLUSTER-IP      EXTERNAL-IP   PORT(S)         AGE
dashboard-metrics-scraper   ClusterIP   10.110.25.61    <none>        8000/TCP        11m
kubernetes-dashboard        NodePort    10.100.65.122   <none>        443:32709/TCP   11m
we can see the 30480 in the kubernetes-dashboard.
Edit kubernetes-dashboard Service
kubectl edit svc -n kubernetes-dashboard kubernetes-dashboard
and chaning the service type from
type: ClusterIPto
type: NodePortAccessing Kubernetes Dashboard
The kubernetes-dashboard has two (2) pods, one (1) for metrics, one (2) for the dashboard.
To access the dashboard, first we need to identify in which Node is running.
kubectl get pods -n kubernetes-dashboard -o wide
NAME                                         READY   STATUS    RESTARTS   AGE     IP           NODE         NOMINATED NODE   READINESS GATES
dashboard-metrics-scraper-64bcc67c9c-fs7pt   1/1     Running   0          2m43s   10.244.1.9   k8wrknode1   <none>           <none>
kubernetes-dashboard-66c887f759-pzt4z        1/1     Running   0          2m44s   10.244.2.9   k8wrknode2   <none>           <none>
In my setup the dashboard pod is running on the worker node 2 and from the /etc/hosts is on the 192.168.122.8 IP.
The NodePort is 32709
k get svc -n kubernetes-dashboard -o wide
So, we can open a new tab on our browser and type:
https://192.168.122.8:32709
and accept the self-signed certificate!
Create An Authentication Token (RBAC)
Last step for the kubernetes-dashboard is to create an authentication token.
Creating a Service Account
Create a new yaml file, with kind: ServiceAccount that has access to kubernetes-dashboard namespace and has name: admin-user.
cat > kubernetes-dashboard.ServiceAccount.yaml <<EOF
apiVersion: v1
kind: ServiceAccount
metadata:
  name: admin-user
  namespace: kubernetes-dashboard

EOF
add this service account to the k8s cluster
kubectl apply -f kubernetes-dashboard.ServiceAccount.yaml
output
serviceaccount/admin-user createdCreating a ClusterRoleBinding
We need to bind the Service Account with the kubernetes-dashboard via Role-based access control.
cat > kubernetes-dashboard.ClusterRoleBinding.yaml <<EOF
apiVersion: rbac.authorization.k8s.io/v1
kind: ClusterRoleBinding
metadata:
  name: admin-user
roleRef:
  apiGroup: rbac.authorization.k8s.io
  kind: ClusterRole
  name: cluster-admin
subjects:
- kind: ServiceAccount
  name: admin-user
  namespace: kubernetes-dashboard

EOF
apply this yaml file
kubectl apply -f kubernetes-dashboard.ClusterRoleBinding.yaml
clusterrolebinding.rbac.authorization.k8s.io/admin-user created
That means, our Service Account User has all the necessary roles to access the kubernetes-dashboard.
Getting a Bearer Token
Final step is to create/get a token for our user.
kubectl -n kubernetes-dashboard create token admin-user
eyJhbGciOiJSUzI1NiIsImtpZCI6Im04M2JOY2k1Yk1hbFBhLVN2cjA4X1pkdktXNldqWkR4bjB6MGpTdFgtVHcifQ.eyJhdWQiOlsiaHR0cHM6Ly9rdWJlcm5ldGVzLmRlZmF1bHQuc3ZjLmNsdXN0ZXIubG9jYWwiXSwiZXhwIjoxNjYxOTU2NDQ1LCJpYXQiOjE2NjE5NTI4NDUsImlzcyI6Imh0dHBzOi8va3ViZXJuZXRlcy5kZWZhdWx0LnN2Yy5jbHVzdGVyLmxvY2FsIiwia3ViZXJuZXRlcy5pbyI6eyJuYW1lc3BhY2UiOiJrdWJlcm5ldGVzLWRhc2hib2FyZCIsInNlcnZpY2VhY2NvdW50Ijp7Im5hbWUiOiJhZG1pbi11c2VyIiwidWlkIjoiN2M4OWIyZDktMGIwYS00ZDg4LTk2Y2EtZDU3NjhjOWU2ZGYxIn19LCJuYmYiOjE2NjE5NTI4NDUsInN1YiI6InN5c3RlbTpzZXJ2aWNlYWNjb3VudDprdWJlcm5ldGVzLWRhc2hib2FyZDphZG1pbi11c2VyIn0.RMRQkZZhcoC5vCvck6hKfqXJ4dfN4JoQyAaClHZvOMI6JgQZEfB2-_Qsh5MfFApJUEit-0TX9r3CzW3JqvB7dmpTPxUQvHK68r82WGveBVp1wF37UyXu_IzxiCQzpCWYr3GcVGAGZVBbhhqNYm765FV02ZA_khHrW3WpB80ikhm_TNLkOS6Llq2UiLFZyHHmjl5pwvGzT7YXZe8s-llZSgc0UenEwPG-82eE279oOy6r4_NltoV1HB3uu0YjUJPlkqAPnHuSfAA7-8A3XAAVHhRQvFPea1qZLc4-oD24AcU0FjWqDMILEyE8zaD2ci8zEQBMoxcf2qmj0wn9cfbZwQ
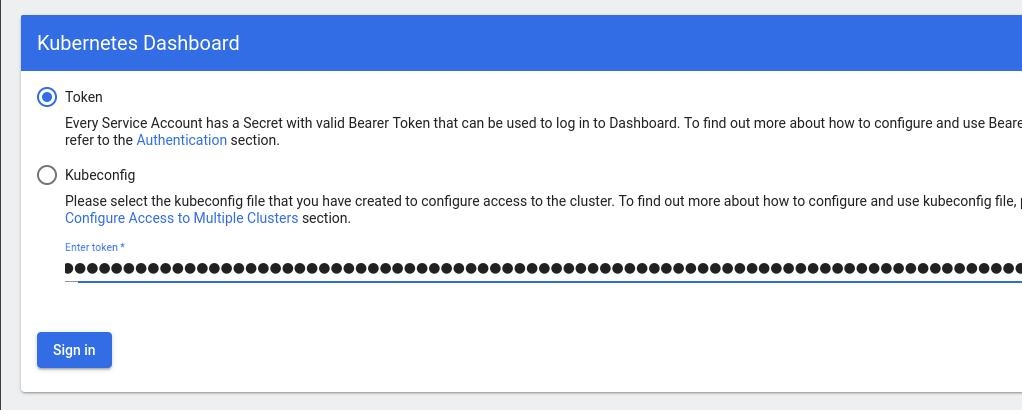
Add this token to the previous login page
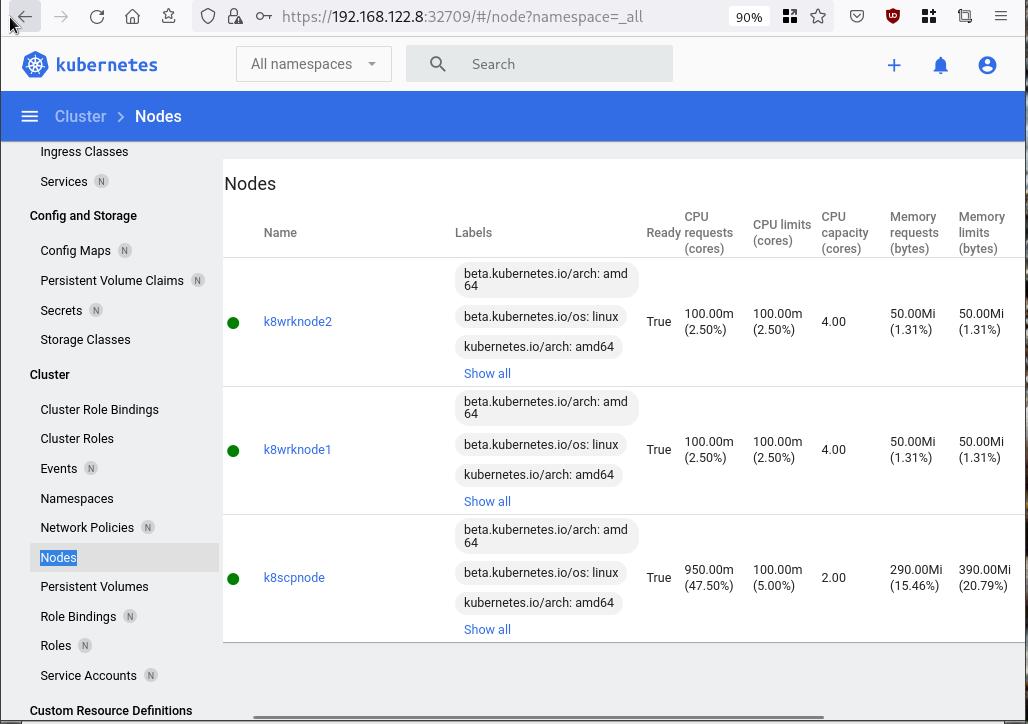
Browsing Kubernetes Dashboard
eg. Cluster –> Nodes
Nginx App
Before finishing this blog post, I would also like to share how to install a simple nginx-app as it is customary to do such thing in every new k8s cluster.
But plz excuse me, I will not get into much details.
You should be able to understand the below k8s commands.
Install nginx-app
kubectl create deployment nginx-app --image=nginx --replicas=2
deployment.apps/nginx-app createdGet Deployment
kubectl get deployment nginx-app -o wideNAME READY UP-TO-DATE AVAILABLE AGE CONTAINERS IMAGES SELECTOR
nginx-app 2/2 2 2 64s nginx nginx app=nginx-appExpose Nginx-App
kubectl expose deployment nginx-app --type=NodePort --port=80
service/nginx-app exposedVerify Service nginx-app
kubectl get svc nginx-app -o wide
NAME        TYPE       CLUSTER-IP      EXTERNAL-IP   PORT(S)        AGE   SELECTOR
nginx-app   NodePort   10.98.170.185   <none>        80:31761/TCP   27s   app=nginx-app
Describe Service nginx-app
kubectl describe svc nginx-app
Name:                     nginx-app
Namespace:                default
Labels:                   app=nginx-app
Annotations:              <none>
Selector:                 app=nginx-app
Type:                     NodePort
IP Family Policy:         SingleStack
IP Families:              IPv4
IP:                       10.98.170.185
IPs:                      10.98.170.185
Port:                     <unset>  80/TCP
TargetPort:               80/TCP
NodePort:                 <unset>  31761/TCP
Endpoints:                10.244.1.10:80,10.244.2.10:80
Session Affinity:         None
External Traffic Policy:  Cluster
Events:                   <none>
Curl Nginx-App
curl http://192.168.122.8:31761
<!DOCTYPE html>
<html>
<head>
<title>Welcome to nginx!</title>
<style>
html { color-scheme: light dark; }
body { width: 35em; margin: 0 auto;
font-family: Tahoma, Verdana, Arial, sans-serif; }
</style>
</head>
<body>
<h1>Welcome to nginx!</h1>
<p>If you see this page, the nginx web server is successfully installed and
working. Further configuration is required.</p>

<p>For online documentation and support please refer to
<a href="http://nginx.org/">nginx.org</a>.<br/>
Commercial support is available at
<a href="http://nginx.com/">nginx.com</a>.</p>

<p><em>Thank you for using nginx.</em></p>
</body>
</html>
Nginx-App from Browser
That’s it !
I hope you enjoyed this blog post.
-ebal
./destroy.sh...
libvirt_domain.domain-ubuntu["k8wrknode1"]: Destroying... [id=446cae2a-ce14-488f-b8e9-f44839091bce]
libvirt_domain.domain-ubuntu["k8scpnode"]: Destroying... [id=51e12abb-b14b-4ab8-b098-c1ce0b4073e3]
time_sleep.wait_for_cloud_init: Destroying... [id=2022-08-30T18:02:06Z]
libvirt_domain.domain-ubuntu["k8wrknode2"]: Destroying... [id=0767fb62-4600-4bc8-a94a-8e10c222b92e]
time_sleep.wait_for_cloud_init: Destruction complete after 0s
libvirt_domain.domain-ubuntu["k8wrknode1"]: Destruction complete after 1s
libvirt_domain.domain-ubuntu["k8scpnode"]: Destruction complete after 1s
libvirt_domain.domain-ubuntu["k8wrknode2"]: Destruction complete after 1s
libvirt_cloudinit_disk.cloud-init["k8wrknode1"]: Destroying... [id=/var/lib/libvirt/images/Jpw2Sg_cloud-init.iso;b8ddfa73-a770-46de-ad16-b0a5a08c8550]
libvirt_cloudinit_disk.cloud-init["k8wrknode2"]: Destroying... [id=/var/lib/libvirt/images/VdUklQ_cloud-init.iso;5511ed7f-a864-4d3f-985a-c4ac07eac233]
libvirt_volume.ubuntu-base["k8scpnode"]: Destroying... [id=/var/lib/libvirt/images/l5Rr1w_ubuntu-base]
libvirt_volume.ubuntu-base["k8wrknode2"]: Destroying... [id=/var/lib/libvirt/images/VdUklQ_ubuntu-base]
libvirt_cloudinit_disk.cloud-init["k8scpnode"]: Destroying... [id=/var/lib/libvirt/images/l5Rr1w_cloud-init.iso;11ef6bb7-a688-4c15-ae33-10690500705f]
libvirt_volume.ubuntu-base["k8wrknode1"]: Destroying... [id=/var/lib/libvirt/images/Jpw2Sg_ubuntu-base]
libvirt_cloudinit_disk.cloud-init["k8wrknode1"]: Destruction complete after 1s
libvirt_volume.ubuntu-base["k8wrknode2"]: Destruction complete after 1s
libvirt_cloudinit_disk.cloud-init["k8scpnode"]: Destruction complete after 1s
libvirt_cloudinit_disk.cloud-init["k8wrknode2"]: Destruction complete after 1s
libvirt_volume.ubuntu-base["k8wrknode1"]: Destruction complete after 1s
libvirt_volume.ubuntu-base["k8scpnode"]: Destruction complete after 2s
libvirt_volume.ubuntu-vol["k8wrknode1"]: Destroying... [id=/var/lib/libvirt/images/Jpw2Sg_ubuntu-vol]
libvirt_volume.ubuntu-vol["k8scpnode"]: Destroying... [id=/var/lib/libvirt/images/l5Rr1w_ubuntu-vol]
libvirt_volume.ubuntu-vol["k8wrknode2"]: Destroying... [id=/var/lib/libvirt/images/VdUklQ_ubuntu-vol]
libvirt_volume.ubuntu-vol["k8scpnode"]: Destruction complete after 0s
libvirt_volume.ubuntu-vol["k8wrknode2"]: Destruction complete after 0s
libvirt_volume.ubuntu-vol["k8wrknode1"]: Destruction complete after 0s
random_id.id["k8scpnode"]: Destroying... [id=l5Rr1w]
random_id.id["k8wrknode2"]: Destroying... [id=VdUklQ]
random_id.id["k8wrknode1"]: Destroying... [id=Jpw2Sg]
random_id.id["k8wrknode2"]: Destruction complete after 0s
random_id.id["k8scpnode"]: Destruction complete after 0s
random_id.id["k8wrknode1"]: Destruction complete after 0s
Destroy complete! Resources: 16 destroyed.
In this blog post, I’ll try to share my personal notes on how to setup a kubernetes cluster with kubeadm on ubuntu 22.04 LTS Virtual Machines.
I am going to use three (3) Virtual Machines in my local lab. My home lab is based on libvirt Qemu/KVM (Kernel-based Virtual Machine) and I run Terraform as the infrastructure provision tool.
There is a copy of this blog post to github.
https://github.com/ebal/k8s_cluster
If you notice something wrong you can either contact me via the contact page, or open a PR in the github project.
you can also follow me at twitter: https://twitter.com/ebalaskas
Kubernetes, also known as K8s, is an open-source system for automating deployment, scaling, and management of containerized applications.
- Prerequisites
- Git Terraform Code for the kubernetes cluster
- Control-Plane Node
- Ports on the control-plane node
- Firewall on the control-plane node
- Hosts file in the control-plane node
- No Swap on the control-plane node
- Kernel modules on the control-plane node
- NeedRestart on the control-plane node
- Installing a Container Runtime on the control-plane node
- Installing kubeadm, kubelet and kubectl on the control-plane node
- Initializing the control-plane node
- Create user access config to the k8s control-plane node
- Verify the control-plane node
- Install an overlay network provider on the control-plane node
- Verify CoreDNS is running on the control-plane node
- Worker Nodes
- Ports on the worker nodes
- Firewall on the worker nodes
- Hosts file in the worker node
- No Swap on the worker node
- Kernel modules on the worker node
- NeedRestart on the worker node
- Installing a Container Runtime on the worker node
- Installing kubeadm, kubelet and kubectl on the worker node
- Get Token from the control-plane node
- Get Certificate Hash from the control-plane node
- Join Workers to the kubernetes cluster
- Is the kubernetes cluster running ?
- Kubernetes Dashboard
- Install kubernetes dashboard
- Add a Node Port to kubernetes dashboard
- Patch kubernetes-dashboard
- Edit kubernetes-dashboard Service
- Accessing Kubernetes Dashboard
- Create An Authentication Token (RBAC)
- Creating a Service Account
- Creating a ClusterRoleBinding
- Getting a Bearer Token
- Browsing Kubernetes Dashboard
- Nginx App
- That’s it !
Prerequisites
- at least 3 Virtual Machines of Ubuntu 22.04 (one for control-plane, two for worker nodes)
- 2GB (or more) of RAM on each Virtual Machine
- 2 CPUs (or more) on each Virtual Machine
- 20Gb of hard disk on each Virtual Machine
- No SWAP partition/image/file on each Virtual Machine
Git Terraform Code for the kubernetes cluster
I prefer to have a reproducible infrastructure, so I can very fast create and destroy my test lab. My preferable way of doing things is testing on each step, so I pretty much destroy everything, coping and pasting commands and keep on. I use terraform for the create the infrastructure. You can find the code for the entire kubernetes cluster here: k8s cluster - Terraform code.
If you do not use terraform, skip this step!
You can git clone the repo to review and edit it according to your needs.
git clone https://github.com/ebal/k8s_cluster.git
cd tf_libvirt
You will need to make appropriate changes. Open Variables.tf for that. The most important option to change, is the User option. Change it to your github username and it will download and setup the VMs with your public key, instead of mine!
But pretty much, everything else should work out of the box. Change the vmem and vcpu settings to your needs.
Init terraform before running the below shell script.
terraform init
and then run
./start.sh
output should be something like:
...
Apply complete! Resources: 16 added, 0 changed, 0 destroyed.

Outputs:

VMs = [
  "192.168.122.169  k8scpnode",
  "192.168.122.40   k8wrknode1",
  "192.168.122.8    k8wrknode2",
]
Verify that you have ssh access to the VMs
eg.
ssh -l ubuntu 192.168.122.169
replace the IP with what the output gave you.
Ubuntu 22.04 Image
If you noticed in the terraform code, I have the below declaration as the cloud image:
../jammy-server-cloudimg-amd64.img
that means, I’ve already downloaded it, in the upper directory to speed things up!
cd ../
curl -sLO https://cloud-images.ubuntu.com/jammy/current/focal-server-cloudimg-amd64.img
cd -
Control-Plane Node
Let’s us now start the configure of the k8s control-plane node.
Ports on the control-plane node
Kubernetes runs a few services that needs to be accessable from the worker nodes.
| Protocol | Direction | Port Range | Purpose | Used By |
|---|---|---|---|---|
| TCP | Inbound | 6443 | Kubernetes API server | All |
| TCP | Inbound | 2379-2380 | etcd server client API | kube-apiserver, etcd |
| TCP | Inbound | 10250 | Kubelet API | Self, Control plane |
| TCP | Inbound | 10259 | kube-scheduler | Self |
| TCP | Inbound | 10257 | kube-controller-manager | Self |
Although etcd ports are included in control plane section, you can also host your
own etcd cluster externally or on custom ports.
Firewall on the control-plane node
We need to open the necessary ports on the CP’s (control-plane node) firewall.
sudo ufw allow 6443/tcp
sudo ufw allow 2379:2380/tcp
sudo ufw allow 10250/tcp
sudo ufw allow 10259/tcp
sudo ufw allow 10257/tcp

#sudo ufw disable
sudo ufw status
the output should be
To                         Action      From
--                         ------      ----
22/tcp                     ALLOW       Anywhere
6443/tcp                   ALLOW       Anywhere
2379:2380/tcp              ALLOW       Anywhere
10250/tcp                  ALLOW       Anywhere
10259/tcp                  ALLOW       Anywhere
10257/tcp                  ALLOW       Anywhere
22/tcp (v6)                ALLOW       Anywhere (v6)
6443/tcp (v6)              ALLOW       Anywhere (v6)
2379:2380/tcp (v6)         ALLOW       Anywhere (v6)
10250/tcp (v6)             ALLOW       Anywhere (v6)
10259/tcp (v6)             ALLOW       Anywhere (v6)
10257/tcp (v6)             ALLOW       Anywhere (v6)
Hosts file in the control-plane node
We need to update the /etc/hosts with the internal IP and hostname.
This will help when it is time to join the worker nodes.
echo $(hostname -I) $(hostname) | sudo tee -a /etc/hosts
Just a reminder: we need to update the hosts file to all the VMs.
To include all the VMs’ IPs and hostnames.
If you already know them, then your /etc/hosts file should look like this:
192.168.122.169  k8scpnode
192.168.122.40   k8wrknode1
192.168.122.8    k8wrknode2
replace the IPs to yours.
No Swap on the control-plane node
Be sure that SWAP is disabled in all virtual machines!
sudo swapoff -a
and the fstab file should not have any swap entry.
The below command should return nothing.
sudo grep -i swap /etc/fstab
If not, edit the /etc/fstab and remove the swap entry.
If you follow my terraform k8s code example from the above github repo,
you will notice that there isn’t any swap entry in the cloud init (user-data) file.
Nevertheless it is always a good thing to douple check.
Kernel modules on the control-plane node
We need to load the below kernel modules on all k8s nodes, so k8s can create some network magic!
- overlay
- br_netfilter
Run the below bash snippet that will do that, and also will enable the forwarding features of the network.
sudo tee /etc/modules-load.d/kubernetes.conf <<EOF
overlay
br_netfilter
EOF

sudo modprobe overlay
sudo modprobe br_netfilter

sudo lsmod | grep netfilter

sudo tee /etc/sysctl.d/kubernetes.conf <<EOF
net.bridge.bridge-nf-call-ip6tables = 1
net.bridge.bridge-nf-call-iptables = 1
net.ipv4.ip_forward = 1
EOF

sudo sysctl --system
NeedRestart on the control-plane node
Before installing any software, we need to make a tiny change to needrestart program. This will help with the automation of installing packages and will stop asking -via dialog- if we would like to restart the services!
echo "\$nrconf{restart} = 'a';" | sudo tee -a /etc/needrestart/needrestart.conf
Installing a Container Runtime on the control-plane node
It is time to choose which container runtime we are going to use on our k8s cluster. There are a few container runtimes for k8s and in the past docker were used to. Nowadays the most common runtime is the containerd that can also uses the cgroup v2 kernel features. There is also a docker-engine runtime via CRI. Read here for more details on the subject.
curl -sL https://download.docker.com/linux/ubuntu/gpg | sudo gpg --dearmor -o /etc/apt/trusted.gpg.d/docker-keyring.gpg

sudo apt-add-repository -y "deb https://download.docker.com/linux/ubuntu jammy stable"

sleep 5

sudo apt -y install containerd.io

containerd config default                              \
 | sed 's/SystemdCgroup = false/SystemdCgroup = true/' \
 | sudo tee /etc/containerd/config.toml

sudo systemctl restart containerd.service
We have also enabled the
systemd cgroup driverso the control-plane node can use the cgroup v2 features.
Installing kubeadm, kubelet and kubectl on the control-plane node
Install the kubernetes packages (kubedam, kubelet and kubectl) by first adding the k8s repository on our virtual machine. To speed up the next step, we will also download the configuration container images.
sudo curl -sLo /etc/apt/trusted.gpg.d/kubernetes-keyring.gpg https://packages.cloud.google.com/apt/doc/apt-key.gpg

sudo apt-add-repository -y "deb http://apt.kubernetes.io/ kubernetes-xenial main"

sleep 5

sudo apt install -y kubelet kubeadm kubectl

sudo kubeadm config images pull
Initializing the control-plane node
We can now initialize our control-plane node for our kubernetes cluster.
There are a few things we need to be careful about:
- We can specify the control-plane-endpoint if we are planning to have a high available k8s cluster. (we will skip this for now),
- Choose a Pod network add-on (next section) but be aware that CoreDNS (DNS and Service Discovery) will not run till then (later),
- define where is our container runtime socket (we will skip it)
- advertise the API server (we will skip it)
But we will define our Pod Network CIDR to the default value of the Pod network add-on so everything will go smoothly later on.
sudo kubeadm init --pod-network-cidr=10.244.0.0/16
Keep the output in a notepad.
Create user access config to the k8s control-plane node
Our k8s control-plane node is running, so we need to have credentials to access it.
The kubectl reads a configuration file (that has the token), so we copying this from k8s admin.
rm -rf $HOME/.kube

mkdir -p $HOME/.kube

sudo cp -i /etc/kubernetes/admin.conf $HOME/.kube/config

sudo chown $(id -u):$(id -g) $HOME/.kube/config

ls -la $HOME/.kube/config

alias k="kubectl"
Verify the control-plane node
Verify that the kubernets is running.
That means we have a k8s cluster - but only the control-plane node is running.
kubectl cluster-info
#kubectl cluster-info dump

k get nodes -o wide; k get pods  -A -o wide
Install an overlay network provider on the control-plane node
As I mentioned above, in order to use the DNS and Service Discovery services in the kubernetes (CoreDNS) we need to install a Container Network Interface (CNI) based Pod network add-on so that your Pods can communicate with each other.
We will use flannel as the simplest of them.
k apply -f https://raw.githubusercontent.com/coreos/flannel/master/Documentation/kube-flannel.yml
Verify CoreDNS is running on the control-plane node
Verify that the control-plane node is Up & Running and the control-plane pods (as coredns pods) are also running
$ k get nodes -o wide

NAME        STATUS   ROLES           AGE   VERSION   INTERNAL-IP       EXTERNAL-IP   OS-IMAGE             KERNEL-VERSION      CONTAINER-RUNTIME
k8scpnode   Ready    control-plane   54s   v1.25.0   192.168.122.169   <none>        Ubuntu 22.04.1 LTS   5.15.0-46-generic   containerd://1.6.8
$ k get pods -A -o wide

NAMESPACE    NAME                              READY STATUS  RESTARTS AGE IP              NODE      NOMINATED NODE READINESS GATES
kube-flannel kube-flannel-ds-zqv2b             1/1   Running 0        36s 192.168.122.169 k8scpnode <none>         <none>
kube-system  coredns-565d847f94-lg54q          1/1   Running 0        38s 10.244.0.2      k8scpnode <none>         <none>
kube-system  coredns-565d847f94-ms8zk          1/1   Running 0        38s 10.244.0.3      k8scpnode <none>         <none>
kube-system  etcd-k8scpnode                    1/1   Running 0        50s 192.168.122.169 k8scpnode <none>         <none>
kube-system  kube-apiserver-k8scpnode          1/1   Running 0        50s 192.168.122.169 k8scpnode <none>         <none>
kube-system  kube-controller-manager-k8scpnode 1/1   Running 0        50s 192.168.122.169 k8scpnode <none>         <none>
kube-system  kube-proxy-pv7tj                  1/1   Running 0        39s 192.168.122.169 k8scpnode <none>         <none>
kube-system  kube-scheduler-k8scpnode          1/1   Running 0        50s 192.168.122.169 k8scpnode <none>         <none>
That’s it with the control-plane node !
Worker Nodes
The below instructions works pretty much the same on both worker nodes.
I will document the steps for the worker1 node but do the same for the worker2 node.
Ports on the worker nodes
As we learned above on the control-plane section, kubernetes runs a few services
| Protocol | Direction | Port Range | Purpose | Used By |
|---|---|---|---|---|
| TCP | Inbound | 10250 | Kubelet API | Self, Control plane |
| TCP | Inbound | 30000-32767 | NodePort Services | All |
Firewall on the worker nodes
so we need to open the necessary ports on the worker nodes too.
sudo ufw allow 10250/tcp
sudo ufw allow 30000:32767/tcp

sudo ufw status
output should look like
To                         Action      From
--                         ------      ----
22/tcp                     ALLOW       Anywhere
10250/tcp                  ALLOW       Anywhere
30000:32767/tcp            ALLOW       Anywhere
22/tcp (v6)                ALLOW       Anywhere (v6)
10250/tcp (v6)             ALLOW       Anywhere (v6)
30000:32767/tcp (v6)       ALLOW       Anywhere (v6)
The next few steps are pretty much exactly the same as in the control-plane node.
In order to keep this documentation short, I’ll just copy/paste the commands.
Hosts file in the worker node
Update the /etc/hosts file to include the IPs and hostname of all VMs.
192.168.122.169  k8scpnode
192.168.122.40   k8wrknode1
192.168.122.8    k8wrknode2
No Swap on the worker node
sudo swapoff -a
Kernel modules on the worker node
sudo tee /etc/modules-load.d/kubernetes.conf <<EOF
overlay
br_netfilter
EOF

sudo modprobe overlay
sudo modprobe br_netfilter

sudo lsmod | grep netfilter

sudo tee /etc/sysctl.d/kubernetes.conf <<EOF
net.bridge.bridge-nf-call-ip6tables = 1
net.bridge.bridge-nf-call-iptables = 1
net.ipv4.ip_forward = 1
EOF

sudo sysctl --system
NeedRestart on the worker node
echo "\$nrconf{restart} = 'a';" | sudo tee -a /etc/needrestart/needrestart.conf
Installing a Container Runtime on the worker node
curl -sL https://download.docker.com/linux/ubuntu/gpg | sudo gpg --dearmor -o /etc/apt/trusted.gpg.d/docker-keyring.gpg

sudo apt-add-repository -y "deb https://download.docker.com/linux/ubuntu jammy stable"

sleep 5

sudo apt -y install containerd.io

containerd config default                              \
 | sed 's/SystemdCgroup = false/SystemdCgroup = true/' \
 | sudo tee /etc/containerd/config.toml

sudo systemctl restart containerd.service
Installing kubeadm, kubelet and kubectl on the worker node
sudo curl -sLo /etc/apt/trusted.gpg.d/kubernetes-keyring.gpg https://packages.cloud.google.com/apt/doc/apt-key.gpg

sudo apt-add-repository -y "deb http://apt.kubernetes.io/ kubernetes-xenial main"

sleep 5

sudo apt install -y kubelet kubeadm kubectl

sudo kubeadm config images pull
Get Token from the control-plane node
To join nodes to the kubernetes cluster, we need to have a couple of things.
- a token from control-plane node
- the CA certificate hash from the contol-plane node.
If you didnt keep the output the initialization of the control-plane node, that’s okay.
Run the below command in the control-plane node.
sudo kubeadm token list
and we will get the initial token that expires after 24hours.
TOKEN                     TTL         EXPIRES                USAGES                   DESCRIPTION                                                EXTRA GROUPS
zt36bp.uht4cziweef1jo1h   23h         2022-08-31T18:38:16Z   authentication,signing   The default bootstrap token generated by 'kubeadm init'.   system:bootstrappers:kubeadm:default-node-token
In this case is the
zt36bp.uht4cziweef1jo1hGet Certificate Hash from the control-plane node
To get the CA certificate hash from the control-plane-node, we need to run a complicated command:
openssl x509 -pubkey -in /etc/kubernetes/pki/ca.crt | openssl rsa -pubin -outform der 2>/dev/null | openssl dgst -sha256 -hex | sed 's/^.* //'
and in my k8s cluster is:
a4833f8c82953370610efaa5ed93b791337232c3a948b710b2435d747889c085Join Workers to the kubernetes cluster
So now, we can Join our worker nodes to the kubernetes cluster.
Run the below command on both worker nodes:
sudo kubeadm join 192.168.122.169:6443 \
       --token zt36bp.uht4cziweef1jo1h \
       --discovery-token-ca-cert-hash sha256:a4833f8c82953370610efaa5ed93b791337232c3a948b710b2435d747889c085
we get this message
Run ‘kubectl get nodes’ on the control-plane to see this node join the cluster.
Is the kubernetes cluster running ?
We can verify that
kubectl get nodes   -o wide
kubectl get pods -A -o wide
NAME         STATUS   ROLES           AGE     VERSION   INTERNAL-IP       EXTERNAL-IP   OS-IMAGE             KERNEL-VERSION      CONTAINER-RUNTIME
k8scpnode    Ready    control-plane   64m     v1.25.0   192.168.122.169   <none>        Ubuntu 22.04.1 LTS   5.15.0-46-generic   containerd://1.6.8
k8wrknode1   Ready    <none>          2m32s   v1.25.0   192.168.122.40    <none>        Ubuntu 22.04.1 LTS   5.15.0-46-generic   containerd://1.6.8
k8wrknode2   Ready    <none>          2m28s   v1.25.0   192.168.122.8     <none>        Ubuntu 22.04.1 LTS   5.15.0-46-generic   containerd://1.6.8
NAMESPACE NAME READY STATUS RESTARTS AGE IP NODE NOMINATED NODE READINESS GATES
kube-flannel kube-flannel-ds-52g92 1/1 Running 0 2m32s 192.168.122.40 k8wrknode1 <none> <none>
kube-flannel kube-flannel-ds-7qlm7 1/1 Running 0 2m28s 192.168.122.8 k8wrknode2 <none> <none>
kube-flannel kube-flannel-ds-zqv2b 1/1 Running 0 64m 192.168.122.169 k8scpnode <none> <none>
kube-system coredns-565d847f94-lg54q 1/1 Running 0 64m 10.244.0.2 k8scpnode <none> <none>
kube-system coredns-565d847f94-ms8zk 1/1 Running 0 64m 10.244.0.3 k8scpnode <none> <none>
kube-system etcd-k8scpnode 1/1 Running 0 64m 192.168.122.169 k8scpnode <none> <none>
kube-system kube-apiserver-k8scpnode 1/1 Running 0 64m 192.168.122.169 k8scpnode <none> <none>
kube-system kube-controller-manager-k8scpnode 1/1 Running 1 (12m ago) 64m 192.168.122.169 k8scpnode <none> <none>
kube-system kube-proxy-4khw6 1/1 Running 0 2m32s 192.168.122.40 k8wrknode1 <none> <none>
kube-system kube-proxy-gm27l 1/1 Running 0 2m28s 192.168.122.8 k8wrknode2 <none> <none>
kube-system kube-proxy-pv7tj 1/1 Running 0 64m 192.168.122.169 k8scpnode <none> <none>
kube-system kube-scheduler-k8scpnode 1/1 Running 1 (12m ago) 64m 192.168.122.169 k8scpnode <none> <none>
That’s it !
Our k8s cluster is running.
Kubernetes Dashboard
is a general purpose, web-based UI for Kubernetes clusters. It allows users to manage applications running in the cluster and troubleshoot them, as well as manage the cluster itself.
We can proceed by installing a k8s dashboard to our k8s cluster.
Install kubernetes dashboard
One simple way to install the kubernetes-dashboard, is by applying the latest (as of this writing) yaml configuration file.
kubectl apply -f https://raw.githubusercontent.com/kubernetes/dashboard/v2.6.1/aio/deploy/recommended.yaml
the output of the above command should be something like
namespace/kubernetes-dashboard created
serviceaccount/kubernetes-dashboard created
service/kubernetes-dashboard created
secret/kubernetes-dashboard-certs created
secret/kubernetes-dashboard-csrf created
secret/kubernetes-dashboard-key-holder created
configmap/kubernetes-dashboard-settings created
role.rbac.authorization.k8s.io/kubernetes-dashboard created
clusterrole.rbac.authorization.k8s.io/kubernetes-dashboard created
rolebinding.rbac.authorization.k8s.io/kubernetes-dashboard created
clusterrolebinding.rbac.authorization.k8s.io/kubernetes-dashboard created
deployment.apps/kubernetes-dashboard created
service/dashboard-metrics-scraper created
deployment.apps/dashboard-metrics-scraper created
Verify the installation
kubectl get all -n kubernetes-dashboard
NAME                                             READY   STATUS    RESTARTS   AGE
pod/dashboard-metrics-scraper-64bcc67c9c-kvll7   1/1     Running   0          2m16s
pod/kubernetes-dashboard-66c887f759-rr4gn        1/1     Running   0          2m16s

NAME                                TYPE        CLUSTER-IP      EXTERNAL-IP   PORT(S)    AGE
service/dashboard-metrics-scraper   ClusterIP   10.110.25.61    <none>        8000/TCP   2m16s
service/kubernetes-dashboard        ClusterIP   10.100.65.122   <none>        443/TCP    2m16s

NAME                                        READY   UP-TO-DATE   AVAILABLE   AGE
deployment.apps/dashboard-metrics-scraper   1/1     1            1           2m16s
deployment.apps/kubernetes-dashboard        1/1     1            1           2m16s

NAME                                                   DESIRED   CURRENT   READY   AGE
replicaset.apps/dashboard-metrics-scraper-64bcc67c9c   1         1         1       2m16s
replicaset.apps/kubernetes-dashboard-66c887f759        1         1         1       2m16s
Add a Node Port to kubernetes dashboard
Kubernetes Dashboard by default runs on a internal 10.x.x.x IP.
To access the dashboard we need to have a NodePort in the kubernetes-dashboard service.
We can either Patch the service or edit the yaml file.
Patch kubernetes-dashboard
kubectl --namespace kubernetes-dashboard patch svc kubernetes-dashboard -p '{"spec": {"type": "NodePort"}}'
output
service/kubernetes-dashboard patched
verify the service
kubectl get svc -n kubernetes-dashboard
NAME                        TYPE        CLUSTER-IP      EXTERNAL-IP   PORT(S)         AGE
dashboard-metrics-scraper   ClusterIP   10.110.25.61    <none>        8000/TCP        11m
kubernetes-dashboard        NodePort    10.100.65.122   <none>        443:32709/TCP   11m
we can see the 30480 in the kubernetes-dashboard.
Edit kubernetes-dashboard Service
kubectl edit svc -n kubernetes-dashboard kubernetes-dashboard
and chaning the service type from
type: ClusterIPto
type: NodePortAccessing Kubernetes Dashboard
The kubernetes-dashboard has two (2) pods, one (1) for metrics, one (2) for the dashboard.
To access the dashboard, first we need to identify in which Node is running.
kubectl get pods -n kubernetes-dashboard -o wide
NAME                                         READY   STATUS    RESTARTS   AGE     IP           NODE         NOMINATED NODE   READINESS GATES
dashboard-metrics-scraper-64bcc67c9c-fs7pt   1/1     Running   0          2m43s   10.244.1.9   k8wrknode1   <none>           <none>
kubernetes-dashboard-66c887f759-pzt4z        1/1     Running   0          2m44s   10.244.2.9   k8wrknode2   <none>           <none>
In my setup the dashboard pod is running on the worker node 2 and from the /etc/hosts is on the 192.168.122.8 IP.
The NodePort is 32709
k get svc -n kubernetes-dashboard -o wide
So, we can open a new tab on our browser and type:
https://192.168.122.8:32709
and accept the self-signed certificate!
Create An Authentication Token (RBAC)
Last step for the kubernetes-dashboard is to create an authentication token.
Creating a Service Account
Create a new yaml file, with kind: ServiceAccount that has access to kubernetes-dashboard namespace and has name: admin-user.
cat > kubernetes-dashboard.ServiceAccount.yaml <<EOF
apiVersion: v1
kind: ServiceAccount
metadata:
  name: admin-user
  namespace: kubernetes-dashboard

EOF
add this service account to the k8s cluster
kubectl apply -f kubernetes-dashboard.ServiceAccount.yaml
output
serviceaccount/admin-user createdCreating a ClusterRoleBinding
We need to bind the Service Account with the kubernetes-dashboard via Role-based access control.
cat > kubernetes-dashboard.ClusterRoleBinding.yaml <<EOF
apiVersion: rbac.authorization.k8s.io/v1
kind: ClusterRoleBinding
metadata:
  name: admin-user
roleRef:
  apiGroup: rbac.authorization.k8s.io
  kind: ClusterRole
  name: cluster-admin
subjects:
- kind: ServiceAccount
  name: admin-user
  namespace: kubernetes-dashboard

EOF
apply this yaml file
kubectl apply -f kubernetes-dashboard.ClusterRoleBinding.yaml
clusterrolebinding.rbac.authorization.k8s.io/admin-user created
That means, our Service Account User has all the necessary roles to access the kubernetes-dashboard.
Getting a Bearer Token
Final step is to create/get a token for our user.
kubectl -n kubernetes-dashboard create token admin-user
eyJhbGciOiJSUzI1NiIsImtpZCI6Im04M2JOY2k1Yk1hbFBhLVN2cjA4X1pkdktXNldqWkR4bjB6MGpTdFgtVHcifQ.eyJhdWQiOlsiaHR0cHM6Ly9rdWJlcm5ldGVzLmRlZmF1bHQuc3ZjLmNsdXN0ZXIubG9jYWwiXSwiZXhwIjoxNjYxOTU2NDQ1LCJpYXQiOjE2NjE5NTI4NDUsImlzcyI6Imh0dHBzOi8va3ViZXJuZXRlcy5kZWZhdWx0LnN2Yy5jbHVzdGVyLmxvY2FsIiwia3ViZXJuZXRlcy5pbyI6eyJuYW1lc3BhY2UiOiJrdWJlcm5ldGVzLWRhc2hib2FyZCIsInNlcnZpY2VhY2NvdW50Ijp7Im5hbWUiOiJhZG1pbi11c2VyIiwidWlkIjoiN2M4OWIyZDktMGIwYS00ZDg4LTk2Y2EtZDU3NjhjOWU2ZGYxIn19LCJuYmYiOjE2NjE5NTI4NDUsInN1YiI6InN5c3RlbTpzZXJ2aWNlYWNjb3VudDprdWJlcm5ldGVzLWRhc2hib2FyZDphZG1pbi11c2VyIn0.RMRQkZZhcoC5vCvck6hKfqXJ4dfN4JoQyAaClHZvOMI6JgQZEfB2-_Qsh5MfFApJUEit-0TX9r3CzW3JqvB7dmpTPxUQvHK68r82WGveBVp1wF37UyXu_IzxiCQzpCWYr3GcVGAGZVBbhhqNYm765FV02ZA_khHrW3WpB80ikhm_TNLkOS6Llq2UiLFZyHHmjl5pwvGzT7YXZe8s-llZSgc0UenEwPG-82eE279oOy6r4_NltoV1HB3uu0YjUJPlkqAPnHuSfAA7-8A3XAAVHhRQvFPea1qZLc4-oD24AcU0FjWqDMILEyE8zaD2ci8zEQBMoxcf2qmj0wn9cfbZwQ
Add this token to the previous login page
Browsing Kubernetes Dashboard
eg. Cluster –> Nodes
Nginx App
Before finishing this blog post, I would also like to share how to install a simple nginx-app as it is customary to do such thing in every new k8s cluster.
But plz excuse me, I will not get into much details.
You should be able to understand the below k8s commands.
Install nginx-app
kubectl create deployment nginx-app --image=nginx --replicas=2
deployment.apps/nginx-app createdGet Deployment
kubectl get deployment nginx-app -o wideNAME READY UP-TO-DATE AVAILABLE AGE CONTAINERS IMAGES SELECTOR
nginx-app 2/2 2 2 64s nginx nginx app=nginx-appExpose Nginx-App
kubectl expose deployment nginx-app --type=NodePort --port=80
service/nginx-app exposedVerify Service nginx-app
kubectl get svc nginx-app -o wide
NAME        TYPE       CLUSTER-IP      EXTERNAL-IP   PORT(S)        AGE   SELECTOR
nginx-app   NodePort   10.98.170.185   <none>        80:31761/TCP   27s   app=nginx-app
Describe Service nginx-app
kubectl describe svc nginx-app
Name:                     nginx-app
Namespace:                default
Labels:                   app=nginx-app
Annotations:              <none>
Selector:                 app=nginx-app
Type:                     NodePort
IP Family Policy:         SingleStack
IP Families:              IPv4
IP:                       10.98.170.185
IPs:                      10.98.170.185
Port:                     <unset>  80/TCP
TargetPort:               80/TCP
NodePort:                 <unset>  31761/TCP
Endpoints:                10.244.1.10:80,10.244.2.10:80
Session Affinity:         None
External Traffic Policy:  Cluster
Events:                   <none>
Curl Nginx-App
curl http://192.168.122.8:31761
<!DOCTYPE html>
<html>
<head>
<title>Welcome to nginx!</title>
<style>
html { color-scheme: light dark; }
body { width: 35em; margin: 0 auto;
font-family: Tahoma, Verdana, Arial, sans-serif; }
</style>
</head>
<body>
<h1>Welcome to nginx!</h1>
<p>If you see this page, the nginx web server is successfully installed and
working. Further configuration is required.</p>

<p>For online documentation and support please refer to
<a href="http://nginx.org/">nginx.org</a>.<br/>
Commercial support is available at
<a href="http://nginx.com/">nginx.com</a>.</p>

<p><em>Thank you for using nginx.</em></p>
</body>
</html>
Nginx-App from Browser
That’s it !
I hope you enjoyed this blog post.
-ebal
./destroy.sh...
libvirt_domain.domain-ubuntu["k8wrknode1"]: Destroying... [id=446cae2a-ce14-488f-b8e9-f44839091bce]
libvirt_domain.domain-ubuntu["k8scpnode"]: Destroying... [id=51e12abb-b14b-4ab8-b098-c1ce0b4073e3]
time_sleep.wait_for_cloud_init: Destroying... [id=2022-08-30T18:02:06Z]
libvirt_domain.domain-ubuntu["k8wrknode2"]: Destroying... [id=0767fb62-4600-4bc8-a94a-8e10c222b92e]
time_sleep.wait_for_cloud_init: Destruction complete after 0s
libvirt_domain.domain-ubuntu["k8wrknode1"]: Destruction complete after 1s
libvirt_domain.domain-ubuntu["k8scpnode"]: Destruction complete after 1s
libvirt_domain.domain-ubuntu["k8wrknode2"]: Destruction complete after 1s
libvirt_cloudinit_disk.cloud-init["k8wrknode1"]: Destroying... [id=/var/lib/libvirt/images/Jpw2Sg_cloud-init.iso;b8ddfa73-a770-46de-ad16-b0a5a08c8550]
libvirt_cloudinit_disk.cloud-init["k8wrknode2"]: Destroying... [id=/var/lib/libvirt/images/VdUklQ_cloud-init.iso;5511ed7f-a864-4d3f-985a-c4ac07eac233]
libvirt_volume.ubuntu-base["k8scpnode"]: Destroying... [id=/var/lib/libvirt/images/l5Rr1w_ubuntu-base]
libvirt_volume.ubuntu-base["k8wrknode2"]: Destroying... [id=/var/lib/libvirt/images/VdUklQ_ubuntu-base]
libvirt_cloudinit_disk.cloud-init["k8scpnode"]: Destroying... [id=/var/lib/libvirt/images/l5Rr1w_cloud-init.iso;11ef6bb7-a688-4c15-ae33-10690500705f]
libvirt_volume.ubuntu-base["k8wrknode1"]: Destroying... [id=/var/lib/libvirt/images/Jpw2Sg_ubuntu-base]
libvirt_cloudinit_disk.cloud-init["k8wrknode1"]: Destruction complete after 1s
libvirt_volume.ubuntu-base["k8wrknode2"]: Destruction complete after 1s
libvirt_cloudinit_disk.cloud-init["k8scpnode"]: Destruction complete after 1s
libvirt_cloudinit_disk.cloud-init["k8wrknode2"]: Destruction complete after 1s
libvirt_volume.ubuntu-base["k8wrknode1"]: Destruction complete after 1s
libvirt_volume.ubuntu-base["k8scpnode"]: Destruction complete after 2s
libvirt_volume.ubuntu-vol["k8wrknode1"]: Destroying... [id=/var/lib/libvirt/images/Jpw2Sg_ubuntu-vol]
libvirt_volume.ubuntu-vol["k8scpnode"]: Destroying... [id=/var/lib/libvirt/images/l5Rr1w_ubuntu-vol]
libvirt_volume.ubuntu-vol["k8wrknode2"]: Destroying... [id=/var/lib/libvirt/images/VdUklQ_ubuntu-vol]
libvirt_volume.ubuntu-vol["k8scpnode"]: Destruction complete after 0s
libvirt_volume.ubuntu-vol["k8wrknode2"]: Destruction complete after 0s
libvirt_volume.ubuntu-vol["k8wrknode1"]: Destruction complete after 0s
random_id.id["k8scpnode"]: Destroying... [id=l5Rr1w]
random_id.id["k8wrknode2"]: Destroying... [id=VdUklQ]
random_id.id["k8wrknode1"]: Destroying... [id=Jpw2Sg]
random_id.id["k8wrknode2"]: Destruction complete after 0s
random_id.id["k8scpnode"]: Destruction complete after 0s
random_id.id["k8wrknode1"]: Destruction complete after 0s
Destroy complete! Resources: 16 destroyed.
One of the most well-known k8s memes is the below image that represent the effort and complexity on building a kubernetes cluster just to run a simple blog. So In this article, I will take the opportunity to install a simple blog engine on kubernetes using k3s!
terraform - libvirt/qemu - ubuntu
For this demo, I will be workinig on my local test lab. A libvirt /qemu ubuntu 20.04 virtual machine via terraform. You can find my terraform notes on my github repo tf/0.15/libvirt/0.6.3/ubuntu/20.04.
k3s
k3s is a lightweight, fully compliant kubernetes distribution that can run on a virtual machine, single node.
login to your machine and became root
$ ssh 192.168.122.42 -l ubuntu
$ sudo -i
#
install k3s with one command
curl -sfL https://get.k3s.io | sh -
output should be something like this
[INFO]  Finding release for channel stable

[INFO]  Using v1.21.1+k3s1 as release
[INFO]  Downloading hash https://github.com/k3s-io/k3s/releases/download/v1.21.1+k3s1/sha256sum-amd64.txt
[INFO]  Downloading binary https://github.com/k3s-io/k3s/releases/download/v1.21.1+k3s1/k3s
[INFO]  Verifying binary download
[INFO]  Installing k3s to /usr/local/bin/k3s
[INFO]  Creating /usr/local/bin/kubectl symlink to k3s
[INFO]  Creating /usr/local/bin/crictl symlink to k3s
[INFO]  Creating /usr/local/bin/ctr symlink to k3s
[INFO]  Creating killall script /usr/local/bin/k3s-killall.sh
[INFO]  Creating uninstall script /usr/local/bin/k3s-uninstall.sh
[INFO]  env: Creating environment file /etc/systemd/system/k3s.service.env
[INFO]  systemd: Creating service file /etc/systemd/system/k3s.service
[INFO]  systemd: Enabling k3s unit
Created symlink /etc/systemd/system/multi-user.target.wants/k3s.service → /etc/systemd/system/k3s.service.
[INFO]  systemd: Starting k3s
Firewall Ports
I would propose to open the below network ports so k3s can run smoothly.
Inbound Rules for K3s Server Nodes
| PROTOCOL | PORT | SOURCE | DESCRIPTION |
|---|---|---|---|
| TCP | 6443 | K3s agent nodes | Kubernetes API Server |
| UDP | 8472 | K3s server and agent nodes | Required only for Flannel VXLAN |
| TCP | 10250 | K3s server and agent nodes | Kubelet metrics |
| TCP | 2379-2380 | K3s server nodes | Required only for HA with embedded etcd |
Typically all outbound traffic is allowed.
ufw allow
ufw allow 6443/tcp
ufw allow 8472/udp
ufw allow 10250/tcp
ufw allow 2379/tcp
ufw allow 2380/tcp
full output
# ufw allow 6443/tcp
Rule added
Rule added (v6)

# ufw allow 8472/udp
Rule added
Rule added (v6)

# ufw allow 10250/tcp
Rule added
Rule added (v6)

# ufw allow 2379/tcp
Rule added
Rule added (v6)

# ufw allow 2380/tcp
Rule added
Rule added (v6)
k3s Nodes / Pods / Deployments
verify nodes, roles, pods and deployments
# kubectl get nodes -A
NAME         STATUS   ROLES                  AGE   VERSION
ubuntu2004   Ready    control-plane,master   11m   v1.21.1+k3s1

# kubectl get pods -A
NAMESPACE     NAME                                      READY   STATUS      RESTARTS   AGE
kube-system   helm-install-traefik-crd-8rjcf            0/1     Completed   2          13m
kube-system   helm-install-traefik-lwgcj                0/1     Completed   3          13m
kube-system   svclb-traefik-xtrcw                       2/2     Running     0          5m13s
kube-system   coredns-7448499f4d-6vrb7                  1/1     Running     5          13m
kube-system   traefik-97b44b794-q294l                   1/1     Running     0          5m14s
kube-system   local-path-provisioner-5ff76fc89d-pq5wb   1/1     Running     6          13m
kube-system   metrics-server-86cbb8457f-n4gsf           1/1     Running     6          13m

# kubectl get deployments -A
NAMESPACE     NAME                     READY   UP-TO-DATE   AVAILABLE   AGE
kube-system   coredns                  1/1     1            1           17m
kube-system   traefik                  1/1     1            1           8m50s
kube-system   local-path-provisioner   1/1     1            1           17m
kube-system   metrics-server           1/1     1            1           17m
Helm
Next thing is to install helm. Helm is a package manager for kubernetes, it will make easy to install applications.
curl -sL https://raw.githubusercontent.com/helm/helm/master/scripts/get-helm-3 | bash
output
Downloading https://get.helm.sh/helm-v3.6.0-linux-amd64.tar.gz
Verifying checksum... Done.
Preparing to install helm into /usr/local/bin
helm installed into /usr/local/bin/helm
helm version

version.BuildInfo{Version:"v3.6.0", GitCommit:"7f2df6467771a75f5646b7f12afb408590ed1755", GitTreeState:"clean", GoVersion:"go1.16.3"}
repo added
As a package manager, you can install k8s packages, named charts and you can find a lot of helm charts here https://artifacthub.io/. You can also add/install a single repo, I will explain this later.
# helm repo add nicholaswilde https://nicholaswilde.github.io/helm-charts/

"nicholaswilde" has been added to your repositories

# helm repo update
Hang tight while we grab the latest from your chart repositories...

Successfully got an update from the "nicholaswilde" chart repository
Update Complete. ⎈Happy Helming!⎈
hub Vs repo
basic difference between hub and repo is that hub is the official artifacthub. You can search charts there
helm search hub blogURL CHART VERSION APP VERSION DESCRIPTION
https://artifacthub.io/packages/helm/nicholaswi... 0.1.2 v1.3 Lightweight self-hosted facebook-styled PHP blog.
https://artifacthub.io/packages/helm/nicholaswi... 0.1.2 v2021.02 An ultra-lightweight blogging engine, written i...
https://artifacthub.io/packages/helm/bitnami/dr... 10.2.23 9.1.10 One of the most versatile open source content m...
https://artifacthub.io/packages/helm/bitnami/ghost 13.0.13 4.6.4 A simple, powerful publishing platform that all...
https://artifacthub.io/packages/helm/bitnami/jo... 10.1.10 3.9.27 PHP content management system (CMS) for publish...
https://artifacthub.io/packages/helm/nicholaswi... 0.1.1 0.1.1 A Self-Hosted, Twitter™-like Decentralised micr...
https://artifacthub.io/packages/helm/nicholaswi... 0.1.1 900b76a A self-hosted well uh wiki engine or content ma...
https://artifacthub.io/packages/helm/bitnami/wo... 11.0.13 5.7.2 Web publishing platform for building blogs and ...using a repo, means that you specify charts sources from single (or multiple) repos, usally outside of hub.
helm search repo blogNAME CHART VERSION APP VERSION DESCRIPTION
nicholaswilde/blog 0.1.2 v1.3 Lightweight self-hosted facebook-styled PHP blog.
nicholaswilde/chyrp-lite 0.1.2 v2021.02 An ultra-lightweight blogging engine, written i...
nicholaswilde/twtxt 0.1.1 0.1.1 A Self-Hosted, Twitter™-like Decentralised micr...
nicholaswilde/wiki 0.1.1 900b76a A self-hosted well uh wiki engine or content ma...
Install a blog engine via helm
before we continue with the installation of our blog engine, we need to set the kube config via a shell variable
kube configuration yaml file
export KUBECONFIG=/etc/rancher/k3s/k3s.yaml
kubectl-k3s, already knows where to find this yaml configuration file. kubectl is a link to k3s in our setup
# whereis kubectl
kubectl: /usr/local/bin/kubectl

# ls -l /usr/local/bin/kubectl
lrwxrwxrwx 1 root root 3 Jun  4 23:20 /usr/local/bin/kubectl -> k3s
but not helm that we just installed.
After that we can install our blog engine.
helm install chyrp-lite              \
  --set env.TZ="Europe/Athens"  \
  nicholaswilde/chyrp-lite
output
NAME: chyrp-lite
LAST DEPLOYED: Fri Jun  4 23:46:04 2021
NAMESPACE: default
STATUS: deployed
REVISION: 1
TEST SUITE: None
NOTES:
Get the application URL by running these commands:
  http://chyrp-lite.192.168.1.203.nip.io/
for the time being, ignore nip.io and verify the deployment
# kubectl get deployments
NAME         READY   UP-TO-DATE   AVAILABLE   AGE
chyrp-lite   1/1     1            1           2m15s

# kubectl get pods
NAME                          READY   STATUS    RESTARTS   AGE
chyrp-lite-5c544b455f-d2pzm   1/1     Running   0          2m18s
Port Forwarding
as this is a pod running through k3s inside a virtual machine on our host operating system, in order to visit the blog and finish the installation we need to expose the port.
Let’s find out if there is a service running
kubectl get service chyrp-lite
output
NAME TYPE CLUSTER-IP EXTERNAL-IP PORT(S) AGE
chyrp-lite ClusterIP 10.43.143.250 <none> 80/TCP 11h
okay we have a cluster ip.
you can also verify that our blog engine is running
curl -s 10.43.143.250/install.php | head
<!DOCTYPE html>
<html>
<head>
<meta charset="UTF-8">
<title>Chyrp Lite Installer</title>
<meta name="viewport" content="width = 800">
<style type="text/css">
@font-face {
font-family: 'Open Sans webfont';
src: url('./fonts/OpenSans-Regular.woff') format('woff');
and then port forward the pod tcp port to our virtual machine
kubectl port-forward service/chyrp-lite 80
output
Forwarding from 127.0.0.1:80 -> 80
Forwarding from [::1]:80 -> 80
k3s issue with TCP Port 80
Port 80 used by build-in load balancer by default
That means service port 80 will become 10080 on the host, but 8080 will become 8080 without any offset.
So the above command will not work, it will give you an 404 error.
We can disable LoadBalancer (we do not need it for this demo) but it is easier to just forward the service port to 10080
kubectl port-forward service/chyrp-lite 10080:80Forwarding from 127.0.0.1:10080 -> 80
Forwarding from [::1]:10080 -> 80
Handling connection for 10080
Handling connection for 10080
from our virtual machine we can verify
curl -s http://127.0.0.1:10080/install.php | head
it will produce
<!DOCTYPE html>
<html>
<head>
<meta charset="UTF-8">
<title>Chyrp Lite Installer</title>
<meta name="viewport" content="width = 800">
<style type="text/css">
@font-face {
font-family: 'Open Sans webfont';
src: url('./fonts/OpenSans-Regular.woff') format('woff');
ssh port forward
So now, we need to forward this TCP port from the virtual machine to our local machine. Using ssh, you should be able to do it like this from another terminal
ssh 192.168.122.42 -l ubuntu -L8080:127.0.0.1:10080
verify it
$ sudo ss -n -t -a 'sport = :10080'
State Recv-Q Send-Q Local Address:Port Peer Address:Port Process
LISTEN 0 128 127.0.0.1:10080 0.0.0.0:*
LISTEN 0 128 [::1]:10080 [::]:*
$ curl -s http://localhost:10080/install.php | head
<!DOCTYPE html>
<html>
<head>
<meta charset="UTF-8">
<title>Chyrp Lite Installer</title>
<meta name="viewport" content="width = 800">
<style type="text/css">
@font-face {
font-family: 'Open Sans webfont';
src: url('./fonts/OpenSans-Regular.woff') format('woff');
I am forwarding to a high tcp port (> 1024) so my user can open a tcp port, eitherwise I need to be root.
finishing the installation
To finish the installation of our blog engine, we need to visit the below url from our browser
Database Setup
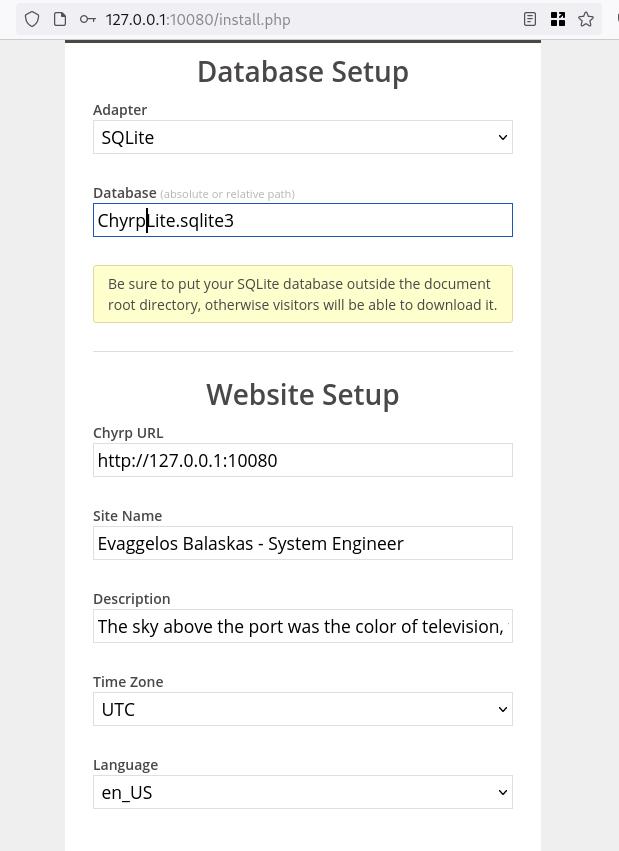
Admin Setup
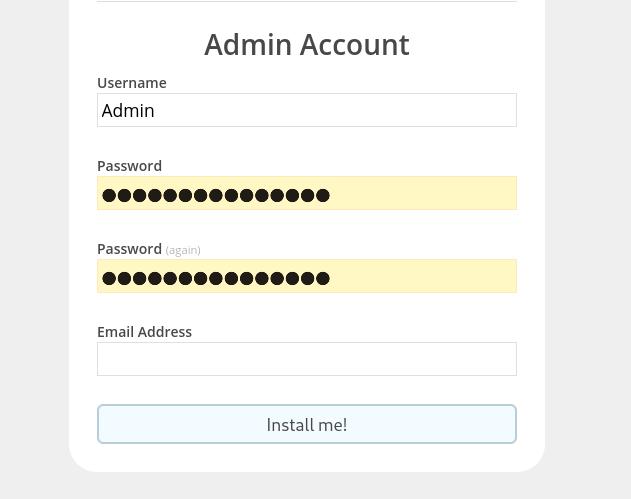
Installation Completed
First blog post
that’s it !
many thanks to erethon for his help & support on this article.
Working on your home lab, it is quiet often that you need to spawn containers or virtual machines to test or develop something. I was doing this kind of testing with public cloud providers with minimal VMs and for short time of periods to reduce any costs. In this article I will try to explain how to use libvirt -that means kvm- with terraform and provide a simple way to run this on your linux machine.
Be aware this will be a (long) technical article and some experience is needed with kvm/libvirt & terraform but I will try to keep it simple so you can follow the instructions.
Terraform
Install Terraform v0.13 either from your distro or directly from hashicopr’s site.
$ terraform version
Terraform v0.13.2
Libvirt
same thing for libvirt
$ libvirtd --version
libvirtd (libvirt) 6.5.0
$ sudo systemctl is-active libvirtd
active
verify that you have access to libvirt
$ virsh -c qemu:///system version
Compiled against library: libvirt 6.5.0
Using library: libvirt 6.5.0
Using API: QEMU 6.5.0
Running hypervisor: QEMU 5.1.0
Terraform Libvirt Provider
To access the libvirt daemon via terraform, we need the terraform-libvirt provider.
Terraform provider to provision infrastructure with Linux’s KVM using libvirt
The official repo is on GitHub - dmacvicar/terraform-provider-libvirt and you can download a precompiled version for your distro from the repo, or you can download a generic version from my gitlab repo
ebal / terraform-provider-libvirt · GitLab
These are my instructions
mkdir -pv ~/.local/share/terraform/plugins/registry.terraform.io/dmacvicar/libvirt/0.6.2/linux_amd64/
curl -sLo ~/.local/share/terraform/plugins/registry.terraform.io/dmacvicar/libvirt/0.6.2/linux_amd64/terraform-provider-libvirt https://gitlab.com/terraform-provider/terraform-provider-libvirt/-/jobs/artifacts/master/raw/terraform-provider-libvirt/terraform-provider-libvirt?job=run-build
chmod +x ~/.local/share/terraform/plugins/registry.terraform.io/dmacvicar/libvirt/0.6.2/linux_amd64/terraform-provider-libvirt
Terraform Init
Let’s create a new directory and test that everything is fine.
mkdir -pv tf_libvirt
cd !$
cat > Provider.tf <<EOF
terraform {
required_version = ">= 0.13"
required_providers {
libvirt = {
source = "dmacvicar/libvirt"
version = "0.6.2"
}
}
}
EOF
$ terraform init
Initializing the backend...
Initializing provider plugins...
- Finding dmacvicar/libvirt versions matching "0.6.2"...
- Installing dmacvicar/libvirt v0.6.2...
- Installed dmacvicar/libvirt v0.6.2 (unauthenticated)
Terraform has been successfully initialized!
You may now begin working with Terraform. Try running "terraform plan" to see
any changes that are required for your infrastructure. All Terraform commands
should now work.
If you ever set or change modules or backend configuration for Terraform,
rerun this command to reinitialize your working directory. If you forget, other
commands will detect it and remind you to do so if necessary.
everything seems okay!
We can verify with tree or find
$ tree -a
.
├── Provider.tf
└── .terraform
└── plugins
├── registry.terraform.io
│ └── dmacvicar
│ └── libvirt
│ └── 0.6.2
│ └── linux_amd64 -> /home/ebal/.local/share/terraform/plugins/registry.terraform.io/dmacvicar/libvirt/0.6.2/linux_amd64
└── selections.json
7 directories, 2 files
Provider
but did we actually connect to libvirtd via terraform ?
Short answer: No.
We just told terraform to use this specific provider.
How to connect ?
We need to add the connection libvirt uri to the provider section:
provider "libvirt" {
uri = "qemu:///system"
}so our Provider.tf looks like this
terraform {
required_version = ">= 0.13"
required_providers {
libvirt = {
source = "dmacvicar/libvirt"
version = "0.6.2"
}
}
}
provider "libvirt" {
uri = "qemu:///system"
}
Libvirt URI
libvirt is a virtualization api/toolkit that supports multiple drivers and thus you can use libvirt against the below virtualization platforms
- LXC - Linux Containers
- OpenVZ
- QEMU
- VirtualBox
- VMware ESX
- VMware Workstation/Player
- Xen
- Microsoft Hyper-V
- Virtuozzo
- Bhyve - The BSD Hypervisor
Libvirt also supports multiple authentication mechanisms like ssh
virsh -c qemu+ssh://username@host1.example.org/systemso it is really important to properly define the libvirt URI in terraform!
In this article, I will limit it to a local libvirt daemon, but keep in mind you can use a remote libvirt daemon as well.
Volume
Next thing, we need a disk volume!
Volume.tf
resource "libvirt_volume" "ubuntu-2004-vol" {
name = "ubuntu-2004-vol"
pool = "default"
#source = "https://cloud-images.ubuntu.com/focal/current/focal-server-cloudimg-amd64-disk-kvm.img"
source = "ubuntu-20.04.img"
format = "qcow2"
}
I have already downloaded this image and verified its checksum, I will use this local image as the base image for my VM’s volume.
By running terraform plan we will see this output:
# libvirt_volume.ubuntu-2004-vol will be created
+ resource "libvirt_volume" "ubuntu-2004-vol" {
+ format = "qcow2"
+ id = (known after apply)
+ name = "ubuntu-2004-vol"
+ pool = "default"
+ size = (known after apply)
+ source = "ubuntu-20.04.img"
}What we expect is to use this source image and create a new disk volume (copy) and put it to the default disk storage libvirt pool.
Let’s try to figure out what is happening here:
terraform plan -out terraform.out
terraform apply terraform.out
terraform show# libvirt_volume.ubuntu-2004-vol:
resource "libvirt_volume" "ubuntu-2004-vol" {
format = "qcow2"
id = "/var/lib/libvirt/images/ubuntu-2004-vol"
name = "ubuntu-2004-vol"
pool = "default"
size = 2361393152
source = "ubuntu-20.04.img"
}
and
$ virsh -c qemu:///system vol-list default
Name Path
------------------------------------------------------------
ubuntu-2004-vol /var/lib/libvirt/images/ubuntu-2004-volVolume Size
BE Aware: by this declaration, the produced disk volume image will have the same size as the original source. In this case ~2G of disk.
We will show later in this article how to expand to something larger.
destroy volume
$ terraform destroy
libvirt_volume.ubuntu-2004-vol: Refreshing state... [id=/var/lib/libvirt/images/ubuntu-2004-vol]
An execution plan has been generated and is shown below.
Resource actions are indicated with the following symbols:
- destroy
Terraform will perform the following actions:
# libvirt_volume.ubuntu-2004-vol will be destroyed
- resource "libvirt_volume" "ubuntu-2004-vol" {
- format = "qcow2" -> null
- id = "/var/lib/libvirt/images/ubuntu-2004-vol" -> null
- name = "ubuntu-2004-vol" -> null
- pool = "default" -> null
- size = 2361393152 -> null
- source = "ubuntu-20.04.img" -> null
}
Plan: 0 to add, 0 to change, 1 to destroy.
Do you really want to destroy all resources?
Terraform will destroy all your managed infrastructure, as shown above.
There is no undo. Only 'yes' will be accepted to confirm.
Enter a value: yes
libvirt_volume.ubuntu-2004-vol: Destroying... [id=/var/lib/libvirt/images/ubuntu-2004-vol]
libvirt_volume.ubuntu-2004-vol: Destruction complete after 0s
Destroy complete! Resources: 1 destroyed.
verify
$ virsh -c qemu:///system vol-list default
Name Path
----------------------------------------------------------
reminder: always destroy!
Domain
Believe it or not, we are half way from our first VM!
We need to create a libvirt domain resource.
Domain.tf
cat > Domain.tf <<EOF
resource "libvirt_domain" "ubuntu-2004-vm" {
name = "ubuntu-2004-vm"
memory = "2048"
vcpu = 1
disk {
volume_id = libvirt_volume.ubuntu-2004-vol.id
}
}
EOFApply the new tf plan
terraform plan -out terraform.out
terraform apply terraform.out
$ terraform show
# libvirt_domain.ubuntu-2004-vm:
resource "libvirt_domain" "ubuntu-2004-vm" {
arch = "x86_64"
autostart = false
disk = [
{
block_device = ""
file = ""
scsi = false
url = ""
volume_id = "/var/lib/libvirt/images/ubuntu-2004-vol"
wwn = ""
},
]
emulator = "/usr/bin/qemu-system-x86_64"
fw_cfg_name = "opt/com.coreos/config"
id = "3a4a2b44-5ecd-433c-8645-9bccc831984f"
machine = "pc"
memory = 2048
name = "ubuntu-2004-vm"
qemu_agent = false
running = true
vcpu = 1
}
# libvirt_volume.ubuntu-2004-vol:
resource "libvirt_volume" "ubuntu-2004-vol" {
format = "qcow2"
id = "/var/lib/libvirt/images/ubuntu-2004-vol"
name = "ubuntu-2004-vol"
pool = "default"
size = 2361393152
source = "ubuntu-20.04.img"
}
Verify via virsh:
$ virsh -c qemu:///system list
Id Name State
--------------------------------
3 ubuntu-2004-vm running
Destroy them!
$ terraform destroy
Do you really want to destroy all resources?
Terraform will destroy all your managed infrastructure, as shown above.
There is no undo. Only 'yes' will be accepted to confirm.
Enter a value: yes
libvirt_domain.ubuntu-2004-vm: Destroying... [id=3a4a2b44-5ecd-433c-8645-9bccc831984f]
libvirt_domain.ubuntu-2004-vm: Destruction complete after 0s
libvirt_volume.ubuntu-2004-vol: Destroying... [id=/var/lib/libvirt/images/ubuntu-2004-vol]
libvirt_volume.ubuntu-2004-vol: Destruction complete after 0s
Destroy complete! Resources: 2 destroyed.
That’s it !
We have successfully created a new VM from a source image that runs on our libvirt environment.
But we can not connect/use or do anything with this instance. Not yet, we need to add a few more things. Like a network interface, a console output and a default cloud-init file to auto-configure the virtual machine.
Variables
Before continuing with the user-data (cloud-init), it is a good time to set up some terraform variables.
cat > Variables.tf <<EOF
variable "domain" {
description = "The domain/host name of the zone"
default = "ubuntu2004"
}
EOF
We are going to use this variable within the user-date yaml file.
Cloud-init
The best way to configure a newly created virtual machine, is via cloud-init and the ability of injecting a user-data.yml file into the virtual machine via terraform-libvirt.
user-data
#cloud-config
#disable_root: true
disable_root: false
chpasswd:
list: |
root:ping
expire: False
# Set TimeZone
timezone: Europe/Athens
hostname: "${hostname}"
# PostInstall
runcmd:
# Remove cloud-init
- apt-get -qqy autoremove --purge cloud-init lxc lxd snapd
- apt-get -y --purge autoremove
- apt -y autoclean
- apt -y clean all
cloud init disk
Terraform will create a new iso by reading the above template file and generate a proper user-data.yaml file. To use this cloud init iso, we need to configure it as a libvirt cloud-init resource.
Cloudinit.tf
data "template_file" "user_data" {
template = file("user-data.yml")
vars = {
hostname = var.domain
}
}
resource "libvirt_cloudinit_disk" "cloud-init" {
name = "cloud-init.iso"
user_data = data.template_file.user_data.rendered
}
and we need to modify our Domain.tf accordingly
cloudinit = libvirt_cloudinit_disk.cloud-init.idTerraform will create and upload this iso disk image into the default libvirt storage pool. And attach it to the virtual machine in the boot process.
At this moment the tf_libvirt directory should look like this:
$ ls -1
Cloudinit.tf
Domain.tf
Provider.tf
ubuntu-20.04.img
user-data.yml
Variables.tf
Volume.tf
To give you an idea, the abstract design is this:

apply
terraform plan -out terraform.out
terraform apply terraform.out
$ terraform show
# data.template_file.user_data:
data "template_file" "user_data" {
id = "cc82a7db4c6498aee21a883729fc4be7b84059d3dec69b92a210e046c67a9a00"
rendered = <<~EOT
#cloud-config
#disable_root: true
disable_root: false
chpasswd:
list: |
root:ping
expire: False
# Set TimeZone
timezone: Europe/Athens
hostname: "ubuntu2004"
# PostInstall
runcmd:
# Remove cloud-init
- apt-get -qqy autoremove --purge cloud-init lxc lxd snapd
- apt-get -y --purge autoremove
- apt -y autoclean
- apt -y clean all
EOT
template = <<~EOT
#cloud-config
#disable_root: true
disable_root: false
chpasswd:
list: |
root:ping
expire: False
# Set TimeZone
timezone: Europe/Athens
hostname: "${hostname}"
# PostInstall
runcmd:
# Remove cloud-init
- apt-get -qqy autoremove --purge cloud-init lxc lxd snapd
- apt-get -y --purge autoremove
- apt -y autoclean
- apt -y clean all
EOT
vars = {
"hostname" = "ubuntu2004"
}
}
# libvirt_cloudinit_disk.cloud-init:
resource "libvirt_cloudinit_disk" "cloud-init" {
id = "/var/lib/libvirt/images/cloud-init.iso;5f5cdc31-1d38-39cb-cc72-971e474ca539"
name = "cloud-init.iso"
pool = "default"
user_data = <<~EOT
#cloud-config
#disable_root: true
disable_root: false
chpasswd:
list: |
root:ping
expire: False
# Set TimeZone
timezone: Europe/Athens
hostname: "ubuntu2004"
# PostInstall
runcmd:
# Remove cloud-init
- apt-get -qqy autoremove --purge cloud-init lxc lxd snapd
- apt-get -y --purge autoremove
- apt -y autoclean
- apt -y clean all
EOT
}
# libvirt_domain.ubuntu-2004-vm:
resource "libvirt_domain" "ubuntu-2004-vm" {
arch = "x86_64"
autostart = false
cloudinit = "/var/lib/libvirt/images/cloud-init.iso;5f5ce077-9508-3b8c-273d-02d44443b79c"
disk = [
{
block_device = ""
file = ""
scsi = false
url = ""
volume_id = "/var/lib/libvirt/images/ubuntu-2004-vol"
wwn = ""
},
]
emulator = "/usr/bin/qemu-system-x86_64"
fw_cfg_name = "opt/com.coreos/config"
id = "3ade5c95-30d4-496b-9bcf-a12d63993cfa"
machine = "pc"
memory = 2048
name = "ubuntu-2004-vm"
qemu_agent = false
running = true
vcpu = 1
}
# libvirt_volume.ubuntu-2004-vol:
resource "libvirt_volume" "ubuntu-2004-vol" {
format = "qcow2"
id = "/var/lib/libvirt/images/ubuntu-2004-vol"
name = "ubuntu-2004-vol"
pool = "default"
size = 2361393152
source = "ubuntu-20.04.img"
}
Lots of output , but let me explain it really quick:
generate a user-data file from template, template is populated with variables, create an cloud-init iso, create a volume disk from source, create a virtual machine with this new volume disk and boot it with this cloud-init iso.
Pretty much, that’s it!!!
$ virsh -c qemu:///system vol-list --details default
Name Path Type Capacity Allocation
---------------------------------------------------------------------------------------------
cloud-init.iso /var/lib/libvirt/images/cloud-init.iso file 364.00 KiB 364.00 KiB
ubuntu-2004-vol /var/lib/libvirt/images/ubuntu-2004-vol file 2.20 GiB 537.94 MiB
$ virsh -c qemu:///system list
Id Name State
--------------------------------
1 ubuntu-2004-vm running
destroy
$ terraform destroy -auto-approve
data.template_file.user_data: Refreshing state... [id=cc82a7db4c6498aee21a883729fc4be7b84059d3dec69b92a210e046c67a9a00]
libvirt_volume.ubuntu-2004-vol: Refreshing state... [id=/var/lib/libvirt/images/ubuntu-2004-vol]
libvirt_cloudinit_disk.cloud-init: Refreshing state... [id=/var/lib/libvirt/images/cloud-init.iso;5f5cdc31-1d38-39cb-cc72-971e474ca539]
libvirt_domain.ubuntu-2004-vm: Refreshing state... [id=3ade5c95-30d4-496b-9bcf-a12d63993cfa]
libvirt_cloudinit_disk.cloud-init: Destroying... [id=/var/lib/libvirt/images/cloud-init.iso;5f5cdc31-1d38-39cb-cc72-971e474ca539]
libvirt_domain.ubuntu-2004-vm: Destroying... [id=3ade5c95-30d4-496b-9bcf-a12d63993cfa]
libvirt_cloudinit_disk.cloud-init: Destruction complete after 0s
libvirt_domain.ubuntu-2004-vm: Destruction complete after 0s
libvirt_volume.ubuntu-2004-vol: Destroying... [id=/var/lib/libvirt/images/ubuntu-2004-vol]
libvirt_volume.ubuntu-2004-vol: Destruction complete after 0s
Destroy complete! Resources: 3 destroyed.
Most important detail is:
Resources: 3 destroyed.
- cloud-init.iso
- ubuntu-2004-vol
- ubuntu-2004-vm
Console
but there are a few things still missing.
To add a console for starters so we can connect into this virtual machine!
To do that, we need to re-edit Domain.tf and add a console output:
console {
target_type = "serial"
type = "pty"
target_port = "0"
}
console {
target_type = "virtio"
type = "pty"
target_port = "1"
}
the full file should look like:
resource "libvirt_domain" "ubuntu-2004-vm" {
name = "ubuntu-2004-vm"
memory = "2048"
vcpu = 1
cloudinit = libvirt_cloudinit_disk.cloud-init.id
disk {
volume_id = libvirt_volume.ubuntu-2004-vol.id
}
console {
target_type = "serial"
type = "pty"
target_port = "0"
}
console {
target_type = "virtio"
type = "pty"
target_port = "1"
}
}
Create again the VM with
terraform plan -out terraform.out
terraform apply terraform.out
And test the console:
$ virsh -c qemu:///system console ubuntu-2004-vm
Connected to domain ubuntu-2004-vm
Escape character is ^] (Ctrl + ])
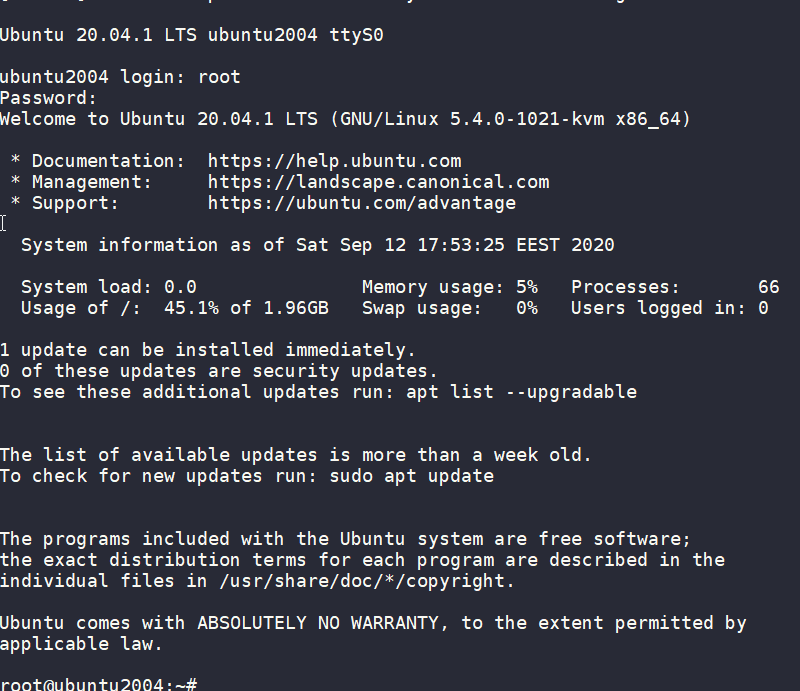
wow!
We have actually logged-in to this VM using the libvirt console!
Virtual Machine
some interesting details
root@ubuntu2004:~# df -h
Filesystem Size Used Avail Use% Mounted on
/dev/root 2.0G 916M 1.1G 46% /
devtmpfs 998M 0 998M 0% /dev
tmpfs 999M 0 999M 0% /dev/shm
tmpfs 200M 392K 200M 1% /run
tmpfs 5.0M 0 5.0M 0% /run/lock
tmpfs 999M 0 999M 0% /sys/fs/cgroup
/dev/vda15 105M 3.9M 101M 4% /boot/efi
tmpfs 200M 0 200M 0% /run/user/0
root@ubuntu2004:~# free -hm
total used free shared buff/cache available
Mem: 2.0Gi 73Mi 1.7Gi 0.0Ki 140Mi 1.8Gi
Swap: 0B 0B 0B
root@ubuntu2004:~# ip a
1: lo: <LOOPBACK,UP,LOWER_UP> mtu 65536 qdisc noqueue state UNKNOWN group default qlen 1000
link/loopback 00:00:00:00:00:00 brd 00:00:00:00:00:00
inet 127.0.0.1/8 scope host lo
valid_lft forever preferred_lft forever
inet6 ::1/128 scope host
valid_lft forever preferred_lft forever
2: tunl0@NONE: <NOARP> mtu 1480 qdisc noop state DOWN group default qlen 1000
link/ipip 0.0.0.0 brd 0.0.0.0
3: sit0@NONE: <NOARP> mtu 1480 qdisc noop state DOWN group default qlen 1000
link/sit 0.0.0.0 brd 0.0.0.0
Do not forget to destroy
$ terraform destroy -auto-approve
data.template_file.user_data: Refreshing state... [id=cc82a7db4c6498aee21a883729fc4be7b84059d3dec69b92a210e046c67a9a00]
libvirt_volume.ubuntu-2004-vol: Refreshing state... [id=/var/lib/libvirt/images/ubuntu-2004-vol]
libvirt_cloudinit_disk.cloud-init: Refreshing state... [id=/var/lib/libvirt/images/cloud-init.iso;5f5ce077-9508-3b8c-273d-02d44443b79c]
libvirt_domain.ubuntu-2004-vm: Refreshing state... [id=69f75b08-1e06-409d-9fd6-f45d82260b51]
libvirt_domain.ubuntu-2004-vm: Destroying... [id=69f75b08-1e06-409d-9fd6-f45d82260b51]
libvirt_domain.ubuntu-2004-vm: Destruction complete after 0s
libvirt_cloudinit_disk.cloud-init: Destroying... [id=/var/lib/libvirt/images/cloud-init.iso;5f5ce077-9508-3b8c-273d-02d44443b79c]
libvirt_volume.ubuntu-2004-vol: Destroying... [id=/var/lib/libvirt/images/ubuntu-2004-vol]
libvirt_cloudinit_disk.cloud-init: Destruction complete after 0s
libvirt_volume.ubuntu-2004-vol: Destruction complete after 0s
Destroy complete! Resources: 3 destroyed.
extend the volume disk
As mentioned above, the volume’s disk size is exactly as the origin source image.
In our case it’s 2G.
What we need to do, is to use the source image as a base for a new volume disk. In our new volume disk, we can declare the size we need.
I would like to make this a user variable: Variables.tf
variable "vol_size" {
description = "The mac & iP address for this VM"
# 10G
default = 10 * 1024 * 1024 * 1024
}
Arithmetic in terraform!!
So the Volume.tf should be:
resource "libvirt_volume" "ubuntu-2004-base" {
name = "ubuntu-2004-base"
pool = "default"
#source = "https://cloud-images.ubuntu.com/focal/current/focal-server-cloudimg-amd64-disk-kvm.img"
source = "ubuntu-20.04.img"
format = "qcow2"
}
resource "libvirt_volume" "ubuntu-2004-vol" {
name = "ubuntu-2004-vol"
pool = "default"
base_volume_id = libvirt_volume.ubuntu-2004-base.id
size = var.vol_size
}
base image –> volume image
test it
terraform plan -out terraform.out
terraform apply terraform.out
$ virsh -c qemu:///system console ubuntu-2004-vm
Connected to domain ubuntu-2004-vm
Escape character is ^] (Ctrl + ])
ubuntu2004 login: root
Password:
Welcome to Ubuntu 20.04.1 LTS (GNU/Linux 5.4.0-1021-kvm x86_64)
* Documentation: https://help.ubuntu.com
* Management: https://landscape.canonical.com
* Support: https://ubuntu.com/advantage
System information as of Sat Sep 12 18:27:46 EEST 2020
System load: 0.29 Memory usage: 6% Processes: 66
Usage of /: 9.3% of 9.52GB Swap usage: 0% Users logged in: 0
0 updates can be installed immediately.
0 of these updates are security updates.
Failed to connect to https://changelogs.ubuntu.com/meta-release-lts. Check your Internet connection or proxy settings
Last login: Sat Sep 12 18:26:37 EEST 2020 on ttyS0
root@ubuntu2004:~# df -h /
Filesystem Size Used Avail Use% Mounted on
/dev/root 9.6G 912M 8.7G 10% /
root@ubuntu2004:~#
10G !
destroy
terraform destroy -auto-approveSwap
I would like to have a swap partition and I will use cloud init to create a swap partition.
modify user-data.yml
# Create swap partition
swap:
filename: /swap.img
size: "auto"
maxsize: 2G
test it
terraform plan -out terraform.out && terraform apply terraform.out$ virsh -c qemu:///system console ubuntu-2004-vm
Connected to domain ubuntu-2004-vm
Escape character is ^] (Ctrl + ])
root@ubuntu2004:~# free -hm
total used free shared buff/cache available
Mem: 2.0Gi 86Mi 1.7Gi 0.0Ki 188Mi 1.8Gi
Swap: 2.0Gi 0B 2.0Gi
root@ubuntu2004:~#
success !!
terraform destroy -auto-approveNetwork
How about internet? network?
Yes, what about it ?
I guess you need to connect to the internets, okay then.
The easiest way is to add this your Domain.tf
network_interface {
network_name = "default"
}
This will use the default network libvirt resource
$ virsh -c qemu:///system net-list
Name State Autostart Persistent
----------------------------------------------------
default active yes yes
if you prefer to directly expose your VM to your local network (be very careful) then replace the above with a macvtap interface. If your ISP router provides dhcp, then your VM will take a random IP from your router.
network_interface {
macvtap = "eth0"
}
test it
terraform plan -out terraform.out && terraform apply terraform.out$ virsh -c qemu:///system console ubuntu-2004-vm
Connected to domain ubuntu-2004-vm
Escape character is ^] (Ctrl + ])
root@ubuntu2004:~#
root@ubuntu2004:~# ip a
1: lo: <LOOPBACK,UP,LOWER_UP> mtu 65536 qdisc noqueue state UNKNOWN group default qlen 1000
link/loopback 00:00:00:00:00:00 brd 00:00:00:00:00:00
inet 127.0.0.1/8 scope host lo
valid_lft forever preferred_lft forever
inet6 ::1/128 scope host
valid_lft forever preferred_lft forever
2: ens3: <BROADCAST,MULTICAST,UP,LOWER_UP> mtu 1500 qdisc pfifo_fast state UP group default qlen 1000
link/ether 52:54:00:36:66:96 brd ff:ff:ff:ff:ff:ff
inet 192.168.122.228/24 brd 192.168.122.255 scope global dynamic ens3
valid_lft 3544sec preferred_lft 3544sec
inet6 fe80::5054:ff:fe36:6696/64 scope link
valid_lft forever preferred_lft forever
3: tunl0@NONE: <NOARP> mtu 1480 qdisc noop state DOWN group default qlen 1000
link/ipip 0.0.0.0 brd 0.0.0.0
4: sit0@NONE: <NOARP> mtu 1480 qdisc noop state DOWN group default qlen 1000
link/sit 0.0.0.0 brd 0.0.0.0
root@ubuntu2004:~# ping -c 5 google.com
PING google.com (172.217.23.142) 56(84) bytes of data.
64 bytes from fra16s18-in-f142.1e100.net (172.217.23.142): icmp_seq=1 ttl=115 time=43.4 ms
64 bytes from fra16s18-in-f142.1e100.net (172.217.23.142): icmp_seq=2 ttl=115 time=43.9 ms
64 bytes from fra16s18-in-f142.1e100.net (172.217.23.142): icmp_seq=3 ttl=115 time=43.0 ms
64 bytes from fra16s18-in-f142.1e100.net (172.217.23.142): icmp_seq=4 ttl=115 time=43.1 ms
64 bytes from fra16s18-in-f142.1e100.net (172.217.23.142): icmp_seq=5 ttl=115 time=43.4 ms
--- google.com ping statistics ---
5 packets transmitted, 5 received, 0% packet loss, time 4005ms
rtt min/avg/max/mdev = 42.977/43.346/43.857/0.311 ms
root@ubuntu2004:~#
destroy
$ terraform destroy -auto-approve
Destroy complete! Resources: 4 destroyed.
SSH
Okay, now that we have network it is possible to setup ssh to our virtual machine and also auto create a user. I would like cloud-init to get my public key from github and setup my user.
disable_root: true
ssh_pwauth: no
users:
- name: ebal
ssh_import_id:
- gh:ebal
shell: /bin/bash
sudo: ALL=(ALL) NOPASSWD:ALL
write_files:
- path: /etc/ssh/sshd_config
content: |
AcceptEnv LANG LC_*
AllowUsers ebal
ChallengeResponseAuthentication no
Compression NO
MaxSessions 3
PasswordAuthentication no
PermitRootLogin no
Port "${sshdport}"
PrintMotd no
Subsystem sftp /usr/lib/openssh/sftp-server
UseDNS no
UsePAM yes
X11Forwarding no
Notice, I have added a new variable called sshdport
Variables.tf
variable "ssh_port" {
description = "The sshd port of the VM"
default = 12345
}
and do not forget to update your cloud-init tf
Cloudinit.tf
data "template_file" "user_data" {
template = file("user-data.yml")
vars = {
hostname = var.domain
sshdport = var.ssh_port
}
}
resource "libvirt_cloudinit_disk" "cloud-init" {
name = "cloud-init.iso"
user_data = data.template_file.user_data.rendered
}
Update VM
I would also like to update & install specific packages to this virtual machine:
# Install packages
packages:
- figlet
- mlocate
- python3-apt
- bash-completion
- ncdu
# Update/Upgrade & Reboot if necessary
package_update: true
package_upgrade: true
package_reboot_if_required: true
# PostInstall
runcmd:
- figlet ${hostname} > /etc/motd
- updatedb
# Firewall
- ufw allow "${sshdport}"/tcp && ufw enable
# Remove cloud-init
- apt-get -y autoremove --purge cloud-init lxc lxd snapd
- apt-get -y --purge autoremove
- apt -y autoclean
- apt -y clean all
Yes, I prefer to uninstall cloud-init at the end.
user-date.yaml
the entire user-date.yaml looks like this:
#cloud-config
disable_root: true
ssh_pwauth: no
users:
- name: ebal
ssh_import_id:
- gh:ebal
shell: /bin/bash
sudo: ALL=(ALL) NOPASSWD:ALL
write_files:
- path: /etc/ssh/sshd_config
content: |
AcceptEnv LANG LC_*
AllowUsers ebal
ChallengeResponseAuthentication no
Compression NO
MaxSessions 3
PasswordAuthentication no
PermitRootLogin no
Port "${sshdport}"
PrintMotd no
Subsystem sftp /usr/lib/openssh/sftp-server
UseDNS no
UsePAM yes
X11Forwarding no
# Set TimeZone
timezone: Europe/Athens
hostname: "${hostname}"
# Create swap partition
swap:
filename: /swap.img
size: "auto"
maxsize: 2G
# Install packages
packages:
- figlet
- mlocate
- python3-apt
- bash-completion
- ncdu
# Update/Upgrade & Reboot if necessary
package_update: true
package_upgrade: true
package_reboot_if_required: true
# PostInstall
runcmd:
- figlet ${hostname} > /etc/motd
- updatedb
# Firewall
- ufw allow "${sshdport}"/tcp && ufw enable
# Remove cloud-init
- apt-get -y autoremove --purge cloud-init lxc lxd snapd
- apt-get -y --purge autoremove
- apt -y autoclean
- apt -y clean all
Output
We need to know the IP to login so create a new terraform file to get the IP
Output.tf
output "IP" {
value = libvirt_domain.ubuntu-2004-vm.network_interface.0.addresses
}
but that means that we need to wait for the dhcp lease. Modify Domain.tf to tell terraform to wait.
network_interface {
network_name = "default"
wait_for_lease = true
}
Plan & Apply
$ terraform plan -out terraform.out && terraform apply terraform.out
Outputs:
IP = [
"192.168.122.79",
]
Verify
$ ssh 192.168.122.79 -p 12345 uptime
19:33:46 up 2 min, 0 users, load average: 0.95, 0.37, 0.14
$ ssh 192.168.122.79 -p 12345
Welcome to Ubuntu 20.04.1 LTS (GNU/Linux 5.4.0-1023-kvm x86_64)
* Documentation: https://help.ubuntu.com
* Management: https://landscape.canonical.com
* Support: https://ubuntu.com/advantage
System information as of Sat Sep 12 19:34:45 EEST 2020
System load: 0.31 Processes: 72
Usage of /: 33.1% of 9.52GB Users logged in: 0
Memory usage: 7% IPv4 address for ens3: 192.168.122.79
Swap usage: 0%
0 updates can be installed immediately.
0 of these updates are security updates.
_ _ ____ ___ ___ _ _
_ _| |__ _ _ _ __ | |_ _ _|___ / _ / _ | || |
| | | | '_ | | | | '_ | __| | | | __) | | | | | | | || |_
| |_| | |_) | |_| | | | | |_| |_| |/ __/| |_| | |_| |__ _|
__,_|_.__/ __,_|_| |_|__|__,_|_____|___/ ___/ |_|
Last login: Sat Sep 12 19:34:37 2020 from 192.168.122.1
ebal@ubuntu2004:~$
ebal@ubuntu2004:~$ df -h /
Filesystem Size Used Avail Use% Mounted on
/dev/root 9.6G 3.2G 6.4G 34% /
ebal@ubuntu2004:~$ free -hm
total used free shared buff/cache available
Mem: 2.0Gi 91Mi 1.7Gi 0.0Ki 197Mi 1.8Gi
Swap: 2.0Gi 0B 2.0Gi
ebal@ubuntu2004:~$ ping -c 5 libreops.cc
PING libreops.cc (185.199.108.153) 56(84) bytes of data.
64 bytes from 185.199.108.153 (185.199.108.153): icmp_seq=1 ttl=55 time=48.4 ms
64 bytes from 185.199.108.153 (185.199.108.153): icmp_seq=2 ttl=55 time=48.7 ms
64 bytes from 185.199.108.153 (185.199.108.153): icmp_seq=3 ttl=55 time=48.5 ms
64 bytes from 185.199.108.153 (185.199.108.153): icmp_seq=4 ttl=55 time=48.3 ms
64 bytes from 185.199.108.153 (185.199.108.153): icmp_seq=5 ttl=55 time=52.8 ms
--- libreops.cc ping statistics ---
5 packets transmitted, 5 received, 0% packet loss, time 4006ms
rtt min/avg/max/mdev = 48.266/49.319/52.794/1.743 ms
what !!!!
awesome
destroy
terraform destroy -auto-approveCustom Network
One last thing I would like to discuss is how to create a new network and provide a specific IP to your VM. This will separate your VMs/lab and it is cheap & easy to setup a new libvirt network.
Network.tf
resource "libvirt_network" "tf_net" {
name = "tf_net"
domain = "libvirt.local"
addresses = ["192.168.123.0/24"]
dhcp {
enabled = true
}
dns {
enabled = true
}
}
and replace network_interface in Domains.tf
network_interface {
network_id = libvirt_network.tf_net.id
network_name = "tf_net"
addresses = ["192.168.123.${var.IP_addr}"]
mac = "52:54:00:b2:2f:${var.IP_addr}"
wait_for_lease = true
}Closely look, there is a new terraform variable
Variables.tf
variable "IP_addr" {
description = "The mac & iP address for this VM"
default = 33
}$ terraform plan -out terraform.out && terraform apply terraform.out
Outputs:
IP = [
"192.168.123.33",
]
$ ssh 192.168.123.33 -p 12345
Welcome to Ubuntu 20.04.1 LTS (GNU/Linux 5.4.0-1021-kvm x86_64)
* Documentation: https://help.ubuntu.com
* Management: https://landscape.canonical.com
* Support: https://ubuntu.com/advantage
System information disabled due to load higher than 1.0
12 updates can be installed immediately.
8 of these updates are security updates.
To see these additional updates run: apt list --upgradable
Last login: Sat Sep 12 19:56:33 2020 from 192.168.123.1
ebal@ubuntu2004:~$ ip addr show ens3
2: ens3: <BROADCAST,MULTICAST,UP,LOWER_UP> mtu 1500 qdisc pfifo_fast state UP group default qlen 1000
link/ether 52:54:00:b2:2f:33 brd ff:ff:ff:ff:ff:ff
inet 192.168.123.33/24 brd 192.168.123.255 scope global dynamic ens3
valid_lft 3491sec preferred_lft 3491sec
inet6 fe80::5054:ff:feb2:2f33/64 scope link
valid_lft forever preferred_lft forever
ebal@ubuntu2004:~$
Terraform files
you can find every terraform example in my github repo
tf/0.13/libvirt/0.6.2/ubuntu/20.04 at master · ebal/tf · GitHub
That’s it!
If you like this article, consider following me on twitter ebalaskas.
In this blog post you will find my personal notes on how to setup a Kubernetes as a Service (KaaS). I will be using Terraform to create the infrastructure on Hetzner’s VMs, Rancher for KaaS and Helm to install the first application on Kubernetes.
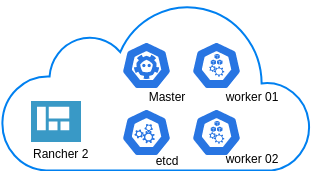
Many thanks to dear friend: adamo for his help.
Terraform
Let’s build our infrastructure!
We are going to use terraform to build 5 VMs
- One (1) master
- One (1) etcd
- Two (2) workers
- One (1) for the Web dashboard
I will not go to much details about terraform, but to have a basic idea
Provider.tf
provider "hcloud" {
token = var.hcloud_token
}Hetzner.tf
data "template_file" "userdata" {
template = "${file("user-data.yml")}"
vars = {
hostname = var.domain
sshdport = var.ssh_port
}
}
resource "hcloud_server" "node" {
count = 5
name = "rke-${count.index}"
image = "ubuntu-18.04"
server_type = "cx11"
user_data = data.template_file.userdata.rendered
}Output.tf
output "IPv4" {
value = hcloud_server.node.*.ipv4_address
}In my user-data (cloud-init) template, the most important lines are these
- usermod -a -G docker deploy
- ufw allow 6443/tcp
- ufw allow 2379/tcp
- ufw allow 2380/tcp
- ufw allow 80/tcp
- ufw allow 443/tcpbuild infra
$ terraform init
$ terraform plan
$ terraform applyoutput
IPv4 = [
"78.47.6x.yyy",
"78.47.1x.yyy",
"78.46.2x.yyy",
"78.47.7x.yyy",
"78.47.4x.yyy",
]In the end we will see something like this on hetzner cloud
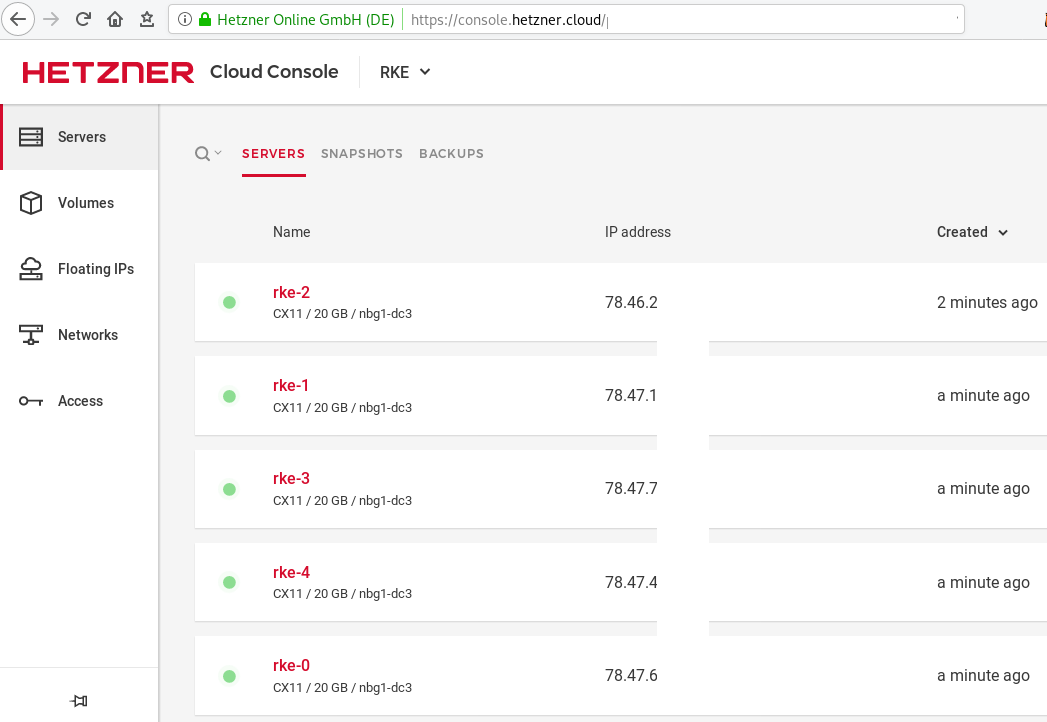
Rancher Kubernetes Engine
Take a look here for more details about what is required and important on using rke: Requirements.
We are going to use the rke aka the Rancher Kubernetes Engine, an extremely simple, lightning fast Kubernetes installer that works everywhere.
download
Download the latest binary from github:
Release Release v1.0.0
$ curl -sLO https://github.com/rancher/rke/releases/download/v1.0.0/rke_linux-amd64
$ chmod +x rke_linux-amd64
$ sudo mv rke_linux-amd64 /usr/local/bin/rkeversion
$ rke --version
rke version v1.0.0rke config
We are ready to configure our Kubernetes Infrastructure using the first 4 VMs.
$ rke configmaster
[+] Cluster Level SSH Private Key Path [~/.ssh/id_rsa]:
[+] Number of Hosts [1]: 4
[+] SSH Address of host (1) [none]: 78.47.6x.yyy
[+] SSH Port of host (1) [22]:
[+] SSH Private Key Path of host (78.47.6x.yyy) [none]:
[-] You have entered empty SSH key path, trying fetch from SSH key parameter
[+] SSH Private Key of host (78.47.6x.yyy) [none]:
[-] You have entered empty SSH key, defaulting to cluster level SSH key: ~/.ssh/id_rsa
[+] SSH User of host (78.47.6x.yyy) [ubuntu]:
[+] Is host (78.47.6x.yyy) a Control Plane host (y/n)? [y]:
[+] Is host (78.47.6x.yyy) a Worker host (y/n)? [n]: n
[+] Is host (78.47.6x.yyy) an etcd host (y/n)? [n]: n
[+] Override Hostname of host (78.47.6x.yyy) [none]: rke-master
[+] Internal IP of host (78.47.6x.yyy) [none]:
[+] Docker socket path on host (78.47.6x.yyy) [/var/run/docker.sock]: etcd
[+] SSH Address of host (2) [none]: 78.47.1x.yyy
[+] SSH Port of host (2) [22]:
[+] SSH Private Key Path of host (78.47.1x.yyy) [none]:
[-] You have entered empty SSH key path, trying fetch from SSH key parameter
[+] SSH Private Key of host (78.47.1x.yyy) [none]:
[-] You have entered empty SSH key, defaulting to cluster level SSH key: ~/.ssh/id_rsa
[+] SSH User of host (78.47.1x.yyy) [ubuntu]:
[+] Is host (78.47.1x.yyy) a Control Plane host (y/n)? [y]: n
[+] Is host (78.47.1x.yyy) a Worker host (y/n)? [n]: n
[+] Is host (78.47.1x.yyy) an etcd host (y/n)? [n]: y
[+] Override Hostname of host (78.47.1x.yyy) [none]: rke-etcd
[+] Internal IP of host (78.47.1x.yyy) [none]:
[+] Docker socket path on host (78.47.1x.yyy) [/var/run/docker.sock]: workers
worker-01
[+] SSH Address of host (3) [none]: 78.46.2x.yyy
[+] SSH Port of host (3) [22]:
[+] SSH Private Key Path of host (78.46.2x.yyy) [none]:
[-] You have entered empty SSH key path, trying fetch from SSH key parameter
[+] SSH Private Key of host (78.46.2x.yyy) [none]:
[-] You have entered empty SSH key, defaulting to cluster level SSH key: ~/.ssh/id_rsa
[+] SSH User of host (78.46.2x.yyy) [ubuntu]:
[+] Is host (78.46.2x.yyy) a Control Plane host (y/n)? [y]: n
[+] Is host (78.46.2x.yyy) a Worker host (y/n)? [n]: y
[+] Is host (78.46.2x.yyy) an etcd host (y/n)? [n]: n
[+] Override Hostname of host (78.46.2x.yyy) [none]: rke-worker-01
[+] Internal IP of host (78.46.2x.yyy) [none]:
[+] Docker socket path on host (78.46.2x.yyy) [/var/run/docker.sock]: worker-02
[+] SSH Address of host (4) [none]: 78.47.4x.yyy
[+] SSH Port of host (4) [22]:
[+] SSH Private Key Path of host (78.47.4x.yyy) [none]:
[-] You have entered empty SSH key path, trying fetch from SSH key parameter
[+] SSH Private Key of host (78.47.4x.yyy) [none]:
[-] You have entered empty SSH key, defaulting to cluster level SSH key: ~/.ssh/id_rsa
[+] SSH User of host (78.47.4x.yyy) [ubuntu]:
[+] Is host (78.47.4x.yyy) a Control Plane host (y/n)? [y]: n
[+] Is host (78.47.4x.yyy) a Worker host (y/n)? [n]: y
[+] Is host (78.47.4x.yyy) an etcd host (y/n)? [n]: n
[+] Override Hostname of host (78.47.4x.yyy) [none]: rke-worker-02
[+] Internal IP of host (78.47.4x.yyy) [none]:
[+] Docker socket path on host (78.47.4x.yyy) [/var/run/docker.sock]: Network Plugin Type
[+] Network Plugin Type (flannel, calico, weave, canal) [canal]: rke_config
[+] Authentication Strategy [x509]:
[+] Authorization Mode (rbac, none) [rbac]: none
[+] Kubernetes Docker image [rancher/hyperkube:v1.16.3-rancher1]:
[+] Cluster domain [cluster.local]:
[+] Service Cluster IP Range [10.43.0.0/16]:
[+] Enable PodSecurityPolicy [n]:
[+] Cluster Network CIDR [10.42.0.0/16]:
[+] Cluster DNS Service IP [10.43.0.10]:
[+] Add addon manifest URLs or YAML files [no]: cluster.yml
the rke config will produce a cluster yaml file, for us to review or edit in case of misconfigure
$ ls -l cluster.yml
-rw-r----- 1 ebal ebal 4720 Dec 7 20:57 cluster.ymlrke up
We are ready to setup our KaaS by running:
$ rke upINFO[0000] Running RKE version: v1.0.0
INFO[0000] Initiating Kubernetes cluster
INFO[0000] [dialer] Setup tunnel for host [78.47.6x.yyy]
INFO[0000] [dialer] Setup tunnel for host [78.47.1x.yyy]
INFO[0000] [dialer] Setup tunnel for host [78.46.2x.yyy]
INFO[0000] [dialer] Setup tunnel for host [78.47.7x.yyy]
...
INFO[0329] [dns] DNS provider coredns deployed successfully
INFO[0329] [addons] Setting up Metrics Server
INFO[0329] [addons] Saving ConfigMap for addon rke-metrics-addon to Kubernetes
INFO[0329] [addons] Successfully saved ConfigMap for addon rke-metrics-addon to Kubernetes
INFO[0329] [addons] Executing deploy job rke-metrics-addon
INFO[0335] [addons] Metrics Server deployed successfully
INFO[0335] [ingress] Setting up nginx ingress controller
INFO[0335] [addons] Saving ConfigMap for addon rke-ingress-controller to Kubernetes
INFO[0335] [addons] Successfully saved ConfigMap for addon rke-ingress-controller to Kubernetes
INFO[0335] [addons] Executing deploy job rke-ingress-controller
INFO[0341] [ingress] ingress controller nginx deployed successfully
INFO[0341] [addons] Setting up user addons
INFO[0341] [addons] no user addons defined
INFO[0341] Finished building Kubernetes cluster successfully Kubernetes
The output of rke will produce a local kube config cluster yaml file for us to connect to kubernetes cluster.
kube_config_cluster.ymlLet’s test our k8s !
$ kubectl --kubeconfig=kube_config_cluster.yml get nodes -A
NAME STATUS ROLES AGE VERSION
rke-etcd Ready etcd 2m5s v1.16.3
rke-master Ready controlplane 2m6s v1.16.3
rke-worker-1 Ready worker 2m4s v1.16.3
rke-worker-2 Ready worker 2m2s v1.16.3
$ kubectl --kubeconfig=kube_config_cluster.yml get pods -A
NAMESPACE NAME READY STATUS RESTARTS AGE
ingress-nginx default-http-backend-67cf578fc4-nlbb6 1/1 Running 0 96s
ingress-nginx nginx-ingress-controller-7scft 1/1 Running 0 96s
ingress-nginx nginx-ingress-controller-8bmmm 1/1 Running 0 96s
kube-system canal-4x58t 2/2 Running 0 114s
kube-system canal-fbr2w 2/2 Running 0 114s
kube-system canal-lhz4x 2/2 Running 1 114s
kube-system canal-sffwm 2/2 Running 0 114s
kube-system coredns-57dc77df8f-9h648 1/1 Running 0 24s
kube-system coredns-57dc77df8f-pmtvk 1/1 Running 0 107s
kube-system coredns-autoscaler-7774bdbd85-qhs9g 1/1 Running 0 106s
kube-system metrics-server-64f6dffb84-txglk 1/1 Running 0 101s
kube-system rke-coredns-addon-deploy-job-9dhlx 0/1 Completed 0 110s
kube-system rke-ingress-controller-deploy-job-jq679 0/1 Completed 0 98s
kube-system rke-metrics-addon-deploy-job-nrpjm 0/1 Completed 0 104s
kube-system rke-network-plugin-deploy-job-x7rt9 0/1 Completed 0 117s
$ kubectl --kubeconfig=kube_config_cluster.yml get componentstatus
NAME AGE
controller-manager <unknown>
scheduler <unknown>
etcd-0 <unknown> <unknown>
$ kubectl --kubeconfig=kube_config_cluster.yml get deployments -A
NAMESPACE NAME READY UP-TO-DATE AVAILABLE AGE
ingress-nginx default-http-backend 1/1 1 1 2m58s
kube-system coredns 2/2 2 2 3m9s
kube-system coredns-autoscaler 1/1 1 1 3m8s
kube-system metrics-server 1/1 1 1 3m4s
$ kubectl --kubeconfig=kube_config_cluster.yml get ns
NAME STATUS AGE
default Active 4m28s
ingress-nginx Active 3m24s
kube-node-lease Active 4m29s
kube-public Active 4m29s
kube-system Active 4m29sRancer2
Now login to the 5th VM we have in Hetzner:
ssh "78.47.4x.yyy" -l ubuntu -p zzzzand install the stable version of Rancher2
$ docker run -d
--restart=unless-stopped
-p 80:80 -p 443:443
--name rancher2
-v /opt/rancher:/var/lib/rancher
rancher/rancher:stable
--acme-domain k8s.ipname.meCaveat: I have create a domain and assigned to this hostname the IP of the latest VMs!
Now I can use letsencrypt with rancher via acme-domain.
verify
$ docker images -a
REPOSITORY TAG IMAGE ID CREATED SIZE
rancher/rancher stable 5ebba94410d8 10 days ago 654MB
$ docker ps -a -a
CONTAINER ID IMAGE COMMAND CREATED STATUS PORTS NAMES
8f798fb8184c rancher/rancher:stable "entrypoint.sh --acm…" 17 seconds ago Up 15 seconds 0.0.0.0:80->80/tcp, 0.0.0.0:443->443/tcp rancher2Access
Before we continue, we need to give access to these VMs so they can communicate with each other. In cloud you can create a VPC with the correct security groups. But with VMs the easiest way is to do something like this:
sudo ufw allow from "78.47.6x.yyy",
sudo ufw allow from "78.47.1x.yyy",
sudo ufw allow from "78.46.2x.yyy",
sudo ufw allow from "78.47.7x.yyy",
sudo ufw allow from "78.47.4x.yyy",Dashboard
Open your browser and type the IP of your rancher2 VM:
https://78.47.4x.yyyor (in my case):
https://k8s.ipname.meand follow the below instructions
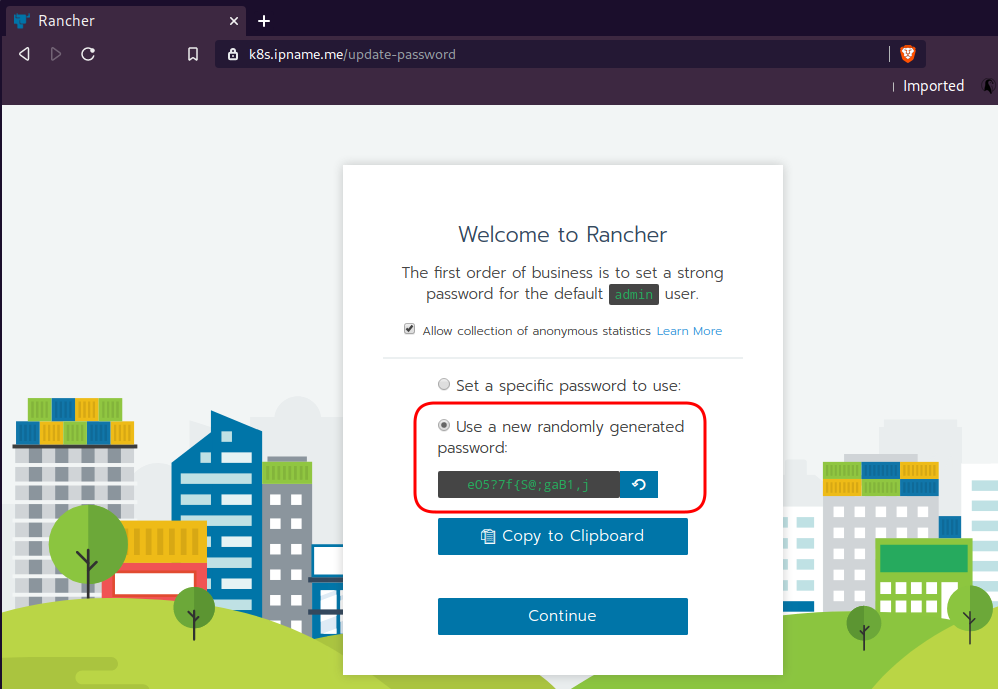


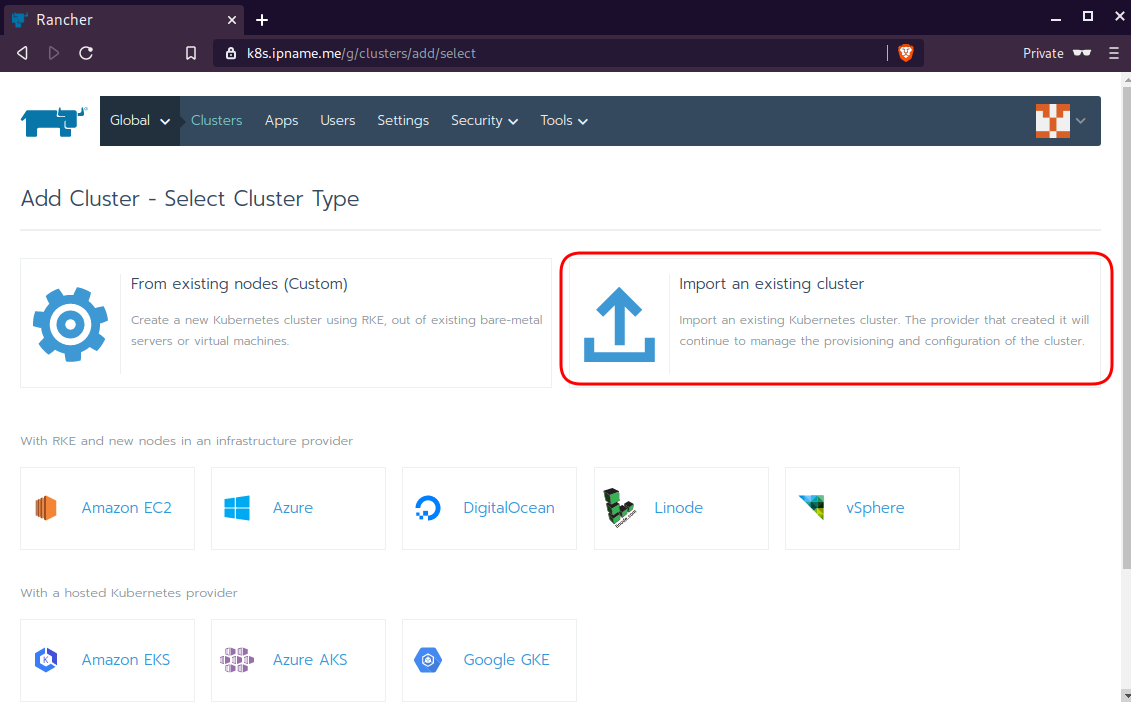
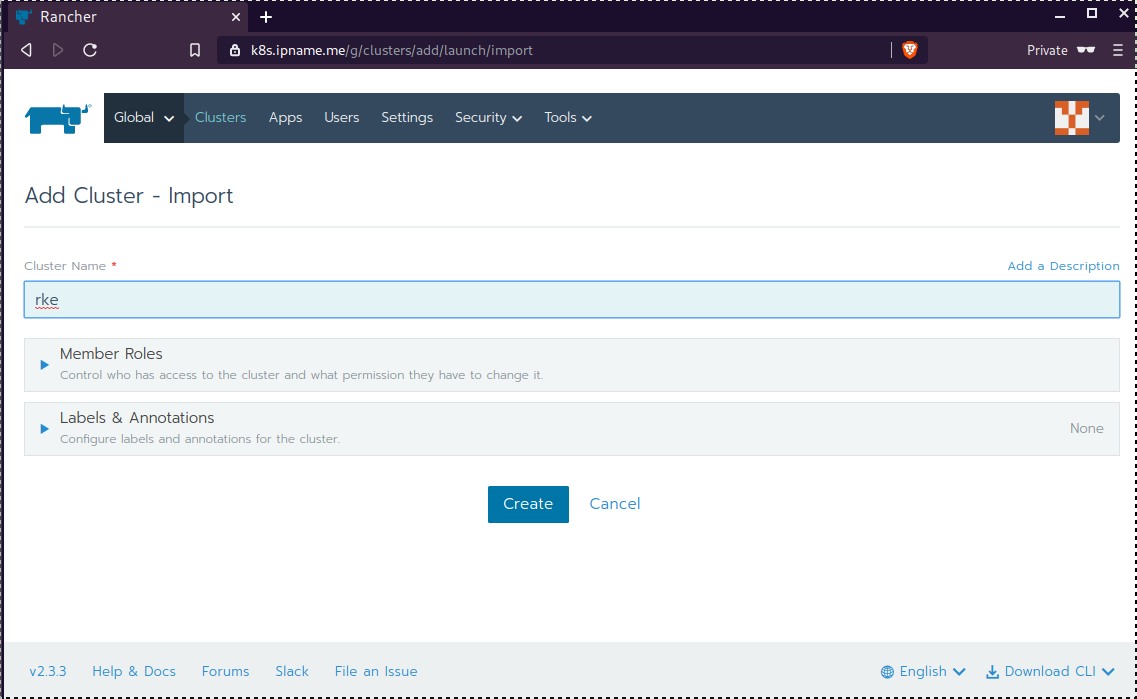
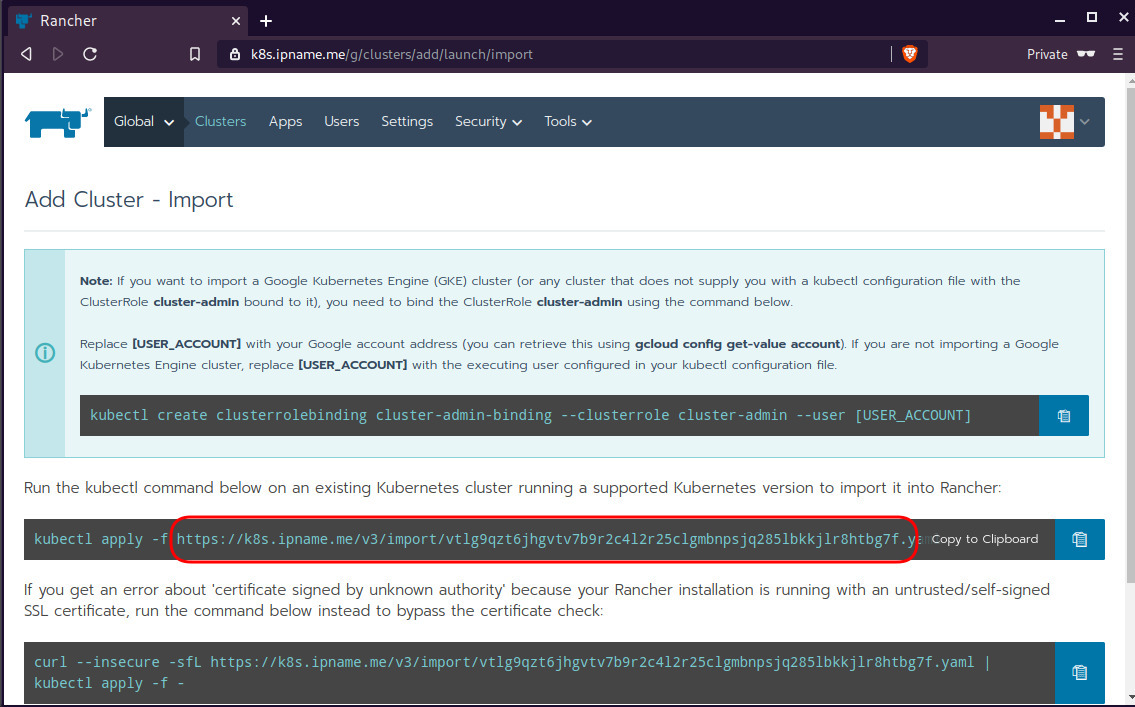
Connect cluster with Rancher2
Download the racnher2 yaml file to your local directory:
$ curl -sLo rancher2.yaml https://k8s.ipname.me/v3/import/nk6p4mg9tzggqscrhh8bzbqdt4447fsffwfm8lms5ghr8r498lngtp.yamlAnd apply this yaml file to your kubernetes cluster:
$ kubectl --kubeconfig=kube_config_cluster.yml apply -f rancher2.yaml
clusterrole.rbac.authorization.k8s.io/proxy-clusterrole-kubeapiserver unchanged
clusterrolebinding.rbac.authorization.k8s.io/proxy-role-binding-kubernetes-master unchanged
namespace/cattle-system unchanged
serviceaccount/cattle unchanged
clusterrolebinding.rbac.authorization.k8s.io/cattle-admin-binding unchanged
secret/cattle-credentials-2704c5f created
clusterrole.rbac.authorization.k8s.io/cattle-admin configured
deployment.apps/cattle-cluster-agent configured
daemonset.apps/cattle-node-agent configuredWeb Gui

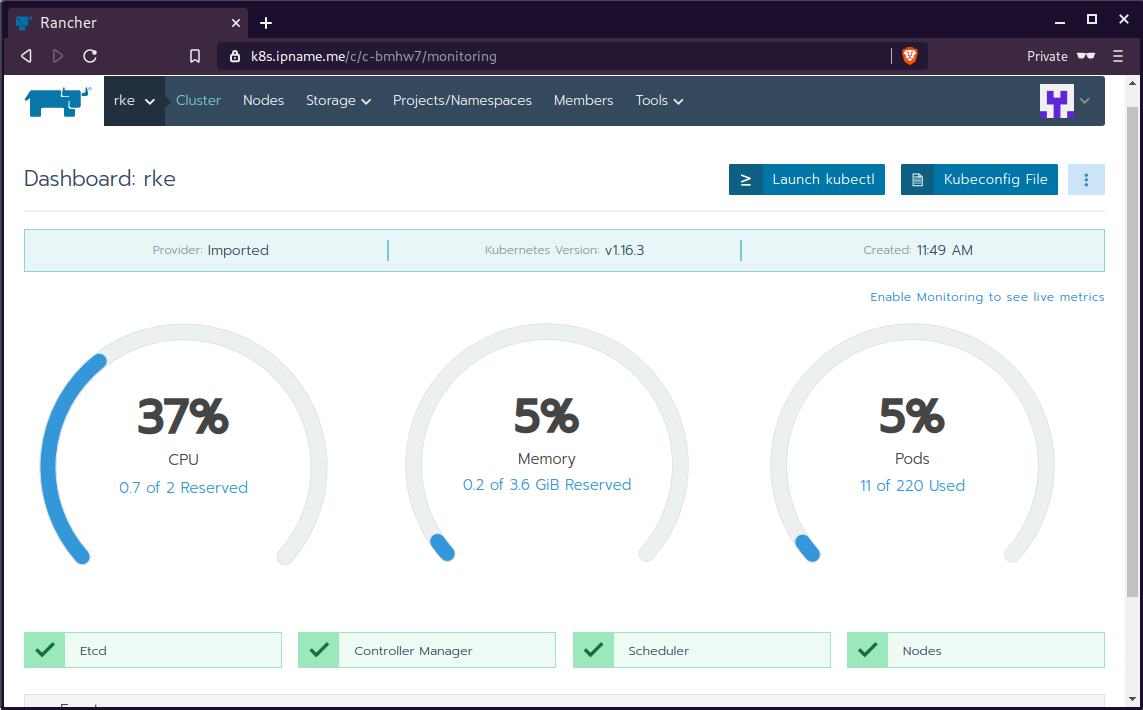
kubectl config
We can now use the Rancher kubectl config by downloading from here:
In this post, it is rancher2.config.yml
helm
Final step is to use helm to install an application to our kubernetes cluster
download and install
$ curl -sfL https://get.helm.sh/helm-v3.0.1-linux-amd64.tar.gz | tar -zxf -
$ chmod +x linux-amd64/helm
$ sudo mv linux-amd64/helm /usr/local/bin/Add Repo
$ helm repo add stable https://kubernetes-charts.storage.googleapis.com/
"stable" has been added to your repositories
$ helm repo update
Hang tight while we grab the latest from your chart repositories...
...
Successfully got an update from the "stable" chart repository
Update Complete. ⎈ Happy Helming!⎈ weave-scope
Install weave scope to rancher:
$ helm --kubeconfig rancher2.config.yml install stable/weave-scope --generate-nameNAME: weave-scope-1575800948
LAST DEPLOYED: Sun Dec 8 12:29:12 2019
NAMESPACE: default
STATUS: deployed
REVISION: 1
NOTES:
You should now be able to access the Scope frontend in your web browser, by
using kubectl port-forward:
kubectl -n default port-forward $(kubectl -n default get endpoints
weave-scope-1575800948-weave-scope -o jsonpath='{.subsets[0].addresses[0].targetRef.name}') 8080:4040
then browsing to http://localhost:8080/.
For more details on using Weave Scope, see the Weave Scope documentation:
https://www.weave.works/docs/scope/latest/introducing/Proxy
Last, we are going to use kubectl to create a forwarder
$ kubectl --kubeconfig=rancher2.config.yml -n default port-forward $(kubectl --kubeconfig=rancher2.config.yml -n default get endpoints weave-scope-1575800948-weave-scope -o jsonpath='{.subsets[0].addresses[0].targetRef.name}') 8080:4040
Forwarding from 127.0.0.1:8080 -> 4040
Forwarding from [::1]:8080 -> 4040
Open your browser in this url:
http://localhost:8080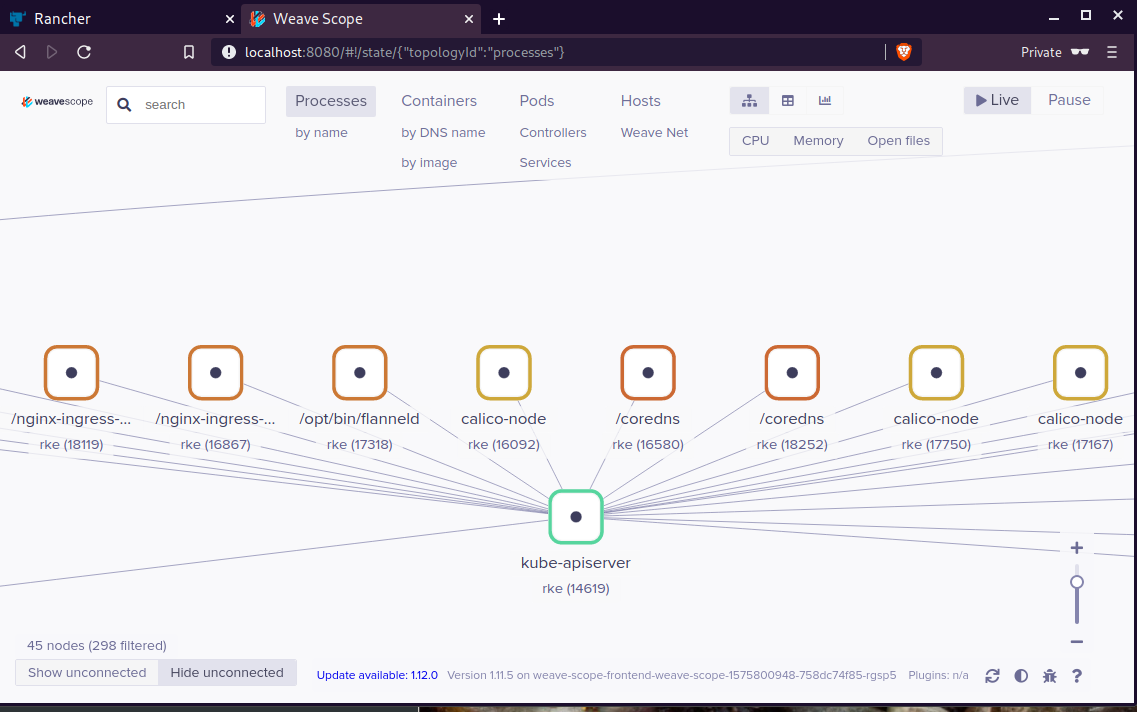
That’s it !
When using tf most of times you need to reuse your Infrastructure as Code, and so your code should be written in such way. In my (very simple) use-case, I need to reuse user-data for cloud-init to setup different VMs but I do not want to rewrite basic/common things every time. Luckily, we can use the template_file.
user-data.yml
In the below yaml file, you will see that we are using tf string-template to produce hostname with this variable:
"${hostname}"here is the file:
#cloud-config
disable_root: true
ssh_pwauth: no
users:
- name: ebal
ssh_import_id:
- gh:ebal
shell: /bin/bash
sudo: ALL=(ALL) NOPASSWD:ALL
# Set TimeZone
timezone: Europe/Athens
hostname: "${hostname}"
# Install packages
packages:
- mlocate
- figlet
# Update/Upgrade & Reboot if necessary
package_update: true
package_upgrade: true
package_reboot_if_required: true
# Remove cloud-init
runcmd:
- figlet "${hostname}" > /etc/motd
- updatedbVariables
Let’s see our tf variables:
$ cat Variables.tfvariable "hcloud_token" {
description = "Hetzner Access API token"
default = ""
}
variable "gandi_api_token" {
description = "Gandi API token"
default = ""
}
variable "domain" {
description = " The domain name "
default = "example.org"
}Terraform Template
So we need to use user-data.yml as a template and replace hostname with var.domain
$ cat example.tfTwo simple steps:
- First we read user-data.yml as template and replace hostname with var.domain
- Then we render the template result to user_data as string
provider "hcloud" {
token = "${var.hcloud_token}"
}
data "template_file" "userdata" {
template = "${file("user-data.yml")}"
vars = {
hostname = "${var.domain}"
}
}
resource "hcloud_server" "node1" {
name = "node1"
image = "ubuntu-18.04"
server_type = "cx11"
user_data = "${data.template_file.userdata.rendered}"
}$ terraform version
Terraform v0.12.3And that’s it !
Using Terraform by HashiCorp and cloud-init on Hetzner cloud provider.
Nowadays with the help of modern tools, we use our infrastructure as code. This approach is very useful because we can have Immutable design with our infra by declaring the state would like our infra to be. This also provide us with flexibility and a more generic way on how to handle our infra as lego bricks, especially on scaling.
UPDATE: 2019.01.22
Hetzner
We need to create an Access API Token within a new project under the console of hetzner cloud.
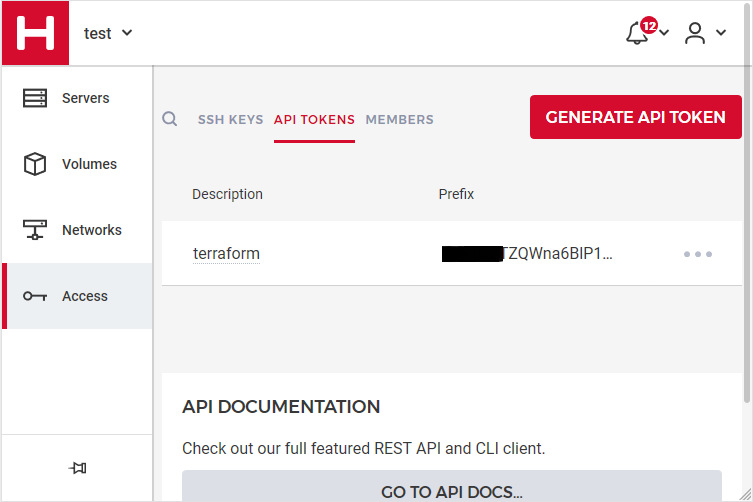
Copy this token and with that in place we can continue with terraform.
For the purposes of this article, I am going to use as the API token: 01234567890
Install Terraform
the latest terraform version at the time of writing this blog post is: v.11.11
$ curl -sL https://releases.hashicorp.com/terraform/0.11.11/terraform_0.11.11_linux_amd64.zip |
bsdtar -xf- && chmod +x terraform
$ sudo mv terraform /usr/local/bin/and verify it
$ terraform versionTerraform v0.11.11
Terraform Provider for Hetzner Cloud
To use the hetzner cloud via terraform, we need the terraform-provider-hcloud plugin.
hcloud, is part of terraform providers repository. So the first time of initialize our project, terraform will download this plugin locally.
Initializing provider plugins...
- Checking for available provider plugins on https://releases.hashicorp.com...
- Downloading plugin for provider "hcloud" (1.7.0)...
...
* provider.hcloud: version = "~> 1.7"
Compile hcloud
If you like, you can always build hcloud from the source code.
There are notes on how to build the plugin here Terraform Hetzner Cloud provider.
GitLab CI
or you can even download the artifact from my gitlab-ci repo.
Plugin directory
You will find the terraform hcloud plugin under your current directory:
./.terraform/plugins/linux_amd64/terraform-provider-hcloud_v1.7.0_x4
I prefer to copy the tf plugins centralized under my home directory:
$ mkdir -pv ~/.terraform/plugins/linux_amd64/
$ mv ./.terraform/plugins/linux_amd64/terraform-provider-hcloud_v1.7.0_x4 ~/.terraform.d/plugins/linux_amd64/terraform-provider-hcloudor if you choose the artifact from gitlab:
$ curl -sL -o ~/.terraform/plugins/linux_amd64/terraform-provider-hcloud https://gitlab.com/ebal/terraform-provider-hcloud-ci/-/jobs/artifacts/master/raw/bin/terraform-provider-hcloud?job=run-buildThat said, when working with multiple terraform projects you may be in a position that you need different versions of the same tf-plugin. In that case it is better to have them under your current working directory/project instead of your home directory. Perhaps one project needs v1.2.3 and another v4.5.6 of the same tf-plugin.
Hetzner Cloud API
Here is a few examples on how to use the Hetzner Cloud API:
$ export -p API_TOKEN="01234567890"
$ curl -sH "Authorization: Bearer $API_TOKEN" https://api.hetzner.cloud/v1/datacenters | jq -r .datacenters[].name
fsn1-dc8
nbg1-dc3
hel1-dc2
fsn1-dc14$ curl -sH "Authorization: Bearer $API_TOKEN" https://api.hetzner.cloud/v1/locations | jq -r .locations[].name
fsn1
nbg1
hel1$ curl -sH "Authorization: Bearer $API_TOKEN" https://api.hetzner.cloud/v1/images | jq -r .images[].name
ubuntu-16.04
debian-9
centos-7
fedora-27
ubuntu-18.04
fedora-28
hetzner.tf
At this point, we are ready to write our terraform file.
It can be as simple as this (CentOS 7):
# Set the variable value in *.tfvars file
# or using -var="hcloud_token=..." CLI option
variable "hcloud_token" {}
# Configure the Hetzner Cloud Provider
provider "hcloud" {
token = "${var.hcloud_token}"
}
# Create a new server running centos
resource "hcloud_server" "node1" {
name = "node1"
image = "centos-7"
server_type = "cx11"
}
Project_Ebal
or a more complex config: Ubuntu 18.04 LTS
# Project_Ebal
variable "hcloud_token" {}
# Configure the Hetzner Cloud Provider
provider "hcloud" {
token = "${var.hcloud_token}"
}
# Create a new server running centos
resource "hcloud_server" "Project_Ebal" {
name = "ebal_project"
image = "ubuntu-18.04"
server_type = "cx11"
location = "nbg1"
}
Repository Structure
Although in this blog post we have a small and simple example of using hetzner cloud with terraform, on larger projects is usually best to have separated terraform files for variables, code and output. For more info, you can take a look here: VCS Repository Structure - Workspaces
├── variables.tf
├── main.tf
├── outputs.tf
Cloud-init
To use cloud-init with hetzner is very simple.
We just need to add this declaration user_data = "${file("user-data.yml")}" to terraform file.
So our previous tf is now this:
# Project_Ebal
variable "hcloud_token" {}
# Configure the Hetzner Cloud Provider
provider "hcloud" {
token = "${var.hcloud_token}"
}
# Create a new server running centos
resource "hcloud_server" "Project_Ebal" {
name = "ebal_project"
image = "ubuntu-18.04"
server_type = "cx11"
location = "nbg1"
user_data = "${file("user-data.yml")}"
}to get the IP_Address of the virtual machine, I would also like to have an output declaration:
output "ipv4_address" {
value = "${hcloud_server.ebal_project.ipv4_address}"
}
Clout-init
You will find more notes on cloud-init on a previous blog post: Cloud-init with CentOS 7.
below is an example of user-data.yml
#cloud-config
disable_root: true
ssh_pwauth: no
users:
- name: ubuntu
ssh_import_id:
- gh:ebal
shell: /bin/bash
sudo: ALL=(ALL) NOPASSWD:ALL
# Set TimeZone
timezone: Europe/Athens
# Install packages
packages:
- mlocate
- vim
- figlet
# Update/Upgrade & Reboot if necessary
package_update: true
package_upgrade: true
package_reboot_if_required: true
# Remove cloud-init
runcmd:
- figlet Project_Ebal > /etc/motd
- updatedb
Terraform
First thing with terraform is to initialize our environment.
Init
$ terraform init
Initializing provider plugins...
Terraform has been successfully initialized!
You may now begin working with Terraform. Try running "terraform plan" to see
any changes that are required for your infrastructure. All Terraform commands
should now work.
If you ever set or change modules or backend configuration for Terraform,
rerun this command to reinitialize your working directory. If you forget, other
commands will detect it and remind you to do so if necessary.
Plan
Of course it is not necessary to plan and then plan with out.
You can skip this step, here exist only for documentation purposes.
$ terraform plan
Refreshing Terraform state in-memory prior to plan...
The refreshed state will be used to calculate this plan, but will not be
persisted to local or remote state storage.
------------------------------------------------------------------------
An execution plan has been generated and is shown below.
Resource actions are indicated with the following symbols:
+ create
Terraform will perform the following actions:
+ hcloud_server.ebal_project
id: <computed>
backup_window: <computed>
backups: "false"
datacenter: <computed>
image: "ubuntu-18.04"
ipv4_address: <computed>
ipv6_address: <computed>
ipv6_network: <computed>
keep_disk: "false"
location: "nbg1"
name: "ebal_project"
server_type: "cx11"
status: <computed>
user_data: "sk6134s+ys+wVdGITc+zWhbONYw="
Plan: 1 to add, 0 to change, 0 to destroy.
------------------------------------------------------------------------
Note: You didn't specify an "-out" parameter to save this plan, so Terraform
can't guarantee that exactly these actions will be performed if
"terraform apply" is subsequently run.
Out
$ terraform plan -out terraform.tfplan
Refreshing Terraform state in-memory prior to plan...
The refreshed state will be used to calculate this plan, but will not be
persisted to local or remote state storage.
------------------------------------------------------------------------
An execution plan has been generated and is shown below.
Resource actions are indicated with the following symbols:
+ create
Terraform will perform the following actions:
+ hcloud_server.ebal_project
id: <computed>
backup_window: <computed>
backups: "false"
datacenter: <computed>
image: "ubuntu-18.04"
ipv4_address: <computed>
ipv6_address: <computed>
ipv6_network: <computed>
keep_disk: "false"
location: "nbg1"
name: "ebal_project"
server_type: "cx11"
status: <computed>
user_data: "sk6134s+ys+wVdGITc+zWhbONYw="
Plan: 1 to add, 0 to change, 0 to destroy.
------------------------------------------------------------------------
This plan was saved to: terraform.tfplan
To perform exactly these actions, run the following command to apply:
terraform apply "terraform.tfplan"
Apply
$ terraform apply "terraform.tfplan"
hcloud_server.ebal_project: Creating...
backup_window: "" => "<computed>"
backups: "" => "false"
datacenter: "" => "<computed>"
image: "" => "ubuntu-18.04"
ipv4_address: "" => "<computed>"
ipv6_address: "" => "<computed>"
ipv6_network: "" => "<computed>"
keep_disk: "" => "false"
location: "" => "nbg1"
name: "" => "ebal_project"
server_type: "" => "cx11"
status: "" => "<computed>"
user_data: "" => "sk6134s+ys+wVdGITc+zWhbONYw="
hcloud_server.ebal_project: Still creating... (10s elapsed)
hcloud_server.ebal_project: Still creating... (20s elapsed)
hcloud_server.ebal_project: Creation complete after 23s (ID: 1676988)
Apply complete! Resources: 1 added, 0 changed, 0 destroyed.
Outputs:
ipv4_address = 1.2.3.4
SSH and verify cloud-init
$ ssh 1.2.3.4 -l ubuntu
Welcome to Ubuntu 18.04.1 LTS (GNU/Linux 4.15.0-43-generic x86_64)
* Documentation: https://help.ubuntu.com
* Management: https://landscape.canonical.com
* Support: https://ubuntu.com/advantage
System information as of Fri Jan 18 12:17:14 EET 2019
System load: 0.41 Processes: 89
Usage of /: 9.7% of 18.72GB Users logged in: 0
Memory usage: 8% IP address for eth0: 1.2.3.4
Swap usage: 0%
0 packages can be updated.
0 updates are security updates.

Destroy
Be Careful without providing a specific terraform out plan, terraform will destroy every tfplan within your working directory/project. So it is always a good practice to explicit destroy a specify resource/tfplan.
$ terraform destroy should better be:
$ terraform destroy -out terraform.tfplan
hcloud_server.ebal_project: Refreshing state... (ID: 1676988)
An execution plan has been generated and is shown below.
Resource actions are indicated with the following symbols:
- destroy
Terraform will perform the following actions:
- hcloud_server.ebal_project
Plan: 0 to add, 0 to change, 1 to destroy.
Do you really want to destroy all resources?
Terraform will destroy all your managed infrastructure, as shown above.
There is no undo. Only 'yes' will be accepted to confirm.
Enter a value: yes
hcloud_server.ebal_project: Destroying... (ID: 1676988)
hcloud_server.ebal_project: Destruction complete after 1s
Destroy complete! Resources: 1 destroyed.
That’s it !
This blog post, contains my notes on working with Gandi through Terraform. I’ve replaced my domain name with: example.com put pretty much everything should work as advertised.
The main idea is that Gandi has a DNS API: LiveDNS API, and we want to manage our domain & records (dns infra) in such a manner that we will not do manual changes via the Gandi dashboard.
Terraform
Although this is partial a terraform blog post, I will not get into much details on terraform. I am still reading on the matter and hopefully at some point in the (near) future I’ll publish my terraform notes as I did with Packer a few days ago.
Installation
Download the latest golang static 64bit binary and install it to our system
$ curl -sLO https://releases.hashicorp.com/terraform/0.11.7/terraform_0.11.7_linux_amd64.zip
$ unzip terraform_0.11.7_linux_amd64.zip
$ sudo mv terraform /usr/local/bin/
Version
Verify terraform by checking the version
$ terraform version
Terraform v0.11.7
Terraform Gandi Provider
There is a community terraform provider for gandi: Terraform provider for the Gandi LiveDNS by Sébastien Maccagnoni (aka tiramiseb) that is simple and straightforward.
Build
To build the provider, follow the notes on README
You can build gandi provider in any distro and just copy the binary to your primary machine/server or build box.
Below my personal (docker) notes:
$ mkdir -pv /root/go/src/
$ cd /root/go/src/
$ git clone https://github.com/tiramiseb/terraform-provider-gandi.git
Cloning into 'terraform-provider-gandi'...
remote: Counting objects: 23, done.
remote: Total 23 (delta 0), reused 0 (delta 0), pack-reused 23
Unpacking objects: 100% (23/23), done.
$ cd terraform-provider-gandi/
$ go get
$ go build -o terraform-provider-gandi
$ ls -l terraform-provider-gandi
-rwxr-xr-x 1 root root 25788936 Jun 12 16:52 terraform-provider-gandiCopy terraform-provider-gandi to the same directory as terraform binary.
Gandi API Token
Login into your gandi account, go through security
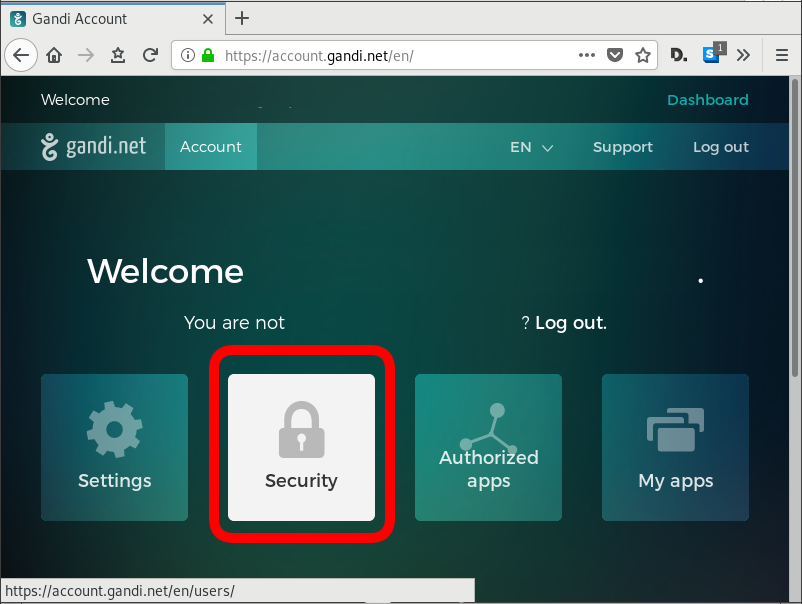
and retrieve your API token
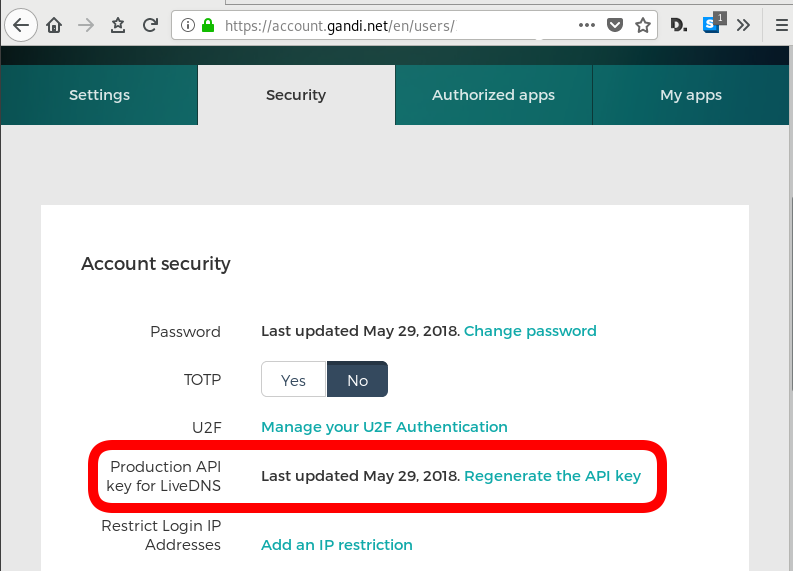
The Token should be a long alphanumeric string.
Repo Structure
Let’s create a simple repo structure. Terraform will read all files from our directory that ends with .tf
$ tree
.
├── main.tf
└── vars.tf- main.tf will hold our dns infra
- vars.tf will have our variables
Files
vars.tf
variable "gandi_api_token" {
description = "A Gandi API token"
}
variable "domain" {
description = " The domain name of the zone "
default = "example.com"
}
variable "TTL" {
description = " The default TTL of zone & records "
default = "3600"
}
variable "github" {
description = "Setting up an apex domain on Microsoft GitHub"
type = "list"
default = [
"185.199.108.153",
"185.199.109.153",
"185.199.110.153",
"185.199.111.153"
]
}
main.tf
# Gandi
provider "gandi" {
key = "${var.gandi_api_token}"
}
# Zone
resource "gandi_zone" "domain_tld" {
name = "${var.domain} Zone"
}
# Domain is always attached to a zone
resource "gandi_domainattachment" "domain_tld" {
domain = "${var.domain}"
zone = "${gandi_zone.domain_tld.id}"
}
# DNS Records
resource "gandi_zonerecord" "mx" {
zone = "${gandi_zone.domain_tld.id}"
name = "@"
type = "MX"
ttl = "${var.TTL}"
values = [ "10 example.com."]
}
resource "gandi_zonerecord" "web" {
zone = "${gandi_zone.domain_tld.id}"
name = "web"
type = "CNAME"
ttl = "${var.TTL}"
values = [ "test.example.com." ]
}
resource "gandi_zonerecord" "www" {
zone = "${gandi_zone.domain_tld.id}"
name = "www"
type = "CNAME"
ttl = "${var.TTL}"
values = [ "${var.domain}." ]
}
resource "gandi_zonerecord" "origin" {
zone = "${gandi_zone.domain_tld.id}"
name = "@"
type = "A"
ttl = "${var.TTL}"
values = [ "${var.github}" ]
}
Variables
By declaring these variables, in vars.tf, we can use them in main.tf.
- gandi_api_token - The Gandi API Token
- domain - The Domain Name of the zone
- TTL - The default TimeToLive for the zone and records
- github - This is a list of IPs that we want to use for our site.
Main
Our zone should have four DNS record types. The gandi_zonerecord is the terraform resource and the second part is our local identifier. Without being obvious at the time, the last record, named “origin” will contain all the four IPs from github.
- gandi_zonerecord” “mx”
- gandi_zonerecord” “web”
- gandi_zonerecord” “www”
- gandi_zonerecord” “origin”
Zone
In other (dns) words , the state of our zone should be:
example.com. 3600 IN MX 10 example.com
web.example.com. 3600 IN CNAME test.example.com.
www.example.com. 3600 IN CNAME example.com.
example.com. 3600 IN A 185.199.108.153
example.com. 3600 IN A 185.199.109.153
example.com. 3600 IN A 185.199.110.153
example.com. 3600 IN A 185.199.111.153
Environment
We haven’t yet declared anywhere in our files the gandi api token. This is by design. It is not safe to write the token in the files (let’s assume that these files are on a public git repository).
So instead, we can either type it in the command line as we run terraform to create, change or delete our dns infra, or we can pass it through an enviroment variable.
export TF_VAR_gandi_api_token="XXXXXXXX"
Verbose Logging
I prefer to have debug on, and appending all messages to a log file:
export TF_LOG="DEBUG"
export TF_LOG_PATH=./terraform.log
Initialize
Ready to start with our setup. First things first, lets initialize our repo.
terraform initthe output should be:
Initializing provider plugins...
Terraform has been successfully initialized!
You may now begin working with Terraform. Try running "terraform plan" to see
any changes that are required for your infrastructure. All Terraform commands
should now work.
If you ever set or change modules or backend configuration for Terraform,
rerun this command to reinitialize your working directory. If you forget, other
commands will detect it and remind you to do so if necessary.
Planning
Next thing , we have to plan !
terraform planFirst line is:
Refreshing Terraform state in-memory prior to plan...
the rest should be:
An execution plan has been generated and is shown below.
Resource actions are indicated with the following symbols:
+ create
Terraform will perform the following actions:
+ gandi_domainattachment.domain_tld
id: <computed>
domain: "example.com"
zone: "${gandi_zone.domain_tld.id}"
+ gandi_zone.domain_tld
id: <computed>
name: "example.com Zone"
+ gandi_zonerecord.mx
id: <computed>
name: "@"
ttl: "3600"
type: "MX"
values.#: "1"
values.3522983148: "10 example.com."
zone: "${gandi_zone.domain_tld.id}"
+ gandi_zonerecord.origin
id: <computed>
name: "@"
ttl: "3600"
type: "A"
values.#: "4"
values.1201759686: "185.199.109.153"
values.226880543: "185.199.111.153"
values.2365437539: "185.199.108.153"
values.3336126394: "185.199.110.153"
zone: "${gandi_zone.domain_tld.id}"
+ gandi_zonerecord.web
id: <computed>
name: "web"
ttl: "3600"
type: "CNAME"
values.#: "1"
values.921960212: "test.example.com."
zone: "${gandi_zone.domain_tld.id}"
+ gandi_zonerecord.www
id: <computed>
name: "www"
ttl: "3600"
type: "CNAME"
values.#: "1"
values.3477242478: "example.com."
zone: "${gandi_zone.domain_tld.id}"
Plan: 6 to add, 0 to change, 0 to destroy.so the plan is Plan: 6 to add !
State
Let’s get back to this msg.
Refreshing Terraform state in-memory prior to plan...
Terraform are telling us, that is refreshing the state.
What does this mean ?
Terraform is Declarative.
That means that terraform is interested only to implement our plan. But needs to know the previous state of our infrastracture. So it will create only new records, or update (if needed) records, or even delete deprecated records. Even so, needs to know the current state of our dns infra (zone/records).
Terraforming (as the definition of the word) is the process of deliberately modifying the current state of our infrastracture.
Import
So we need to get the current state to a local state and re-plan our terraformation.
$ terraform import gandi_domainattachment.domain_tld example.comgandi_domainattachment.domain_tld: Importing from ID "example.com"...
gandi_domainattachment.domain_tld: Import complete!
Imported gandi_domainattachment (ID: example.com)
gandi_domainattachment.domain_tld: Refreshing state... (ID: example.com)
Import successful!
The resources that were imported are shown above. These resources are now in
your Terraform state and will henceforth be managed by Terraform.How import works ?
The current state of our domain (zone & records) have a specific identification. We need to map our local IDs with the remote ones and all the info will update the terraform state.
So the previous import command has three parts:
Gandi Resouce .Local ID Remote ID
gandi_domainattachment.domain_tld example.comTerraform State
The successful import of the domain attachment, creates a local terraform state file terraform.tfstate:
$ cat terraform.tfstate {
"version": 3,
"terraform_version": "0.11.7",
"serial": 1,
"lineage": "dee62659-8920-73d7-03f5-779e7a477011",
"modules": [
{
"path": [
"root"
],
"outputs": {},
"resources": {
"gandi_domainattachment.domain_tld": {
"type": "gandi_domainattachment",
"depends_on": [],
"primary": {
"id": "example.com",
"attributes": {
"domain": "example.com",
"id": "example.com",
"zone": "XXXXXXXX-6bd2-11e8-XXXX-00163ee24379"
},
"meta": {},
"tainted": false
},
"deposed": [],
"provider": "provider.gandi"
}
},
"depends_on": []
}
]
}
Import All Resources
Reading through the state file, we see that our zone has also an ID:
"zone": "XXXXXXXX-6bd2-11e8-XXXX-00163ee24379"We should use this ID to import all resources.
Zone Resource
Import the gandi zone resource:
terraform import gandi_zone.domain_tld XXXXXXXX-6bd2-11e8-XXXX-00163ee24379
DNS Records
As we can see above in DNS section, we have four (4) dns records and when importing resources, we need to add their path after the ID.
eg.
for MX is /@/MX
for web is /web/CNAME
etc
terraform import gandi_zonerecord.mx XXXXXXXX-6bd2-11e8-XXXX-00163ee24379/@/MX
terraform import gandi_zonerecord.web XXXXXXXX-6bd2-11e8-XXXX-00163ee24379/web/CNAME
terraform import gandi_zonerecord.www XXXXXXXX-6bd2-11e8-XXXX-00163ee24379/www/CNAME
terraform import gandi_zonerecord.origin XXXXXXXX-6bd2-11e8-XXXX-00163ee24379/@/A
Re-Planning
Okay, we have imported our dns infra state to a local file.
Time to plan once more:
$ terraform planPlan: 2 to add, 1 to change, 0 to destroy.
Save Planning
We can save our plan:
$ terraform plan -out terraform.tfplan
Apply aka run our plan
We can now apply our plan to our dns infra, the gandi provider.
$ terraform applyDo you want to perform these actions?
Terraform will perform the actions described above.
Only 'yes' will be accepted to approve.
Enter a value: To Continue, we need to type: yes
Non Interactive
or we can use our already saved plan to run without asking:
$ terraform apply "terraform.tfplan"gandi_zone.domain_tld: Modifying... (ID: XXXXXXXX-6bd2-11e8-XXXX-00163ee24379)
name: "example.com zone" => "example.com Zone"
gandi_zone.domain_tld: Modifications complete after 2s (ID: XXXXXXXX-6bd2-11e8-XXXX-00163ee24379)
gandi_domainattachment.domain_tld: Creating...
domain: "" => "example.com"
zone: "" => "XXXXXXXX-6bd2-11e8-XXXX-00163ee24379"
gandi_zonerecord.www: Creating...
name: "" => "www"
ttl: "" => "3600"
type: "" => "CNAME"
values.#: "" => "1"
values.3477242478: "" => "example.com."
zone: "" => "XXXXXXXX-6bd2-11e8-XXXX-00163ee24379"
gandi_domainattachment.domain_tld: Creation complete after 0s (ID: example.com)
gandi_zonerecord.www: Creation complete after 1s (ID: XXXXXXXX-6bd2-11e8-XXXX-00163ee24379/www/CNAME)Apply complete! Resources: 2 added, 1 changed, 0 destroyed.