(this is a copy of my git repo of this post)
https://github.com/ebal/k8s_cluster/
Kubernetes, also known as k8s, is an open-source system for automating deployment, scaling, and management of containerized applications.
Notice The initial (old) blog post with ubuntu 22.04 is (still) here: blog post
- Prerequisites
- Git Terraform Code for the kubernetes cluster
- Control-Plane Node
- Ports on the control-plane node
- Firewall on the control-plane node
- Hosts file in the control-plane node
- Updating your hosts file
- No Swap on the control-plane node
- Kernel modules on the control-plane node
- NeedRestart on the control-plane node
- temporarily
- permanently
- Installing a Container Runtime on the control-plane node
- Installing kubeadm, kubelet and kubectl on the control-plane node
- Get kubernetes admin configuration images
- Initializing the control-plane node
- Create user access config to the k8s control-plane node
- Verify the control-plane node
- Install an overlay network provider on the control-plane node
- Verify CoreDNS is running on the control-plane node
- Worker Nodes
- Get Token from the control-plane node
- Is the kubernetes cluster running ?
- Kubernetes Dashboard
- Helm
- Install kubernetes dashboard
- Accessing Dashboard via a NodePort
- Patch kubernetes-dashboard
- Edit kubernetes-dashboard Service
- Accessing Kubernetes Dashboard
- Create An Authentication Token (RBAC)
- Creating a Service Account
- Creating a ClusterRoleBinding
- Getting a Bearer Token
- Browsing Kubernetes Dashboard
- Nginx App
- That’s it
In this blog post, I’ll share my personal notes on setting up a kubernetes cluster using kubeadm on Ubuntu 24.04 LTS Virtual Machines.
For this setup, I will use three (3) Virtual Machines in my local lab. My home lab is built on libvirt with QEMU/KVM (Kernel-based Virtual Machine), and I use Terraform as the infrastructure provisioning tool.
Prerequisites
- at least 3 Virtual Machines of Ubuntu 24.04 (one for control-plane, two for worker nodes)
- 2GB (or more) of RAM on each Virtual Machine
- 2 CPUs (or more) on each Virtual Machine
- 20Gb of hard disk on each Virtual Machine
- No SWAP partition/image/file on each Virtual Machine
Streamline the lab environment
To simplify the Terraform code for the libvirt/QEMU Kubernetes lab, I’ve made a few adjustments so that all of the VMs use the below default values:
- ssh port: 22/TCP
- volume size: 40G
- memory: 4096
- cpu: 4
Review the values and adjust them according to your requirements and limitations.
Git Terraform Code for the kubernetes cluster
I prefer maintaining a reproducible infrastructure so that I can quickly create and destroy my test lab. My approach involves testing each step, so I often destroy everything, copy and paste commands, and move forward. I use Terraform to provision the infrastructure. You can find the full Terraform code for the Kubernetes cluster here: k8s cluster - Terraform code.
If you do not use terraform, skip this step!
You can git clone the repo to review and edit it according to your needs.
git clone https://github.com/ebal/k8s_cluster.git
cd tf_libvirt
You will need to make appropriate changes. Open Variables.tf for that. The most important option to change, is the User option. Change it to your github username and it will download and setup the VMs with your public key, instead of mine!
But pretty much, everything else should work out of the box. Change the vmem and vcpu settings to your needs.
Initilaze the working directory
Init terraform before running the below shell script.
This action will download in your local directory all the required teffarorm providers or modules.
terraform init
Ubuntu 24.04 Image
Before proceeding with creating the VMs, we need to ensure that the Ubuntu 24.04 image is available on our system, or modify the code to download it from the internet.
In Variables.tf terraform file, you will notice the below entries
# The image source of the VM
# cloud_image = "https://cloud-images.ubuntu.com/oracular/current/focal-server-cloudimg-amd64.img"
cloud_image = "../oracular-server-cloudimg-amd64.img"
If you do not want to download the Ubuntu 24.04 cloud server image then make the below change
# The image source of the VM
cloud_image = "https://cloud-images.ubuntu.com/oracular/current/focal-server-cloudimg-amd64.img"
# cloud_image = "../oracular-server-cloudimg-amd64.img"
otherwise you need to download it, in the upper directory, to speed things up
cd ../
IMAGE="oracular" # 24.04
curl -sLO https://cloud-images.ubuntu.com/${IMAGE}/current/${IMAGE}-server-cloudimg-amd64.img
cd -

ls -l ../oracular-server-cloudimg-amd64.img
Spawn the VMs
We are ready to spawn our 3 VMs by running terraform plan & terraform apply
./start.sh
output should be something like:
...
Apply complete! Resources: 16 added, 0 changed, 0 destroyed.

Outputs:

VMs = [
  "192.168.122.223 k8scpnode1",
  "192.168.122.50  k8swrknode1",
  "192.168.122.10  k8swrknode2",
]
Verify that you have ssh access to the VMs
eg.
ssh ubuntu@192.168.122.223
Replace the IP with the one provided in the output.
DISCLAIMER if something failed, destroy everything with ./destroy.sh to remove any garbages before run ./start.sh again!!
Control-Plane Node
Let’s now begin configuring the Kubernetes control-plane node.
Ports on the control-plane node
Kubernetes runs a few services that needs to be accessable from the worker nodes.
| Protocol | Direction | Port Range | Purpose | Used By |
|---|---|---|---|---|
| TCP | Inbound | 6443 | Kubernetes API server | All |
| TCP | Inbound | 2379-2380 | etcd server client API | kube-apiserver, etcd |
| TCP | Inbound | 10250 | Kubelet API | Self, Control plane |
| TCP | Inbound | 10259 | kube-scheduler | Self |
| TCP | Inbound | 10257 | kube-controller-manager | Self |
Although etcd ports are included in control plane section, you can also host your
own etcd cluster externally or on custom ports.
Firewall on the control-plane node
We need to open the necessary ports on the CP’s (control-plane node) firewall.
sudo ufw allow 6443/tcp
sudo ufw allow 2379:2380/tcp
sudo ufw allow 10250/tcp
sudo ufw allow 10259/tcp
sudo ufw allow 10257/tcp

# sudo ufw disable
sudo ufw status
the output should be
To                         Action      From
--                         ------      ----
22/tcp                     ALLOW       Anywhere
6443/tcp                   ALLOW       Anywhere
2379:2380/tcp              ALLOW       Anywhere
10250/tcp                  ALLOW       Anywhere
10259/tcp                  ALLOW       Anywhere
10257/tcp                  ALLOW       Anywhere
22/tcp (v6)                ALLOW       Anywhere (v6)
6443/tcp (v6)              ALLOW       Anywhere (v6)
2379:2380/tcp (v6)         ALLOW       Anywhere (v6)
10250/tcp (v6)             ALLOW       Anywhere (v6)
10259/tcp (v6)             ALLOW       Anywhere (v6)
10257/tcp (v6)             ALLOW       Anywhere (v6)
Hosts file in the control-plane node
We need to update the /etc/hosts with the internal IP and hostname.
This will help when it is time to join the worker nodes.
echo $(hostname -I) $(hostname) | sudo tee -a /etc/hosts
Just a reminder: we need to update the hosts file to all the VMs.
To include all the VMs’ IPs and hostnames.
If you already know them, then your /etc/hosts file should look like this:
192.168.122.223 k8scpnode1
192.168.122.50  k8swrknode1
192.168.122.10  k8swrknode2
replace the IPs to yours.
Updating your hosts file
if you already the IPs of your VMs, run the below script to ALL 3 VMs
sudo tee -a /etc/hosts <<EOF

192.168.122.223 k8scpnode1
192.168.122.50  k8swrknode1
192.168.122.10  k8swrknode2
EOF
No Swap on the control-plane node
Be sure that SWAP is disabled in all virtual machines!
sudo swapoff -a
and the fstab file should not have any swap entry.
The below command should return nothing.
sudo grep -i swap /etc/fstab
If not, edit the /etc/fstab and remove the swap entry.
If you follow my terraform k8s code example from the above github repo,
you will notice that there isn’t any swap entry in the cloud init (user-data) file.
Nevertheless it is always a good thing to douple check.
Kernel modules on the control-plane node
We need to load the below kernel modules on all k8s nodes, so k8s can create some network magic!
- overlay
- br_netfilter
Run the below bash snippet that will do that, and also will enable the forwarding features of the network.
sudo tee /etc/modules-load.d/kubernetes.conf <<EOF
overlay
br_netfilter
EOF

sudo modprobe overlay
sudo modprobe br_netfilter

sudo lsmod | grep netfilter

sudo tee /etc/sysctl.d/kubernetes.conf <<EOF
net.bridge.bridge-nf-call-ip6tables = 1
net.bridge.bridge-nf-call-iptables = 1
net.ipv4.ip_forward = 1
EOF

sudo sysctl --system
NeedRestart on the control-plane node
Before installing any software, we need to make a tiny change to needrestart program. This will help with the automation of installing packages and will stop asking -via dialog- if we would like to restart the services!
temporarily
export -p NEEDRESTART_MODE="a"
permanently
a more permanent way, is to update the configuration file
echo "$nrconf{restart} = 'a';" | sudo tee -a /etc/needrestart/needrestart.conf
Installing a Container Runtime on the control-plane node
It is time to choose which container runtime we are going to use on our k8s cluster. There are a few container runtimes for k8s and in the past docker were used to. Nowadays the most common runtime is the containerd that can also uses the cgroup v2 kernel features. There is also a docker-engine runtime via CRI. Read here for more details on the subject.
curl -sL https://download.docker.com/linux/ubuntu/gpg | sudo gpg --dearmor -o /etc/apt/trusted.gpg.d/docker-keyring.gpg

sudo apt-add-repository -y "deb https://download.docker.com/linux/ubuntu oracular stable"

sleep 3

sudo apt-get -y install containerd.io

containerd config default
 | sed 's/SystemdCgroup = false/SystemdCgroup = true/'
 | sudo tee /etc/containerd/config.toml

sudo systemctl restart containerd.service
You can find the containerd configuration file here:
/etc/containerd/config.toml
In earlier versions of ubuntu we should enable the systemd cgroup driver.
Recomendation from official documentation is:
It is best to use cgroup v2, use the systemd cgroup driver instead of cgroupfs.
Starting with v1.22 and later, when creating a cluster with kubeadm, if the user does not set the cgroupDriver field under KubeletConfiguration, kubeadm defaults it to systemd.
Installing kubeadm, kubelet and kubectl on the control-plane node
Install the kubernetes packages (kubedam, kubelet and kubectl) by first adding the k8s repository on our virtual machine. To speed up the next step, we will also download the configuration container images.
This guide is using kubeadm, so we need to check the latest version.
Kubernetes v1.31 is the latest version when this guide was written.
VERSION="1.31"

curl -fsSL https://pkgs.k8s.io/core:/stable:/v${VERSION}/deb/Release.key | sudo gpg --dearmor -o /etc/apt/keyrings/kubernetes-apt-keyring.gpg

# allow unprivileged APT programs to read this keyring
sudo chmod 0644 /etc/apt/keyrings/kubernetes-apt-keyring.gpg

# This overwrites any existing configuration in /etc/apt/sources.list.d/kubernetes.list
echo "deb [signed-by=/etc/apt/keyrings/kubernetes-apt-keyring.gpg] https://pkgs.k8s.io/core:/stable:/v${VERSION}/deb/ /" | sudo tee /etc/apt/sources.list.d/kubernetes.list

# helps tools such as command-not-found to work correctly
sudo chmod 0644 /etc/apt/sources.list.d/kubernetes.list

sleep 2

sudo apt-get update
sudo apt-get install -y kubelet kubeadm kubectl
Get kubernetes admin configuration images
Retrieve the Kubernetes admin configuration images.
sudo kubeadm config images pull
Initializing the control-plane node
We can now proceed with initializing the control-plane node for our Kubernetes cluster.
There are a few things we need to be careful about:
- We can specify the control-plane-endpoint if we are planning to have a high available k8s cluster. (we will skip this for now),
- Choose a Pod network add-on (next section) but be aware that CoreDNS (DNS and Service Discovery) will not run till then (later),
- define where is our container runtime socket (we will skip it)
- advertise the API server (we will skip it)
But we will define our Pod Network CIDR to the default value of the Pod network add-on so everything will go smoothly later on.
sudo kubeadm init --pod-network-cidr=10.244.0.0/16
Keep the output in a notepad.
Create user access config to the k8s control-plane node
Our k8s control-plane node is running, so we need to have credentials to access it.
The kubectl reads a configuration file (that has the token), so we copying this from k8s admin.
rm -rf $HOME/.kube
mkdir -p $HOME/.kube

sudo cp -i /etc/kubernetes/admin.conf $HOME/.kube/config

sudo chown $(id -u):$(id -g) $HOME/.kube/config

ls -la $HOME/.kube/config

echo 'alias k="kubectl"' | sudo tee -a /etc/bash.bashrc
source /etc/bash.bashrc
Verify the control-plane node
Verify that the kubernets is running.
That means we have a k8s cluster - but only the control-plane node is running.
kubectl cluster-info
# kubectl cluster-info dump

kubectl get nodes   -o wide
kubectl get pods -A -o wide
Install an overlay network provider on the control-plane node
As I mentioned above, in order to use the DNS and Service Discovery services in the kubernetes (CoreDNS) we need to install a Container Network Interface (CNI) based Pod network add-on so that your Pods can communicate with each other.
Kubernetes Flannel is a popular network overlay solution for Kubernetes clusters, primarily used to enable networking between pods across different nodes. It’s a simple and easy-to-implement network fabric that uses the VXLAN protocol to create a flat virtual network, allowing Kubernetes pods to communicate with each other across different hosts.
Make sure to open the below udp ports for flannel’s VXLAN traffic (if you are going to use it):
sudo ufw allow 8472/udp
To install Flannel as the networking solution for your Kubernetes (K8s) cluster, run the following command to deploy Flannel:
k apply -f https://raw.githubusercontent.com/flannel-io/flannel/master/Documentation/kube-flannel.yml
Verify CoreDNS is running on the control-plane node
Verify that the control-plane node is Up & Running and the control-plane pods (as coredns pods) are also running
k get nodes -o wide
NAME        STATUS  ROLES          AGE  VERSION  INTERNAL-IP      EXTERNAL-IP  OS-IMAGE      KERNEL-VERSION    CONTAINER-RUNTIME
k8scpnode1  Ready   control-plane  12m  v1.31.3  192.168.122.223  <none>       Ubuntu 24.10  6.11.0-9-generic  containerd://1.7.23
k get pods -A -o wide
NAMESPACE     NAME                                READY  STATUS   RESTARTS  AGE    IP               NODE        NOMINATED NODE  READINESS GATES
kube-flannel  kube-flannel-ds-9v8fq               1/1    Running  0         2m17s  192.168.122.223  k8scpnode1  <none>          <none>
kube-system   coredns-7c65d6cfc9-dg6nq            1/1    Running  0         12m    10.244.0.2       k8scpnode1  <none>          <none>
kube-system   coredns-7c65d6cfc9-r4ksc            1/1    Running  0         12m    10.244.0.3       k8scpnode1  <none>          <none>
kube-system   etcd-k8scpnode1                     1/1    Running  0         13m    192.168.122.223  k8scpnode1  <none>          <none>
kube-system   kube-apiserver-k8scpnode1           1/1    Running  0         12m    192.168.122.223  k8scpnode1  <none>          <none>
kube-system   kube-controller-manager-k8scpnode1  1/1    Running  0         12m    192.168.122.223  k8scpnode1  <none>          <none>
kube-system   kube-proxy-sxtk9                    1/1    Running  0         12m    192.168.122.223  k8scpnode1  <none>          <none>
kube-system   kube-scheduler-k8scpnode1           1/1    Running  0         13m    192.168.122.223  k8scpnode1  <none>          <none>
That’s it with the control-plane node !
Worker Nodes
The following instructions apply similarly to both worker nodes. I will document the steps for the k8swrknode1 node, but please follow the same process for the k8swrknode2 node.
Ports on the worker nodes
As we learned above on the control-plane section, kubernetes runs a few services
| Protocol | Direction | Port Range | Purpose | Used By |
|---|---|---|---|---|
| TCP | Inbound | 10250 | Kubelet API | Self, Control plane |
| TCP | Inbound | 10256 | kube-proxy | Self, Load balancers |
| TCP | Inbound | 30000-32767 | NodePort Services | All |
Firewall on the worker nodes
so we need to open the necessary ports on the worker nodes too.
sudo ufw allow 10250/tcp
sudo ufw allow 10256/tcp
sudo ufw allow 30000:32767/tcp

sudo ufw status
The output should appear as follows:
To                         Action      From
--                         ------      ----
22/tcp                     ALLOW       Anywhere
10250/tcp                  ALLOW       Anywhere
30000:32767/tcp            ALLOW       Anywhere
22/tcp (v6)                ALLOW       Anywhere (v6)
10250/tcp (v6)             ALLOW       Anywhere (v6)
30000:32767/tcp (v6)       ALLOW       Anywhere (v6)
and do not forget, we also need to open UDP 8472 for flannel
sudo ufw allow 8472/udp
The next few steps are pretty much exactly the same as in the control-plane node.
In order to keep this documentation short, I’ll just copy/paste the commands.
Hosts file in the worker node
Update the /etc/hosts file to include the IPs and hostname of all VMs.
192.168.122.223 k8scpnode1
192.168.122.50  k8swrknode1
192.168.122.10  k8swrknode2
No Swap on the worker node
sudo swapoff -a
Kernel modules on the worker node
sudo tee /etc/modules-load.d/kubernetes.conf <<EOF
overlay
br_netfilter
EOF

sudo modprobe overlay
sudo modprobe br_netfilter

sudo lsmod | grep netfilter

sudo tee /etc/sysctl.d/kubernetes.conf <<EOF
net.bridge.bridge-nf-call-ip6tables = 1
net.bridge.bridge-nf-call-iptables = 1
net.ipv4.ip_forward = 1
EOF

sudo sysctl --system
NeedRestart on the worker node
export -p NEEDRESTART_MODE="a"
Installing a Container Runtime on the worker node
curl -sL https://download.docker.com/linux/ubuntu/gpg | sudo gpg --dearmor -o /etc/apt/trusted.gpg.d/docker-keyring.gpg

sudo apt-add-repository -y "deb https://download.docker.com/linux/ubuntu oracular stable"

sleep 3

sudo apt-get -y install containerd.io

containerd config default
 | sed 's/SystemdCgroup = false/SystemdCgroup = true/'
 | sudo tee /etc/containerd/config.toml

sudo systemctl restart containerd.service
Installing kubeadm, kubelet and kubectl on the worker node
VERSION="1.31"

curl -fsSL https://pkgs.k8s.io/core:/stable:/v${VERSION}/deb/Release.key | sudo gpg --dearmor -o /etc/apt/keyrings/kubernetes-apt-keyring.gpg

# allow unprivileged APT programs to read this keyring
sudo chmod 0644 /etc/apt/keyrings/kubernetes-apt-keyring.gpg

# This overwrites any existing configuration in /etc/apt/sources.list.d/kubernetes.list
echo "deb [signed-by=/etc/apt/keyrings/kubernetes-apt-keyring.gpg] https://pkgs.k8s.io/core:/stable:/v${VERSION}/deb/ /" | sudo tee /etc/apt/sources.list.d/kubernetes.list

# helps tools such as command-not-found to work correctly
sudo chmod 0644 /etc/apt/sources.list.d/kubernetes.list

sleep 3

sudo apt-get update
sudo apt-get install -y kubelet kubeadm kubectl
Get Token from the control-plane node
To join nodes to the kubernetes cluster, we need to have a couple of things.
- a token from control-plane node
- the CA certificate hash from the contol-plane node.
If you didnt keep the output the initialization of the control-plane node, that’s okay.
Run the below command in the control-plane node.
sudo kubeadm token list
and we will get the initial token that expires after 24hours.
TOKEN                    TTL  EXPIRES               USAGES                  DESCRIPTION                                               EXTRA GROUPS
7n4iwm.8xqwfcu4i1co8nof  23h  2024-11-26T12:14:55Z  authentication,signing  The default bootstrap token generated by 'kubeadm init'.  system:bootstrappers:kubeadm:default-node-token
In this case is the
7n4iwm.8xqwfcu4i1co8nofGet Certificate Hash from the control-plane node
To get the CA certificate hash from the control-plane-node, we need to run a complicated command:
openssl x509 -pubkey -in /etc/kubernetes/pki/ca.crt | openssl rsa -pubin -outform der 2>/dev/null | openssl dgst -sha256 -hex | sed 's/^.* //'
and in my k8s cluster is:
2f68e4b27cae2d2a6431f3da308a691d00d9ef3baa4677249e43b3100d783061Join Workers to the kubernetes cluster
So now, we can Join our worker nodes to the kubernetes cluster.
Run the below command on both worker nodes:
sudo kubeadm join 192.168.122.223:6443
        --token 7n4iwm.8xqwfcu4i1co8nof
        --discovery-token-ca-cert-hash sha256:2f68e4b27cae2d2a6431f3da308a691d00d9ef3baa4677249e43b3100d783061
we get this message
Run ‘kubectl get nodes’ on the control-plane to see this node join the cluster.
Is the kubernetes cluster running ?
We can verify that
kubectl get nodes   -o wide
kubectl get pods -A -o wide
All nodes have successfully joined the Kubernetes cluster
so make sure they are in Ready status.
k8scpnode1   Ready  control-plane  58m    v1.31.3  192.168.122.223  <none>  Ubuntu 24.10  6.11.0-9-generic  containerd://1.7.23
k8swrknode1  Ready  <none>         3m37s  v1.31.3  192.168.122.50   <none>  Ubuntu 24.10  6.11.0-9-generic  containerd://1.7.23
k8swrknode2  Ready  <none>         3m37s  v1.31.3  192.168.122.10   <none>  Ubuntu 24.10  6.11.0-9-generic  containerd://1.7.23
All pods
so make sure all pods are in Running status.
NAMESPACE     NAME                                READY  STATUS   RESTARTS  AGE    IP               NODE         NOMINATED NODE  READINESS GATES
kube-flannel  kube-flannel-ds-9v8fq               1/1    Running  0         46m    192.168.122.223  k8scpnode1   <none>          <none>
kube-flannel  kube-flannel-ds-hmtmv               1/1    Running  0         3m32s  192.168.122.50   k8swrknode1  <none>          <none>
kube-flannel  kube-flannel-ds-rwkrm               1/1    Running  0         3m33s  192.168.122.10   k8swrknode2  <none>          <none>
kube-system   coredns-7c65d6cfc9-dg6nq            1/1    Running  0         57m    10.244.0.2       k8scpnode1   <none>          <none>
kube-system   coredns-7c65d6cfc9-r4ksc            1/1    Running  0         57m    10.244.0.3       k8scpnode1   <none>          <none>
kube-system   etcd-k8scpnode1                     1/1    Running  0         57m    192.168.122.223  k8scpnode1   <none>          <none>
kube-system   kube-apiserver-k8scpnode1           1/1    Running  0         57m    192.168.122.223  k8scpnode1   <none>          <none>
kube-system   kube-controller-manager-k8scpnode1  1/1    Running  0         57m    192.168.122.223  k8scpnode1   <none>          <none>
kube-system   kube-proxy-49f6q                    1/1    Running  0         3m32s  192.168.122.50   k8swrknode1  <none>          <none>
kube-system   kube-proxy-6qpph                    1/1    Running  0         3m33s  192.168.122.10   k8swrknode2  <none>          <none>
kube-system   kube-proxy-sxtk9                    1/1    Running  0         57m    192.168.122.223  k8scpnode1   <none>          <none>
kube-system   kube-scheduler-k8scpnode1           1/1    Running  0         57m    192.168.122.223  k8scpnode1   <none>          <none>
That’s it !
Our k8s cluster is running.
Kubernetes Dashboard
is a general purpose, web-based UI for Kubernetes clusters. It allows users to manage applications running in the cluster and troubleshoot them, as well as manage the cluster itself.
Next, we can move forward with installing the Kubernetes dashboard on our cluster.
Helm
Helm—a package manager for Kubernetes that simplifies the process of deploying applications to a Kubernetes cluster. As of version 7.0.0, kubernetes-dashboard has dropped support for Manifest-based installation. Only Helm-based installation is supported now.
Live on the edge !
curl -sL https://raw.githubusercontent.com/helm/helm/main/scripts/get-helm-3 | bash
Install kubernetes dashboard
We need to add the kubernetes-dashboard helm repository first and install the helm chart after:
# Add kubernetes-dashboard repository
helm repo add kubernetes-dashboard https://kubernetes.github.io/dashboard/

# Deploy a Helm Release named "kubernetes-dashboard" using the kubernetes-dashboard chart
helm upgrade --install kubernetes-dashboard kubernetes-dashboard/kubernetes-dashboard --create-namespace --namespace kubernetes-dashboard
The output of the command above should resemble something like this:
Release "kubernetes-dashboard" does not exist. Installing it now.

NAME: kubernetes-dashboard
LAST DEPLOYED: Mon Nov 25 15:36:51 2024
NAMESPACE: kubernetes-dashboard
STATUS: deployed
REVISION: 1
TEST SUITE: None

NOTES:
*************************************************************************************************
*** PLEASE BE PATIENT: Kubernetes Dashboard may need a few minutes to get up and become ready ***
*************************************************************************************************

Congratulations! You have just installed Kubernetes Dashboard in your cluster.

To access Dashboard run:
  kubectl -n kubernetes-dashboard port-forward svc/kubernetes-dashboard-kong-proxy 8443:443

NOTE: In case port-forward command does not work, make sure that kong service name is correct.
      Check the services in Kubernetes Dashboard namespace using:
        kubectl -n kubernetes-dashboard get svc

Dashboard will be available at:
  https://localhost:8443
Verify the installation
kubectl -n kubernetes-dashboard get svc
NAME                                   TYPE        CLUSTER-IP       EXTERNAL-IP   PORT(S)    AGE
kubernetes-dashboard-api               ClusterIP   10.106.254.153   <none>        8000/TCP   3m48s
kubernetes-dashboard-auth              ClusterIP   10.103.156.167   <none>        8000/TCP   3m48s
kubernetes-dashboard-kong-proxy        ClusterIP   10.105.230.13    <none>        443/TCP    3m48s
kubernetes-dashboard-metrics-scraper   ClusterIP   10.109.7.234     <none>        8000/TCP   3m48s
kubernetes-dashboard-web               ClusterIP   10.106.125.65    <none>        8000/TCP   3m48s
kubectl get all -n kubernetes-dashboard
NAME                                                       READY   STATUS    RESTARTS   AGE
pod/kubernetes-dashboard-api-6dbb79747-rbtlc               1/1     Running   0          4m5s
pod/kubernetes-dashboard-auth-55d7cc5fbd-xccft             1/1     Running   0          4m5s
pod/kubernetes-dashboard-kong-57d45c4f69-t9lw2             1/1     Running   0          4m5s
pod/kubernetes-dashboard-metrics-scraper-df869c886-lt624   1/1     Running   0          4m5s
pod/kubernetes-dashboard-web-6ccf8d967-9rp8n               1/1     Running   0          4m5s

NAME                                           TYPE        CLUSTER-IP       EXTERNAL-IP   PORT(S)    AGE
service/kubernetes-dashboard-api               ClusterIP   10.106.254.153   <none>        8000/TCP   4m10s
service/kubernetes-dashboard-auth              ClusterIP   10.103.156.167   <none>        8000/TCP   4m10s
service/kubernetes-dashboard-kong-proxy        ClusterIP   10.105.230.13    <none>        443/TCP    4m10s
service/kubernetes-dashboard-metrics-scraper   ClusterIP   10.109.7.234     <none>        8000/TCP   4m10s
service/kubernetes-dashboard-web               ClusterIP   10.106.125.65    <none>        8000/TCP   4m10s

NAME                                                   READY   UP-TO-DATE   AVAILABLE   AGE
deployment.apps/kubernetes-dashboard-api               1/1     1            1           4m7s
deployment.apps/kubernetes-dashboard-auth              1/1     1            1           4m7s
deployment.apps/kubernetes-dashboard-kong              1/1     1            1           4m7s
deployment.apps/kubernetes-dashboard-metrics-scraper   1/1     1            1           4m7s
deployment.apps/kubernetes-dashboard-web               1/1     1            1           4m7s

NAME                                                             DESIRED   CURRENT   READY   AGE
replicaset.apps/kubernetes-dashboard-api-6dbb79747               1         1         1       4m6s
replicaset.apps/kubernetes-dashboard-auth-55d7cc5fbd             1         1         1       4m6s
replicaset.apps/kubernetes-dashboard-kong-57d45c4f69             1         1         1       4m6s
replicaset.apps/kubernetes-dashboard-metrics-scraper-df869c886   1         1         1       4m6s
replicaset.apps/kubernetes-dashboard-web-6ccf8d967               1         1         1       4m6s
Accessing Dashboard via a NodePort
A NodePort is a type of Service in Kubernetes that exposes a service on each node’s IP at a static port. This allows external traffic to reach the service by accessing the node’s IP and port. kubernetes-dashboard by default runs on a internal 10.x.x.x IP. To access the dashboard we need to have a NodePort in the kubernetes-dashboard service.
We can either Patch the service or edit the yaml file.
Choose one of the two options below; there’s no need to run both as it’s unnecessary (but not harmful).
Patch kubernetes-dashboard
This is one way to add a NodePort.
kubectl --namespace kubernetes-dashboard patch svc kubernetes-dashboard-kong-proxy -p '{"spec": {"type": "NodePort"}}'output
service/kubernetes-dashboard-kong-proxy patchedverify the service
kubectl get svc -n kubernetes-dashboardoutput
NAME                                   TYPE        CLUSTER-IP       EXTERNAL-IP   PORT(S)         AGE
kubernetes-dashboard-api               ClusterIP   10.106.254.153   <none>        8000/TCP        50m
kubernetes-dashboard-auth              ClusterIP   10.103.156.167   <none>        8000/TCP        50m
kubernetes-dashboard-kong-proxy        NodePort    10.105.230.13    <none>        443:32116/TCP   50m
kubernetes-dashboard-metrics-scraper   ClusterIP   10.109.7.234     <none>        8000/TCP        50m
kubernetes-dashboard-web               ClusterIP   10.106.125.65    <none>        8000/TCP        50m
we can see the 32116 in the kubernetes-dashboard.
Edit kubernetes-dashboard Service
This is an alternative way to add a NodePort.
kubectl edit svc -n kubernetes-dashboard kubernetes-dashboard-kong-proxy
and chaning the service type from
type: ClusterIPto
type: NodePortAccessing Kubernetes Dashboard
The kubernetes-dashboard has two (2) pods, one (1) for metrics, one (2) for the dashboard.
To access the dashboard, first we need to identify in which Node is running.
kubectl get pods -n kubernetes-dashboard -o wide
NAME                                                   READY   STATUS    RESTARTS   AGE    IP            NODE          NOMINATED NODE   READINESS GATES
kubernetes-dashboard-api-56f6f4b478-p4xbj              1/1     Running   0          55m   10.244.2.12   k8swrknode1   <none>           <none>
kubernetes-dashboard-auth-565b88d5f9-fscj9             1/1     Running   0          55m   10.244.1.12   k8swrknode2   <none>           <none>
kubernetes-dashboard-kong-57d45c4f69-rts57             1/1     Running   0          55m   10.244.2.10   k8swrknode1   <none>           <none>
kubernetes-dashboard-metrics-scraper-df869c886-bljqr   1/1     Running   0          55m   10.244.2.11   k8swrknode1   <none>           <none>
kubernetes-dashboard-web-6ccf8d967-t6k28               1/1     Running   0          55m   10.244.1.11   k8swrknode2   <none>           <none>
In my setup the dashboard pod is running on the worker node 1 and from the /etc/hosts is on the 192.168.122.50 IP.
The NodePort is 32116
k get svc -n kubernetes-dashboard -o wide
So, we can open a new tab on our browser and type:
https://192.168.122.50:32116and accept the self-signed certificate!
Create An Authentication Token (RBAC)
Last step for the kubernetes-dashboard is to create an authentication token.
Creating a Service Account
Create a new yaml file, with kind: ServiceAccount that has access to kubernetes-dashboard namespace and has name: admin-user.
cat > kubernetes-dashboard.ServiceAccount.yaml <<EOF
apiVersion: v1
kind: ServiceAccount
metadata:
  name: admin-user
  namespace: kubernetes-dashboard

EOF
add this service account to the k8s cluster
kubectl apply -f kubernetes-dashboard.ServiceAccount.yaml
output
serviceaccount/admin-user createdCreating a ClusterRoleBinding
We need to bind the Service Account with the kubernetes-dashboard via Role-based access control.
cat > kubernetes-dashboard.ClusterRoleBinding.yaml <<EOF
apiVersion: rbac.authorization.k8s.io/v1
kind: ClusterRoleBinding
metadata:
  name: admin-user
roleRef:
  apiGroup: rbac.authorization.k8s.io
  kind: ClusterRole
  name: cluster-admin
subjects:
- kind: ServiceAccount
  name: admin-user
  namespace: kubernetes-dashboard

EOF
apply this yaml file
kubectl apply -f kubernetes-dashboard.ClusterRoleBinding.yaml
clusterrolebinding.rbac.authorization.k8s.io/admin-user created
That means, our Service Account User has all the necessary roles to access the kubernetes-dashboard.
Getting a Bearer Token
Final step is to create/get a token for our user.
kubectl -n kubernetes-dashboard create token admin-user
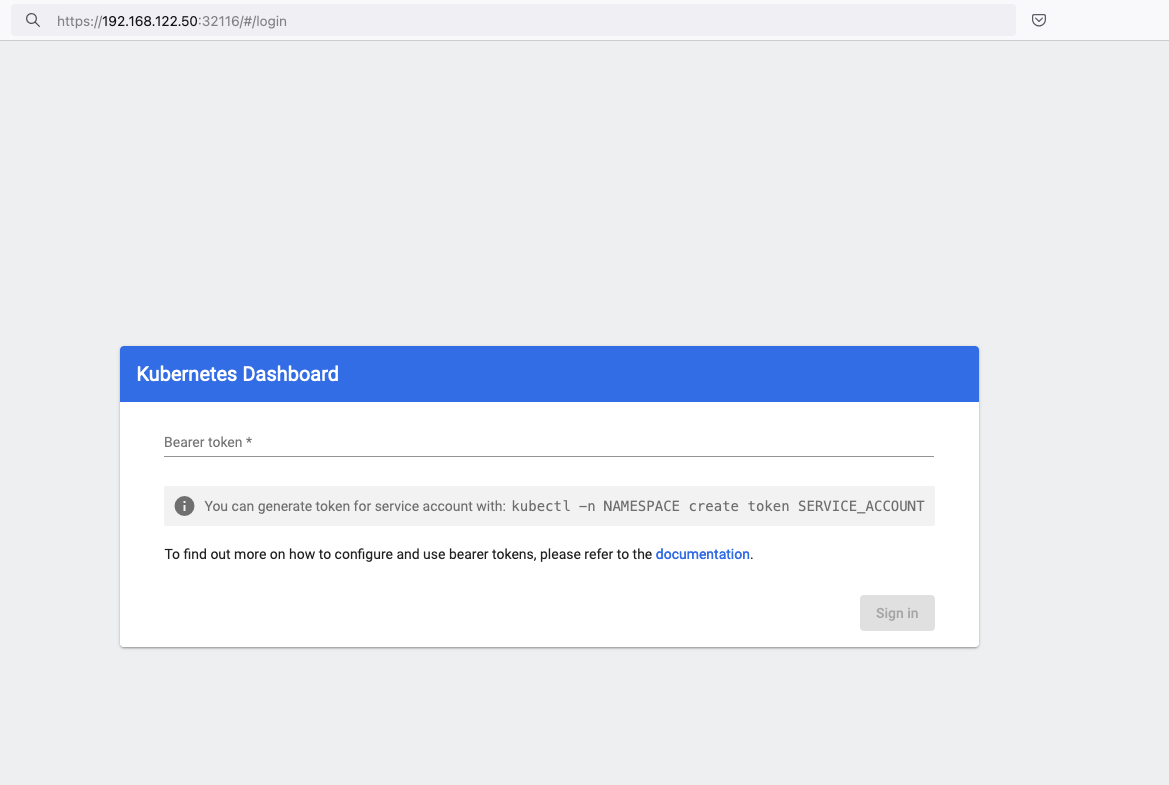
eyJhbGciOiJSUzI1NiIsImtpZCI6IlpLbDVPVFQxZ1pTZlFKQlFJQkR6dVdGdGpvbER1YmVmVmlJTUd5WEVfdUEifQ.eyJhdWQiOlsiaHR0cHM6Ly9rdWJlcm5ldGVzLmRlZmF1bHQuc3ZjLmNsdXN0ZXIubG9jYWwiXSwiZXhwIjoxNzMyNzI0NTQ5LCJpYXQiOjE3MzI3MjA5NDksImlzcyI6Imh0dHBzOi8va3ViZXJuZXRlcy5kZWZhdWx0LnN2Yy5jbHVzdGVyLmxvY2FsIiwianRpIjoiMTczNzQyZGUtNDViZi00NjhkLTlhYWYtMDg3MDA3YmZmMjk3Iiwia3ViZXJuZXRlcy5pbyI6eyJuYW1lc3BhY2UiOiJrdWJlcm5ldGVzLWRhc2hib2FyZCIsInNlcnZpY2VhY2NvdW50Ijp7Im5hbWUiOiJhZG1pbi11c2VyIiwidWlkIjoiYWZhZmNhYzItZDYxNy00M2I0LTg2N2MtOTVkMzk5YmQ4ZjIzIn19LCJuYmYiOjE3MzI3MjA5NDksInN1YiI6InN5c3RlbTpzZXJ2aWNlYWNjb3VudDprdWJlcm5ldGVzLWRhc2hib2FyZDphZG1pbi11c2VyIn0.AlPSIrRsCW2vPa1P3aDQ21jaeIU2MAtiKcDO23zNRcd8-GbJUX_3oSInmSx9o2029eI5QxciwjduIRdJfTuhiPPypb3tp31bPT6Pk6_BgDuN7n4Ki9Y2vQypoXJcJNikjZpSUzQ9TOm88e612qfidSc88ATpfpS518IuXCswPg4WPjkI1WSPn-lpL6etrRNVfkT1eeSR0fO3SW3HIWQX9ce-64T0iwGIFjs0BmhDbBtEW7vH5h_hHYv3cbj_6yGj85Vnpjfcs9a9nXxgPrn_up7iA6lPtLMvQJ2_xvymc57aRweqsGSHjP2NWya9EF-KBy6bEOPB29LaIaKMywSuOQAdd this token to the previous login page
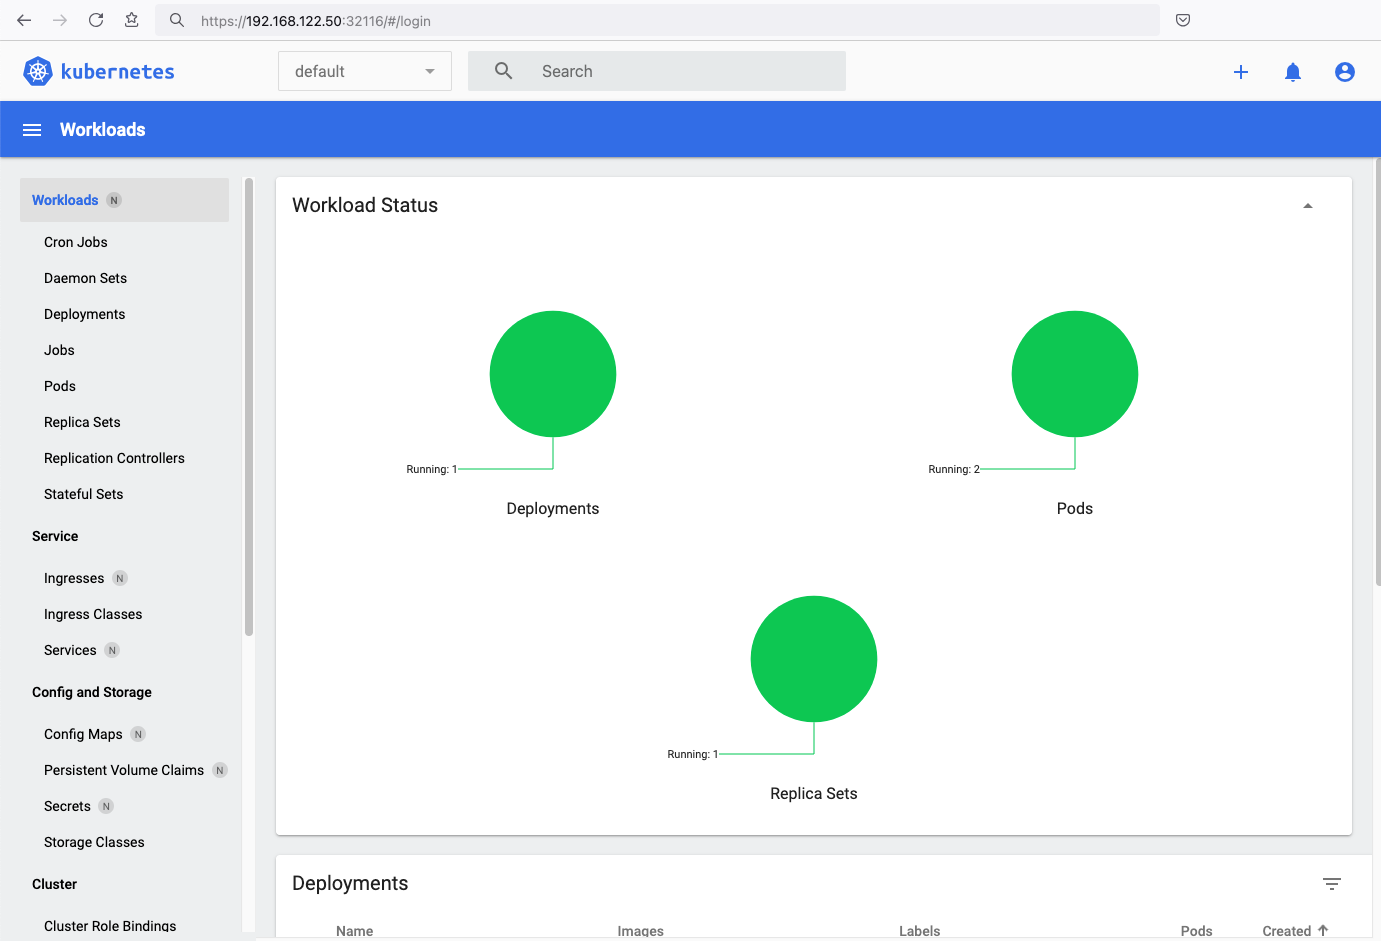
Browsing Kubernetes Dashboard
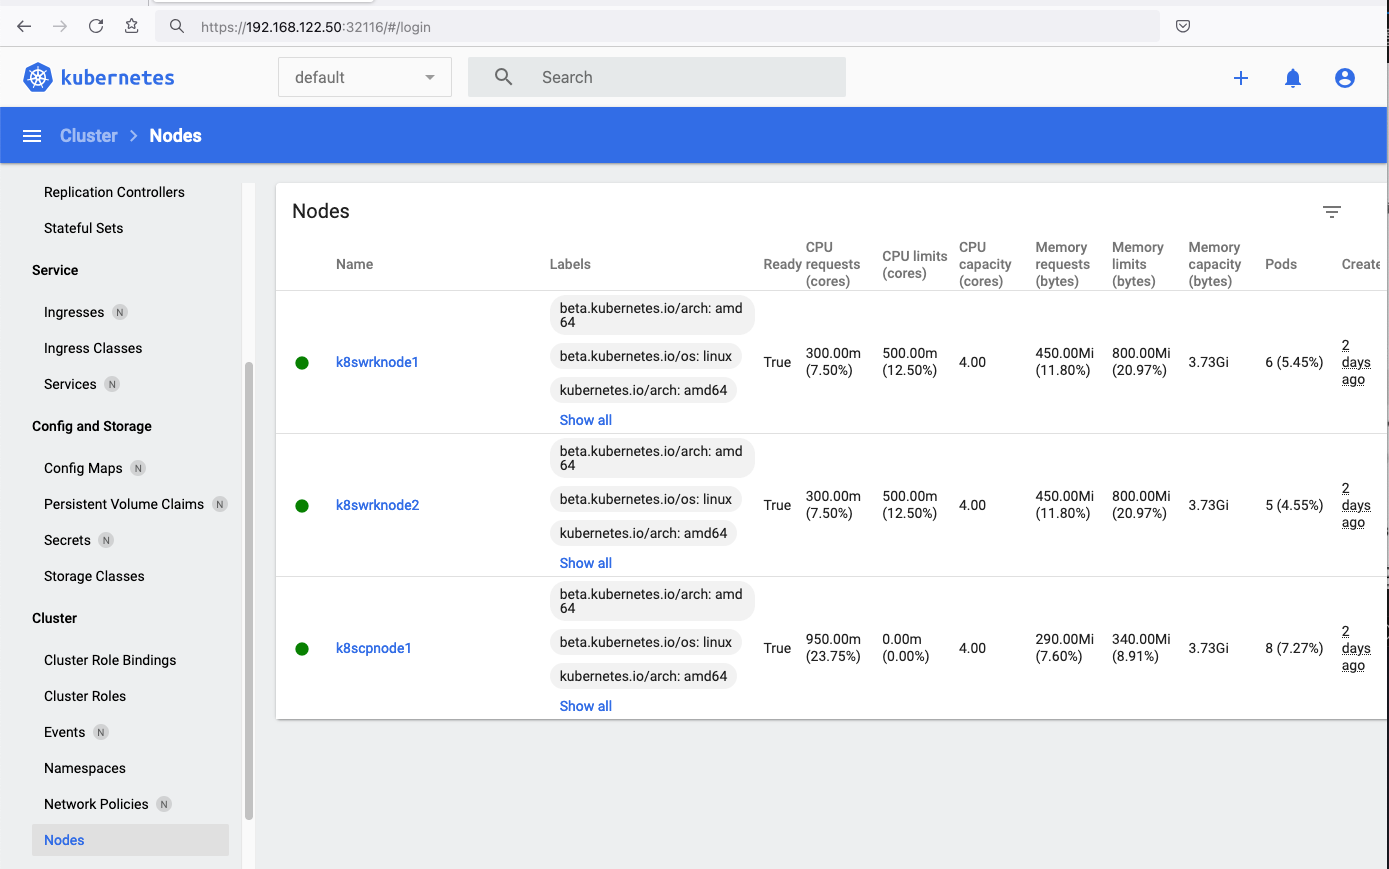
eg. Cluster –> Nodes
Nginx App
Before finishing this blog post, I would also like to share how to install a simple nginx-app as it is customary to do such thing in every new k8s cluster.
But plz excuse me, I will not get into much details.
You should be able to understand the below k8s commands.
Install nginx-app
kubectl create deployment nginx-app --image=nginx --replicas=2
deployment.apps/nginx-app createdGet Deployment
kubectl get deployment nginx-app -o wideNAME READY UP-TO-DATE AVAILABLE AGE CONTAINERS IMAGES SELECTOR
nginx-app 2/2 2 2 64s nginx nginx app=nginx-appExpose Nginx-App
kubectl expose deployment nginx-app --type=NodePort --port=80
service/nginx-app exposedVerify Service nginx-app
kubectl get svc nginx-app -o wide
NAME        TYPE       CLUSTER-IP      EXTERNAL-IP   PORT(S)        AGE   SELECTOR
nginx-app   NodePort   10.98.170.185   <none>        80:31761/TCP   27s   app=nginx-app
Describe Service nginx-app
kubectl describe svc nginx-app
Name:                     nginx-app
Namespace:                default
Labels:                   app=nginx-app
Annotations:              <none>
Selector:                 app=nginx-app
Type:                     NodePort
IP Family Policy:         SingleStack
IP Families:              IPv4
IP:                       10.98.170.185
IPs:                      10.98.170.185
Port:                     <unset>  80/TCP
TargetPort:               80/TCP
NodePort:                 <unset>  31761/TCP
Endpoints:                10.244.1.10:80,10.244.2.10:80
Session Affinity:         None
External Traffic Policy:  Cluster
Events:                   <none>
Curl Nginx-App
curl http://192.168.122.8:31761
<!DOCTYPE html>
<html>
<head>
<title>Welcome to nginx!</title>
<style>
html { color-scheme: light dark; }
body { width: 35em; margin: 0 auto;
font-family: Tahoma, Verdana, Arial, sans-serif; }
</style>
</head>
<body>
<h1>Welcome to nginx!</h1>
<p>If you see this page, the nginx web server is successfully installed and
working. Further configuration is required.</p>

<p>For online documentation and support please refer to
<a href="http://nginx.org/">nginx.org</a>.<br/>
Commercial support is available at
<a href="http://nginx.com/">nginx.com</a>.</p>

<p><em>Thank you for using nginx.</em></p>
</body>
</html>
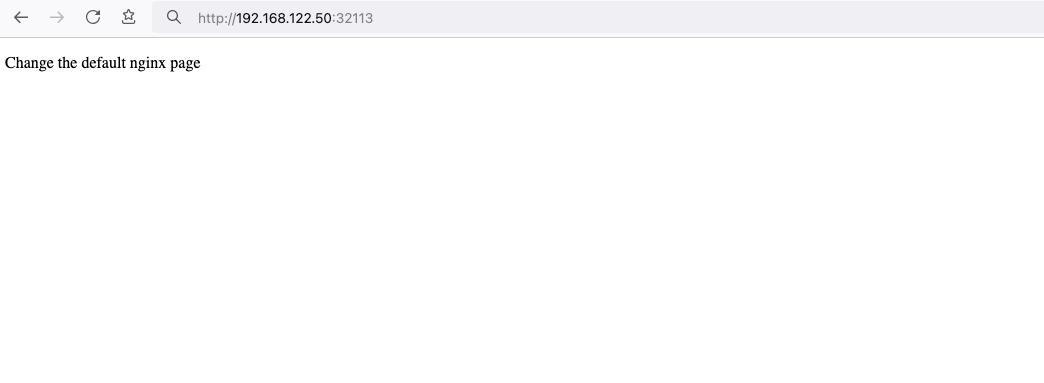
Nginx-App from Browser

Change the default page
Last but not least, let’s modify the default index page to something different for educational purposes with the help of a ConfigMap
The idea is to create a ConfigMap with the html of our new index page then we would like to attach it to our nginx deployment as a volume mount !
cat > nginx_config.map << EOF
apiVersion: v1
data:
  index.html: |
    <!DOCTYPE html>
    <html lang="en">
    <head>
        <title>A simple HTML document</title>
    </head>
    <body>
        <p>Change the default nginx page </p>
    </body>
    </html>
kind: ConfigMap
metadata:
  name: nginx-config-page
  namespace: default
EOF
cat nginx_config.mapapiVersion: v1
data:
index.html: |
<!DOCTYPE html>
<html lang="en">
<head>
<title>A simple HTML document</title>
</head>
<body>
<p>Change the default nginx page </p>
</body>
</html>
kind: ConfigMap
metadata:
name: nginx-config-page
namespace: defaultapply the config.map
kubectl apply -f nginx_config.map
verify
kubectl get configmapNAME DATA AGE
kube-root-ca.crt 1 2d3h
nginx-config-page 1 16mnow the diffucult part, we need to mount our config map to the nginx deployment and to do that, we need to edit the nginx deployment.
kubectl edit deployments.apps nginx-apprewrite spec section to include:
- the VolumeMount &
- the ConfigMap as Volume
    spec:
      containers:
        - image: nginx
        ...
        volumeMounts:
        - mountPath: /usr/share/nginx/html
          name: nginx-config
    ...
      volumes:
      - configMap:
          name: nginx-config-page
        name: nginx-config
After saving, the nginx deployment will be updated by it-self.
finally we can see our updated first index page:
That’s it
I hope you enjoyed this post.
-Evaggelos Balaskas
destroy our lab
./destroy.sh...
libvirt_domain.domain-ubuntu["k8wrknode1"]: Destroying... [id=446cae2a-ce14-488f-b8e9-f44839091bce]
libvirt_domain.domain-ubuntu["k8scpnode"]: Destroying... [id=51e12abb-b14b-4ab8-b098-c1ce0b4073e3]
time_sleep.wait_for_cloud_init: Destroying... [id=2022-08-30T18:02:06Z]
libvirt_domain.domain-ubuntu["k8wrknode2"]: Destroying... [id=0767fb62-4600-4bc8-a94a-8e10c222b92e]
time_sleep.wait_for_cloud_init: Destruction complete after 0s
libvirt_domain.domain-ubuntu["k8wrknode1"]: Destruction complete after 1s
libvirt_domain.domain-ubuntu["k8scpnode"]: Destruction complete after 1s
libvirt_domain.domain-ubuntu["k8wrknode2"]: Destruction complete after 1s
libvirt_cloudinit_disk.cloud-init["k8wrknode1"]: Destroying... [id=/var/lib/libvirt/images/Jpw2Sg_cloud-init.iso;b8ddfa73-a770-46de-ad16-b0a5a08c8550]
libvirt_cloudinit_disk.cloud-init["k8wrknode2"]: Destroying... [id=/var/lib/libvirt/images/VdUklQ_cloud-init.iso;5511ed7f-a864-4d3f-985a-c4ac07eac233]
libvirt_volume.ubuntu-base["k8scpnode"]: Destroying... [id=/var/lib/libvirt/images/l5Rr1w_ubuntu-base]
libvirt_volume.ubuntu-base["k8wrknode2"]: Destroying... [id=/var/lib/libvirt/images/VdUklQ_ubuntu-base]
libvirt_cloudinit_disk.cloud-init["k8scpnode"]: Destroying... [id=/var/lib/libvirt/images/l5Rr1w_cloud-init.iso;11ef6bb7-a688-4c15-ae33-10690500705f]
libvirt_volume.ubuntu-base["k8wrknode1"]: Destroying... [id=/var/lib/libvirt/images/Jpw2Sg_ubuntu-base]
libvirt_cloudinit_disk.cloud-init["k8wrknode1"]: Destruction complete after 1s
libvirt_volume.ubuntu-base["k8wrknode2"]: Destruction complete after 1s
libvirt_cloudinit_disk.cloud-init["k8scpnode"]: Destruction complete after 1s
libvirt_cloudinit_disk.cloud-init["k8wrknode2"]: Destruction complete after 1s
libvirt_volume.ubuntu-base["k8wrknode1"]: Destruction complete after 1s
libvirt_volume.ubuntu-base["k8scpnode"]: Destruction complete after 2s
libvirt_volume.ubuntu-vol["k8wrknode1"]: Destroying... [id=/var/lib/libvirt/images/Jpw2Sg_ubuntu-vol]
libvirt_volume.ubuntu-vol["k8scpnode"]: Destroying... [id=/var/lib/libvirt/images/l5Rr1w_ubuntu-vol]
libvirt_volume.ubuntu-vol["k8wrknode2"]: Destroying... [id=/var/lib/libvirt/images/VdUklQ_ubuntu-vol]
libvirt_volume.ubuntu-vol["k8scpnode"]: Destruction complete after 0s
libvirt_volume.ubuntu-vol["k8wrknode2"]: Destruction complete after 0s
libvirt_volume.ubuntu-vol["k8wrknode1"]: Destruction complete after 0s
random_id.id["k8scpnode"]: Destroying... [id=l5Rr1w]
random_id.id["k8wrknode2"]: Destroying... [id=VdUklQ]
random_id.id["k8wrknode1"]: Destroying... [id=Jpw2Sg]
random_id.id["k8wrknode2"]: Destruction complete after 0s
random_id.id["k8scpnode"]: Destruction complete after 0s
random_id.id["k8wrknode1"]: Destruction complete after 0s
Destroy complete! Resources: 16 destroyed.
Personal notes on hardening an new ubuntu 24.04 LTS ssh daemon setup for incoming ssh traffic.
Port <12345>

PasswordAuthentication no
KbdInteractiveAuthentication no
UsePAM yes
X11Forwarding no
PrintMotd no
UseDNS no

KexAlgorithms sntrup761x25519-sha512@openssh.com,curve25519-sha256,curve25519-sha256@libssh.org,diffie-hellman-group-exchange-sha256,diffie-hellman-group16-sha512,diffie-hellman-group18-sha512,diffie-hellman-group14-sha256

HostKeyAlgorithms ssh-ed25519-cert-v01@openssh.com,ecdsa-sha2-nistp256-cert-v01@openssh.com,ecdsa-sha2-nistp384-cert-v01@openssh.com,ecdsa-sha2-nistp521-cert-v01@openssh.com,sk-ssh-ed25519-cert-v01@openssh.com,sk-ecdsa-sha2-nistp256-cert-v01@openssh.com,rsa-sha2-512-cert-v01@openssh.com,rsa-sha2-256-cert-v01@openssh.com,ssh-ed25519,ecdsa-sha2-nistp384,ecdsa-sha2-nistp521,sk-ssh-ed25519@openssh.com,sk-ecdsa-sha2-nistp256@openssh.com,rsa-sha2-512,rsa-sha2-256

MACs umac-128-etm@openssh.com,hmac-sha2-256-etm@openssh.com,hmac-sha2-512-etm@openssh.com,umac-128@openssh.com,hmac-sha2-256,hmac-sha2-512

AcceptEnv LANG LC_*
AllowUsers <username>

Subsystem       sftp    /usr/lib/openssh/sftp-server
testing with https://sshcheck.com/
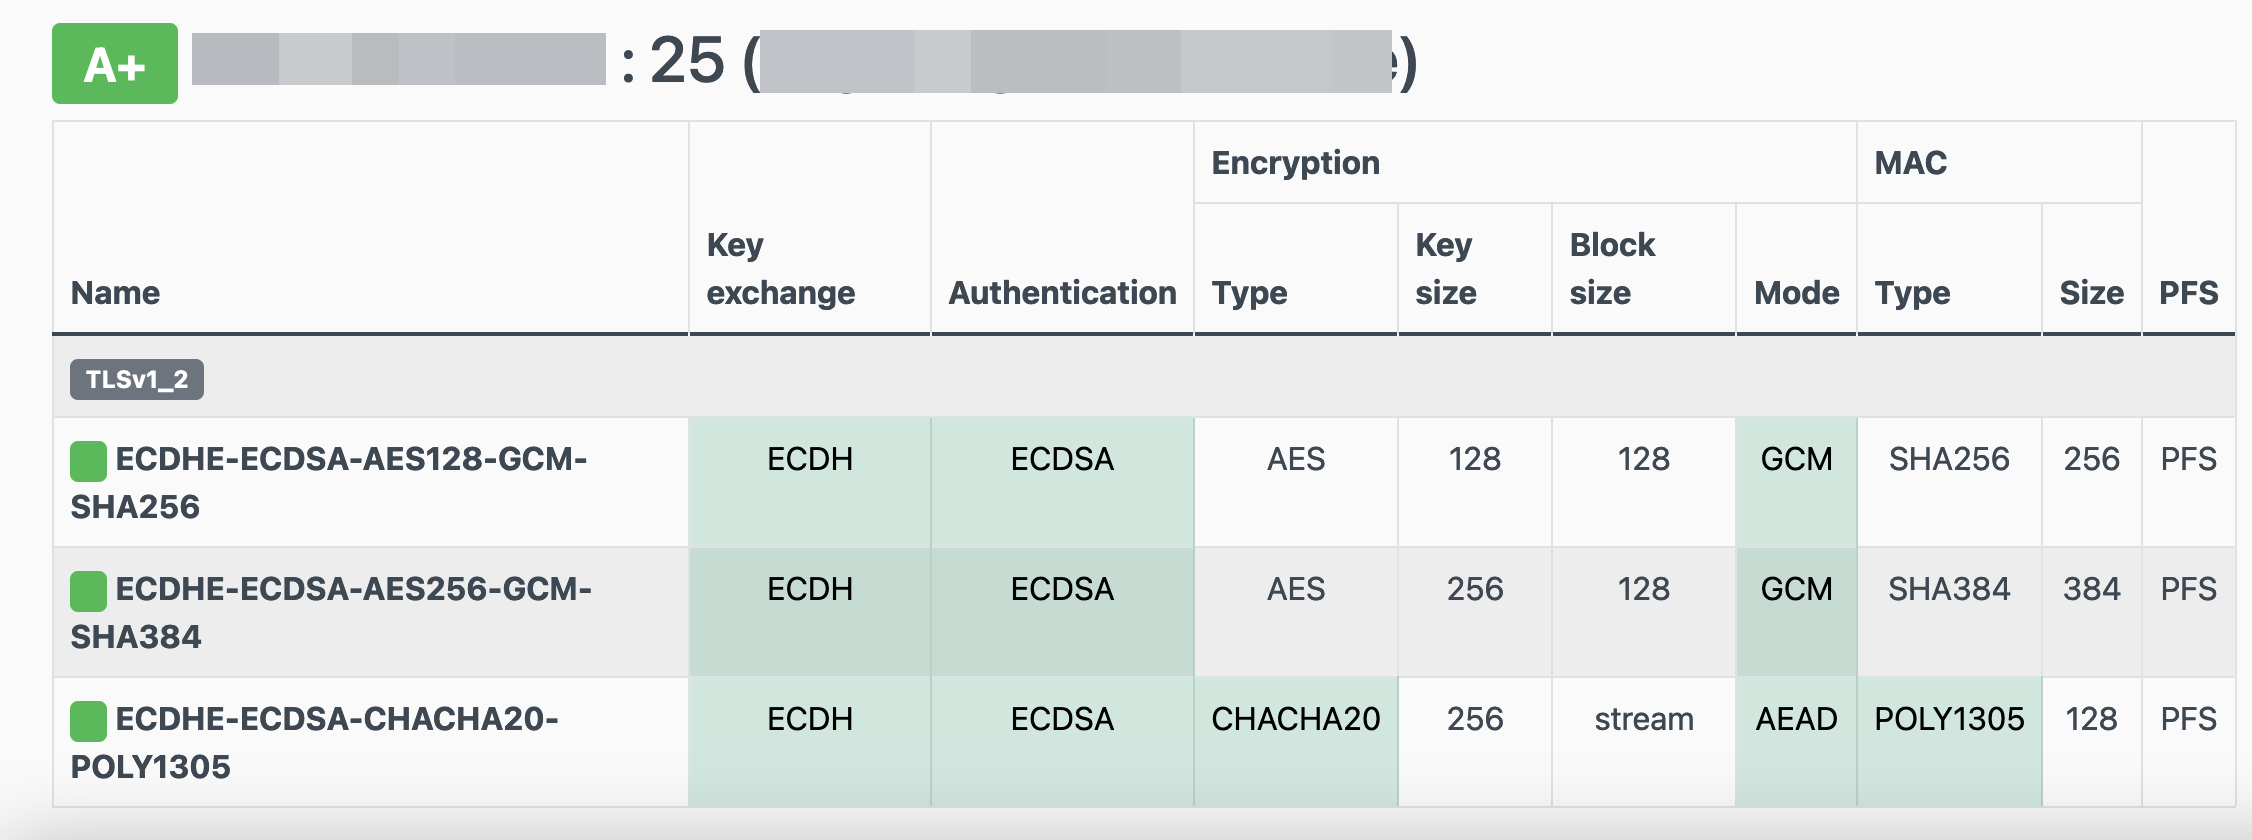
Personal notes on hardening an new ubuntu 24.04 LTS postfix setup for incoming smtp TLS traffic.
Create a Diffie–Hellman key exchange
openssl dhparam -out /etc/postfix/dh2048.pem 2048for offering a new random DH group.
SMTPD - Incoming Traffic
# SMTPD - Incoming Traffic

postscreen_dnsbl_action = drop
postscreen_dnsbl_sites =
        bl.spamcop.net,
        zen.spamhaus.org

smtpd_banner = <put your banner here>

smtpd_helo_required = yes
smtpd_starttls_timeout = 30s

smtpd_tls_CApath = /etc/ssl/certs
smtpd_tls_cert_file = /root/.acme.sh/<your_domain>/fullchain.cer
smtpd_tls_key_file = /root/.acme.sh/<your_domain>/<your_domain>.key

smtpd_tls_dh1024_param_file = ${config_directory}/dh2048.pem
smtpd_tls_ciphers = HIGH

# Wick ciphers
smtpd_tls_exclude_ciphers =
        3DES,
        AES128-GCM-SHA256,
        AES128-SHA,
        AES128-SHA256,
        AES256-GCM-SHA384,
        AES256-SHA,
        AES256-SHA256,
        CAMELLIA128-SHA,
        CAMELLIA256-SHA,
        DES-CBC3-SHA,
        DHE-RSA-DES-CBC3-SHA,
        aNULL,
        eNULL,
        CBC

smtpd_tls_loglevel = 1
smtpd_tls_mandatory_ciphers = HIGH
smtpd_tls_protocols = !SSLv2, !SSLv3, !TLSv1, !TLSv1.1
smtpd_tls_security_level = may
smtpd_tls_session_cache_database = btree:${data_directory}/smtpd_scache
smtpd_use_tls = yes
tls_preempt_cipherlist = yes

unknown_local_recipient_reject_code = 550
Local Testing
testssl -t smtp <your_domain>.:25
Online Testing
result
I have many random VPS and VMs across europe in different providers for reasons.
Two of them, are still running rpm based distro from 2011 and yes 13years later, I have not found the time to migrate them! Needless to say these are still my most stable running linux machines that I have, zero problems, ZERO PROBLEMS and are in production and heavily used every day. Let me write this again in bold: ZERO PROBLEMS.
But as time has come, I want to close some public services and use a mesh VPN for ssh. Tailscale entered the conversation and seems it’s binary works in new and old linux machines too.
long story short, I wanted an init script and with the debian package: dpkg, I could use start-stop-daemon.
Here is the init script:
#!/bin/bash

# ebal, Thu, 08 Aug 2024 14:18:11 +0300

### BEGIN INIT INFO
# Provides:          tailscaled
# Required-Start:    $local_fs $network $syslog
# Required-Stop:     $local_fs $network $syslog
# Default-Start:     2 3 4 5
# Default-Stop:      0 1 6
# Short-Description: tailscaled daemon
# Description:       tailscaled daemon
### END INIT INFO

. /etc/rc.d/init.d/functions

prog="tailscaled"
DAEMON="/usr/local/bin/tailscaled"
PIDFILE="/var/run/tailscaled.pid"

test -x $DAEMON || exit 0

case "$1" in
  start)
    echo "Starting ${prog} ..."
    start-stop-daemon --start --background --pidfile $PIDFILE --make-pidfile --startas $DAEMON --
    RETVAL=$?
    ;;
  stop)
    echo "Stopping ${prog} ..."
    if [ -f ${PIDFILE} ]; then
        start-stop-daemon --stop --pidfile $PIDFILE --retry 5 --startas ${DAEMON} -- -cleanup
        rm -f ${PIDFILE} > /dev/null 2>&1
    fi
    RETVAL=$?
    ;;
  status)
    start-stop-daemon --status --pidfile ${PIDFILE}
    status $prog
    RETVAL=$?
    ;;
  *)
    echo "Usage: /etc/init.d/tailscaled {start|stop|status}"
    RETVAL=1
    ;;
esac

exit ${RETVAL}
an example:
[root@kvm ~]# /etc/init.d/tailscaled start
Starting tailscaled ...

[root@kvm ~]# /etc/init.d/tailscaled status
tailscaled (pid  29101) is running...

[root@kvm ~]# find /var/ -type f -name "tailscale*pid"
/var/run/tailscaled.pid

[root@kvm ~]# cat /var/run/tailscaled.pid
29101

[root@kvm ~]# ps -e fuwww | grep -i tailscaled
root     29400  0.0  0.0 103320   880 pts/0    S+   16:49   0:00                      _ grep --color -i tailscaled
root     29101  2.0  0.7 1250440 32180 ?       Sl   16:48   0:00 /usr/local/bin/tailscaled

[root@kvm ~]# tailscale up

[root@kvm ~]# tailscale set -ssh

[root@kvm ~]# /etc/init.d/tailscaled stop
Stopping tailscaled ...

[root@kvm ~]# /etc/init.d/tailscaled status
tailscaled is stopped

[root@kvm ~]# /etc/init.d/tailscaled stop
Stopping tailscaled ...

[root@kvm ~]# /etc/init.d/tailscaled start
Starting tailscaled ...

[root@kvm ~]# /etc/init.d/tailscaled start
Starting tailscaled ...
process already running.

[root@kvm ~]# /etc/init.d/tailscaled status
tailscaled (pid  29552) is running...
Migrate legacy openldap to a docker container.
Prologue
I maintain a couple of legacy EOL CentOS 6.x SOHO servers to different locations. Stability on those systems is unparalleled and is -mainly- the reason of keeping them in production, as they run almost a decade without a major issue.
But I need to do a modernization of these legacy systems. So I must prepare a migration plan. Initial goal was to migrate everything to ansible roles. Although, I’ve walked down this path a few times in the past, the result is not something desirable. A plethora of configuration files and custom scripts. Not easily maintainable for future me.
Current goal is to setup a minimal setup for the underlying operating system, that I can easily upgrade through it’s LTS versions and separate the services from it. Keep the configuration on a git repository and deploy docker containers via docker-compose.
In this blog post, I will document the openldap service. I had some is issues against bitnami/openldap docker container so the post is also a kind of documentation.
Preparation
Two different cases, in one I have the initial ldif files (without the data) and on the second node I only have the data in ldifs but not the initial schema. So, I need to create for both locations a combined ldif that will contain the schema and data.
And that took me more time that it should! I could not get the service running correctly and I experimented with ldap exports till I found something that worked against bitnami/openldap notes and environment variables.
ldapsearch command
In /root/.ldap_conf I keep the environment variables as Base, Bind and Admin Password (only root user can read them).
cat /usr/local/bin/lds #!/bin/bash
source /root/.ldap_conf
/usr/bin/ldapsearch
-o ldif-wrap=no
-H ldap://$HOST
-D $BIND
-b $BASE
-LLL -x
-w $PASS $*
sudo lds > /root/openldap_export.ldif
Bitnami/openldap
GitHub page of bitnami/openldap has extensive documentation and a lot of environment variables you need to setup, to run an openldap service. Unfortunately, it took me quite a while, in order to find the proper configuration to import ldif from my current openldap service.
Through the years bitnami has made a few changes in libopenldap.sh which produced a frustrated period for me to review the shell script and understand what I need to do.
I would like to explain it in simplest terms here and hopefully someone will find it easier to migrate their openldap.
TL;DR
The correct way:
Create local directories
mkdir -pv {ldif,openldap}Place your openldap_export.ldif to the local ldif directory, and start openldap service with:
docker compose up---
services:
openldap:
image: bitnami/openldap:2.6
container_name: openldap
env_file:
- path: ./ldap.env
volumes:
- ./openldap:/bitnami/openldap
- ./ldifs:/ldifs
ports:
- 1389:1389
restart: always
volumes:
data:
driver: local
driver_opts:
device: /storage/docker
Your environmental configuration file, should look like:
cat ldap.env LDAP_ADMIN_USERNAME="admin"
LDAP_ADMIN_PASSWORD="testtest"
LDAP_ROOT="dc=example,dc=org"
LDAP_ADMIN_DN="cn=admin,$ LDAP_ROOT"
LDAP_SKIP_DEFAULT_TREE=yes
Below we are going to analyze and get into details of bitnami/openldap docker container and process.
OpenLDAP Version in docker container images.
Bitnami/openldap docker containers -at the time of writing- represent the below OpenLDAP versions:
bitnami/openldap:2    -> OpenLDAP: slapd 2.4.58
bitnami/openldap:2.5  -> OpenLDAP: slapd 2.5.17
bitnami/openldap:2.6  -> OpenLDAP: slapd 2.6.7
list images
docker images -a
REPOSITORY         TAG       IMAGE ID       CREATED        SIZE
bitnami/openldap   2.6       bf93eace348a   30 hours ago   160MB
bitnami/openldap   2.5       9128471b9c2c   2 days ago     160MB
bitnami/openldap   2         3c1b9242f419   2 years ago    151MB
Initial run without skipping default tree
As mentioned above the problem was with LDAP environment variables and LDAP_SKIP_DEFAULT_TREE was in the middle of those.
cat ldap.env LDAP_ADMIN_USERNAME="admin"
LDAP_ADMIN_PASSWORD="testtest"
LDAP_ROOT="dc=example,dc=org"
LDAP_ADMIN_DN="cn=admin,$ LDAP_ROOT"
LDAP_SKIP_DEFAULT_TREE=no
for testing: always empty ./openldap/ directory
docker compose up -dBy running ldapsearch (see above) the results are similar to below data
ldsdn: dc=example,dc=org
objectClass: dcObject
objectClass: organization
dc: example
o: example
dn: ou=users,dc=example,dc=org
objectClass: organizationalUnit
ou: users
dn: cn=user01,ou=users,dc=example,dc=org
cn: User1
cn: user01
sn: Bar1
objectClass: inetOrgPerson
objectClass: posixAccount
objectClass: shadowAccount
userPassword:: Yml0bmFtaTE=
uid: user01
uidNumber: 1000
gidNumber: 1000
homeDirectory: /home/user01
dn: cn=user02,ou=users,dc=example,dc=org
cn: User2
cn: user02
sn: Bar2
objectClass: inetOrgPerson
objectClass: posixAccount
objectClass: shadowAccount
userPassword:: Yml0bmFtaTI=
uid: user02
uidNumber: 1001
gidNumber: 1001
homeDirectory: /home/user02
dn: cn=readers,ou=users,dc=example,dc=org
cn: readers
objectClass: groupOfNames
member: cn=user01,ou=users,dc=example,dc=org
member: cn=user02,ou=users,dc=example,dc=org
so as you can see, they create some default users and groups.
Initial run with skipping default tree
Now, let’s skip creating the default users/groups.
cat ldap.env LDAP_ADMIN_USERNAME="admin"
LDAP_ADMIN_PASSWORD="testtest"
LDAP_ROOT="dc=example,dc=org"
LDAP_ADMIN_DN="cn=admin,$ LDAP_ROOT"
LDAP_SKIP_DEFAULT_TREE=yes
(always empty ./openldap/ directory )
docker compose up -dldapsearch now returns:
No such object (32)That puzzled me … a lot !
Conclusion
It does NOT matter if you place your ldif schema file and data and populate the LDAP variables with bitnami/openldap. Or use ANY other LDAP variable from bitnami/openldap reference manual.
The correct method is to SKIP default tree and place your export ldif to the local ldif directory. Nothing else worked.
Took me almost 4 days to figure it out and I had to read the libopenldap.sh.
That’s it !
There is some confusion on which is the correct way to migrate your current/local docker images to another disk. To reduce this confusion, I will share my personal notes on the subject.
Prologue
I replaced a btrfs raid-1 1TB storage with another btrfs raid-1 4TB setup. So 2 disks out, 2 new disks in. I also use luks, so all my disks are encrypted with random 4k keys before btrfs on them. There is -for sure- a write-penalty with this setup, but I am for data resilience - not speed.
Before
These are my local docker images
docker images -a
REPOSITORY        TAG           IMAGE ID         CREATED      SIZE
golang            1.19          b47c7dfaaa93     5 days   ago   993MB
archlinux         base-devel    a37dc5345d16     6 days   ago   764MB
archlinux         base          d4e07600b346    4 weeks  ago   418MB
ubuntu            22.04         58db3edaf2be    2 months ago   77.8MB
centos7           ruby          28f8bde8a757    3 months ago   532MB
ubuntu            20.04         d5447fc01ae6    4 months ago   72.8MB
ruby              latest        046e6d725a3c    4 months ago   893MB
alpine            latest        49176f190c7e    4 months ago   7.04MB
bash              latest        018f8f38ad92    5 months ago   12.3MB
ubuntu            18.04         71eaf13299f4    5 months ago   63.1MB
centos            6             5bf9684f4720   19 months ago   194MB
centos            7             eeb6ee3f44bd   19 months ago   204MB
centos            8             5d0da3dc9764   19 months ago   231MB
ubuntu            16.04         b6f507652425   19 months ago   135MB
3bal/centos6-eol  devtoolset-7  ff3fa1a19332    2 years  ago   693MB
3bal/centos6-eol  latest        aa2256d57c69    2 years  ago   194MB
centos6           ebal          d073310c1ec4    2 years  ago   3.62GB
3bal/arch         devel         76a20143aac1    2 years  ago   1.02GB
cern/slc6-base    latest        63453d0a9b55    3 years  ago   222MB
Yes, I am still using centos6! It’s stable!!
docker save - docker load
Reading docker’s documentation, the suggested way is docker save and docker load. Seems easy enough:
docker save --output busybox.tar busybox
docker load < busybox.tar.gz
which is a lie!
docker prune
before we do anything with the docker images, let us clean up the garbages
sudo docker system prune
docker save - the wrong way
so I used the ImageID as a reference:
docker images -a | grep -v ^REPOSITORY | awk '{print "docker save -o "$3".tar "$3}'
piped out through a bash shell | bash -x
and got my images:
$ ls -1

33a093dd9250.tar
b47c7dfaaa93.tar
16eed3dc21a6.tar
d4e07600b346.tar
58db3edaf2be.tar
28f8bde8a757.tar
382715ecff56.tar
d5447fc01ae6.tar
046e6d725a3c.tar
49176f190c7e.tar
018f8f38ad92.tar
71eaf13299f4.tar
5bf9684f4720.tar
eeb6ee3f44bd.tar
5d0da3dc9764.tar
b6f507652425.tar
ff3fa1a19332.tar
aa2256d57c69.tar
d073310c1ec4.tar
76a20143aac1.tar
63453d0a9b55.tar
docker daemon
I had my docker images on tape-archive (tar) format. Now it was time to switch to my new btrfs storage. In order to do that, the safest way is my tweaking the
/etc/docker/daemon.json
and I added the data-root section
{
    "dns": ["8.8.8.8"],
    "data-root": "/mnt/WD40PURZ/var_lib_docker"
}
I will explain var_lib_docker in a bit, stay with me.
and restarted docker
sudo systemctl restart dockerdocker load - the wrong way
It was time to restore aka load the docker images back to docker
ls -1 | awk '{print "docker load --input "$1".tar"}'

docker load --input 33a093dd9250.tar
docker load --input b47c7dfaaa93.tar
docker load --input 16eed3dc21a6.tar
docker load --input d4e07600b346.tar
docker load --input 58db3edaf2be.tar
docker load --input 28f8bde8a757.tar
docker load --input 382715ecff56.tar
docker load --input d5447fc01ae6.tar
docker load --input 046e6d725a3c.tar
docker load --input 49176f190c7e.tar
docker load --input 018f8f38ad92.tar
docker load --input 71eaf13299f4.tar
docker load --input 5bf9684f4720.tar
docker load --input eeb6ee3f44bd.tar
docker load --input 5d0da3dc9764.tar
docker load --input b6f507652425.tar
docker load --input ff3fa1a19332.tar
docker load --input aa2256d57c69.tar
docker load --input d073310c1ec4.tar
docker load --input 76a20143aac1.tar
docker load --input 63453d0a9b55.tar
I was really happy, till I saw the result:
# docker images -a

REPOSITORY   TAG       IMAGE ID       CREATED         SIZE
<none>       <none>    b47c7dfaaa93   5 days ago      993MB
<none>       <none>    a37dc5345d16   6 days ago      764MB
<none>       <none>    16eed3dc21a6   2 weeks ago     65.5MB
<none>       <none>    d4e07600b346   4 weeks ago     418MB
<none>       <none>    58db3edaf2be   2 months ago    77.8MB
<none>       <none>    28f8bde8a757   3 months ago    532MB
<none>       <none>    382715ecff56   3 months ago    705MB
<none>       <none>    d5447fc01ae6   4 months ago    72.8MB
<none>       <none>    046e6d725a3c   4 months ago    893MB
<none>       <none>    49176f190c7e   4 months ago    7.04MB
<none>       <none>    018f8f38ad92   5 months ago    12.3MB
<none>       <none>    71eaf13299f4   5 months ago    63.1MB
<none>       <none>    5bf9684f4720   19 months ago   194MB
<none>       <none>    eeb6ee3f44bd   19 months ago   204MB
<none>       <none>    5d0da3dc9764   19 months ago   231MB
<none>       <none>    b6f507652425   19 months ago   135MB
<none>       <none>    ff3fa1a19332   2 years ago     693MB
<none>       <none>    aa2256d57c69   2 years ago     194MB
<none>       <none>    d073310c1ec4   2 years ago     3.62GB
<none>       <none>    76a20143aac1   2 years ago     1.02GB
<none>       <none>    63453d0a9b55   3 years ago     222MB
No REPOSITORY or TAG !
then after a few minutes of internet search, I’ve realized that if you use the ImageID as a reference point in docker save, you will not get these values !!!!
and there is no reference here: https://docs.docker.com/engine/reference/commandline/save/
Removed everything , removed the data-root from /etc/docker/daemon.json and started again from the beginning
docker save - the correct way
docker images -a | grep -v ^REPOSITORY | awk '{print "docker save -o "$3".tar "$1":"$2""}' | sh -xoutput:
+ docker save -o b47c7dfaaa93.tar golang:1.19
+ docker save -o a37dc5345d16.tar archlinux:base-devel
+ docker save -o d4e07600b346.tar archlinux:base
+ docker save -o 58db3edaf2be.tar ubuntu:22.04
+ docker save -o 28f8bde8a757.tar centos7:ruby
+ docker save -o 382715ecff56.tar gitlab/gitlab-runner:ubuntu
+ docker save -o d5447fc01ae6.tar ubuntu:20.04
+ docker save -o 046e6d725a3c.tar ruby:latest
+ docker save -o 49176f190c7e.tar alpine:latest
+ docker save -o 018f8f38ad92.tar bash:latest
+ docker save -o 71eaf13299f4.tar ubuntu:18.04
+ docker save -o 5bf9684f4720.tar centos:6
+ docker save -o eeb6ee3f44bd.tar centos:7
+ docker save -o 5d0da3dc9764.tar centos:8
+ docker save -o b6f507652425.tar ubuntu:16.04
+ docker save -o ff3fa1a19332.tar 3bal/centos6-eol:devtoolset-7
+ docker save -o aa2256d57c69.tar 3bal/centos6-eol:latest
+ docker save -o d073310c1ec4.tar centos6:ebal
+ docker save -o 76a20143aac1.tar 3bal/arch:devel
+ docker save -o 63453d0a9b55.tar cern/slc6-base:latest
docker daemon with new data point
{
    "dns": ["8.8.8.8"],
    "data-root": "/mnt/WD40PURZ/var_lib_docker"
}
restart docker
sudo systemctl restart dockerdocker load - the correct way
ls -1 | awk '{print "docker load --input "$1}'
and verify -moment of truth-
$ docker images -a
REPOSITORY        TAG           IMAGE         ID  CREATED  SIZE
archlinux         base-devel    33a093dd9250  3   days     ago   764MB
golang            1.19          b47c7dfaaa93  8   days     ago   993MB
archlinux         base          d4e07600b346  4   weeks    ago   418MB
ubuntu            22.04         58db3edaf2be  2   months   ago   77.8MB
centos7           ruby          28f8bde8a757  3   months   ago   532MB
gitlab/gitlab-runner ubuntu     382715ecff56  4   months   ago   705MB
ubuntu            20.04         d5447fc01ae6  4   months   ago   72.8MB
ruby              latest        046e6d725a3c  4   months   ago   893MB
alpine            latest        49176f190c7e  4   months   ago   7.04MB
bash              latest        018f8f38ad92  5   months   ago   12.3MB
ubuntu            18.04         71eaf13299f4  5   months   ago   63.1MB
centos            6             5bf9684f4720  19  months   ago   194MB
centos            7             eeb6ee3f44bd  19  months   ago   204MB
centos            8             5d0da3dc9764  19  months   ago   231MB
ubuntu            16.04         b6f507652425  19  months   ago   135MB
3bal/centos6-eol  devtoolset-7  ff3fa1a19332  2   years    ago   693MB
3bal/centos6-eol  latest        aa2256d57c69  2   years    ago   194MB
centos6           ebal          d073310c1ec4  2   years    ago   3.62GB
3bal/arch         devel         76a20143aac1  2   years    ago   1.02GB
cern/slc6-base    latest        63453d0a9b55  3   years    ago   222MB
success !
btrfs mount point
Now it is time to explain the var_lib_docker
but first , let’s verify ST1000DX002 mount point with WD40PURZ
$ sudo ls -l /mnt/ST1000DX002/var_lib_docker/

total 4
drwx--x--- 1 root root  20 Nov 24  2020 btrfs
drwx------ 1 root root  20 Nov 24  2020 builder
drwx--x--x 1 root root 154 Dec 18  2020 buildkit
drwx--x--x 1 root root  12 Dec 18  2020 containerd
drwx--x--- 1 root root   0 Apr 14 19:52 containers
-rw------- 1 root root  59 Feb 13 10:45 engine-id
drwx------ 1 root root  10 Nov 24  2020 image
drwxr-x--- 1 root root  10 Nov 24  2020 network
drwx------ 1 root root  20 Nov 24  2020 plugins
drwx------ 1 root root   0 Apr 18 18:19 runtimes
drwx------ 1 root root   0 Nov 24  2020 swarm
drwx------ 1 root root   0 Apr 18 18:32 tmp
drwx------ 1 root root   0 Nov 24  2020 trust
drwx-----x 1 root root 568 Apr 18 18:19 volumes
$ sudo ls -l /mnt/WD40PURZ/var_lib_docker/

total 4
drwx--x--- 1 root root  20 Apr 18 16:51 btrfs
drwxr-xr-x 1 root root  14 Apr 18 17:46 builder
drwxr-xr-x 1 root root 148 Apr 18 17:48 buildkit
drwxr-xr-x 1 root root  20 Apr 18 17:47 containerd
drwx--x--- 1 root root   0 Apr 14 19:52 containers
-rw------- 1 root root  59 Feb 13 10:45 engine-id
drwxr-xr-x 1 root root  20 Apr 18 17:48 image
drwxr-xr-x 1 root root  24 Apr 18 17:48 network
drwxr-xr-x 1 root root  34 Apr 18 17:48 plugins
drwx------ 1 root root   0 Apr 18 18:36 runtimes
drwx------ 1 root root   0 Nov 24  2020 swarm
drwx------ 1 root root  48 Apr 18 18:42 tmp
drwx------ 1 root root   0 Nov 24  2020 trust
drwx-----x 1 root root  70 Apr 18 18:36 volumes
var_lib_docker is actually a btrfs subvolume that we can mount it on our system
$ sudo btrfs subvolume show /mnt/WD40PURZ/var_lib_docker/

var_lib_docker
        Name:                   var_lib_docker
        UUID:                   5552de11-f37c-4143-855f-50d02f0a9836
        Parent UUID:            -
        Received UUID:          -
        Creation time:          2023-04-18 16:25:54 +0300
        Subvolume ID:           4774
        Generation:             219588
        Gen at creation:        215579
        Parent ID:              5
        Top level ID:           5
        Flags:                  -
        Send transid:           0
        Send time:              2023-04-18 16:25:54 +0300
        Receive transid:        0
        Receive time:           -
        Snapshot(s):
We can use the subvolume id for that:
mount -o subvolid=4774 LABEL="WD40PURZ" /var/lib/docker/
So /var/lib/docker/ path on our rootfs, is now a mount point for our BTRFS raid-1 4TB storage and we can remove the data-root declaration from /etc/docker/daemon.json and restart our docker service.
That’s it !
I’ve been using btrfs for a decade now (yes, than means 10y) on my setup (btw I use ArchLinux). I am using subvolumes and read-only snapshots with btrfs, but I have never created a script to automate my backups.
I KNOW, WHAT WAS I DOING ALL THESE YEARS!!A few days ago, a dear friend asked me something about btrfs snapshots, and that question gave me the nudge to think about my btrfs subvolume snapshots and more specific how to automate them. A day later, I wrote a simple (I think so) script to do automate my backups.
The script as a gist
The script is online as a gist here: BTRFS: Automatic Snapshots Script . In this blog post, I’ll try to describe the requirements and what is my thinking. I waited a couple weeks so the cron (or systemd timer) script run itself and verify that everything works fine. Seems that it does (at least for now) and the behaviour is as expected. I will keep a static copy of my script in this blog post but any future changes should be done in the above gist.
Improvements
The script can be improved by many,many ways (check available space before run, measure the time of running, remove sudo, check if root is running the script, verify the partitions are on btrfs, better debugging, better reporting, etc etc). These are some of the ways of improving the script, I am sure you can think a million more - feel free to sent me your proposals. If I see something I like, I will incorporate them and attribute of-course. But be reminded that I am not driven by smart code, I prefer to have clear and simple code, something that everybody can easily read and understand.
Mount Points
To be completely transparent, I encrypt all my disks (usually with a random keyfile). I use btrfs raid1 on the disks and create many subvolumes on them. Everything exists outside of my primary ssd rootfs disk. So I use a small but fast ssd for my operating system and btrfs-raid1 for my “spinning rust” disks.
BTRFS subvolumes can be mounted as normal partitions and that is exactly what I’ve done with my home and opt. I keep everything that I’ve install outside of my distribution under opt.
This setup is very flexible as I can easy replace the disks when the storage is full by removing one by one of the disks from btrfs-raid1, remove-add the new larger disk, repair-restore raid, then remove the other disk, install the second and (re)balance the entire raid1 on them!
Although this is out of scope, I use a stub archlinux UEFI kernel so I do not have grub and my entire rootfs is also encrypted and btrfs!
mount -o subvolid=10701 LABEL="ST1000DX002" /home
mount -o subvolid=10657 LABEL="ST1000DX002" /opt
Declare variables
# paths MUST end with '/'
btrfs_paths=("/" "/home/" "/opt/")
timestamp=$(date +%Y%m%d_%H%M%S)
keep_snapshots=3
yymmdd="$(date +%Y/%m/%d)"
logfile="/var/log/btrfsSnapshot/${yymmdd}/btrfsSnapshot.log"
The first variable in the script is actually a bash array
btrfs_paths=("/" "/home/" "/opt/")
and all three (3) paths (rootfs, home & opt) are different mount points on different encrypted disks.
MUST end with / (forward slash), either-wise something catastrophic will occur to your system. Be very careful. Please, be very careful!
Next variable is the timestamp we will use, that will create something like
partition_YYYYMMDD_HHMMSS
After that is how many snapshots we would like to keep to our system. You can increase it to whatever you like. But be careful of the storage.
keep_snapshots=3
I like using shortcuts in shell scripts to reduce the long one-liners that some people think that it is alright. I dont, so
yymmdd="$(date +%Y/%m/%d)"
is one of these shortcuts !
Last, I like to have a logfile to review at a later time and see what happened.
logfile="/var/log/btrfsSnapshot/${yymmdd}/btrfsSnapshot.log"
Log Directory
for older dudes -like me- you know that you can not have all your logs under one directory but you need to structure them. The above yymmdd shortcut can help here. As I am too lazy to check if the directory already exist, I just (re)create the log directory that the script will use.
sudo mkdir -p "/var/log/btrfsSnapshot/${yymmdd}/"
For - Loop
We enter to the crucial part of the script. We are going to iterate our btrfs commands in a bash for-loop structure so we can run the same commands for all our partitions (variable: btrfs_paths)
for btrfs_path in "${btrfs_paths[@]}"; do
    <some commands>
done
Snapshot Directory
We need to have our snapshots in a specific location. So I chose .Snapshot/ under each partition. And I am silently (re)creating this directory -again I am lazy, someone should check if the directory/path already exist- just to be sure that the directory exist.
sudo mkdir -p "${btrfs_path}".Snapshot/
I am also using very frequently mlocate (updatedb) so to avoid having multiple (duplicates) in your index, do not forget to update updatedb.conf to exclude the snapshot directories.
PRUNENAMES = ".Snapshot"How many snapshots are there?
Yes, how many ?
In order to learn this, we need to count them. I will try to skip every other subvolume that exist under the path and count only the read-only, snapshots under each partition.
sudo btrfs subvolume list -o -r -s "${btrfs_path}" | grep -c ".Snapshot/"
Delete Previous snapshots
At this point in the script, we are ready to delete all previous snapshots and only keep the latest or to be exact whatever the keep_snapshots variables says we should keep.
To do that, we are going to iterate via a while-loop (this is a nested loop inside the above for-loop)
while [ "${keep_snapshots}" -le "${list_btrfs_snap}" ]
do
  <some commands>
done
considering that the keep_snapshots is an integer, we iterate the delete command less or equal from the list of already btrfs existing snapshots.
Delete Command
To avoid mistakes, we delete by subvolume id and not by the name of the snapshot, under the btrfs path we listed above.
btrfs subvolume delete --subvolid "${prev_btrfs_snap}" "${btrfs_path}"and we log the output of the command into our log
Delete subvolume (no-commit): '//.Snapshot/20221107_091028'
Create a new subvolume snapshot
And now we are going to create a new read-only snapshot under our btrfs subvolume.
btrfs subvolume snapshot -r "${btrfs_path}" "${btrfs_path}.Snapshot/${timestamp}"
the log entry will have something like:
Create a readonly snapshot of '/' in '/.Snapshot/20221111_000001'
That’s it !
Output
Log Directory Structure and output
sudo tree /var/log/btrfsSnapshot/2022/11/
/var/log/btrfsSnapshot/2022/11/
├── 07
│   └── btrfsSnapshot.log
├── 10
│   └── btrfsSnapshot.log
├── 11
│   └── btrfsSnapshot.log
└── 18
    └── btrfsSnapshot.log

4 directories, 4 files
sudo cat /var/log/btrfsSnapshot/2022/11/18/btrfsSnapshot.log
######## Fri, 18 Nov 2022 00:00:01 +0200 ########

Delete subvolume (no-commit): '//.Snapshot/20221107_091040'
Create a readonly snapshot of '/' in '/.Snapshot/20221118_000001'

Delete subvolume (no-commit): '/home//home/.Snapshot/20221107_091040'
Create a readonly snapshot of '/home/' in '/home/.Snapshot/20221118_000001'

Delete subvolume (no-commit): '/opt//opt/.Snapshot/20221107_091040'
Create a readonly snapshot of '/opt/' in '/opt/.Snapshot/20221118_000001'
Mount a read-only subvolume
As something extra for this article, I will mount a read-only subvolume, so you can see how it is done.
$ sudo btrfs subvolume list -o -r -s /

ID 462 gen 5809766 cgen 5809765 top level 5 otime 2022-11-10 18:11:20 path .Snapshot/20221110_181120
ID 463 gen 5810106 cgen 5810105 top level 5 otime 2022-11-11 00:00:01 path .Snapshot/20221111_000001
ID 464 gen 5819886 cgen 5819885 top level 5 otime 2022-11-18 00:00:01 path .Snapshot/20221118_000001

$ sudo mount -o subvolid=462 /media/
mount: /media/: can't find in /etc/fstab.

$ sudo mount -o subvolid=462 LABEL=rootfs /media/

$ df -HP /media/
Filesystem       Size  Used Avail Use% Mounted on
/dev/mapper/ssd  112G  9.1G  102G   9% /media

$ sudo touch /media/etc/ebal
touch: cannot touch '/media/etc/ebal': Read-only file system

$ sudo diff /etc/pacman.d/mirrorlist /media/etc/pacman.d/mirrorlist

294c294
< Server = http://ftp.ntua.gr/pub/linux/archlinux/$repo/os/$arch
---
> #Server = http://ftp.ntua.gr/pub/linux/archlinux/$repo/os/$arch

$ sudo umount /media
The Script
Last, but not least, the full script as was the date of this article.
#!/bin/bash
set -e

# ebal, Mon, 07 Nov 2022 08:49:37 +0200

## 0 0 * * Fri /usr/local/bin/btrfsSnapshot.sh

# paths MUST end with '/'
btrfs_paths=("/" "/home/" "/opt/")
timestamp=$(date +%Y%m%d_%H%M%S)
keep_snapshots=3
yymmdd="$(date +%Y/%m/%d)"
logfile="/var/log/btrfsSnapshot/${yymmdd}/btrfsSnapshot.log"

sudo mkdir -p "/var/log/btrfsSnapshot/${yymmdd}/"

echo "######## $(date -R) ########" | sudo tee -a "${logfile}"
echo "" | sudo tee -a "${logfile}"

for btrfs_path in "${btrfs_paths[@]}"; do

    ## Create Snapshot directory
    sudo mkdir -p "${btrfs_path}".Snapshot/

    ## How many Snapshots are there ?
    list_btrfs_snap=$(sudo btrfs subvolume list -o -r -s "${btrfs_path}" | grep -c ".Snapshot/")

    ## Get oldest rootfs btrfs snapshot
    while [ "${keep_snapshots}" -le "${list_btrfs_snap}" ]
    do
        prev_btrfs_snap=$(sudo btrfs subvolume list -o -r -s  "${btrfs_path}" | grep ".Snapshot/" | sort | head -1 | awk '{print $2}')

        ## Delete a btrfs snapshot by their subvolume id
        sudo btrfs subvolume delete --subvolid "${prev_btrfs_snap}" "${btrfs_path}" | sudo tee -a "${logfile}"

        list_btrfs_snap=$(sudo btrfs subvolume list -o -r -s "${btrfs_path}" | grep -c ".Snapshot/")
    done

    ## Create a new read-only btrfs snapshot
    sudo btrfs subvolume snapshot -r "${btrfs_path}" "${btrfs_path}.Snapshot/${timestamp}" | sudo tee -a "${logfile}"

    echo "" | sudo tee -a "${logfile}"

done
When creating a new Cloud Virtual Machine the cloud provider is copying a virtual disk as the base image (we called it mí̱tra or matrix) and starts your virtual machine from another virtual disk (or volume cloud disk) that in fact is a snapshot of the base image.
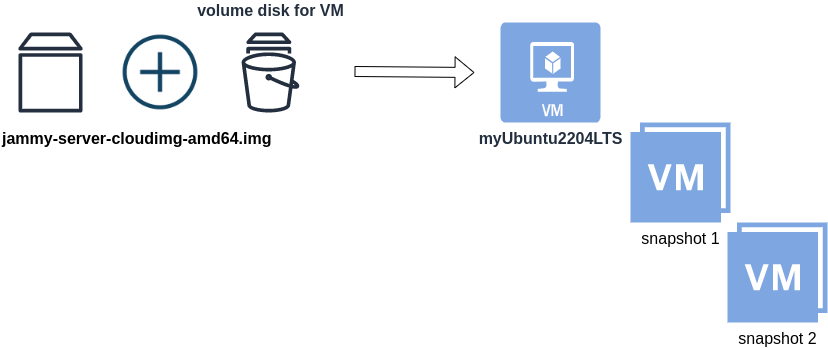
Just for the sake of this example, let us say that the base cloud image is the
jammy-server-cloudimg-amd64.imgWhen creating a new Libvirt (qemu/kvm) virtual machine, you can use this base image to start your VM instead of using an iso to install ubuntu 22.04 LTS. When choosing this image, then all changes will occur to that image and if you want to spawn another virtual machine, you need to (re)download it.
So instead of doing that, the best practice is to copy this image as base and start from a snapshot aka a baking file from that image. It is best because you can always quickly revert all your changes and (re)spawn the VM from the fresh/clean base image. Or you can always create another snapshot and revert if needed.
inspect images
To see how that works here is a local example from my linux machine.
qemu-img info /var/lib/libvirt/images/lEvXLA_tf-base.qcow2
image: /var/lib/libvirt/images/lEvXLA_tf-base.qcow2
file format: qcow2
virtual size: 2.2 GiB (2361393152 bytes)
disk size: 636 MiB
cluster_size: 65536
Format specific information:
    compat: 0.10
    compression type: zlib
    refcount bits: 16
the most important attributes to inspect are
virtual size: 2.2 GiB
disk size: 636 MiB
and the volume disk of my virtual machine
qemu-img info /var/lib/libvirt/images/lEvXLA_tf-vol.qcow2
image: /var/lib/libvirt/images/lEvXLA_tf-vol.qcow2
file format: qcow2
virtual size: 10 GiB (10737418240 bytes)
disk size: 1.6 GiB
cluster_size: 65536
backing file: /var/lib/libvirt/images/lEvXLA_tf-base.qcow2
backing file format: qcow2
Format specific information:
    compat: 0.10
    compression type: zlib
    refcount bits: 16
We see here
virtual size: 10 GiB
disk size: 1.6 GiB
cause I have extended the volume disk size to 10G from 2.2G , doing some updates and install some packages.
Now here is a problem.
I would like to use my own cloud image as base for some projects. It will help me speed things up and also do some common things I am usually doing in every setup.
If I copy the volume disk, then I will copy 1.6G of the snapshot disk. I can not use this as a base image. The volume disk contains only the delta from the base image!
baking file
Let’s first understand a bit better what is happening here
qemu-img info –backing-chain /var/lib/libvirt/images/lEvXLA_tf-vol.qcow2
image: /var/lib/libvirt/images/lEvXLA_tf-vol.qcow2
file format: qcow2
virtual size: 10 GiB (10737418240 bytes)
disk size: 1.6 GiB
cluster_size: 65536
backing file: /var/lib/libvirt/images/lEvXLA_tf-base.qcow2
backing file format: qcow2
Format specific information:
    compat: 0.10
    compression type: zlib
    refcount bits: 16

image: /var/lib/libvirt/images/lEvXLA_tf-base.qcow2
file format: qcow2
virtual size: 2.2 GiB (2361393152 bytes)
disk size: 636 MiB
cluster_size: 65536
Format specific information:
    compat: 0.10
    compression type: zlib
    refcount bits: 16
By inspecting the volume disk, we see that this image is chained to our base image.
disk size: 1.6 GiB
disk size: 636 MiB
Commit Volume
If we want to commit our volume changes to our base images, we need to commit them.
sudo qemu-img commit /var/lib/libvirt/images/lEvXLA_tf-vol.qcow2

Image committed.
Be aware, we commit our changes the volume disk => so our base will get the updates !!
Base Image
We need to see our base image grow we our changes
  disk size: 1.6 GiB
+ disk size: 636 MiB
=
  disk size: 2.11 GiB
and we can verify that by getting the image info (details)
qemu-img info /var/lib/libvirt/images/lEvXLA_tf-base.qcow2
image: /var/lib/libvirt/images/lEvXLA_tf-base.qcow2
file format: qcow2
virtual size: 10 GiB (10737418240 bytes)
disk size: 2.11 GiB
cluster_size: 65536
Format specific information:
    compat: 0.10
    compression type: zlib
    refcount bits: 16
That’s it !
Using Terraform for personal projects, is a good way to create your lab in a reproducible manner. Wherever your lab is, either in the “cloud” aka other’s people computers or in a self-hosted environment, you can run your Infrastructure as code (IaC) instead of performing manual tasks each time.
My preferable way is to use QEMU/KVM (Kernel Virtual Machine) on my libvirt (self-hosted) lab. You can quickly build a k8s cluster or test a few virtual machines with different software, without paying extra money to cloud providers.
Terraform uses a state file to store your entire infra in json format. This file will be the source of truth for your infrastructure. Any changes you make in the code, terraform will figure out what needs to add/destroy and run only what have changed.
Working in a single repository, terraform will create a local state file on your working directory. This is fast and reliable when working alone. When working with a team (either in an opensource project/service or it is something work related) you need to share the state with others. Eitherwise the result will be catastrophic as each person will have no idea of the infrastructure state of the service.
In this blog post, I will try to explain how to use GitLab to store the terraform state into a remote repository by using the tf backend: http which is REST.
Greate a new private GitLab Project
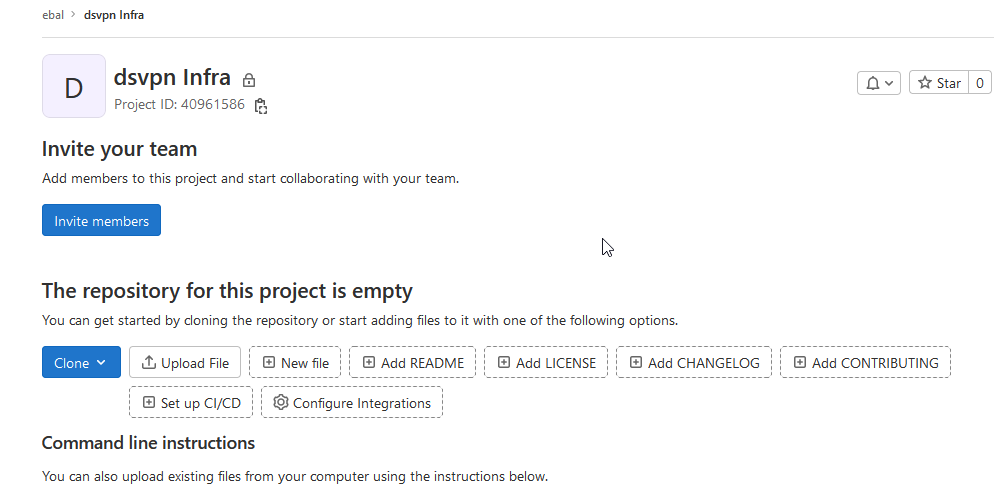
We need the Project ID which is under the project name in the top.
Create a new api token
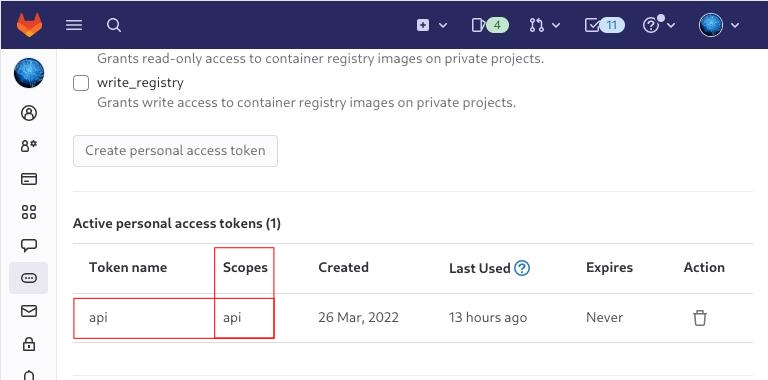
Verify that your Project has the ability to store terraform state files
You are ready to clone the git repository to your system.
Backend
Reading the documentation in the below links
seems that the only thing we need to do, is to expand our terraform project with this:
terraform {
  backend "http" {
  }
}
Doing that, we inform our IaC that our terraform backend should be a remote address.
Took me a while to figure this out, but after re-reading all the necessary documentation materials the idea is to declare your backend on gitlab and to do this, we need to initialize the http backend.
The only Required configuration setting is the remote address and should be something like this:
terraform {
  backend "http" {
    address = "https://gitlab.com/api/v4/projects/<PROJECT_ID>/terraform/state/<STATE_NAME>"
  }
}
Where PROJECT_ID and STATE_NAME are relative to your project.
In this article, we go with
GITLAB_PROJECT_ID="40961586"
GITLAB_TF_STATE_NAME="tf_state"
Terraform does not allow to use variables in the backend http, so the preferable way is to export them to our session.
and we -of course- need the address:
TF_HTTP_ADDRESS="https://gitlab.com/api/v4/projects/${GITLAB_PROJECT_ID}/terraform/state/${GITLAB_TF_STATE_NAME}"
For convience reasons, I will create a file named: terraform.config outside of this git repo
cat > ../terraform.config <<EOF
export -p GITLAB_PROJECT_ID="40961586"
export -p GITLAB_TF_STATE_NAME="tf_state"
export -p GITLAB_URL="https://gitlab.com/api/v4/projects"

# Address
export -p TF_HTTP_ADDRESS="${GITLAB_URL}/${GITLAB_PROJECT_ID}/terraform/state/${GITLAB_TF_STATE_NAME}"

EOF

source ../terraform.config
this should do the trick.
Authentication
In order to authenticate via tf against GitLab to store the tf remote state, we need to also set two additional variables:
# Authentication
TF_HTTP_USERNAME="api"
TF_HTTP_PASSWORD="<TOKEN>"
put them in the above terraform.config file.
Pretty much we are done!
Initialize Terraform
source ../terraform.config

terraform init
Initializing the backend...

Successfully configured the backend "http"! Terraform will automatically
use this backend unless the backend configuration changes.

Initializing provider plugins...
- Finding latest version of hashicorp/http...
- Finding latest version of hashicorp/random...
- Finding latest version of hashicorp/template...
- Finding dmacvicar/libvirt versions matching ">= 0.7.0"...
- Installing hashicorp/random v3.4.3...
- Installed hashicorp/random v3.4.3 (signed by HashiCorp)
- Installing hashicorp/template v2.2.0...
- Installed hashicorp/template v2.2.0 (signed by HashiCorp)
- Installing dmacvicar/libvirt v0.7.0...
- Installed dmacvicar/libvirt v0.7.0 (unauthenticated)
- Installing hashicorp/http v3.2.1...
- Installed hashicorp/http v3.2.1 (signed by HashiCorp)

Terraform has created a lock file .terraform.lock.hcl to record the provider
selections it made above. Include this file in your version control repository
so that Terraform can guarantee to make the same selections by default when
you run "terraform init" in the future.

...

Terraform has been successfully initialized!

You may now begin working with Terraform. Try running "terraform plan" to see
any changes that are required for your infrastructure. All Terraform commands
should now work.

If you ever set or change modules or backend configuration for Terraform,
rerun this command to reinitialize your working directory. If you forget, other
commands will detect it and remind you to do so if necessary.
Remote state
by running
terraform plan
we can now see the remote terraform state in the gitlab
Opening Actions –> Copy terraform init command we can see the below configuration:
export GITLAB_ACCESS_TOKEN=<YOUR-ACCESS-TOKEN>

terraform init
    -backend-config="address=https://gitlab.com/api/v4/projects/40961586/terraform/state/tf_state"
    -backend-config="lock_address=https://gitlab.com/api/v4/projects/40961586/terraform/state/tf_state/lock"
    -backend-config="unlock_address=https://gitlab.com/api/v4/projects/40961586/terraform/state/tf_state/lock"
    -backend-config="username=api"
    -backend-config="password=$GITLAB_ACCESS_TOKEN"
    -backend-config="lock_method=POST"
    -backend-config="unlock_method=DELETE"
    -backend-config="retry_wait_min=5"
Update terraform backend configuration
I dislike running a “long” terraform init command, so we will put these settings to our tf code.
Separating the static changes from the dynamic, our Backend http config can become something like this:
terraform {
  backend "http" {
    lock_method    = "POST"
    unlock_method  = "DELETE"
    retry_wait_min = 5
  }
}
but we need to update our terraform.config once more, to include all the variables of the http backend configuration for locking and unlocking the state.
# Lock
export -p TF_HTTP_LOCK_ADDRESS="${TF_HTTP_ADDRESS}/lock"

# Unlock
export -p TF_HTTP_UNLOCK_ADDRESS="${TF_HTTP_ADDRESS}/lock"
Terraform Config
So here is our entire terraform config file
# GitLab

export -p GITLAB_URL="https://gitlab.com/api/v4/projects"
export -p GITLAB_PROJECT_ID="<>"
export -p GITLAB_TF_STATE_NAME="tf_state"

# Terraform

# Address
export -p TF_HTTP_ADDRESS="${GITLAB_URL}/${GITLAB_PROJECT_ID}/terraform/state/${GITLAB_TF_STATE_NAME}"

# Lock
export -p TF_HTTP_LOCK_ADDRESS="${TF_HTTP_ADDRESS}/lock"

# Unlock
export -p TF_HTTP_UNLOCK_ADDRESS="${TF_HTTP_ADDRESS}/lock"

# Authentication
export -p TF_HTTP_USERNAME="api"
export -p TF_HTTP_PASSWORD="<>"
And pretty much that’s it!
Other Colleagues
So in order our team mates/colleagues want to make changes to this specific gitlab repo (or even extended to include a pipeline) they need
- Git clone the repo
- Edit the terraform.config
- Initialize terraform (terraform init)
And terraform will use the remote state file.
In the last few months of this year, a business question exists in all our minds:
-Can we reduce Cost ?
-Are there any legacy cloud resources that we can remove ?
The answer is YES, it is always Yes. It is part of your Technical Debt (remember that?).
In our case we had to check a few cloud resources, but the most impressive were our Object Storage Service that in the past we were using Buckets and Objects as backup volumes … for databases … database clusters!!
So let’s find out what is our Techinical Debt in our OBS … ~ 1.8PB . One petabyte holds 1000 terabytes (TB), One terabyte holds 1000 gigabytes (GB).
We have confirmed with our colleagues and scheduled the decomissions of these legacy buckets/objects. We’ve noticed that a few of them are in TB sizes with million of objects and in some cases with not a hierarchy structure (paths) so there is an issue with command line tools or web UI tools.
The problem is called LISTING and/or PAGING.
That means we can not list in a POSIX way (nerdsssss) all our objects so we can try delete them. We need to PAGE them in 50 or 100 objects and that means we need to batch our scripts. This could be a very long/time based job.
Then after a couple days of reading manuals (remember these ?), I found that we can create a Lifecycle Policy to our Buckets !!!
But before going on to setup the Lifecycle policy, just a quick reminder how the Object Lifecycle works
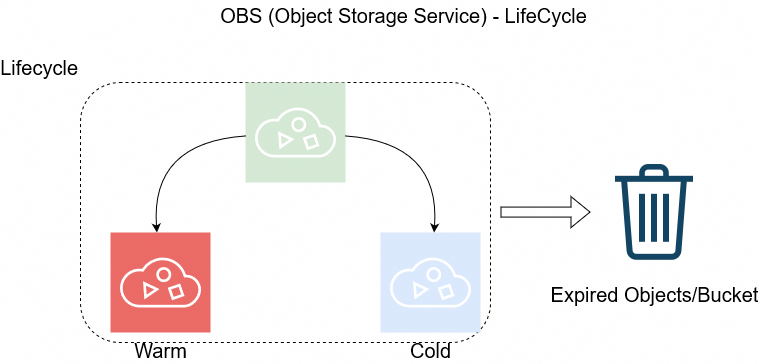
The objects can be in Warm/Cold or in Expired State as buckets support versioning. This has to do with the retention policy of logs/data.
So in order to automatically delete ALL objects from a bucket, we need to setup up the Expire Time to 1 day.
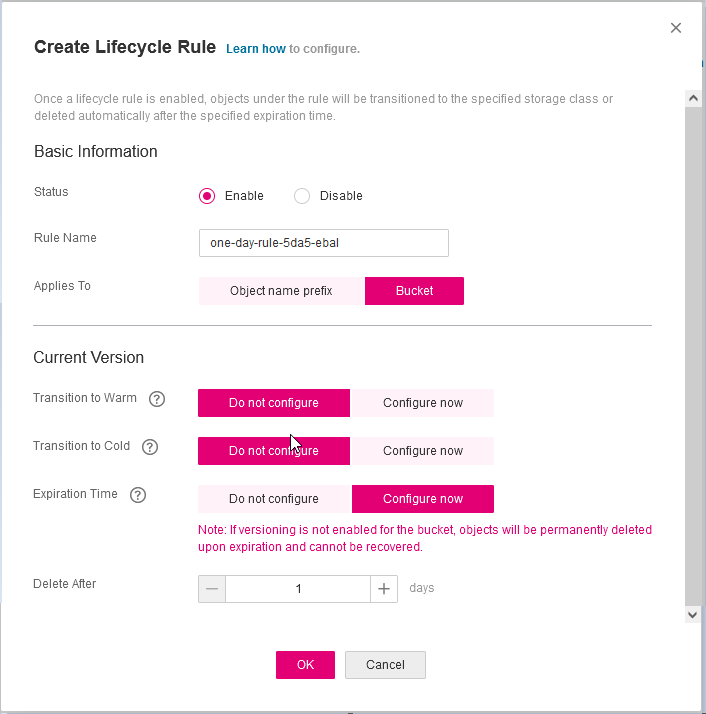
Then you have to wait for 24h and next day
yehhhhhhhhhhhh !
PS. Caveat Remember BEFORE all that, do disable Logging as the default setting is to log every action to a local log path, inside the Bucket.
In this blog post, I’ll try to share my personal notes on how to setup a kubernetes cluster with kubeadm on ubuntu 22.04 LTS Virtual Machines.
I am going to use three (3) Virtual Machines in my local lab. My home lab is based on libvirt Qemu/KVM (Kernel-based Virtual Machine) and I run Terraform as the infrastructure provision tool.
There is a copy of this blog post to github.
https://github.com/ebal/k8s_cluster
If you notice something wrong you can either contact me via the contact page, or open a PR in the github project.
you can also follow me at twitter: https://twitter.com/ebalaskas
Kubernetes, also known as K8s, is an open-source system for automating deployment, scaling, and management of containerized applications.
- Prerequisites
- Git Terraform Code for the kubernetes cluster
- Control-Plane Node
- Ports on the control-plane node
- Firewall on the control-plane node
- Hosts file in the control-plane node
- No Swap on the control-plane node
- Kernel modules on the control-plane node
- NeedRestart on the control-plane node
- Installing a Container Runtime on the control-plane node
- Installing kubeadm, kubelet and kubectl on the control-plane node
- Initializing the control-plane node
- Create user access config to the k8s control-plane node
- Verify the control-plane node
- Install an overlay network provider on the control-plane node
- Verify CoreDNS is running on the control-plane node
- Worker Nodes
- Ports on the worker nodes
- Firewall on the worker nodes
- Hosts file in the worker node
- No Swap on the worker node
- Kernel modules on the worker node
- NeedRestart on the worker node
- Installing a Container Runtime on the worker node
- Installing kubeadm, kubelet and kubectl on the worker node
- Get Token from the control-plane node
- Get Certificate Hash from the control-plane node
- Join Workers to the kubernetes cluster
- Is the kubernetes cluster running ?
- Kubernetes Dashboard
- Install kubernetes dashboard
- Add a Node Port to kubernetes dashboard
- Patch kubernetes-dashboard
- Edit kubernetes-dashboard Service
- Accessing Kubernetes Dashboard
- Create An Authentication Token (RBAC)
- Creating a Service Account
- Creating a ClusterRoleBinding
- Getting a Bearer Token
- Browsing Kubernetes Dashboard
- Nginx App
- That’s it !
Prerequisites
- at least 3 Virtual Machines of Ubuntu 22.04 (one for control-plane, two for worker nodes)
- 2GB (or more) of RAM on each Virtual Machine
- 2 CPUs (or more) on each Virtual Machine
- 20Gb of hard disk on each Virtual Machine
- No SWAP partition/image/file on each Virtual Machine
Git Terraform Code for the kubernetes cluster
I prefer to have a reproducible infrastructure, so I can very fast create and destroy my test lab. My preferable way of doing things is testing on each step, so I pretty much destroy everything, coping and pasting commands and keep on. I use terraform for the create the infrastructure. You can find the code for the entire kubernetes cluster here: k8s cluster - Terraform code.
If you do not use terraform, skip this step!
You can git clone the repo to review and edit it according to your needs.
git clone https://github.com/ebal/k8s_cluster.git
cd tf_libvirt
You will need to make appropriate changes. Open Variables.tf for that. The most important option to change, is the User option. Change it to your github username and it will download and setup the VMs with your public key, instead of mine!
But pretty much, everything else should work out of the box. Change the vmem and vcpu settings to your needs.
Init terraform before running the below shell script.
terraform init
and then run
./start.sh
output should be something like:
...
Apply complete! Resources: 16 added, 0 changed, 0 destroyed.

Outputs:

VMs = [
  "192.168.122.169  k8scpnode",
  "192.168.122.40   k8wrknode1",
  "192.168.122.8    k8wrknode2",
]
Verify that you have ssh access to the VMs
eg.
ssh -l ubuntu 192.168.122.169
replace the IP with what the output gave you.
Ubuntu 22.04 Image
If you noticed in the terraform code, I have the below declaration as the cloud image:
../jammy-server-cloudimg-amd64.img
that means, I’ve already downloaded it, in the upper directory to speed things up!
cd ../
curl -sLO https://cloud-images.ubuntu.com/jammy/current/focal-server-cloudimg-amd64.img
cd -
Control-Plane Node
Let’s us now start the configure of the k8s control-plane node.
Ports on the control-plane node
Kubernetes runs a few services that needs to be accessable from the worker nodes.
| Protocol | Direction | Port Range | Purpose | Used By |
|---|---|---|---|---|
| TCP | Inbound | 6443 | Kubernetes API server | All |
| TCP | Inbound | 2379-2380 | etcd server client API | kube-apiserver, etcd |
| TCP | Inbound | 10250 | Kubelet API | Self, Control plane |
| TCP | Inbound | 10259 | kube-scheduler | Self |
| TCP | Inbound | 10257 | kube-controller-manager | Self |
Although etcd ports are included in control plane section, you can also host your
own etcd cluster externally or on custom ports.
Firewall on the control-plane node
We need to open the necessary ports on the CP’s (control-plane node) firewall.
sudo ufw allow 6443/tcp
sudo ufw allow 2379:2380/tcp
sudo ufw allow 10250/tcp
sudo ufw allow 10259/tcp
sudo ufw allow 10257/tcp

#sudo ufw disable
sudo ufw status
the output should be
To                         Action      From
--                         ------      ----
22/tcp                     ALLOW       Anywhere
6443/tcp                   ALLOW       Anywhere
2379:2380/tcp              ALLOW       Anywhere
10250/tcp                  ALLOW       Anywhere
10259/tcp                  ALLOW       Anywhere
10257/tcp                  ALLOW       Anywhere
22/tcp (v6)                ALLOW       Anywhere (v6)
6443/tcp (v6)              ALLOW       Anywhere (v6)
2379:2380/tcp (v6)         ALLOW       Anywhere (v6)
10250/tcp (v6)             ALLOW       Anywhere (v6)
10259/tcp (v6)             ALLOW       Anywhere (v6)
10257/tcp (v6)             ALLOW       Anywhere (v6)
Hosts file in the control-plane node
We need to update the /etc/hosts with the internal IP and hostname.
This will help when it is time to join the worker nodes.
echo $(hostname -I) $(hostname) | sudo tee -a /etc/hosts
Just a reminder: we need to update the hosts file to all the VMs.
To include all the VMs’ IPs and hostnames.
If you already know them, then your /etc/hosts file should look like this:
192.168.122.169  k8scpnode
192.168.122.40   k8wrknode1
192.168.122.8    k8wrknode2
replace the IPs to yours.
No Swap on the control-plane node
Be sure that SWAP is disabled in all virtual machines!
sudo swapoff -a
and the fstab file should not have any swap entry.
The below command should return nothing.
sudo grep -i swap /etc/fstab
If not, edit the /etc/fstab and remove the swap entry.
If you follow my terraform k8s code example from the above github repo,
you will notice that there isn’t any swap entry in the cloud init (user-data) file.
Nevertheless it is always a good thing to douple check.
Kernel modules on the control-plane node
We need to load the below kernel modules on all k8s nodes, so k8s can create some network magic!
- overlay
- br_netfilter
Run the below bash snippet that will do that, and also will enable the forwarding features of the network.
sudo tee /etc/modules-load.d/kubernetes.conf <<EOF
overlay
br_netfilter
EOF

sudo modprobe overlay
sudo modprobe br_netfilter

sudo lsmod | grep netfilter

sudo tee /etc/sysctl.d/kubernetes.conf <<EOF
net.bridge.bridge-nf-call-ip6tables = 1
net.bridge.bridge-nf-call-iptables = 1
net.ipv4.ip_forward = 1
EOF

sudo sysctl --system
NeedRestart on the control-plane node
Before installing any software, we need to make a tiny change to needrestart program. This will help with the automation of installing packages and will stop asking -via dialog- if we would like to restart the services!
echo "\$nrconf{restart} = 'a';" | sudo tee -a /etc/needrestart/needrestart.conf
Installing a Container Runtime on the control-plane node
It is time to choose which container runtime we are going to use on our k8s cluster. There are a few container runtimes for k8s and in the past docker were used to. Nowadays the most common runtime is the containerd that can also uses the cgroup v2 kernel features. There is also a docker-engine runtime via CRI. Read here for more details on the subject.
curl -sL https://download.docker.com/linux/ubuntu/gpg | sudo gpg --dearmor -o /etc/apt/trusted.gpg.d/docker-keyring.gpg

sudo apt-add-repository -y "deb https://download.docker.com/linux/ubuntu jammy stable"

sleep 5

sudo apt -y install containerd.io

containerd config default                              \
 | sed 's/SystemdCgroup = false/SystemdCgroup = true/' \
 | sudo tee /etc/containerd/config.toml

sudo systemctl restart containerd.service
We have also enabled the
systemd cgroup driverso the control-plane node can use the cgroup v2 features.
Installing kubeadm, kubelet and kubectl on the control-plane node
Install the kubernetes packages (kubedam, kubelet and kubectl) by first adding the k8s repository on our virtual machine. To speed up the next step, we will also download the configuration container images.
sudo curl -sLo /etc/apt/trusted.gpg.d/kubernetes-keyring.gpg https://packages.cloud.google.com/apt/doc/apt-key.gpg

sudo apt-add-repository -y "deb http://apt.kubernetes.io/ kubernetes-xenial main"

sleep 5

sudo apt install -y kubelet kubeadm kubectl

sudo kubeadm config images pull
Initializing the control-plane node
We can now initialize our control-plane node for our kubernetes cluster.
There are a few things we need to be careful about:
- We can specify the control-plane-endpoint if we are planning to have a high available k8s cluster. (we will skip this for now),
- Choose a Pod network add-on (next section) but be aware that CoreDNS (DNS and Service Discovery) will not run till then (later),
- define where is our container runtime socket (we will skip it)
- advertise the API server (we will skip it)
But we will define our Pod Network CIDR to the default value of the Pod network add-on so everything will go smoothly later on.
sudo kubeadm init --pod-network-cidr=10.244.0.0/16
Keep the output in a notepad.
Create user access config to the k8s control-plane node
Our k8s control-plane node is running, so we need to have credentials to access it.
The kubectl reads a configuration file (that has the token), so we copying this from k8s admin.
rm -rf $HOME/.kube

mkdir -p $HOME/.kube

sudo cp -i /etc/kubernetes/admin.conf $HOME/.kube/config

sudo chown $(id -u):$(id -g) $HOME/.kube/config

ls -la $HOME/.kube/config

alias k="kubectl"
Verify the control-plane node
Verify that the kubernets is running.
That means we have a k8s cluster - but only the control-plane node is running.
kubectl cluster-info
#kubectl cluster-info dump

k get nodes -o wide; k get pods  -A -o wide
Install an overlay network provider on the control-plane node
As I mentioned above, in order to use the DNS and Service Discovery services in the kubernetes (CoreDNS) we need to install a Container Network Interface (CNI) based Pod network add-on so that your Pods can communicate with each other.
We will use flannel as the simplest of them.
k apply -f https://raw.githubusercontent.com/coreos/flannel/master/Documentation/kube-flannel.yml
Verify CoreDNS is running on the control-plane node
Verify that the control-plane node is Up & Running and the control-plane pods (as coredns pods) are also running
$ k get nodes -o wide

NAME        STATUS   ROLES           AGE   VERSION   INTERNAL-IP       EXTERNAL-IP   OS-IMAGE             KERNEL-VERSION      CONTAINER-RUNTIME
k8scpnode   Ready    control-plane   54s   v1.25.0   192.168.122.169   <none>        Ubuntu 22.04.1 LTS   5.15.0-46-generic   containerd://1.6.8
$ k get pods -A -o wide

NAMESPACE    NAME                              READY STATUS  RESTARTS AGE IP              NODE      NOMINATED NODE READINESS GATES
kube-flannel kube-flannel-ds-zqv2b             1/1   Running 0        36s 192.168.122.169 k8scpnode <none>         <none>
kube-system  coredns-565d847f94-lg54q          1/1   Running 0        38s 10.244.0.2      k8scpnode <none>         <none>
kube-system  coredns-565d847f94-ms8zk          1/1   Running 0        38s 10.244.0.3      k8scpnode <none>         <none>
kube-system  etcd-k8scpnode                    1/1   Running 0        50s 192.168.122.169 k8scpnode <none>         <none>
kube-system  kube-apiserver-k8scpnode          1/1   Running 0        50s 192.168.122.169 k8scpnode <none>         <none>
kube-system  kube-controller-manager-k8scpnode 1/1   Running 0        50s 192.168.122.169 k8scpnode <none>         <none>
kube-system  kube-proxy-pv7tj                  1/1   Running 0        39s 192.168.122.169 k8scpnode <none>         <none>
kube-system  kube-scheduler-k8scpnode          1/1   Running 0        50s 192.168.122.169 k8scpnode <none>         <none>
That’s it with the control-plane node !
Worker Nodes
The below instructions works pretty much the same on both worker nodes.
I will document the steps for the worker1 node but do the same for the worker2 node.
Ports on the worker nodes
As we learned above on the control-plane section, kubernetes runs a few services
| Protocol | Direction | Port Range | Purpose | Used By |
|---|---|---|---|---|
| TCP | Inbound | 10250 | Kubelet API | Self, Control plane |
| TCP | Inbound | 30000-32767 | NodePort Services | All |
Firewall on the worker nodes
so we need to open the necessary ports on the worker nodes too.
sudo ufw allow 10250/tcp
sudo ufw allow 30000:32767/tcp

sudo ufw status
output should look like
To                         Action      From
--                         ------      ----
22/tcp                     ALLOW       Anywhere
10250/tcp                  ALLOW       Anywhere
30000:32767/tcp            ALLOW       Anywhere
22/tcp (v6)                ALLOW       Anywhere (v6)
10250/tcp (v6)             ALLOW       Anywhere (v6)
30000:32767/tcp (v6)       ALLOW       Anywhere (v6)
The next few steps are pretty much exactly the same as in the control-plane node.
In order to keep this documentation short, I’ll just copy/paste the commands.
Hosts file in the worker node
Update the /etc/hosts file to include the IPs and hostname of all VMs.
192.168.122.169  k8scpnode
192.168.122.40   k8wrknode1
192.168.122.8    k8wrknode2
No Swap on the worker node
sudo swapoff -a
Kernel modules on the worker node
sudo tee /etc/modules-load.d/kubernetes.conf <<EOF
overlay
br_netfilter
EOF

sudo modprobe overlay
sudo modprobe br_netfilter

sudo lsmod | grep netfilter

sudo tee /etc/sysctl.d/kubernetes.conf <<EOF
net.bridge.bridge-nf-call-ip6tables = 1
net.bridge.bridge-nf-call-iptables = 1
net.ipv4.ip_forward = 1
EOF

sudo sysctl --system
NeedRestart on the worker node
echo "\$nrconf{restart} = 'a';" | sudo tee -a /etc/needrestart/needrestart.conf
Installing a Container Runtime on the worker node
curl -sL https://download.docker.com/linux/ubuntu/gpg | sudo gpg --dearmor -o /etc/apt/trusted.gpg.d/docker-keyring.gpg

sudo apt-add-repository -y "deb https://download.docker.com/linux/ubuntu jammy stable"

sleep 5

sudo apt -y install containerd.io

containerd config default                              \
 | sed 's/SystemdCgroup = false/SystemdCgroup = true/' \
 | sudo tee /etc/containerd/config.toml

sudo systemctl restart containerd.service
Installing kubeadm, kubelet and kubectl on the worker node
sudo curl -sLo /etc/apt/trusted.gpg.d/kubernetes-keyring.gpg https://packages.cloud.google.com/apt/doc/apt-key.gpg

sudo apt-add-repository -y "deb http://apt.kubernetes.io/ kubernetes-xenial main"

sleep 5

sudo apt install -y kubelet kubeadm kubectl

sudo kubeadm config images pull
Get Token from the control-plane node
To join nodes to the kubernetes cluster, we need to have a couple of things.
- a token from control-plane node
- the CA certificate hash from the contol-plane node.
If you didnt keep the output the initialization of the control-plane node, that’s okay.
Run the below command in the control-plane node.
sudo kubeadm token list
and we will get the initial token that expires after 24hours.
TOKEN                     TTL         EXPIRES                USAGES                   DESCRIPTION                                                EXTRA GROUPS
zt36bp.uht4cziweef1jo1h   23h         2022-08-31T18:38:16Z   authentication,signing   The default bootstrap token generated by 'kubeadm init'.   system:bootstrappers:kubeadm:default-node-token
In this case is the
zt36bp.uht4cziweef1jo1hGet Certificate Hash from the control-plane node
To get the CA certificate hash from the control-plane-node, we need to run a complicated command:
openssl x509 -pubkey -in /etc/kubernetes/pki/ca.crt | openssl rsa -pubin -outform der 2>/dev/null | openssl dgst -sha256 -hex | sed 's/^.* //'
and in my k8s cluster is:
a4833f8c82953370610efaa5ed93b791337232c3a948b710b2435d747889c085Join Workers to the kubernetes cluster
So now, we can Join our worker nodes to the kubernetes cluster.
Run the below command on both worker nodes:
sudo kubeadm join 192.168.122.169:6443 \
       --token zt36bp.uht4cziweef1jo1h \
       --discovery-token-ca-cert-hash sha256:a4833f8c82953370610efaa5ed93b791337232c3a948b710b2435d747889c085
we get this message
Run ‘kubectl get nodes’ on the control-plane to see this node join the cluster.
Is the kubernetes cluster running ?
We can verify that
kubectl get nodes   -o wide
kubectl get pods -A -o wide
NAME         STATUS   ROLES           AGE     VERSION   INTERNAL-IP       EXTERNAL-IP   OS-IMAGE             KERNEL-VERSION      CONTAINER-RUNTIME
k8scpnode    Ready    control-plane   64m     v1.25.0   192.168.122.169   <none>        Ubuntu 22.04.1 LTS   5.15.0-46-generic   containerd://1.6.8
k8wrknode1   Ready    <none>          2m32s   v1.25.0   192.168.122.40    <none>        Ubuntu 22.04.1 LTS   5.15.0-46-generic   containerd://1.6.8
k8wrknode2   Ready    <none>          2m28s   v1.25.0   192.168.122.8     <none>        Ubuntu 22.04.1 LTS   5.15.0-46-generic   containerd://1.6.8
NAMESPACE NAME READY STATUS RESTARTS AGE IP NODE NOMINATED NODE READINESS GATES
kube-flannel kube-flannel-ds-52g92 1/1 Running 0 2m32s 192.168.122.40 k8wrknode1 <none> <none>
kube-flannel kube-flannel-ds-7qlm7 1/1 Running 0 2m28s 192.168.122.8 k8wrknode2 <none> <none>
kube-flannel kube-flannel-ds-zqv2b 1/1 Running 0 64m 192.168.122.169 k8scpnode <none> <none>
kube-system coredns-565d847f94-lg54q 1/1 Running 0 64m 10.244.0.2 k8scpnode <none> <none>
kube-system coredns-565d847f94-ms8zk 1/1 Running 0 64m 10.244.0.3 k8scpnode <none> <none>
kube-system etcd-k8scpnode 1/1 Running 0 64m 192.168.122.169 k8scpnode <none> <none>
kube-system kube-apiserver-k8scpnode 1/1 Running 0 64m 192.168.122.169 k8scpnode <none> <none>
kube-system kube-controller-manager-k8scpnode 1/1 Running 1 (12m ago) 64m 192.168.122.169 k8scpnode <none> <none>
kube-system kube-proxy-4khw6 1/1 Running 0 2m32s 192.168.122.40 k8wrknode1 <none> <none>
kube-system kube-proxy-gm27l 1/1 Running 0 2m28s 192.168.122.8 k8wrknode2 <none> <none>
kube-system kube-proxy-pv7tj 1/1 Running 0 64m 192.168.122.169 k8scpnode <none> <none>
kube-system kube-scheduler-k8scpnode 1/1 Running 1 (12m ago) 64m 192.168.122.169 k8scpnode <none> <none>
That’s it !
Our k8s cluster is running.
Kubernetes Dashboard
is a general purpose, web-based UI for Kubernetes clusters. It allows users to manage applications running in the cluster and troubleshoot them, as well as manage the cluster itself.
We can proceed by installing a k8s dashboard to our k8s cluster.
Install kubernetes dashboard
One simple way to install the kubernetes-dashboard, is by applying the latest (as of this writing) yaml configuration file.
kubectl apply -f https://raw.githubusercontent.com/kubernetes/dashboard/v2.6.1/aio/deploy/recommended.yaml
the output of the above command should be something like
namespace/kubernetes-dashboard created
serviceaccount/kubernetes-dashboard created
service/kubernetes-dashboard created
secret/kubernetes-dashboard-certs created
secret/kubernetes-dashboard-csrf created
secret/kubernetes-dashboard-key-holder created
configmap/kubernetes-dashboard-settings created
role.rbac.authorization.k8s.io/kubernetes-dashboard created
clusterrole.rbac.authorization.k8s.io/kubernetes-dashboard created
rolebinding.rbac.authorization.k8s.io/kubernetes-dashboard created
clusterrolebinding.rbac.authorization.k8s.io/kubernetes-dashboard created
deployment.apps/kubernetes-dashboard created
service/dashboard-metrics-scraper created
deployment.apps/dashboard-metrics-scraper created
Verify the installation
kubectl get all -n kubernetes-dashboard
NAME                                             READY   STATUS    RESTARTS   AGE
pod/dashboard-metrics-scraper-64bcc67c9c-kvll7   1/1     Running   0          2m16s
pod/kubernetes-dashboard-66c887f759-rr4gn        1/1     Running   0          2m16s

NAME                                TYPE        CLUSTER-IP      EXTERNAL-IP   PORT(S)    AGE
service/dashboard-metrics-scraper   ClusterIP   10.110.25.61    <none>        8000/TCP   2m16s
service/kubernetes-dashboard        ClusterIP   10.100.65.122   <none>        443/TCP    2m16s

NAME                                        READY   UP-TO-DATE   AVAILABLE   AGE
deployment.apps/dashboard-metrics-scraper   1/1     1            1           2m16s
deployment.apps/kubernetes-dashboard        1/1     1            1           2m16s

NAME                                                   DESIRED   CURRENT   READY   AGE
replicaset.apps/dashboard-metrics-scraper-64bcc67c9c   1         1         1       2m16s
replicaset.apps/kubernetes-dashboard-66c887f759        1         1         1       2m16s
Add a Node Port to kubernetes dashboard
Kubernetes Dashboard by default runs on a internal 10.x.x.x IP.
To access the dashboard we need to have a NodePort in the kubernetes-dashboard service.
We can either Patch the service or edit the yaml file.
Patch kubernetes-dashboard
kubectl --namespace kubernetes-dashboard patch svc kubernetes-dashboard -p '{"spec": {"type": "NodePort"}}'
output
service/kubernetes-dashboard patched
verify the service
kubectl get svc -n kubernetes-dashboard
NAME                        TYPE        CLUSTER-IP      EXTERNAL-IP   PORT(S)         AGE
dashboard-metrics-scraper   ClusterIP   10.110.25.61    <none>        8000/TCP        11m
kubernetes-dashboard        NodePort    10.100.65.122   <none>        443:32709/TCP   11m
we can see the 30480 in the kubernetes-dashboard.
Edit kubernetes-dashboard Service
kubectl edit svc -n kubernetes-dashboard kubernetes-dashboard
and chaning the service type from
type: ClusterIPto
type: NodePortAccessing Kubernetes Dashboard
The kubernetes-dashboard has two (2) pods, one (1) for metrics, one (2) for the dashboard.
To access the dashboard, first we need to identify in which Node is running.
kubectl get pods -n kubernetes-dashboard -o wide
NAME                                         READY   STATUS    RESTARTS   AGE     IP           NODE         NOMINATED NODE   READINESS GATES
dashboard-metrics-scraper-64bcc67c9c-fs7pt   1/1     Running   0          2m43s   10.244.1.9   k8wrknode1   <none>           <none>
kubernetes-dashboard-66c887f759-pzt4z        1/1     Running   0          2m44s   10.244.2.9   k8wrknode2   <none>           <none>
In my setup the dashboard pod is running on the worker node 2 and from the /etc/hosts is on the 192.168.122.8 IP.
The NodePort is 32709
k get svc -n kubernetes-dashboard -o wide
So, we can open a new tab on our browser and type:
https://192.168.122.8:32709
and accept the self-signed certificate!
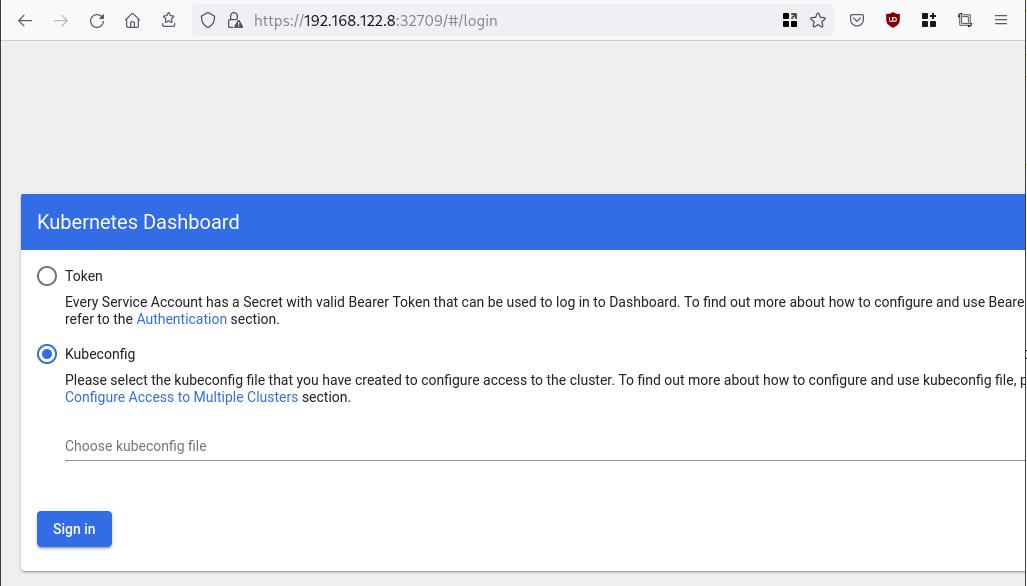
Create An Authentication Token (RBAC)
Last step for the kubernetes-dashboard is to create an authentication token.
Creating a Service Account
Create a new yaml file, with kind: ServiceAccount that has access to kubernetes-dashboard namespace and has name: admin-user.
cat > kubernetes-dashboard.ServiceAccount.yaml <<EOF
apiVersion: v1
kind: ServiceAccount
metadata:
  name: admin-user
  namespace: kubernetes-dashboard

EOF
add this service account to the k8s cluster
kubectl apply -f kubernetes-dashboard.ServiceAccount.yaml
output
serviceaccount/admin-user createdCreating a ClusterRoleBinding
We need to bind the Service Account with the kubernetes-dashboard via Role-based access control.
cat > kubernetes-dashboard.ClusterRoleBinding.yaml <<EOF
apiVersion: rbac.authorization.k8s.io/v1
kind: ClusterRoleBinding
metadata:
  name: admin-user
roleRef:
  apiGroup: rbac.authorization.k8s.io
  kind: ClusterRole
  name: cluster-admin
subjects:
- kind: ServiceAccount
  name: admin-user
  namespace: kubernetes-dashboard

EOF
apply this yaml file
kubectl apply -f kubernetes-dashboard.ClusterRoleBinding.yaml
clusterrolebinding.rbac.authorization.k8s.io/admin-user created
That means, our Service Account User has all the necessary roles to access the kubernetes-dashboard.
Getting a Bearer Token
Final step is to create/get a token for our user.
kubectl -n kubernetes-dashboard create token admin-user
eyJhbGciOiJSUzI1NiIsImtpZCI6Im04M2JOY2k1Yk1hbFBhLVN2cjA4X1pkdktXNldqWkR4bjB6MGpTdFgtVHcifQ.eyJhdWQiOlsiaHR0cHM6Ly9rdWJlcm5ldGVzLmRlZmF1bHQuc3ZjLmNsdXN0ZXIubG9jYWwiXSwiZXhwIjoxNjYxOTU2NDQ1LCJpYXQiOjE2NjE5NTI4NDUsImlzcyI6Imh0dHBzOi8va3ViZXJuZXRlcy5kZWZhdWx0LnN2Yy5jbHVzdGVyLmxvY2FsIiwia3ViZXJuZXRlcy5pbyI6eyJuYW1lc3BhY2UiOiJrdWJlcm5ldGVzLWRhc2hib2FyZCIsInNlcnZpY2VhY2NvdW50Ijp7Im5hbWUiOiJhZG1pbi11c2VyIiwidWlkIjoiN2M4OWIyZDktMGIwYS00ZDg4LTk2Y2EtZDU3NjhjOWU2ZGYxIn19LCJuYmYiOjE2NjE5NTI4NDUsInN1YiI6InN5c3RlbTpzZXJ2aWNlYWNjb3VudDprdWJlcm5ldGVzLWRhc2hib2FyZDphZG1pbi11c2VyIn0.RMRQkZZhcoC5vCvck6hKfqXJ4dfN4JoQyAaClHZvOMI6JgQZEfB2-_Qsh5MfFApJUEit-0TX9r3CzW3JqvB7dmpTPxUQvHK68r82WGveBVp1wF37UyXu_IzxiCQzpCWYr3GcVGAGZVBbhhqNYm765FV02ZA_khHrW3WpB80ikhm_TNLkOS6Llq2UiLFZyHHmjl5pwvGzT7YXZe8s-llZSgc0UenEwPG-82eE279oOy6r4_NltoV1HB3uu0YjUJPlkqAPnHuSfAA7-8A3XAAVHhRQvFPea1qZLc4-oD24AcU0FjWqDMILEyE8zaD2ci8zEQBMoxcf2qmj0wn9cfbZwQ
Add this token to the previous login page
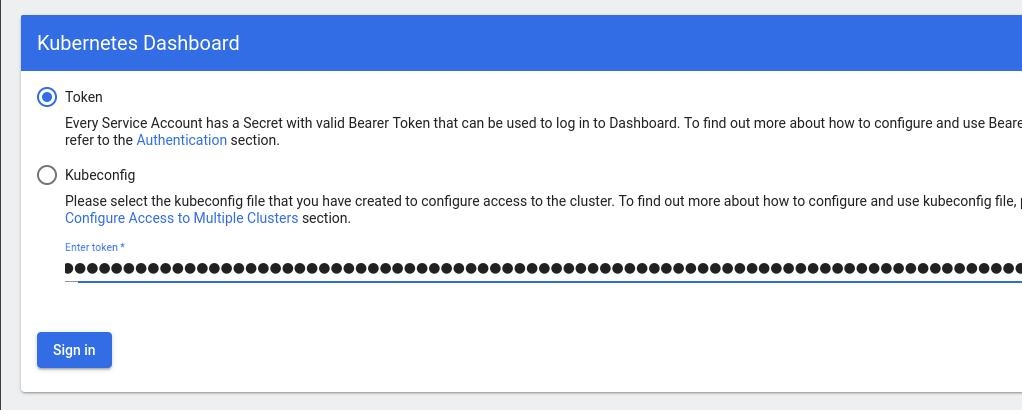
Browsing Kubernetes Dashboard
eg. Cluster –> Nodes
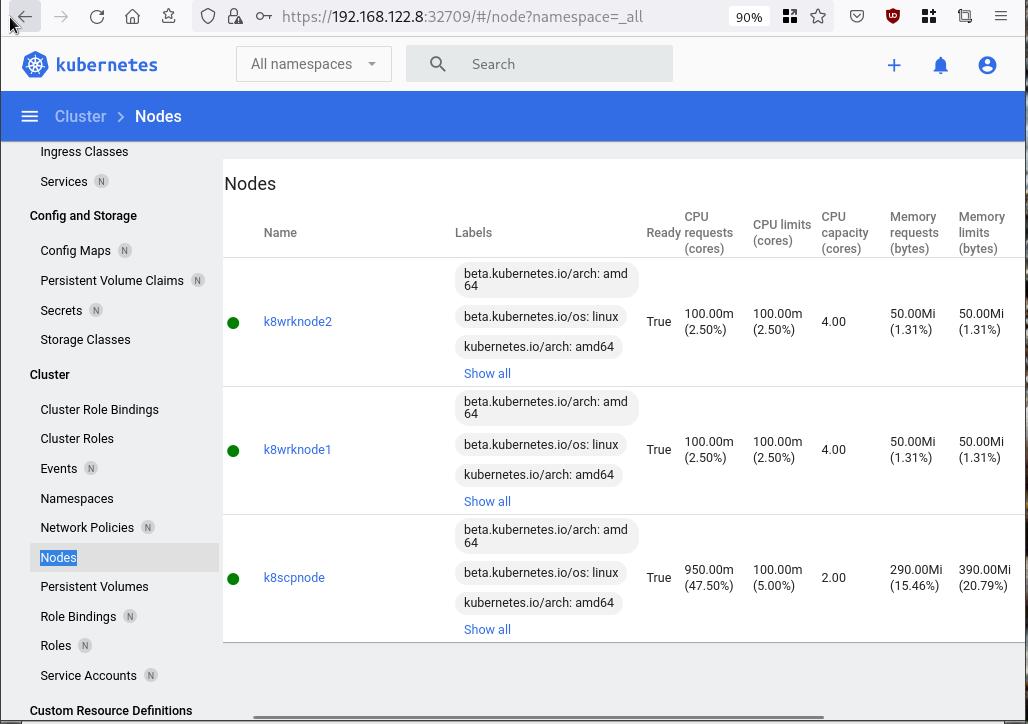
Nginx App
Before finishing this blog post, I would also like to share how to install a simple nginx-app as it is customary to do such thing in every new k8s cluster.
But plz excuse me, I will not get into much details.
You should be able to understand the below k8s commands.
Install nginx-app
kubectl create deployment nginx-app --image=nginx --replicas=2
deployment.apps/nginx-app createdGet Deployment
kubectl get deployment nginx-app -o wideNAME READY UP-TO-DATE AVAILABLE AGE CONTAINERS IMAGES SELECTOR
nginx-app 2/2 2 2 64s nginx nginx app=nginx-appExpose Nginx-App
kubectl expose deployment nginx-app --type=NodePort --port=80
service/nginx-app exposedVerify Service nginx-app
kubectl get svc nginx-app -o wide
NAME        TYPE       CLUSTER-IP      EXTERNAL-IP   PORT(S)        AGE   SELECTOR
nginx-app   NodePort   10.98.170.185   <none>        80:31761/TCP   27s   app=nginx-app
Describe Service nginx-app
kubectl describe svc nginx-app
Name:                     nginx-app
Namespace:                default
Labels:                   app=nginx-app
Annotations:              <none>
Selector:                 app=nginx-app
Type:                     NodePort
IP Family Policy:         SingleStack
IP Families:              IPv4
IP:                       10.98.170.185
IPs:                      10.98.170.185
Port:                     <unset>  80/TCP
TargetPort:               80/TCP
NodePort:                 <unset>  31761/TCP
Endpoints:                10.244.1.10:80,10.244.2.10:80
Session Affinity:         None
External Traffic Policy:  Cluster
Events:                   <none>
Curl Nginx-App
curl http://192.168.122.8:31761
<!DOCTYPE html>
<html>
<head>
<title>Welcome to nginx!</title>
<style>
html { color-scheme: light dark; }
body { width: 35em; margin: 0 auto;
font-family: Tahoma, Verdana, Arial, sans-serif; }
</style>
</head>
<body>
<h1>Welcome to nginx!</h1>
<p>If you see this page, the nginx web server is successfully installed and
working. Further configuration is required.</p>

<p>For online documentation and support please refer to
<a href="http://nginx.org/">nginx.org</a>.<br/>
Commercial support is available at
<a href="http://nginx.com/">nginx.com</a>.</p>

<p><em>Thank you for using nginx.</em></p>
</body>
</html>
Nginx-App from Browser

That’s it !
I hope you enjoyed this blog post.
-ebal
./destroy.sh...
libvirt_domain.domain-ubuntu["k8wrknode1"]: Destroying... [id=446cae2a-ce14-488f-b8e9-f44839091bce]
libvirt_domain.domain-ubuntu["k8scpnode"]: Destroying... [id=51e12abb-b14b-4ab8-b098-c1ce0b4073e3]
time_sleep.wait_for_cloud_init: Destroying... [id=2022-08-30T18:02:06Z]
libvirt_domain.domain-ubuntu["k8wrknode2"]: Destroying... [id=0767fb62-4600-4bc8-a94a-8e10c222b92e]
time_sleep.wait_for_cloud_init: Destruction complete after 0s
libvirt_domain.domain-ubuntu["k8wrknode1"]: Destruction complete after 1s
libvirt_domain.domain-ubuntu["k8scpnode"]: Destruction complete after 1s
libvirt_domain.domain-ubuntu["k8wrknode2"]: Destruction complete after 1s
libvirt_cloudinit_disk.cloud-init["k8wrknode1"]: Destroying... [id=/var/lib/libvirt/images/Jpw2Sg_cloud-init.iso;b8ddfa73-a770-46de-ad16-b0a5a08c8550]
libvirt_cloudinit_disk.cloud-init["k8wrknode2"]: Destroying... [id=/var/lib/libvirt/images/VdUklQ_cloud-init.iso;5511ed7f-a864-4d3f-985a-c4ac07eac233]
libvirt_volume.ubuntu-base["k8scpnode"]: Destroying... [id=/var/lib/libvirt/images/l5Rr1w_ubuntu-base]
libvirt_volume.ubuntu-base["k8wrknode2"]: Destroying... [id=/var/lib/libvirt/images/VdUklQ_ubuntu-base]
libvirt_cloudinit_disk.cloud-init["k8scpnode"]: Destroying... [id=/var/lib/libvirt/images/l5Rr1w_cloud-init.iso;11ef6bb7-a688-4c15-ae33-10690500705f]
libvirt_volume.ubuntu-base["k8wrknode1"]: Destroying... [id=/var/lib/libvirt/images/Jpw2Sg_ubuntu-base]
libvirt_cloudinit_disk.cloud-init["k8wrknode1"]: Destruction complete after 1s
libvirt_volume.ubuntu-base["k8wrknode2"]: Destruction complete after 1s
libvirt_cloudinit_disk.cloud-init["k8scpnode"]: Destruction complete after 1s
libvirt_cloudinit_disk.cloud-init["k8wrknode2"]: Destruction complete after 1s
libvirt_volume.ubuntu-base["k8wrknode1"]: Destruction complete after 1s
libvirt_volume.ubuntu-base["k8scpnode"]: Destruction complete after 2s
libvirt_volume.ubuntu-vol["k8wrknode1"]: Destroying... [id=/var/lib/libvirt/images/Jpw2Sg_ubuntu-vol]
libvirt_volume.ubuntu-vol["k8scpnode"]: Destroying... [id=/var/lib/libvirt/images/l5Rr1w_ubuntu-vol]
libvirt_volume.ubuntu-vol["k8wrknode2"]: Destroying... [id=/var/lib/libvirt/images/VdUklQ_ubuntu-vol]
libvirt_volume.ubuntu-vol["k8scpnode"]: Destruction complete after 0s
libvirt_volume.ubuntu-vol["k8wrknode2"]: Destruction complete after 0s
libvirt_volume.ubuntu-vol["k8wrknode1"]: Destruction complete after 0s
random_id.id["k8scpnode"]: Destroying... [id=l5Rr1w]
random_id.id["k8wrknode2"]: Destroying... [id=VdUklQ]
random_id.id["k8wrknode1"]: Destroying... [id=Jpw2Sg]
random_id.id["k8wrknode2"]: Destruction complete after 0s
random_id.id["k8scpnode"]: Destruction complete after 0s
random_id.id["k8wrknode1"]: Destruction complete after 0s
Destroy complete! Resources: 16 destroyed.
So you build a GitLab project, you created a pipeline and then a scheduler to run every week your pipeline.
And then you realize that you are polluting the internet with deprecated (garbage) things, at some point you have a debug option on, bla bla bla… etc etc.
It is time to clean up your mess!
Create a GitLab API Token
Select scopes: api.
Verify API token
run something like this
export GITLAB_API="glpat-HldkXzyurwBmroAdQCMo"

curl -sL --header "PRIVATE-TOKEN: ${GITLAB_API}" "https://gitlab.com/api/v4/projects?owned=true" | jq .[].path_with_namespace
you should see your projects.
Get your Project ID
create a new bash variable:
export PROJECT="terraform-provider/terraform-provider-hcloud-ci"
and then use the get rest api call
curl -sL --header "PRIVATE-TOKEN: ${GITLAB_API}" "https://gitlab.com/api/v4/projects?owned=true&search=${PROJECT}&search_namespaces=true" | jq -r .[].id
or you can also put the id into a new bash variable:
export ID=$(curl -sL --header "PRIVATE-TOKEN: ${GITLAB_API}" "https://gitlab.com/api/v4/projects?owned=true&search=${PROJECT}&search_namespaces=true" | jq -r .[].id)
View the previous pipelines
curl -sL \
  --header "PRIVATE-TOKEN: ${GITLAB_API}" \
  https://gitlab.com/api/v4/projects/${ID}/pipelines | jq .
Remove deprecated pipelines
just delete them via the API
curl -sL --header "PRIVATE-TOKEN: ${GITLAB_API}"   "https://gitlab.com/api/v4/projects/${ID}/pipelines?per_page=150"  \
 | jq  -r .[].id    \
 | awk '{print "curl -sL --header \"PRIVATE-TOKEN: ${GITLAB_API}\" --request DELETE https://gitlab.com/api/v4/projects/${ID}/pipelines/"$1}'   \
 | sh -x
that’s it !
WackoWiki is the wiki of my choice and one of the first opensource project I’ve ever contributed. I still use wackowiki for personal use!
A few days ago, wackowiki released version 6.0.25. In this blog post, I will try to share my experience of installing wackowiki on a new VM ubuntu 20.04 LTS.
Ansible Role
I have updated the WackoWiki Ansible Role on my personal github account to represent all necessary steps of this article.
Terraform files
In order to test/verify wackowiki installation and ansible role, I use a virtual machine on my home lab. To make this fast and reproducable, I have uploaded my terraform files that I used on my lab here: GitHub
Requirements
Ubuntu 20.04 LTS
apt-get update
apt -y install /
       php /
       php-common /
       php-bcmath /
       php-ctype /
       php-gd /
       php-iconv /
       php-json /
       php-mbstring /
       php-mysql /
       apache2 /
       libapache2-mod-php /
       mariadb-server /
       unzip
Apache2
We need to enable mod_reqwrite in apache2 but also to add the appropiate configuration in the default conf in VirtualHost
sudo -i
a2enmod rewrite
vim /etc/apache2/sites-available/000-default.conf
<VirtualHost *:80>
...
    # enable.htaccess
    <Directory /var/www/html/>
        Options Indexes FollowSymLinks MultiViews
        AllowOverride All
        Require all granted
    </Directory>
...
</VirtualHost>
MySQL
wacko.sql
CREATE DATABASE IF NOT EXISTS wacko;
CREATE USER IF NOT EXISTS 'wacko'@'localhost' IDENTIFIED BY 'YOURNEWPASSWORD';
GRANT  ALL PRIVILEGES ON wacko.* TO 'wacko'@'localhost';
FLUSH  PRIVILEGES;
sudo -i
mysql < wacko.sql
Get WackoWiki
curl -sLO https://downloads.sourceforge.net/wackowiki/wacko.6.0.25.zip
unzip wacko.6.0.25.zip
mv wackowiki-6.0.25/wacko /var/www/html/wacko/
chown -R www-data:www-data /var/www/html/wacko/
Web Installation

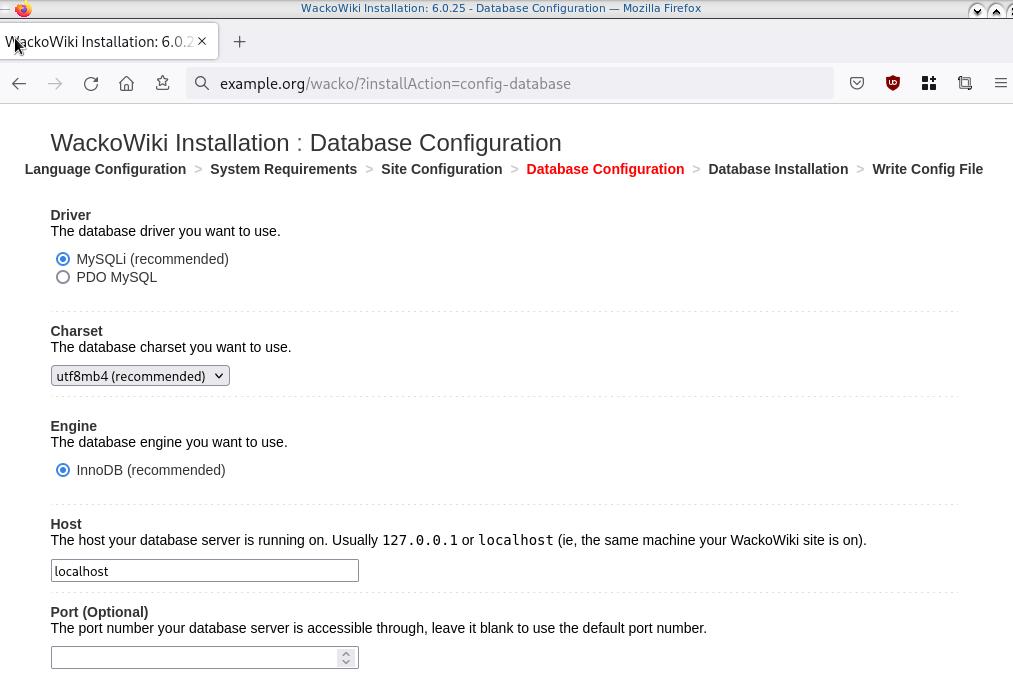
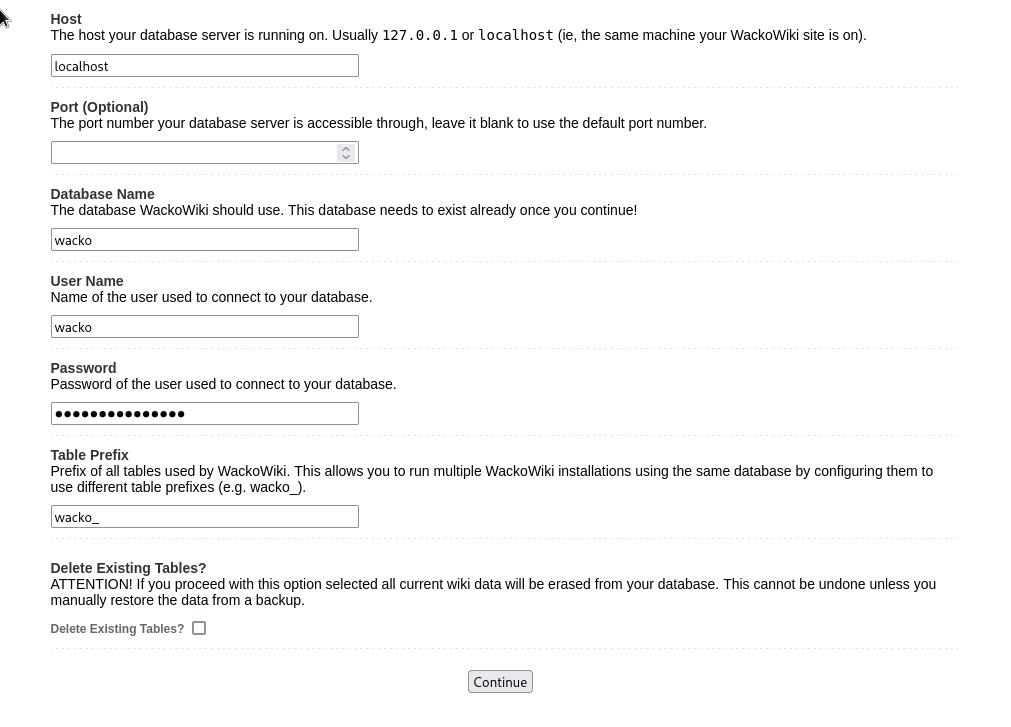
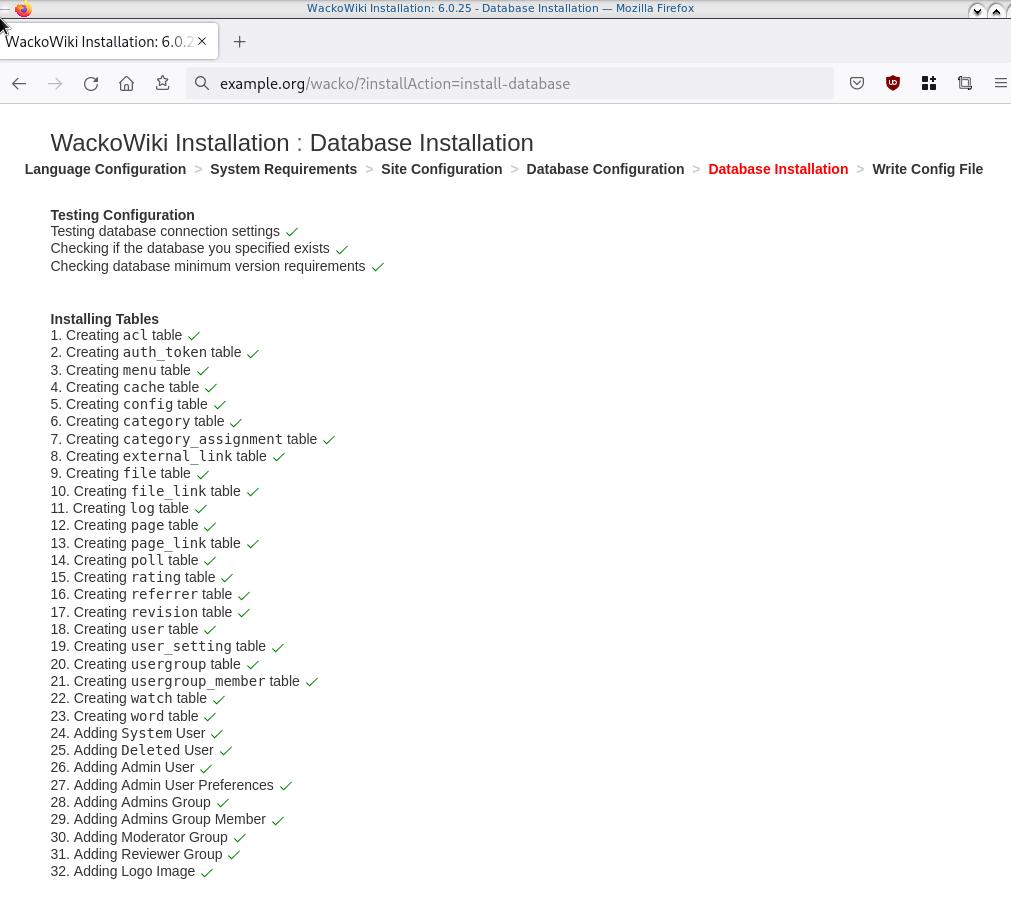
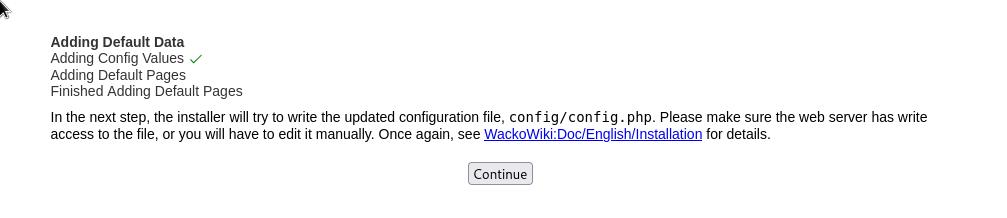
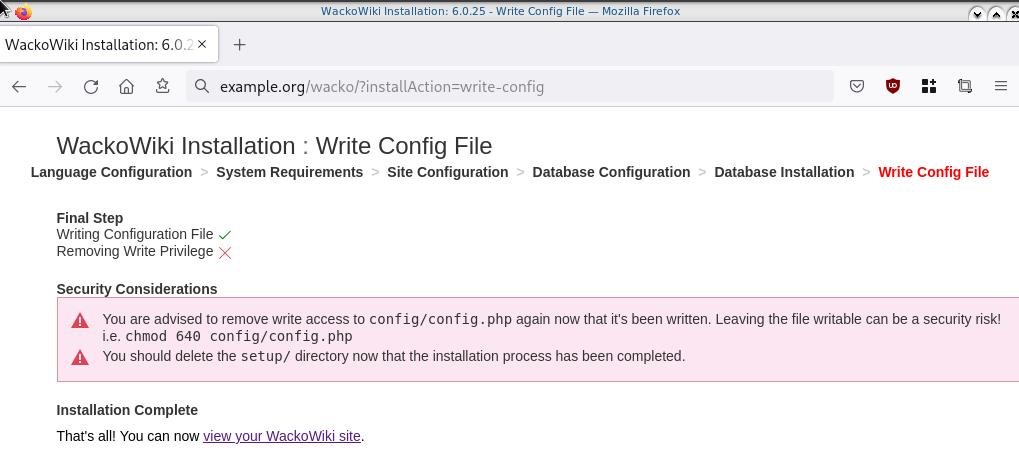
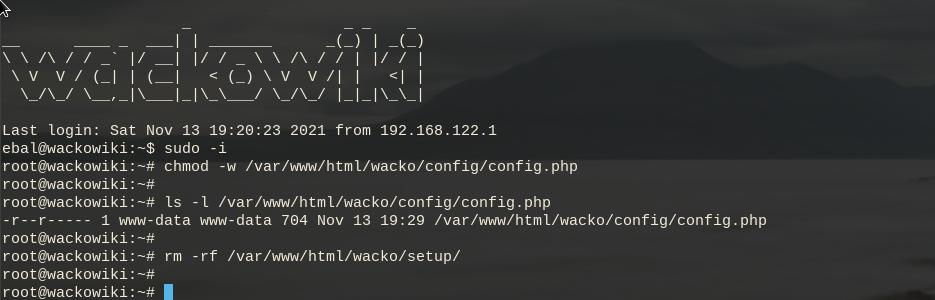
Post Install
Last, we need to remove write permission for the wackowiki configuration file and remove setup folder
sudo -i
chmod -w /var/www/html/wacko/config/config.php
rm -rf   /var/www/html/wacko/setup/
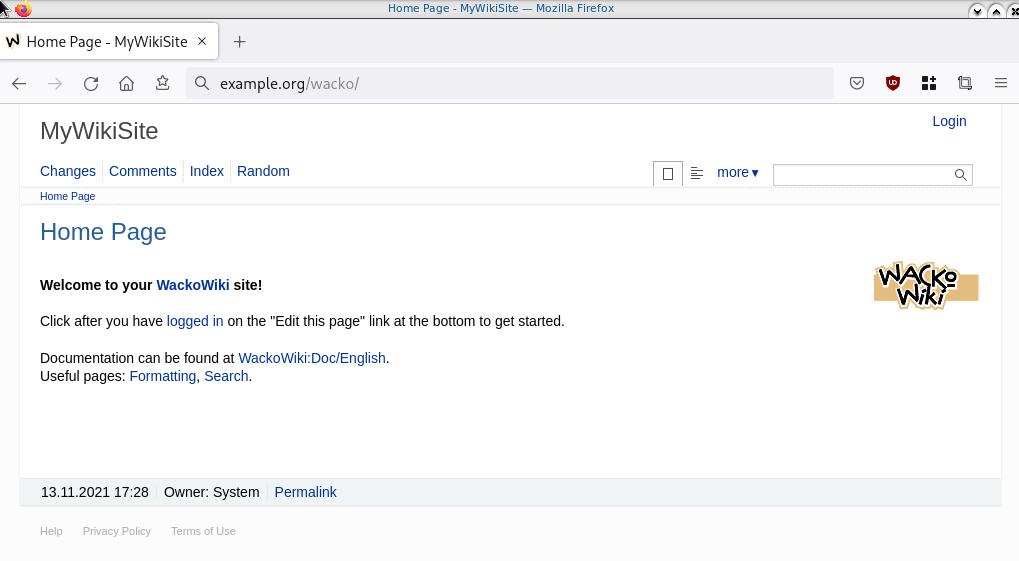
Simple WackoWiki Walkthrough
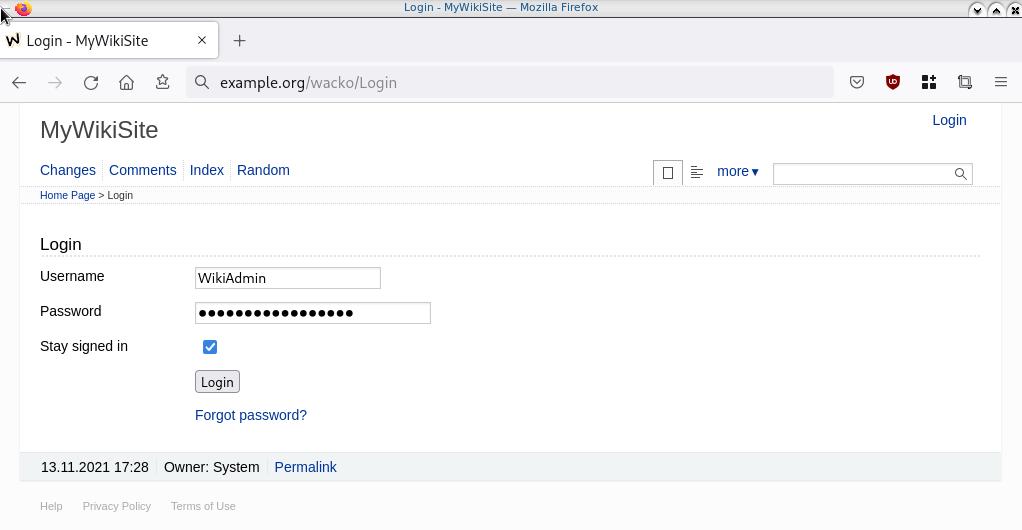
WireGuard: fast, modern, secure VPN tunnel. WireGuard securely encapsulates IP packets over UDP.
Goal
What I would like to achieve, in this article, is to provide a comprehensive guide for a redirect-gateway vpn using wireguard with a twist. The client machine should reach internet through the wireguard vpn server. No other communications should be allowed from the client and that means if we drop the VPN connection, client can not go to the internet.
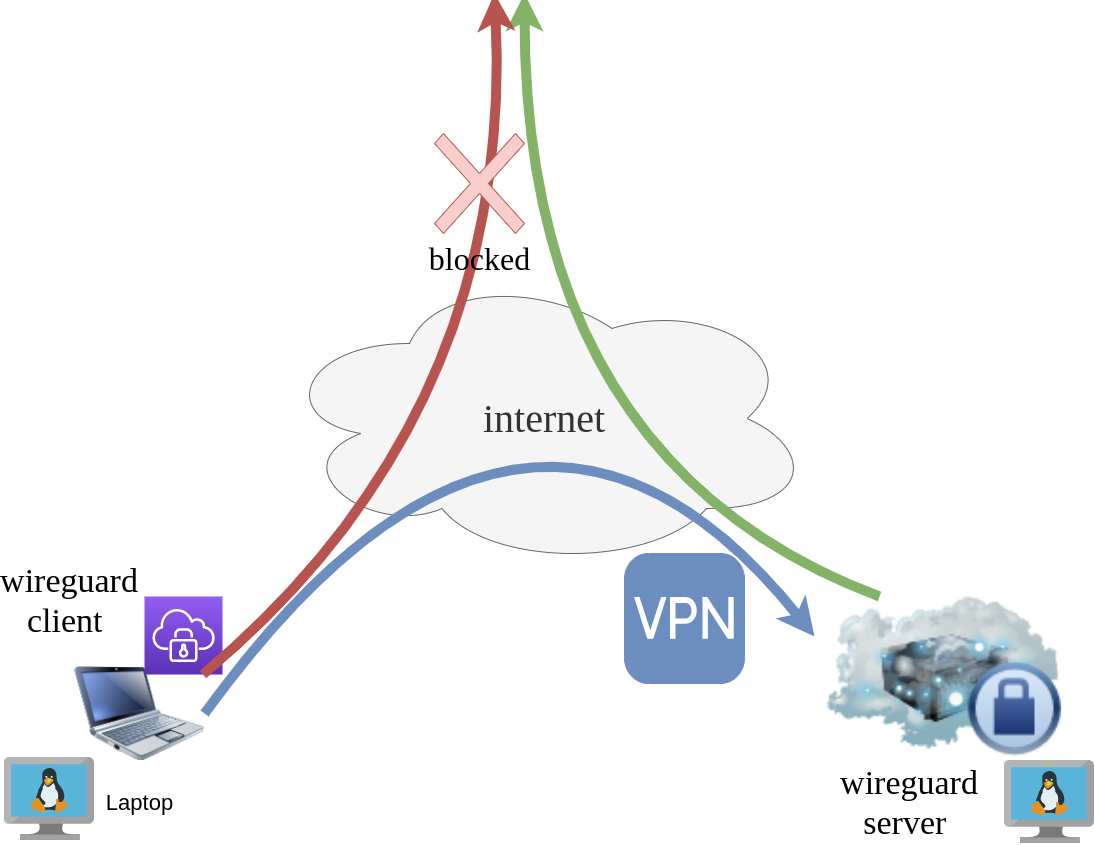
Intro - Lab Details
Here are my lab details. This blog post will help you understand all the necessary steps and provide you with a guide to replicate the setup. You should be able to create a wireguard VPN server-client between two points. I will be using ubuntu 20.04 as base images for both virtual machines. I am also using LibVirt and Qemu/KVM running on my archlinux host.
Wireguard Generate Keys
and the importance of them!
Before we begin, give me a moment to try explaining how the encryption between these two machines, in a high level design works.
Each linux machines creates a pair of keys.
- Private Key
- Public Key
These keys have a unique relationship. You can use your public key to encrypt something but only your private key can decrypt it. That mean, you can share your public keys via an cleartext channel (internet, email, slack). The other parties can use your public key to encrypt traffic towards you, but none other decrypt it. If a malicious actor replace the public keys, you can not decrypt any incoming traffic thus make it impossible to connect to VPN server!

Public - Private Keys
Now each party has the other’s public keys and they can encrypt traffic for each other, BUT only you can decrypt your traffic with your private key. Your private key never leaves your computer.
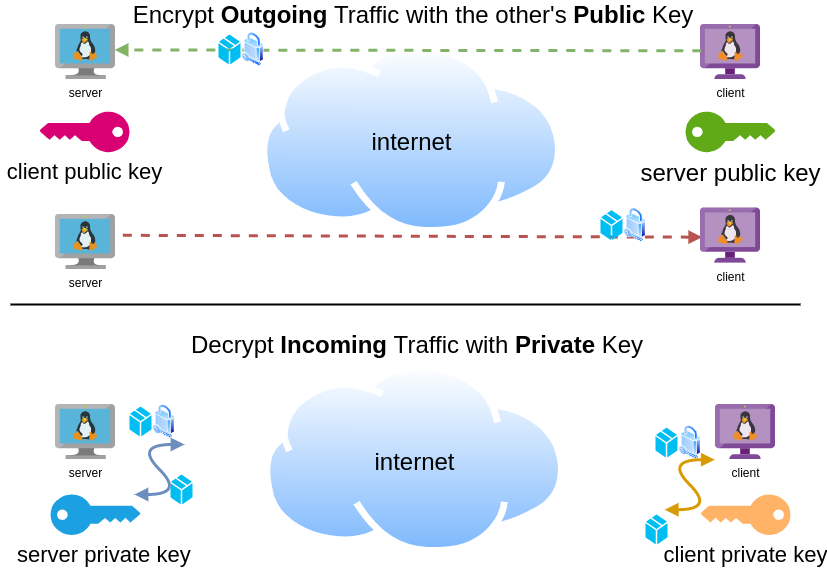
Hopefully you get the idea.
Wireguard Server - Ubuntu 20.04 LTS
In order to make the guide easy to follow, I will start with the server part.
Server Key Generation
Generate a random private and public key for the server as-root
wg genkey | tee /etc/wireguard/privatekey | wg pubkey > /etc/wireguard/publickeyMake the keys read-only
chmod 0400 /etc/wireguard/*keyList keys
ls -l /etc/wireguard/total 8
-r-------- 1 root root 45 Jul 12 20:29 privatekey
-r-------- 1 root root 45 Jul 12 20:29 publickey
UDP Port & firewall
In order to run a VPN service, you need to choose a random port that wireguard VPN server can listen to it.
eg.
61194open firewall
ufw allow 61194/udpRule added
Rule added (v6)
view more info
ufw status verboseStatus: active
Logging: on (low)
Default: deny (incoming), allow (outgoing), disabled (routed)
New profiles: skip
To Action From
-- ------ ----
22/tcp ALLOW IN Anywhere
61194 ALLOW IN Anywhere
22/tcp (v6) ALLOW IN Anywhere (v6)
61194 (v6) ALLOW IN Anywhere (v6)
So you see, only SSH and our VPN ports are open.
Default Incoming Policy is: DENY.
Wireguard Server Configuration File
Now it is time to create a basic configuration wireguard-server file.
Naming the wireguard interface
Clarification the name of our interface does not matter, you can choose any name. Gets it’s name from the configuration filename! But in order to follow the majority of guides try to use something from wg+. For me it is easier to name wireguard interface:
- wg0
but you may seen it also as
- wg
without a number. All good!
Making a shell script for wireguard server configuration file
Running the below script will create a new configuration file /etc/wireguard/wg0.conf
PRIVATE_KEY=$(cat /etc/wireguard/privatekey)
NETWORK=10.0.8
cat > /etc/wireguard/wg0.conf <<EOF
[Interface]
Address = ${NETWORK}.1/24
ListenPort = 61194
PrivateKey = ${PRIVATE_KEY}
EOF
ls -l /etc/wireguard/wg0.conf
cat /etc/wireguard/wg0.conf
Note I have chosen the network 10.0.8.0/24 for my VPN setup, you can choose any Private Network
10.0.0.0/8 - Class A
172.16.0.0/12 - Class B
192.168.0.0/16 - Class CI chose a Class C (256 IPs) from a /8 (Class A) private network, do not be confused about this. It’s just a Class-C /24 private network.
Let’s make our first test with the server
wg-quick up wg0[#] ip link add wg0 type wireguard
[#] wg setconf wg0 /dev/fd/63
[#] ip -4 address add 10.0.8.1/24 dev wg0
[#] ip link set mtu 1420 up dev wg0
It’s Alive!
Kernel Module
Verify that wireguard is loaded as a kernel module on your system.
lsmod | grep wireguardwireguard 212992 0
ip6_udp_tunnel 16384 1 wireguard
udp_tunnel 16384 1 wireguard
Wireguard is in the Linux kernel since March 2020.
Show IP address
ip address show dev wg03: wg0: <POINTOPOINT,NOARP,UP,LOWER_UP> mtu 1420
qdisc noqueue state UNKNOWN group default qlen 1000
link/none
inet 10.0.8.1/24 scope global wg0
valid_lft forever preferred_lft forever
Listening Connections
Verify that wireguard server listens to our specific UDP port
ss -nulp '( sport = :61194 )' | column -tState Recv-Q Send-Q Local Address:Port Peer Address:Port Process
UNCONN 0 0 0.0.0.0:61194 0.0.0.0:*
UNCONN 0 0 [::]:61194 [::]:*
Show wg0
wg show wg0interface: wg0
public key: <public key>
private key: (hidden)
listening port: 61194
Show Config
wg showconf wg0[Interface]
ListenPort = 61194
PrivateKey = <private key>
Close wireguard
wg-quick down wg0What is IP forwarding
In order for our VPN server to forward our client’s network traffic from the internal interface wg0 to it’s external interface and on top of that, to separate it’s own traffic from client’s traffic, the vpn server needs to masquerade all client’s traffic in a way that knows who to forward and send back traffic to the client. In a nuthshell this is IP forwarding and perhaps the below diagram can explain it a little better.

To do that, we need to enable the IP forward feature on our linux kernel.
sysctl -w net.ipv4.ip_forward=1The above command does not persist the change across reboots. To persist this setting we need to add it, to sysctl configuration. And although many set this option global, we do not need to have to do that!
Wireguard provides four (4) stages, to run our own scripts.
Wireguard stages
- PreUp
- PostUp
- PreDown
- PostDown
So we can choose to enable IP forwarding at wireguard up and disable it on wireguard down.
IP forwarding in wireguard configuration file
PRIVATE_KEY=$(cat /etc/wireguard/privatekey)
NETWORK=10.0.8
cat > /etc/wireguard/wg0.conf <<EOF
[Interface]
Address = ${NETWORK}.1/24
ListenPort = 61194
PrivateKey = ${PRIVATE_KEY}
PreUp = sysctl -w net.ipv4.ip_forward=1
PostDown = sysctl -w net.ipv4.ip_forward=0
EOF
verify above configuration
wg-quick up wg0[#] sysctl -w net.ipv4.ip_forward=1
net.ipv4.ip_forward = 1
[#] ip link add wg0 type wireguard
[#] wg setconf wg0 /dev/fd/63
[#] ip -4 address add 10.0.8.1/24 dev wg0
[#] ip link set mtu 1420 up dev wg0Verify system control setting for IP forward:
sysctl net.ipv4.ip_forwardnet.ipv4.ip_forward = 1
Close wireguard
wg-quick down wg0[#] wg showconf wg0
[#] ip link delete dev wg0
[#] sysctl -w net.ipv4.ip_forward=0
net.ipv4.ip_forward = 0
Verify that now IP Forward is not enabled.
sysctl net.ipv4.ip_forwardnet.ipv4.ip_forward = 0
Routing via firewall rules
Next on our agenda, is to add some additional rules on our firewall. We already enabled IP Forward feature with the above and now it is time to update our firewall so it can masquerade our client’s network traffic.
Default Route
We need to identify the default external network interface on the ubuntu server.
DEF_ROUTE=$(ip -4 -json route list default | jq -r .[0].dev)
usually is eth0 or ensp3 or something similar.
firewall rules
- We need to forward traffic from the internal interface to the external interface
- We need to masquerade the traffic of the client.
iptables -A FORWARD -i %i -o ${DEF_ROUTE} -s ${NETWORK}.0/24 -j ACCEPT
iptables -t nat -A POSTROUTING -s ${NETWORK}.0/24 -o ${DEF_ROUTE} -j MASQUERADE
and also we need to drop these rules when we stop wireguard service
iptables -D FORWARD -i %i -o ${DEF_ROUTE} -s ${NETWORK}.0/24 -j ACCEPT
iptables -t nat -D POSTROUTING -s ${NETWORK}.0/24 -o ${DEF_ROUTE} -j MASQUERADE
See the -D after iptables.
iptables is a CLI (command line interface) for netfilters. So think the above rules as filters on our network traffic.
WG Server Conf
To put everything all together and also use wireguard PostUp and PreDown to
wg genkey | tee /etc/wireguard/privatekey | wg pubkey > /etc/wireguard/publickey
chmod 0400 /etc/wireguard/*key
PRIVATE_KEY=$(cat /etc/wireguard/privatekey)
NETWORK=10.0.8
DEF_ROUTE=$(ip -4 -json route list default | jq -r .[0].dev)
WG_PORT=61194
cat > /etc/wireguard/wg0.conf <<EOF
[Interface]
Address = ${NETWORK}.1/24
ListenPort = ${WG_PORT}
PrivateKey = ${PRIVATE_KEY}
PreUp = sysctl -w net.ipv4.ip_forward=1
PostDown = sysctl -w net.ipv4.ip_forward=0
PostUp = iptables -A FORWARD -i %i -o ${DEF_ROUTE} -s ${NETWORK}.0/24 -j ACCEPT ; iptables -t nat -A POSTROUTING -s ${NETWORK}.0/24 -o ${DEF_ROUTE} -j MASQUERADE
PreDown = iptables -D FORWARD -i %i -o ${DEF_ROUTE} -s ${NETWORK}.0/24 -j ACCEPT ; iptables -t nat -D POSTROUTING -s ${NETWORK}.0/24 -o ${DEF_ROUTE} -j MASQUERADE
EOF
testing up
wg-quick up wg0[#] sysctl -w net.ipv4.ip_forward=1
net.ipv4.ip_forward = 1
[#] ip link add wg0 type wireguard
[#] wg setconf wg0 /dev/fd/63
[#] ip -4 address add 10.0.8.1/24 dev wg0
[#] ip link set mtu 1420 up dev wg0
[#] iptables -A FORWARD -i wg0 -o ens3 -s 10.0.8.0/24 -j ACCEPT ; iptables -t nat -A POSTROUTING -s 10.0.8.0/24 -o ens3 -j MASQUERADE
testing down
wg-quick down wg0[#] iptables -D FORWARD -i wg0 -o ens3 -s 10.0.8.0/24 -j ACCEPT ; iptables -t nat -D POSTROUTING -s 10.0.8.0/24 -o ens3 -j MASQUERADE
[#] ip link delete dev wg0
[#] sysctl -w net.ipv4.ip_forward=0
net.ipv4.ip_forward = 0
Start at boot time
systemctl enable wg-quick@wg0and status
systemctl status wg-quick@wg0Get the wireguard server public key
We have NOT finished yet with the server !
Also we need the output of:
cat /etc/wireguard/publickeyoutput should be something like this:
wr3jUAs2qdQ1Oaxbs1aA0qrNjogY6uqDpLop54WtQI4=Wireguard Client - Ubuntu 20.04 LTS
Now we need to move to our client virtual machine.
It is a lot easier but similar with above commands.
Client Key Generation
Generate a random private and public key for the client
wg genkey | tee /etc/wireguard/privatekey | wg pubkey > /etc/wireguard/publickeyMake the keys read-only
chmod 0400 /etc/wireguard/*keyWireguard Client Configuration File
Need to replace <wireguard server public key> with the output of the above command.
Configuration is similar but simpler from the server
PRIVATE_KEY=$(cat /etc/wireguard/privatekey)
NETWORK=10.0.8
WG_PORT=61194
WGS_IP=$(ip -4 -json route list default | jq -r .[0].prefsrc)
WSG_PUBLIC_KEY="<wireguard server public key>"
cat > /etc/wireguard/wg0.conf <<EOF
[Interface]
Address = ${NETWORK}.2/24
PrivateKey = ${PRIVATE_KEY}
[Peer]
PublicKey = ${WSG_PUBLIC_KEY}
Endpoint = ${WGS_IP}:${WG_PORT}
AllowedIPs = 0.0.0.0/0
EOF
verify
wg-quick up wg0[#] ip link add wg0 type wireguard
[#] wg setconf wg0 /dev/fd/63
[#] ip -4 address add 10.0.8.2/24 dev wg0
[#] ip link set mtu 1420 up dev wg0
[#] wg set wg0 fwmark 51820
[#] ip -4 route add 0.0.0.0/0 dev wg0 table 51820
[#] ip -4 rule add not fwmark 51820 table 51820
[#] ip -4 rule add table main suppress_prefixlength 0
[#] sysctl -q net.ipv4.conf.all.src_valid_mark=1
[#] iptables-restore -n
start client at boot
systemctl enable wg-quick@wg0Get the wireguard client public key
We have finished with the client, but we need the output of:
cat /etc/wireguard/publickeyWireguard Server - Peers
As we mentioned above, we need to exchange public keys of server & client to the other machines in order to encrypt network traffic.
So as we get the client public key and run the below script to the server
WSC_PUBLIC_KEY="<wireguard client public key>"
NETWORK=10.0.8
wg set wg0 peer ${WSC_PUBLIC_KEY} allowed-ips ${NETWORK}.2
after that we can verify that our wireguard server and connect to the wireguard client
wireguard server ping to client
$ ping -c 5 10.0.8.2
PING 10.0.8.2 (10.0.8.2) 56(84) bytes of data.
64 bytes from 10.0.8.2: icmp_seq=1 ttl=64 time=0.714 ms
64 bytes from 10.0.8.2: icmp_seq=2 ttl=64 time=0.456 ms
64 bytes from 10.0.8.2: icmp_seq=3 ttl=64 time=0.557 ms
64 bytes from 10.0.8.2: icmp_seq=4 ttl=64 time=0.620 ms
64 bytes from 10.0.8.2: icmp_seq=5 ttl=64 time=0.563 ms
--- 10.0.8.2 ping statistics ---
5 packets transmitted, 5 received, 0% packet loss, time 4103ms
rtt min/avg/max/mdev = 0.456/0.582/0.714/0.084 ms
wireguard client ping to server
$ ping -c 5 10.0.8.1
PING 10.0.8.1 (10.0.8.1) 56(84) bytes of data.
64 bytes from 10.0.8.1: icmp_seq=1 ttl=64 time=0.752 ms
64 bytes from 10.0.8.1: icmp_seq=2 ttl=64 time=0.639 ms
64 bytes from 10.0.8.1: icmp_seq=3 ttl=64 time=0.622 ms
64 bytes from 10.0.8.1: icmp_seq=4 ttl=64 time=0.625 ms
64 bytes from 10.0.8.1: icmp_seq=5 ttl=64 time=0.597 ms
--- 10.0.8.1 ping statistics ---
5 packets transmitted, 5 received, 0% packet loss, time 4093ms
rtt min/avg/max/mdev = 0.597/0.647/0.752/0.054 ms
wireguard server - Peers at configuration file
Now the final things is to update our wireguard server with the client Peer (or peers).
wg showconf wg0the output should be something like that:
[Interface]
ListenPort = 61194
PrivateKey = <server: private key>
[Peer]
PublicKey = <client: public key>
AllowedIPs = 10.0.8.2/32
Endpoint = 192.168.122.68:52587
We need to append the peer section to our configuration file.
so /etc/wireguard/wg0.conf should look like this:
[Interface]
Address = 10.0.8.1/24
ListenPort = 61194
PrivateKey = <server: private key>
PreUp = sysctl -w net.ipv4.ip_forward=1
PostDown = sysctl -w net.ipv4.ip_forward=0
PostUp = iptables -A FORWARD -i %i -o ens3 -s 10.0.8.0/24 -j ACCEPT ; iptables -t nat -A POSTROUTING -s 10.0.8.0/24 -o ens3 -j MASQUERADE
PreDown = iptables -D FORWARD -i %i -o ens3 -s 10.0.8.0/24 -j ACCEPT ; iptables -t nat -D POSTROUTING -s 10.0.8.0/24 -o ens3 -j MASQUERADE
[Peer]
PublicKey = <client: public key>
AllowedIPs = 10.0.8.2/32
Endpoint = 192.168.122.68:52587
SaveConfig
In None of server or client wireguard configuration file, we didn’t declare this option. If set, then the configuration is saved on the current state of wg0 interface. Very useful !
SaveConfig = trueclient firewall
It is time to introduce our twist!
If you mtr or traceroute our traffic from our client, we will notice that in need our network traffic goes through the wireguard vpn server !
My traceroute [v0.93]
wgc (10.0.8.2) 2021-07-21T22:41:44+0300
Packets Pings
Host Loss% Snt Last Avg Best Wrst StDev
1. 10.0.8.1 0.0% 88 0.6 0.6 0.4 0.8 0.1
2. myhomepc 0.0% 88 0.8 0.8 0.5 1.0 0.1
3. _gateway 0.0% 88 3.8 4.0 3.3 9.6 0.8
...
The first entry is:
1. 10.0.8.1 if we drop our vpn connection.
wg-quick down wg0We still go to the internet.
My traceroute [v0.93]
wgc (192.168.122.68) 2021-07-21T22:45:04+0300
Packets Pings
Host Loss% Snt Last Avg Best Wrst StDev
1. myhomepc 0.0% 1 0.3 0.3 0.3 0.3 0.0
2. _gateway 0.0% 1 3.3 3.3 3.3 3.3 0.0
This is important because in some use cases, we do not want our client to directly or unsupervised talk to the internet.
UFW alternative for the client
So to avoid this issue, we will re-rewrite our firewall rules.
A simple script to do that is the below. Declares the default policy to DENY for everything and only accepts ssh incoming traffic and outgoing traffic through the vpn.
DEF_ROUTE=$(ip -4 -json route list default | jq -r .[0].dev)
WGS_IP=192.168.122.69
WG_PORT=61194
## reset
ufw --force reset
## deny everything!
ufw default deny incoming
ufw default deny outgoing
ufw default deny forward
## allow ssh
ufw allow 22/tcp
## enable
ufw --force enable
## allow traffic out to the vpn server
ufw allow out on ${DEF_ROUTE} to ${WGS_IP} port ${WG_PORT}
## allow tunnel traffic out
ufw allow out on wg+
# ufw status verbose
Status: active
Logging: on (low)
Default: deny (incoming), deny (outgoing), disabled (routed)
New profiles: skip
To Action From
-- ------ ----
22/tcp ALLOW IN Anywhere
22/tcp (v6) ALLOW IN Anywhere (v6)
192.168.122.69 61194 ALLOW OUT Anywhere on ens3
Anywhere ALLOW OUT Anywhere on wg+
Anywhere (v6) ALLOW OUT Anywhere (v6) on wg+
DNS
There is caveat. Please bare with me.
Usually and especially in virtual machines they get DNS setting through a local LAN. We can either allow traffic on the local vlan or update our local DNS setting so it can go only through our VPN
cat > /etc/systemd/resolved.conf <<EOF
[Resolve]
DNS=88.198.92.222
EOF
systemctl restart systemd-resolved
let’s try this
# ping google.com
ping: google.com: Temporary failure in name resolution
Correct, fire up wireguard vpn client
wg-quick up wg0
ping -c4 google.comPING google.com (142.250.185.238) 56(84) bytes of data.
64 bytes from fra16s53-in-f14.1e100.net (142.250.185.238): icmp_seq=1 ttl=115 time=43.5 ms
64 bytes from fra16s53-in-f14.1e100.net (142.250.185.238): icmp_seq=2 ttl=115 time=44.9 ms
64 bytes from fra16s53-in-f14.1e100.net (142.250.185.238): icmp_seq=3 ttl=115 time=43.8 ms
64 bytes from fra16s53-in-f14.1e100.net (142.250.185.238): icmp_seq=4 ttl=115 time=43.0 ms
--- google.com ping statistics ---
4 packets transmitted, 4 received, 0% packet loss, time 3004ms
rtt min/avg/max/mdev = 42.990/43.795/44.923/0.707 ms
mtr shows:
mtr google.com My traceroute [v0.93]
wgc (10.0.8.2) 2021-07-21T23:01:16+0300
Packets Pings
Host Loss% Snt Last Avg Best Wrst StDev
1. 10.0.8.1 0.0% 2 0.6 0.7 0.6 0.7 0.1
2. _gateway 0.0% 1 0.8 0.8 0.8 0.8 0.0
3. 192.168.1.1 0.0% 1 3.8 3.8 3.8 3.8 0.0
drop vpn connection
# wg-quick down wg0
[#] ip -4 rule delete table 51820
[#] ip -4 rule delete table main suppress_prefixlength 0
[#] ip link delete dev wg0
[#] iptables-restore -n
# ping -c4 google.com
ping: google.com: Temporary failure in name resolution
and that is perfect !
No internet access for our client. Only when our vpn connection is up!
WireGuard: fast, modern, secure VPN tunnel
That’s it!
Below my personal settings -as of today- for LibreDNS using systemd-resolved service for DNS resolution.
sudo vim /etc/systemd/resolved.conf
basic settings
[Resolve]
DNS=116.202.176.26:854#dot.libredns.gr
DNSOverTLS=yes
FallbackDNS=88.198.92.222
Cache=yes
apply
sudo systemctl restart systemd-resolved.service
verify
resolvectl query analytics.google.com
analytics.google.com: 0.0.0.0 -- link: eth0
-- Information acquired via protocol DNS in 144.7ms.
-- Data is authenticated: no; Data was acquired via local or encrypted transport: yes
-- Data from: network
Explain Settings
DNS setting
DNS=116.202.176.26:854#dot.libredns.gr
We declare the IP of our DoT service. Using : as a separator we add the no-ads TCP port of DoT, 854. We also need to add our domain in the end to tell systemd-resolved that this IP should respond to dot.libredns.gr
Dns Over TLS
DNSOverTLS=yes
The usually setting is yes. In older systemd versions you can also select opportunistic.
As we are using Lets Encrypt systemd-resolved can not verify (by default) the IP inside the certificate. The type of certificate can verify the domain dot.libredns.gr but we are asking the IP: 116.202.176.26 and this is another type of certificate that is not free. In order to “fix” this , we added the #dot.libredns.gr in the above setting.
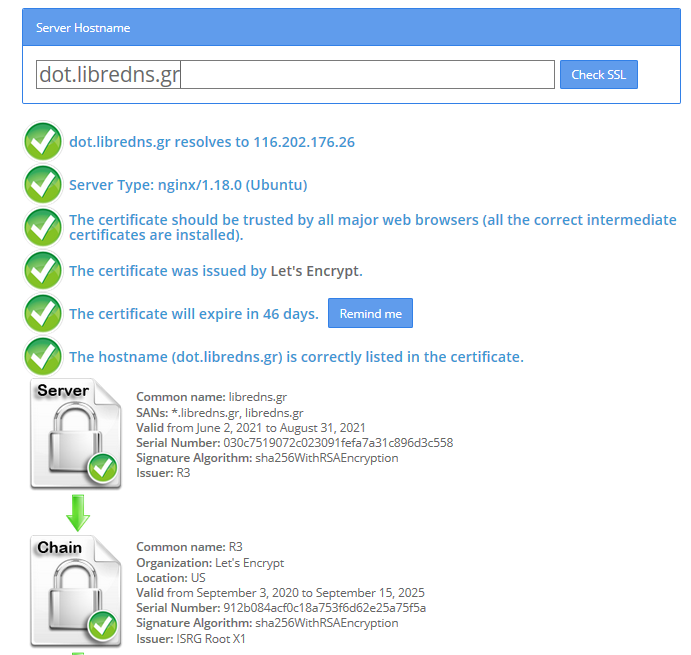
FallBack
Yes not everything has Five nines so you may need a fall back dns to .. fall. Be aware this is cleartext traffic! Not encrypted.
FallbackDNS=88.198.92.222
Cache
Last but not least, caching your queries can give provide you with an additional speed when browsing the internet ! You already asked this a few seconds ago, why not caching it on your local system?
Cache=yes
to give you an example
resolvectl query analytics.google.com
analytics.google.com: 0.0.0.0 -- link: eth0
-- Information acquired via protocol DNS in 144.7ms.
-- Data is authenticated: no; Data was acquired via local or encrypted transport: yes
-- Data from: network
second time:
resolvectl query analytics.google.com
analytics.google.com: 0.0.0.0 -- link: eth0
-- Information acquired via protocol DNS in 2.3ms.
-- Data is authenticated: no; Data was acquired via local or encrypted transport: yes
-- Data from: cacheOne of the most well-known k8s memes is the below image that represent the effort and complexity on building a kubernetes cluster just to run a simple blog. So In this article, I will take the opportunity to install a simple blog engine on kubernetes using k3s!
terraform - libvirt/qemu - ubuntu
For this demo, I will be workinig on my local test lab. A libvirt /qemu ubuntu 20.04 virtual machine via terraform. You can find my terraform notes on my github repo tf/0.15/libvirt/0.6.3/ubuntu/20.04.
k3s
k3s is a lightweight, fully compliant kubernetes distribution that can run on a virtual machine, single node.
login to your machine and became root
$ ssh 192.168.122.42 -l ubuntu
$ sudo -i
#
install k3s with one command
curl -sfL https://get.k3s.io | sh -
output should be something like this
[INFO] Finding release for channel stable
[INFO] Using v1.21.1+k3s1 as release
[INFO] Downloading hash https://github.com/k3s-io/k3s/releases/download/v1.21.1+k3s1/sha256sum-amd64.txt
[INFO] Downloading binary https://github.com/k3s-io/k3s/releases/download/v1.21.1+k3s1/k3s
[INFO] Verifying binary download
[INFO] Installing k3s to /usr/local/bin/k3s
[INFO] Creating /usr/local/bin/kubectl symlink to k3s
[INFO] Creating /usr/local/bin/crictl symlink to k3s
[INFO] Creating /usr/local/bin/ctr symlink to k3s
[INFO] Creating killall script /usr/local/bin/k3s-killall.sh
[INFO] Creating uninstall script /usr/local/bin/k3s-uninstall.sh
[INFO] env: Creating environment file /etc/systemd/system/k3s.service.env
[INFO] systemd: Creating service file /etc/systemd/system/k3s.service
[INFO] systemd: Enabling k3s unit
Created symlink /etc/systemd/system/multi-user.target.wants/k3s.service → /etc/systemd/system/k3s.service.
[INFO] systemd: Starting k3s
Firewall Ports
I would propose to open the below network ports so k3s can run smoothly.
Inbound Rules for K3s Server Nodes
| PROTOCOL | PORT | SOURCE | DESCRIPTION |
|---|---|---|---|
| TCP | 6443 | K3s agent nodes | Kubernetes API Server |
| UDP | 8472 | K3s server and agent nodes | Required only for Flannel VXLAN |
| TCP | 10250 | K3s server and agent nodes | Kubelet metrics |
| TCP | 2379-2380 | K3s server nodes | Required only for HA with embedded etcd |
Typically all outbound traffic is allowed.
ufw allow
ufw allow 6443/tcp
ufw allow 8472/udp
ufw allow 10250/tcp
ufw allow 2379/tcp
ufw allow 2380/tcp
full output
# ufw allow 6443/tcp
Rule added
Rule added (v6)
# ufw allow 8472/udp
Rule added
Rule added (v6)
# ufw allow 10250/tcp
Rule added
Rule added (v6)
# ufw allow 2379/tcp
Rule added
Rule added (v6)
# ufw allow 2380/tcp
Rule added
Rule added (v6)
k3s Nodes / Pods / Deployments
verify nodes, roles, pods and deployments
# kubectl get nodes -A
NAME         STATUS   ROLES                  AGE   VERSION
ubuntu2004   Ready    control-plane,master   11m   v1.21.1+k3s1

# kubectl get pods -A
NAMESPACE     NAME                                      READY   STATUS      RESTARTS   AGE
kube-system   helm-install-traefik-crd-8rjcf            0/1     Completed   2          13m
kube-system   helm-install-traefik-lwgcj                0/1     Completed   3          13m
kube-system   svclb-traefik-xtrcw                       2/2     Running     0          5m13s
kube-system   coredns-7448499f4d-6vrb7                  1/1     Running     5          13m
kube-system   traefik-97b44b794-q294l                   1/1     Running     0          5m14s
kube-system   local-path-provisioner-5ff76fc89d-pq5wb   1/1     Running     6          13m
kube-system   metrics-server-86cbb8457f-n4gsf           1/1     Running     6          13m

# kubectl get deployments -A
NAMESPACE     NAME                     READY   UP-TO-DATE   AVAILABLE   AGE
kube-system   coredns                  1/1     1            1           17m
kube-system   traefik                  1/1     1            1           8m50s
kube-system   local-path-provisioner   1/1     1            1           17m
kube-system   metrics-server           1/1     1            1           17m
Helm
Next thing is to install helm. Helm is a package manager for kubernetes, it will make easy to install applications.
curl -sL https://raw.githubusercontent.com/helm/helm/master/scripts/get-helm-3 | bash
output
Downloading https://get.helm.sh/helm-v3.6.0-linux-amd64.tar.gz
Verifying checksum... Done.
Preparing to install helm into /usr/local/bin
helm installed into /usr/local/bin/helm
helm version

version.BuildInfo{Version:"v3.6.0", GitCommit:"7f2df6467771a75f5646b7f12afb408590ed1755", GitTreeState:"clean", GoVersion:"go1.16.3"}
repo added
As a package manager, you can install k8s packages, named charts and you can find a lot of helm charts here https://artifacthub.io/. You can also add/install a single repo, I will explain this later.
# helm repo add nicholaswilde https://nicholaswilde.github.io/helm-charts/

"nicholaswilde" has been added to your repositories

# helm repo update
Hang tight while we grab the latest from your chart repositories...

Successfully got an update from the "nicholaswilde" chart repository
Update Complete. ⎈Happy Helming!⎈
hub Vs repo
basic difference between hub and repo is that hub is the official artifacthub. You can search charts there
helm search hub blogURL CHART VERSION APP VERSION DESCRIPTION
https://artifacthub.io/packages/helm/nicholaswi... 0.1.2 v1.3 Lightweight self-hosted facebook-styled PHP blog.
https://artifacthub.io/packages/helm/nicholaswi... 0.1.2 v2021.02 An ultra-lightweight blogging engine, written i...
https://artifacthub.io/packages/helm/bitnami/dr... 10.2.23 9.1.10 One of the most versatile open source content m...
https://artifacthub.io/packages/helm/bitnami/ghost 13.0.13 4.6.4 A simple, powerful publishing platform that all...
https://artifacthub.io/packages/helm/bitnami/jo... 10.1.10 3.9.27 PHP content management system (CMS) for publish...
https://artifacthub.io/packages/helm/nicholaswi... 0.1.1 0.1.1 A Self-Hosted, Twitter™-like Decentralised micr...
https://artifacthub.io/packages/helm/nicholaswi... 0.1.1 900b76a A self-hosted well uh wiki engine or content ma...
https://artifacthub.io/packages/helm/bitnami/wo... 11.0.13 5.7.2 Web publishing platform for building blogs and ...using a repo, means that you specify charts sources from single (or multiple) repos, usally outside of hub.
helm search repo blogNAME CHART VERSION APP VERSION DESCRIPTION
nicholaswilde/blog 0.1.2 v1.3 Lightweight self-hosted facebook-styled PHP blog.
nicholaswilde/chyrp-lite 0.1.2 v2021.02 An ultra-lightweight blogging engine, written i...
nicholaswilde/twtxt 0.1.1 0.1.1 A Self-Hosted, Twitter™-like Decentralised micr...
nicholaswilde/wiki 0.1.1 900b76a A self-hosted well uh wiki engine or content ma...
Install a blog engine via helm
before we continue with the installation of our blog engine, we need to set the kube config via a shell variable
kube configuration yaml file
export KUBECONFIG=/etc/rancher/k3s/k3s.yaml
kubectl-k3s, already knows where to find this yaml configuration file. kubectl is a link to k3s in our setup
# whereis kubectl
kubectl: /usr/local/bin/kubectl

# ls -l /usr/local/bin/kubectl
lrwxrwxrwx 1 root root 3 Jun  4 23:20 /usr/local/bin/kubectl -> k3s
but not helm that we just installed.
After that we can install our blog engine.
helm install chyrp-lite              \
  --set env.TZ="Europe/Athens"  \
  nicholaswilde/chyrp-lite
output
NAME: chyrp-lite
LAST DEPLOYED: Fri Jun  4 23:46:04 2021
NAMESPACE: default
STATUS: deployed
REVISION: 1
TEST SUITE: None
NOTES:
Get the application URL by running these commands:
  http://chyrp-lite.192.168.1.203.nip.io/
for the time being, ignore nip.io and verify the deployment
# kubectl get deployments
NAME         READY   UP-TO-DATE   AVAILABLE   AGE
chyrp-lite   1/1     1            1           2m15s

# kubectl get pods
NAME                          READY   STATUS    RESTARTS   AGE
chyrp-lite-5c544b455f-d2pzm   1/1     Running   0          2m18s
Port Forwarding
as this is a pod running through k3s inside a virtual machine on our host operating system, in order to visit the blog and finish the installation we need to expose the port.
Let’s find out if there is a service running
kubectl get service chyrp-lite
output
NAME         TYPE        CLUSTER-IP      EXTERNAL-IP   PORT(S)   AGE
chyrp-lite   ClusterIP   10.43.143.250   <none>        80/TCP    11h
okay we have a cluster ip.
you can also verify that our blog engine is running
curl -s 10.43.143.250/install.php | head

<!DOCTYPE html>
<html>
    <head>
        <meta charset="UTF-8">
        <title>Chyrp Lite Installer</title>
        <meta name="viewport" content="width = 800">
        <style type="text/css">
            @font-face {
                font-family: 'Open Sans webfont';
                src: url('./fonts/OpenSans-Regular.woff') format('woff');
and then port forward the pod tcp port to our virtual machine
kubectl port-forward service/chyrp-lite 80
output
Forwarding from 127.0.0.1:80 -> 80
Forwarding from [::1]:80 -> 80
k3s issue with TCP Port 80
Port 80 used by build-in load balancer by default
That means service port 80 will become 10080 on the host, but 8080 will become 8080 without any offset.
So the above command will not work, it will give you an 404 error.
We can disable LoadBalancer (we do not need it for this demo) but it is easier to just forward the service port to 10080
kubectl port-forward service/chyrp-lite 10080:80Forwarding from 127.0.0.1:10080 -> 80
Forwarding from [::1]:10080 -> 80
Handling connection for 10080
Handling connection for 10080
from our virtual machine we can verify
curl -s http://127.0.0.1:10080/install.php | head
it will produce
<!DOCTYPE html>
<html>
    <head>
        <meta charset="UTF-8">
        <title>Chyrp Lite Installer</title>
        <meta name="viewport" content="width = 800">
        <style type="text/css">
            @font-face {
                font-family: 'Open Sans webfont';
                src: url('./fonts/OpenSans-Regular.woff') format('woff');
ssh port forward
So now, we need to forward this TCP port from the virtual machine to our local machine. Using ssh, you should be able to do it like this from another terminal
ssh 192.168.122.42 -l ubuntu -L8080:127.0.0.1:10080
verify it
$ sudo ss -n -t -a 'sport = :10080'
State Recv-Q Send-Q Local Address:Port Peer Address:Port Process
LISTEN 0 128 127.0.0.1:10080 0.0.0.0:*
LISTEN 0 128 [::1]:10080 [::]:*
$ curl -s http://localhost:10080/install.php | head
<!DOCTYPE html>
<html>
<head>
<meta charset="UTF-8">
<title>Chyrp Lite Installer</title>
<meta name="viewport" content="width = 800">
<style type="text/css">
@font-face {
font-family: 'Open Sans webfont';
src: url('./fonts/OpenSans-Regular.woff') format('woff');
I am forwarding to a high tcp port (> 1024) so my user can open a tcp port, eitherwise I need to be root.
finishing the installation
To finish the installation of our blog engine, we need to visit the below url from our browser
Database Setup
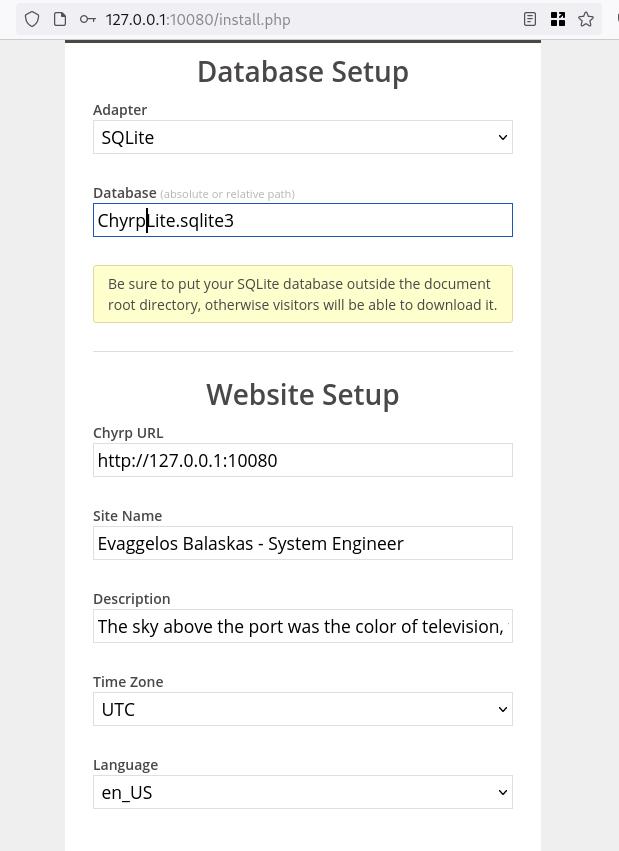
Admin Setup
Installation Completed
First blog post
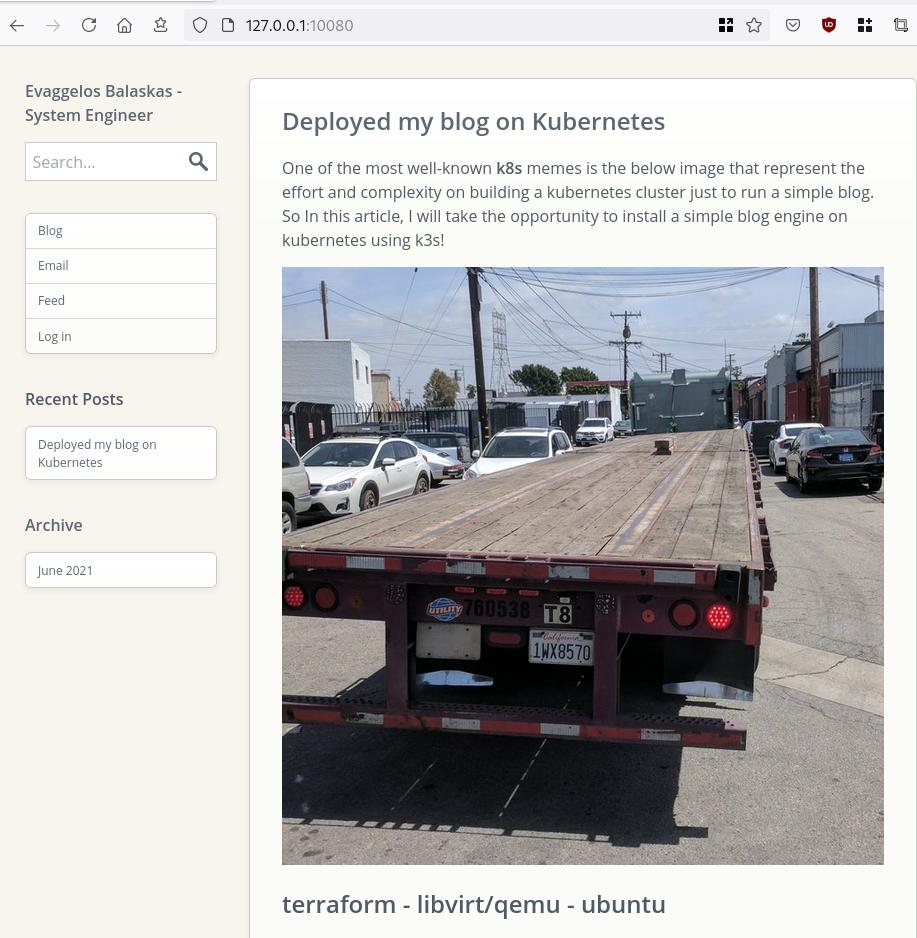
that’s it !
I am using archlinux in my WSL for the last two (2) years and the whole experience is quite smooth. I wanted to test native docker will run within WSL and not with the windows docker/container service, so I installed docker. My main purpose is building packages so (for now) I do not need networking/routes or anything else.
WSL
ebal@myworklaptop:~$ uname -a
Linux myworklaptop 4.19.128-microsoft-standard #1 SMP Tue Jun 23 12:58:10 UTC 2020 x86_64 GNU/Linux
ebal@myworklaptop:~$ cat /etc/os-release
NAME="Arch Linux"
PRETTY_NAME="Arch Linux"
ID=arch
BUILD_ID=rolling
ANSI_COLOR="38;2;23;147;209"
HOME_URL="https://www.archlinux.org/"
DOCUMENTATION_URL="https://wiki.archlinux.org/"
SUPPORT_URL="https://bbs.archlinux.org/"
BUG_REPORT_URL="https://bugs.archlinux.org/"
LOGO=archlinuxDocker Install
$ sudo pacman -S docker
$ sudo pacman -Q docker
docker 1:20.10.6-1
$ sudo dockerd -v
Docker version 20.10.6, build 8728dd246c
Run docker
sudo dockerd -D-D is for debug
and now pull an alpine image
ebal@myworklaptop:~$ docker images
REPOSITORY TAG IMAGE ID CREATED SIZE
ebal@myworklaptop:~$ docker pull alpine:latest
latest: Pulling from library/alpine
540db60ca938: Pull complete
Digest: sha256:69e70a79f2d41ab5d637de98c1e0b055206ba40a8145e7bddb55ccc04e13cf8f
Status: Downloaded newer image for alpine:latest
docker.io/library/alpine:latest
ebal@myworklaptop:~$ docker images
REPOSITORY TAG IMAGE ID CREATED SIZE
alpine latest 6dbb9cc54074 2 weeks ago 5.61MB
Test alpine image
docker run -ti alpine:latest ashperform a simple update
# apk update
fetch https://dl-cdn.alpinelinux.org/alpine/v3.13/main/x86_64/APKINDEX.tar.gz
fetch https://dl-cdn.alpinelinux.org/alpine/v3.13/community/x86_64/APKINDEX.tar.gz
v3.13.5-71-gfcabe3349a [https://dl-cdn.alpinelinux.org/alpine/v3.13/main]
v3.13.5-65-g28e7396caa [https://dl-cdn.alpinelinux.org/alpine/v3.13/community]
OK: 13887 distinct packages available
okay, seems that it is working.
Genie Systemd
as many already know, we can not run systemd inside WSL, at least not by default. So here comes genie !
A quick way into a systemd “bottle” for WSL
WSLv2 ONLY.
wsl.exe -l -v
NAME STATE VERSION
* Archlinux Running 2
Ubuntu-20.04 Stopped 1
It will work on my arch.
Install Genie
genie comes by default with an archlinux artifact from github
curl -sLO https://github.com/arkane-systems/genie/releases/download/v1.40/genie-systemd-1.40-1-x86_64.pkg.tar.zst
sudo pacman -U genie-systemd-1.40-1-x86_64.pkg.tar.zst
$ pacman -Q genie-systemd
genie-systemd 1.40-1daemonize
Genie has a dependency of daemonize.
In Archlinux, you can find the latest version of daemonize here:
https://gitlab.com/archlinux_build/daemonize
$ sudo pacman -U daemonize-1.7.8-1-x86_64.pkg.tar.zst
loading packages...
resolving dependencies...
looking for conflicting packages...
Package (1) New Version Net Change
daemonize 1.7.8-1 0.03 MiB
Total Installed Size: 0.03 MiB
:: Proceed with installation? [Y/n] y$ pacman -Q daemonize
daemonize 1.7.8-1Is genie running ?
We can start as-root genie with a new shell:
# genie --version
1.40
# genie -s
Waiting for systemd....!
# genie -r
running
okay !
Windows Terminal
In order to use systemd-genie by default, we need to run our WSL Archlinux with an initial command.
I use aka.ms/terminal to start/open my WSLv2 Archlinux so I had to edit the “Command Line” Option to this:
wsl.exe -d Archlinux genie -sYou can also verify that your WSL distro is down, with this
wsl.exe --shutdownthen fire up a new WSL distro!
Systemd Service
you can enable & start docker service unit,
$ sudo systemctl enable docker
$ sudo systemctl start dockerso next time will auto-start:
$ docker images
REPOSITORY TAG IMAGE ID CREATED SIZE
alpine latest 6dbb9cc54074 2 weeks ago 5.61MB
systemd
$ ps -e fuwwww | grep -i systemd
root 1 0.1 0.2 21096 10748 ? Ss 14:27 0:00 systemd
root 29 0.0 0.2 30472 11168 ? Ss 14:27 0:00 /usr/lib/systemd/systemd-journald
root 38 0.0 0.1 25672 7684 ? Ss 14:27 0:00 /usr/lib/systemd/systemd-udevd
dbus 63 0.0 0.1 12052 5736 ? Ss 14:27 0:00 /usr/bin/dbus-daemon --system --address=systemd: --nofork --nopidfile --systemd-activation --syslog-only
root 65 0.0 0.1 14600 7224 ? Ss 14:27 0:00 /usr/lib/systemd/systemd-logind
root 211 0.0 0.1 14176 6872 ? Ss 14:27 0:00 /usr/lib/systemd/systemd-machined
ebal 312 0.0 0.0 3164 808 pts/1 S+ 14:30 0:00 _ grep -i systemd
ebal 215 0.0 0.2 16036 8956 ? Ss 14:27 0:00 /usr/lib/systemd/systemd --user
$ systemctl status docker
* docker.service - Docker Application Container Engine
Loaded: loaded (/usr/lib/systemd/system/docker.service; enabled; vendor preset: disabled)
Active: active (running) since Sat 2021-05-01 14:27:12 EEST; 3min 22s ago
TriggeredBy: * docker.socket
Docs: https://docs.docker.com
Main PID: 64 (dockerd)
Tasks: 17 (limit: 4715)
Memory: 167.9M
CGroup: /system.slice/docker.service
|-64 /usr/bin/dockerd -H fd://
`-80 containerd --config /var/run/docker/containerd/containerd.toml --log-level info
May 01 14:27:12 myworklaptop-wsl systemd[1]: Started Docker Application Container Engine.
May 01 14:27:12 myworklaptop-wsl dockerd[64]: time="2021-05-01T14:27:12.303580300+03:00" level=info msg="AP>
that’s it !
I am an archlinux user using Sony WH-1000XM3 bluetooth noise-cancellation headphones. I am also using pulseaudio and it took me a while to switch the bluetooth headphones to HSP/HFP profile so the microphone can work too. Switching the bluetooth profile of your headphones to HeadSet Audio works but it is only monophonic audio and without noise-cancellation and I had to switch to piperwire also. But at least now the microphone works!
I was wondering how distros that by default have already switched to pipewire deal with this situation. So I started a fedora 34 (beta) edition and attached both my bluetooth adapter TP-LINK UB400 v1 and my web camera Logitech HD Webcam C270.
The test should be to open a jitsi meet and a zoom test meeting and verify that my headphones can work without me doing any stranger CLI magic.
tldr; works out of the box !
lsusb
[root@fedora ~]# lsusb
Bus 002 Device 001: ID 1d6b:0003 Linux Foundation 3.0 root hub
Bus 001 Device 004: ID 046d:0825 Logitech, Inc. Webcam C270
Bus 001 Device 003: ID 0a12:0001 Cambridge Silicon Radio, Ltd Bluetooth Dongle (HCI mode)
Bus 001 Device 002: ID 0627:0001 Adomax Technology Co., Ltd QEMU USB Tablet
Bus 001 Device 001: ID 1d6b:0002 Linux Foundation 2.0 root hub
as you can see both usb devices have properly attached to fedora34
kernel
we need Linux kernel > 5.10.x to have a proper support
[root@fedora ~]# uname -a
Linux fedora 5.11.10-300.fc34.x86_64 #1 SMP Thu Mar 25 14:03:32 UTC 2021 x86_64 x86_64 x86_64 GNU/Linux pipewire
and of-course piperwire installed
[root@fedora ~]# rpm -qa | grep -Ei 'blue|pipe|pulse'
libpipeline-1.5.3-2.fc34.x86_64
pulseaudio-libs-14.2-3.fc34.x86_64
pulseaudio-libs-glib2-14.2-3.fc34.x86_64
pipewire0.2-libs-0.2.7-5.fc34.x86_64
bluez-libs-5.56-4.fc34.x86_64
pipewire-libs-0.3.24-4.fc34.x86_64
pipewire-0.3.24-4.fc34.x86_64
bluez-5.56-4.fc34.x86_64
bluez-obexd-5.56-4.fc34.x86_64
pipewire-gstreamer-0.3.24-4.fc34.x86_64
pipewire-pulseaudio-0.3.24-4.fc34.x86_64
gnome-bluetooth-libs-3.34.5-1.fc34.x86_64
gnome-bluetooth-3.34.5-1.fc34.x86_64
bluez-cups-5.56-4.fc34.x86_64
NetworkManager-bluetooth-1.30.2-1.fc34.x86_64
pipewire-alsa-0.3.24-4.fc34.x86_64
pipewire-jack-audio-connection-kit-0.3.24-4.fc34.x86_64
pipewire-utils-0.3.24-4.fc34.x86_64
screenshots
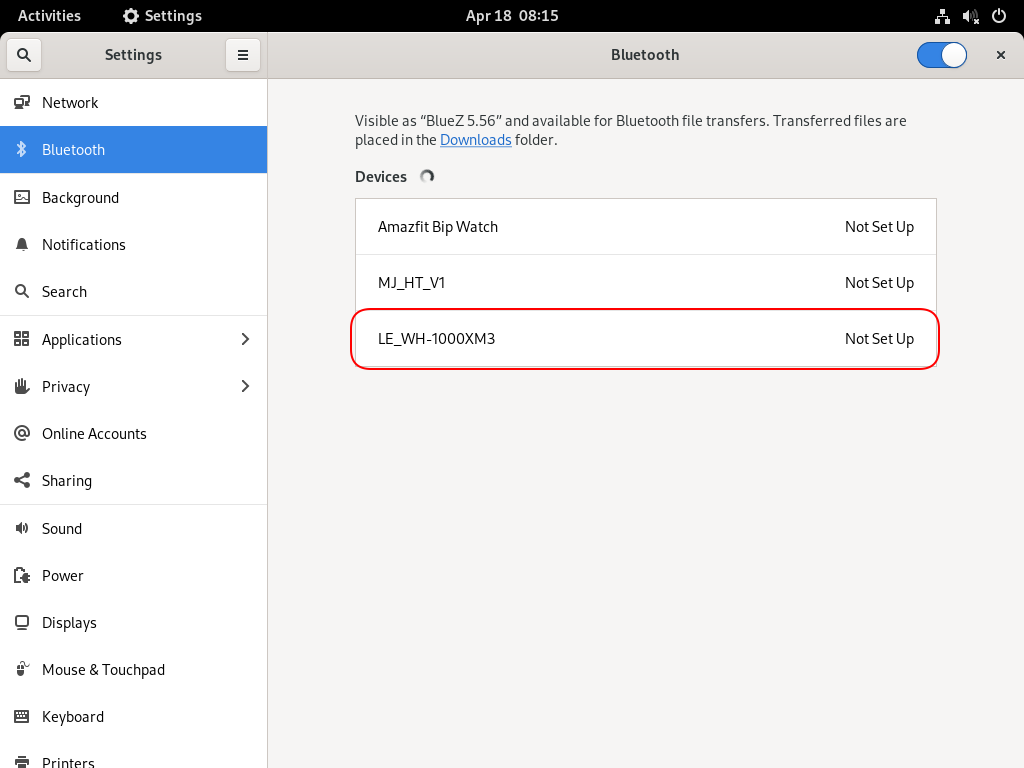
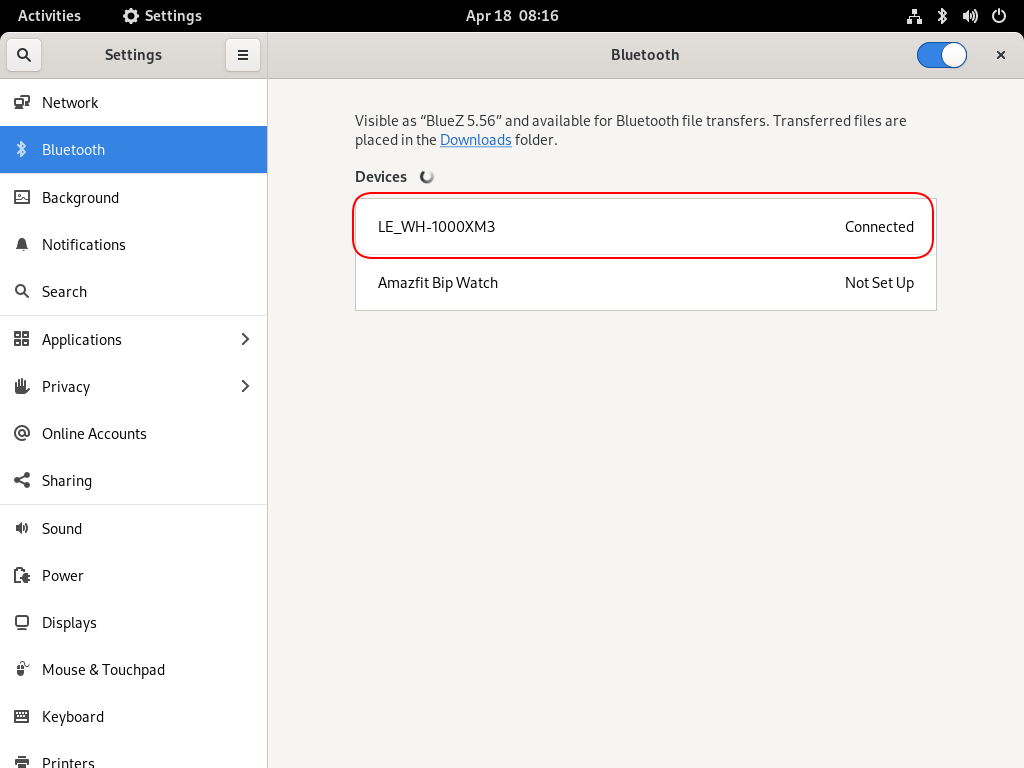
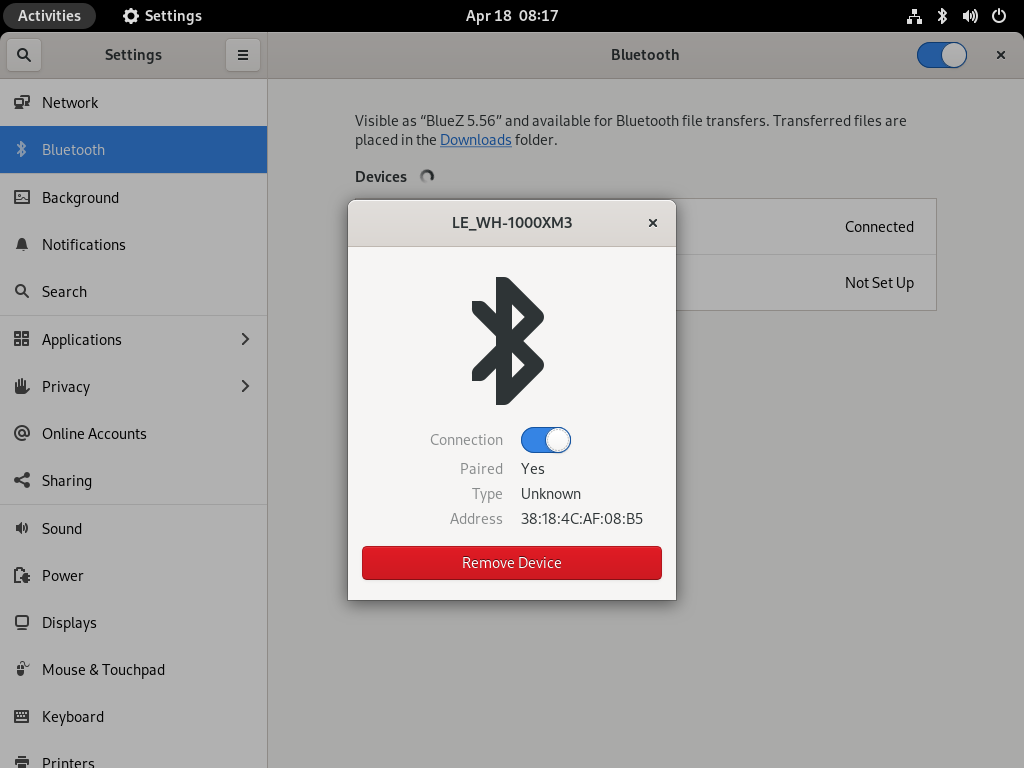
Bluetooth Profiles
Online Meetings


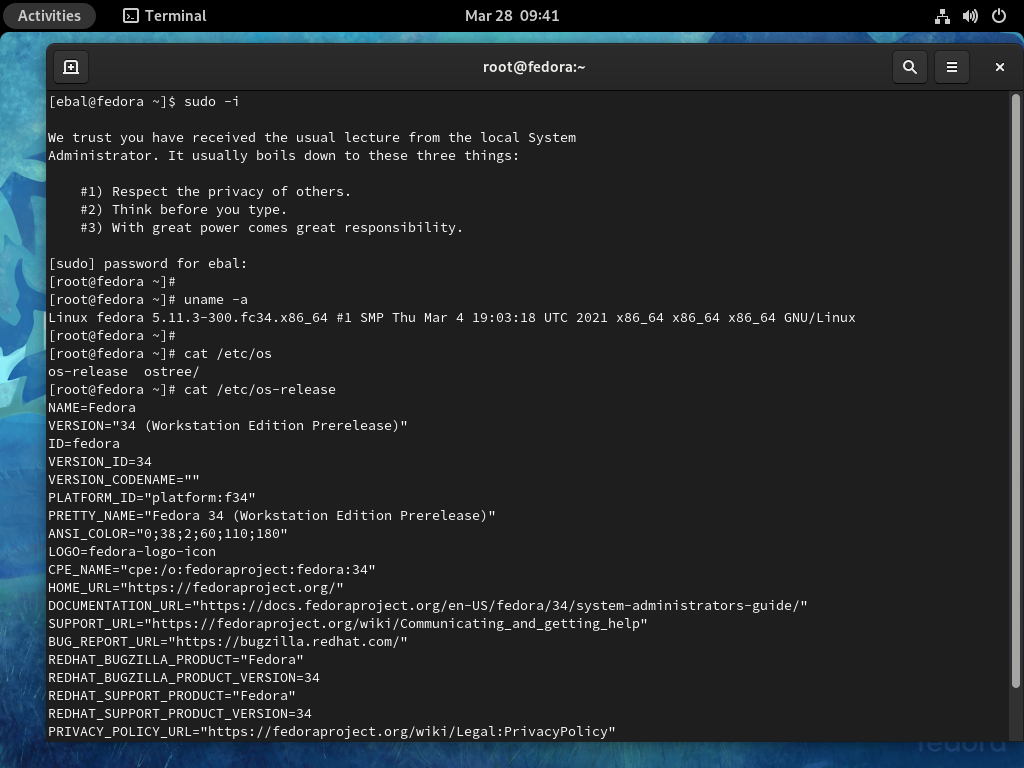


I upgraded my home internet connection and as a result I had to give up my ~15y Static IP. Having an ephemeral Dynamic IP means I need to use a dynamic dns service to access my homepc. Although the ISP’s CPE (router) has a few public dynamic dns services, I chose to create a simple solution on my own self-hosted DNS infra.
There are a couple of ways to do that, PowerDNS supports Dynamic Updates but I do not want to open PowerDNS to the internet for this kind of operations. I just want to use cron with a simple curl over https.
PowerDNS WebAPI
to enable and use the Built-in Webserver and HTTP API we need to update our configuration:
/etc/pdns/pdns.conf
api-key=0123456789ABCDEF
api=yesand restart powerdns auth server.
verify it
ss -tnl 'sport = :8081'State Recv-Q Send-Q Local Address:Port Peer Address:Port
LISTEN 0 10 127.0.0.1:8081 *:*
WebServer API in PHP
Next to build our API in PHP
Basic Auth
By using https means that the transport layer is encrypted so we only need to create a basic auth mechanism.
<?php
if ( !isset($_SERVER["PHP_AUTH_USER"]) ) {
header("WWW-Authenticate: Basic realm='My Realm'");
header("HTTP/1.0 401 Unauthorized");
echo "Restricted area: Only Authorized Personnel Are Allowed to Enter This Area";
exit;
} else {
// code goes here
}
?>by sending Basic Auth headers, the _SERVER php array variable will contain two extra variables
$_SERVER["PHP_AUTH_USER"]
$_SERVER["PHP_AUTH_PW"]We do not need to setup an external IDM/LDAP or any other user management system just for this usecase (single user access).
and we can use something like:
<?php
if (($_SERVER["PHP_AUTH_USER"] == "username") && ($_SERVER["PHP_AUTH_PW"] == "very_secret_password")){
// code goes here
}
?>RRSet Object
We need to create the RRSet Object
here is a simple example
<?php
$comments = array(
);
$record = array(
array(
"disabled" => False,
"content" => $_SERVER["REMOTE_ADDR"]
)
);
$rrsets = array(
array(
"name" => "dyndns.example.org.",
"type" => "A",
"ttl" => 60,
"changetype" => "REPLACE",
"records" => $record,
"comments" => $comments
)
);
$data = array (
"rrsets" => $rrsets
);
?>by running this data set to json_encode should return something like this
{
"rrsets": [
{
"changetype": "REPLACE",
"comments": [],
"name": "dyndns.example.org.",
"records": [
{
"content": "1.2.3.4",
"disabled": false
}
],
"ttl": 60,
"type": "A"
}
]
}be sure to verify that records, comments and rrsets are also arrays !
Stream Context
Next thing to create our stream context
$API_TOKEN = "0123456789ABCDEF";
$URL = "http://127.0.0.1:8081/api/v1/servers/localhost/zones/example.org";
$stream_options = array(
"http" => array(
"method" => "PATCH",
"header" => "Content-type: application/json \r\n" .
"X-API-Key: $API_TOKEN",
"content" => json_encode($data),
"timeout" => 3
)
);
$context = stream_context_create($stream_options);
Be aware of " \r\n" . in header field, this took me more time than it should ! To have multiple header fiels into the http stream, you need (I don’t know why) to carriage return them.
Get Zone details
Before continue, let’s make a small script to verify that we can successfully talk to the PowerDNS HTTP API with php
<?php
$API_TOKEN = "0123456789ABCDEF";
$URL = "http://127.0.0.1:8081/api/v1/servers/localhost/zones/example.org";
$stream_options = array(
"http" => array(
"method" => "GET",
"header" => "Content-type: application/jsonrn".
"X-API-Key: $API_TOKEN"
)
);
$context = stream_context_create($stream_options);
echo file_get_contents($URL, false, $context);
?>by running this:
php get.php | jq .we should get the records of our zone in json format.
Cron Entry
you should be able to put the entire codebase together by now, so let’s work on the last component of our self-hosted dynamic dns server, how to update our record via curl
curl -sL https://username:very_secret_password@example.org/dyndns.phpevery minute should do the trick
# dyndns
* * * * * curl -sL https://username:very_secret_password@example.org/dyndns.php
That’s it !