Docker Swarm
The native Docker Container Orchestration system is Docker Swarm that in simple terms means that you can have multiple docker machines (hosts) to run your multiple docker containers (replicas). It is best to work with Docker Engine v1.12 and above as docker engine includes docker swarm natively.
Docker Swarm logo:

In not so simply terms, docker instances (engines) running on multiple machines (nodes), communicating together (VXLAN) as a cluster (swarm).
Nodes
To begin with, we need to create our docker machines. One of the nodes must be the manager and the others will run as workers. For testing purposes I will run three (3) docker engines:
- Manager Docker Node: myengine0
- Worker Docker Node 1: myengine1
- Worker Docker Node 2: myengine2
Drivers
A docker node is actually a machine that runs the docker engine in the swarm mode. The machine can be a physical, virtual, a virtualbox, a cloud instance, a VPS, a AWS etc etc
As the time of this blog post, officially docker supports natively the below drivers:
- Amazon Web Services
- Microsoft Azure
- Digital Ocean
- Exoscale
- Google Compute Engine
- Generic
- Microsoft Hyper-V
- OpenStack
- Rackspace
- IBM Softlayer
- Oracle VirtualBox
- VMware vCloud Air
- VMware Fusion
- VMware vSphere
QEMU - KVM
but there are unofficial drivers also.
I will use the qemu - kvm driver from this github repository: https://github.com/dhiltgen/docker-machine-kvm
The simplest way to add the kvm driver is this:
> cd /usr/local/bin/
> sudo -s
# wget -c https://github.com/dhiltgen/docker-machine-kvm/releases/download/v0.7.0/docker-machine-driver-kvm
# chmod 0750 docker-machine-driver-kvm
Docker Machines
The next thing we need to do, is to create our docker machines. Look on your distro’s repositories:
# yes | pacman -S docker-machineManager
$ docker-machine create -d kvm myengine0

Running pre-create checks...
Creating machine...
(myengine0) Image cache directory does not exist, creating it at /home/ebal/.docker/machine/cache...
(myengine0) No default Boot2Docker ISO found locally, downloading the latest release...
(myengine0) Latest release for github.com/boot2docker/boot2docker is v1.13.1
(myengine0) Downloading /home/ebal/.docker/machine/cache/boot2docker.iso from https://github.com/boot2docker/boot2docker/releases/download/v1.13.1/boot2docker.iso...
(myengine0) 0%....10%....20%....30%....40%....50%....60%....70%....80%....90%....100%
(myengine0) Copying /home/ebal/.docker/machine/cache/boot2docker.iso to /home/ebal/.docker/machine/machines/myengine0/boot2docker.iso...

Waiting for machine to be running, this may take a few minutes...
Detecting operating system of created instance...
Waiting for SSH to be available...
Detecting the provisioner...
Provisioning with boot2docker...
Copying certs to the local machine directory...
Copying certs to the remote machine...
Setting Docker configuration on the remote daemon...
Checking connection to Docker...
Docker is up and running!
To see how to connect your Docker Client to the Docker Engine running on this virtual machine, run: docker-machine env myengine0
Worker 1
$ docker-machine create -d kvm myengine1
Running pre-create checks...
Creating machine...
(myengine1) Copying /home/ebal/.docker/machine/cache/boot2docker.iso to /home/ebal/.docker/machine/machines/myengine1/boot2docker.iso...
Waiting for machine to be running, this may take a few minutes...
Detecting operating system of created instance...
Waiting for SSH to be available...
Detecting the provisioner...
Provisioning with boot2docker...
Copying certs to the local machine directory...
Copying certs to the remote machine...
Setting Docker configuration on the remote daemon...
Checking connection to Docker...
Docker is up and running!
To see how to connect your Docker Client to the Docker Engine running on this virtual machine, run: docker-machine env myengine1
Worker 2
$ docker-machine create -d kvm myengine2
Running pre-create checks...
Creating machine...
(myengine2) Copying /home/ebal/.docker/machine/cache/boot2docker.iso to /home/ebal/.docker/machine/machines/myengine2/boot2docker.iso...
Waiting for machine to be running, this may take a few minutes...
Detecting operating system of created instance...
Waiting for SSH to be available...
Detecting the provisioner...
Provisioning with boot2docker...
Copying certs to the local machine directory...
Copying certs to the remote machine...
Setting Docker configuration on the remote daemon...
Checking connection to Docker...
Docker is up and running!
To see how to connect your Docker Client to the Docker Engine running on this virtual machine, run: docker-machine env myengine2
List your Machines
$ docker-machine env myengine0
export DOCKER_TLS_VERIFY="1"
export DOCKER_HOST="tcp://192.168.42.126:2376"
export DOCKER_CERT_PATH="/home/ebal/.docker/machine/machines/myengine0"
export DOCKER_MACHINE_NAME="myengine0"
# Run this command to configure your shell:
# eval $(docker-machine env myengine0)
$ docker-machine ls

NAME        ACTIVE   DRIVER   STATE     URL                         SWARM   DOCKER    ERRORS
myengine0   -        kvm      Running   tcp://192.168.42.126:2376           v1.13.1
myengine1   -        kvm      Running   tcp://192.168.42.51:2376            v1.13.1
myengine2   -        kvm      Running   tcp://192.168.42.251:2376           v1.13.1
Inspect
You can get the IP of your machines with:
$ docker-machine ip myengine0
192.168.42.126

$ docker-machine ip myengine1
192.168.42.51

$ docker-machine ip myengine2
192.168.42.251
with ls as seen above or use the inspect parameter for a full list of information regarding your machines in a json format:
$ docker-machine inspect myengine0
If you have jq you can filter out some info
$ docker-machine inspect myengine0  | jq .'Driver.DiskPath'

"/home/ebal/.docker/machine/machines/myengine0/myengine0.img"
SSH
To enter inside the kvm docker machine, you can use ssh
Manager
$ docker-machine ssh myengine0

                        ##         .
                  ## ## ##        ==
               ## ## ## ## ##    ===
           /"""""""""""""""""___/ ===
      ~~~ {~~ ~~~~ ~~~ ~~~~ ~~~ ~ /  ===- ~~~
           ______ o           __/
                          __/
              ___________/
 _                 _   ____     _            _
| |__   ___   ___ | |_|___  __| | ___   ___| | _____ _ __
| '_  / _  / _ | __| __) / _` |/ _  / __| |/ / _  '__|
| |_) | (_) | (_) | |_ / __/ (_| | (_) | (__|   <  __/ |
|_.__/ ___/ ___/ __|_______,_|___/ ___|_|____|_|
Boot2Docker version 1.13.1, build HEAD : b7f6033 - Wed Feb  8 20:31:48 UTC 2017
Docker version 1.13.1, build 092cba3
Worker 1
$ docker-machine ssh myengine1

                        ##         .
                  ## ## ##        ==
               ## ## ## ## ##    ===
           /"""""""""""""""""___/ ===
      ~~~ {~~ ~~~~ ~~~ ~~~~ ~~~ ~ /  ===- ~~~
           ______ o           __/
                          __/
              ___________/
 _                 _   ____     _            _
| |__   ___   ___ | |_|___  __| | ___   ___| | _____ _ __
| '_  / _  / _ | __| __) / _` |/ _  / __| |/ / _  '__|
| |_) | (_) | (_) | |_ / __/ (_| | (_) | (__|   <  __/ |
|_.__/ ___/ ___/ __|_______,_|___/ ___|_|____|_|
Boot2Docker version 1.13.1, build HEAD : b7f6033 - Wed Feb  8 20:31:48 UTC 2017
Docker version 1.13.1, build 092cba3
Worker 2
$ docker-machine ssh myengine2

                        ##         .
                  ## ## ##        ==
               ## ## ## ## ##    ===
           /"""""""""""""""""___/ ===
      ~~~ {~~ ~~~~ ~~~ ~~~~ ~~~ ~ /  ===- ~~~
           ______ o           __/
                          __/
              ___________/
 _                 _   ____     _            _
| |__   ___   ___ | |_|___  __| | ___   ___| | _____ _ __
| '_  / _  / _ | __| __) / _` |/ _  / __| |/ / _  '__|
| |_) | (_) | (_) | |_ / __/ (_| | (_) | (__|   <  __/ |
|_.__/ ___/ ___/ __|_______,_|___/ ___|_|____|_|
Boot2Docker version 1.13.1, build HEAD : b7f6033 - Wed Feb  8 20:31:48 UTC 2017
Docker version 1.13.1, build 092cba3
Swarm Cluster
Now it’s time to build a swarm of docker machines!
Initialize the manager
docker@myengine0:~$  docker swarm init --advertise-addr 192.168.42.126

Swarm initialized: current node (jwyrvepkz29ogpcx18lgs8qhx) is now a manager.

To add a worker to this swarm, run the following command:

    docker swarm join
    --token SWMTKN-1-4vpiktzp68omwayfs4c3j5mrdrsdavwnewx5834g9cp6p1koeo-bgcwtrz6srt45qdxswnneb6i9
    192.168.42.126:2377

To add a manager to this swarm, run 'docker swarm join-token manager' and follow the instructions.
Join Worker 1
docker@myengine1:~$  docker swarm join
>     --token SWMTKN-1-4vpiktzp68omwayfs4c3j5mrdrsdavwnewx5834g9cp6p1koeo-bgcwtrz6srt45qdxswnneb6i9
>     192.168.42.126:2377

This node joined a swarm as a worker.
Join Worker 2
docker@myengine2:~$   docker swarm join
>     --token SWMTKN-1-4vpiktzp68omwayfs4c3j5mrdrsdavwnewx5834g9cp6p1koeo-bgcwtrz6srt45qdxswnneb6i9
>     192.168.42.126:2377

This node joined a swarm as a worker.
From the manager
docker@myengine0:~$  docker node ls

ID                           HOSTNAME   STATUS  AVAILABILITY  MANAGER STATUS
jwyrvepkz29ogpcx18lgs8qhx *  myengine0  Ready   Active        Leader
m5akhw7j60fru2d0an4lnsgr3    myengine2  Ready   Active
sfau3r42bqbhtz1c6v9hnld67    myengine1  Ready   Active
Info
We can find more information about the docker-machines running the docker info command when you have ssh-ed the nodes:
eg. the swarm part:
manager
Swarm: active
 NodeID: jwyrvepkz29ogpcx18lgs8qhx
 Is Manager: true
 ClusterID: 8fjv5fzp0wtq9hibl7w2v65cs
 Managers: 1
 Nodes: 3
 Orchestration:
  Task History Retention Limit: 5
 Raft:
  Snapshot Interval: 10000
  Number of Old Snapshots to Retain: 0
  Heartbeat Tick: 1
  Election Tick: 3
 Dispatcher:
  Heartbeat Period: 5 seconds
 CA Configuration:
  Expiry Duration: 3 months
 Node Address: 192.168.42.126
 Manager Addresses:
  192.168.42.126:2377
worker1
Swarm: active
 NodeID: sfau3r42bqbhtz1c6v9hnld67
 Is Manager: false
 Node Address: 192.168.42.51
 Manager Addresses:
  192.168.42.126:2377
worker 2
Swarm: active
 NodeID: m5akhw7j60fru2d0an4lnsgr3
 Is Manager: false
 Node Address: 192.168.42.251
 Manager Addresses:
  192.168.42.126:2377
Services
Now it’s time to test our docker swarm by running a container service across our entire fleet!
For testing purposes we chose 6 replicas of an nginx container:
docker@myengine0:~$ docker service create --replicas 6 -p 80:80 --name web nginx

ql6iogo587ibji7e154m7npal
List images
docker@myengine0:~$  docker images
REPOSITORY          TAG                 IMAGE ID            CREATED             SIZE
nginx               <none>              db079554b4d2        9 days ago          182 MB
List of services
regarding your docker registry or your internet connection, we will see the replicas running:
docker@myengine0:~$ docker service ls
ID            NAME  MODE        REPLICAS  IMAGE
ql6iogo587ib  web   replicated  0/6       nginx:latest

docker@myengine0:~$ docker service ls
ID            NAME  MODE        REPLICAS  IMAGE
ql6iogo587ib  web   replicated  2/6       nginx:latest

docker@myengine0:~$ docker service ls
ID            NAME  MODE        REPLICAS  IMAGE
ql6iogo587ib  web   replicated  3/6       nginx:latest

docker@myengine0:~$ docker service ls
ID            NAME  MODE        REPLICAS  IMAGE
ql6iogo587ib  web   replicated  6/6       nginx:latest
docker@myengine0:~$  docker service ps web

ID            NAME   IMAGE         NODE       DESIRED STATE  CURRENT STATE           ERROR  PORTS
t3v855enecgv  web.1  nginx:latest  myengine1  Running        Running 17 minutes ago
xgwi91plvq00  web.2  nginx:latest  myengine2  Running        Running 17 minutes ago
0l6h6a0va2fy  web.3  nginx:latest  myengine0  Running        Running 16 minutes ago
qchj744k0e45  web.4  nginx:latest  myengine1  Running        Running 17 minutes ago
udimh2bokl8k  web.5  nginx:latest  myengine2  Running        Running 17 minutes ago
t50yhhtngbac  web.6  nginx:latest  myengine0  Running        Running 16 minutes ago
Browser
To verify that our replicas are running as they should:

Scaling a service
It’s really interesting that we can scale out or scale down our replicas on the fly !
from the manager
docker@myengine0:~$  docker service ls
ID            NAME  MODE        REPLICAS  IMAGE
ql6iogo587ib  web   replicated  6/6       nginx:latest

docker@myengine0:~$ docker service ps web
ID            NAME   IMAGE         NODE       DESIRED STATE  CURRENT STATE       ERROR  PORTS
t3v855enecgv  web.1  nginx:latest  myengine1  Running        Running 3 days ago
xgwi91plvq00  web.2  nginx:latest  myengine2  Running        Running 3 days ago
0l6h6a0va2fy  web.3  nginx:latest  myengine0  Running        Running 3 days ago
qchj744k0e45  web.4  nginx:latest  myengine1  Running        Running 3 days ago
udimh2bokl8k  web.5  nginx:latest  myengine2  Running        Running 3 days ago
t50yhhtngbac  web.6  nginx:latest  myengine0  Running        Running 3 days ago
Scale Down
from the manager
$ docker service scale web=3
web scaled to 3

docker@myengine0:~$ docker service ls
ID            NAME  MODE        REPLICAS  IMAGE
ql6iogo587ib  web   replicated  3/3       nginx:latest

docker@myengine0:~$ docker service ps web
ID            NAME   IMAGE         NODE       DESIRED STATE  CURRENT STATE       ERROR  PORTS
0l6h6a0va2fy  web.3  nginx:latest  myengine0  Running        Running 3 days ago
qchj744k0e45  web.4  nginx:latest  myengine1  Running        Running 3 days ago
udimh2bokl8k  web.5  nginx:latest  myengine2  Running        Running 3 days ago
Scale Up
from the manager
docker@myengine0:~$ docker service scale web=8
web scaled to 8
docker@myengine0:~$
docker@myengine0:~$ docker service ls
ID            NAME  MODE        REPLICAS  IMAGE
ql6iogo587ib  web   replicated  3/8       nginx:latest
docker@myengine0:~$
docker@myengine0:~$ docker service ls
ID            NAME  MODE        REPLICAS  IMAGE
ql6iogo587ib  web   replicated  4/8       nginx:latest
docker@myengine0:~$
docker@myengine0:~$ docker service ls
ID            NAME  MODE        REPLICAS  IMAGE
ql6iogo587ib  web   replicated  8/8       nginx:latest
docker@myengine0:~$
docker@myengine0:~$
docker@myengine0:~$ docker service ps web
ID            NAME   IMAGE         NODE       DESIRED STATE  CURRENT STATE           ERROR  PORTS
lyhoyseg8844  web.1  nginx:latest  myengine1  Running        Running 7 seconds ago
w3j9bhcn9f6e  web.2  nginx:latest  myengine2  Running        Running 8 seconds ago
0l6h6a0va2fy  web.3  nginx:latest  myengine0  Running        Running 3 days ago
qchj744k0e45  web.4  nginx:latest  myengine1  Running        Running 3 days ago
udimh2bokl8k  web.5  nginx:latest  myengine2  Running        Running 3 days ago
vr8jhbum8tlg  web.6  nginx:latest  myengine1  Running        Running 7 seconds ago
m4jzati4ddpp  web.7  nginx:latest  myengine2  Running        Running 8 seconds ago
7jek2zvuz6fs  web.8  nginx:latest  myengine0  Running        Running 11 seconds ago
prerequisites
You need to already have a LDAP instance in your infrastructure that you can reach from your test linux machine. Your ldap has an organization unit for people and one for groups.
Ldap server conf
It is always a good thing to write your notes/settings beforehand:
Ldap Server: myldapserver.example.org
Domain Component: dc=example,dc=org

People base: ou=people,dc=example,dc=org
Group base: ou=Groups,dc=example,dc=org

bind user: userpam
bind pass: 1234567890
Installation
On your centos 7 machine, you have to install two packages:
# yum -y install nss-pam-ldapd

  Installing : nscd-2.17-157.el7_3.1.x86_64
  Installing : nss-pam-ldapd-0.8.13-8.el7.x86_64
local LDAP name service daemon
Edit the /etc/nslcd.conf file accordingly to your ldap setup.
# grep -Ev '#|^$' /etc/nslcd.conf
uid nslcd
gid ldap

uri ldap://myldapserver.example.org
base ou=people,dc=example,dc=org

ssl no
tls_cacertdir /etc/openldap/cacerts
This is the most basic configuration file, without any TLS (encryption) support, but for our test purposes is ok.
restart nslcd
Every time you change something to nslcd.conf file, you need to restart the service:
# systemctl restart nslcd
Name Service Switch
By default the Name Service Switch have ldap support for the below pam services:
# grep ldap /etc/nsswitch.conf

passwd:     files sss ldap
shadow:     files sss ldap
group:      files sss ldap
netgroup:   files sss ldap
automount:  files ldap
if not, just add it yourself. Just remember that the order is from left to right, that means your centos machine will first try to look in your local files, then to your System Security Services Daemon and finally to your ldap URI !
Testing
In this first step, the only way to test that your linux machine can talk to your linux server is via getent looking up on the passwd service:
# getent passwd | grep ebal

ebal:x:374:374:Evaggelos Balaskas:/home/ebal:/bin/bash
Ldap Bind Password
The above example is for anonymous bind against your ldap server. That means that secrets (as the password of the user) can not be viewed (actually tested it on the encrypted hash) as for that you need to bind to your ldap server with your credentials.
# egrep -v '^$|#' /etc/nslcd.conf

uid nslcd
gid ldap
uri ldap://myldapserver.example.org
base ou=people,dc=example,dc=org

binddn cn=userpam,dc=example,dc=org
bindpw 1234567890

ssl no
tls_cacertdir /etc/openldap/cacerts
restart nslcd
# systemctl restart nslcd
Testing
Now it’s time for your first ssh login:
~> ssh testvm
ebal@testvm's password:

Last login: Mon Feb 13 22:50:12 2017
/usr/bin/id: cannot find name for group ID 374

~>  id
uid=374(ebal) gid=374 groups=374
You can login without problem, but there is a warning for your group id.
Ldap Group Configuration
So, we need to add support for our group base on the nslcd configuration file:
# egrep -v '^$|#' /etc/nslcd.conf

uid nslcd
gid ldap
uri ldap://myldapserver.example.org
base ou=people,dc=example,dc=org
binddn cn=userpam,dc=example,dc=org
bindpw 1234567890

base group ou=Groups,dc=example,dc=org

ssl no
tls_cacertdir /etc/openldap/cacerts
restart nslcd
# systemctl restart nslcdtesting
We first test it against getent using the group service:
# getent group | grep 374
ebal:*:374
and after that, we can ssh again to our linux machine:
~> ssh testvm
ebal@testvm's password:
Last login: Mon Feb 13 23:14:42 2017 from testserver

~> id
uid=374(ebal) gid=374(ebal) groups=374(ebal)
Now it shows the group name without a problem.
Fairphone FP1U
I have this phone for more than 3,5 years

running on Android v4.2 !
Gapps
I dont have them, I dont even have a google account.
Although fairphone comes with an extra GApps package zip, I haven’t installed them either.
Fake GApps
Unfortunately there are some android apps that need GApps to run. So, without any further ado, here are my notes on how to add support for alternative open sources.
Disclaimer
Device may brick ! Do a full backup and keep it somewhere safe.
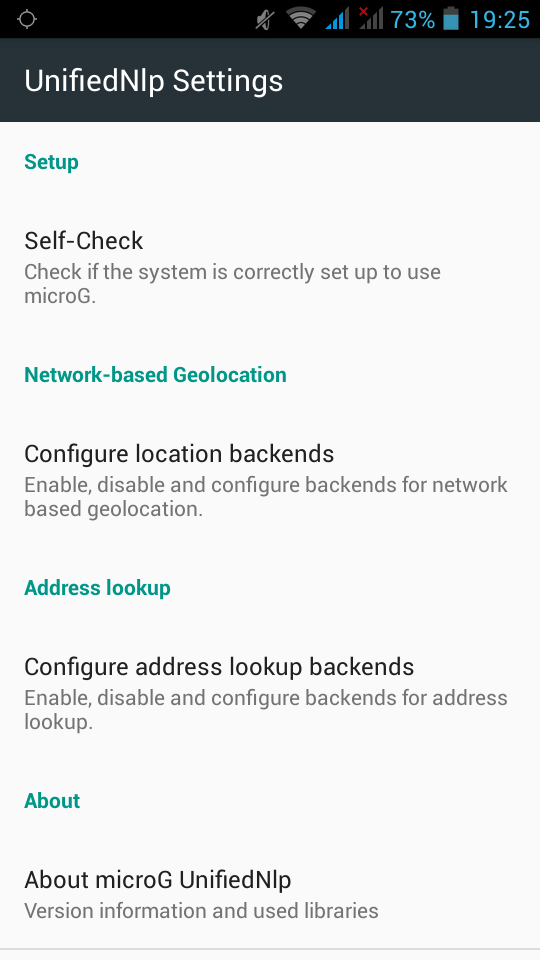
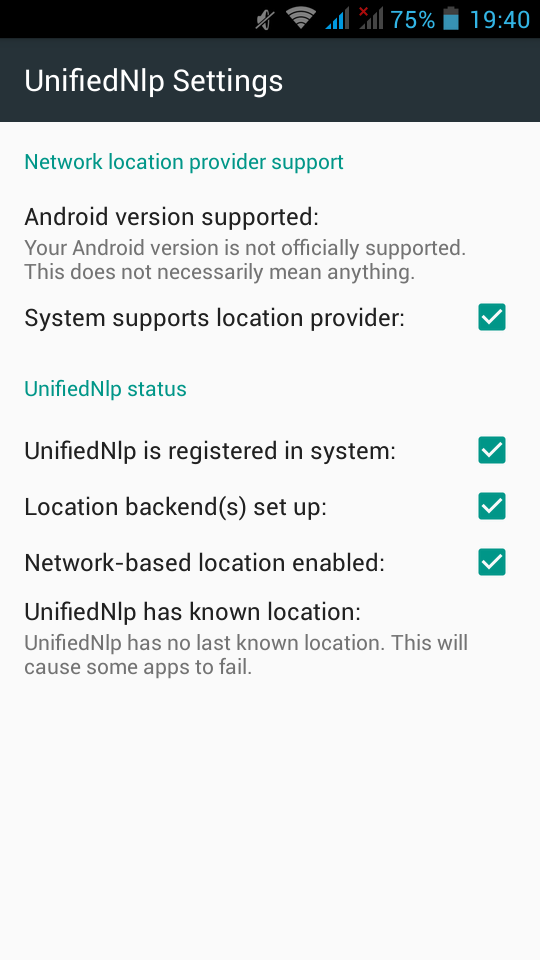
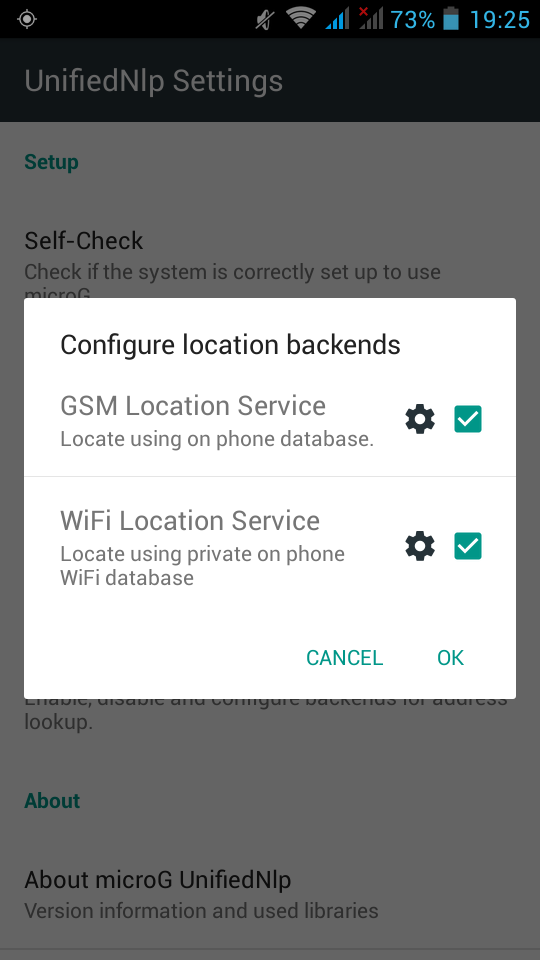
Location Service
We start with the easy one, how to add support for location service.
In Fdroid we can find the UnifiedNlp suite of packages that work as a Location provider middleware. On my device, I installed the below apps:
https://f-droid.org/repository/browse/?fdfilter=UnifiedNlp
UnifiedNlp
Screenshots from my fairphone, after a few reboots
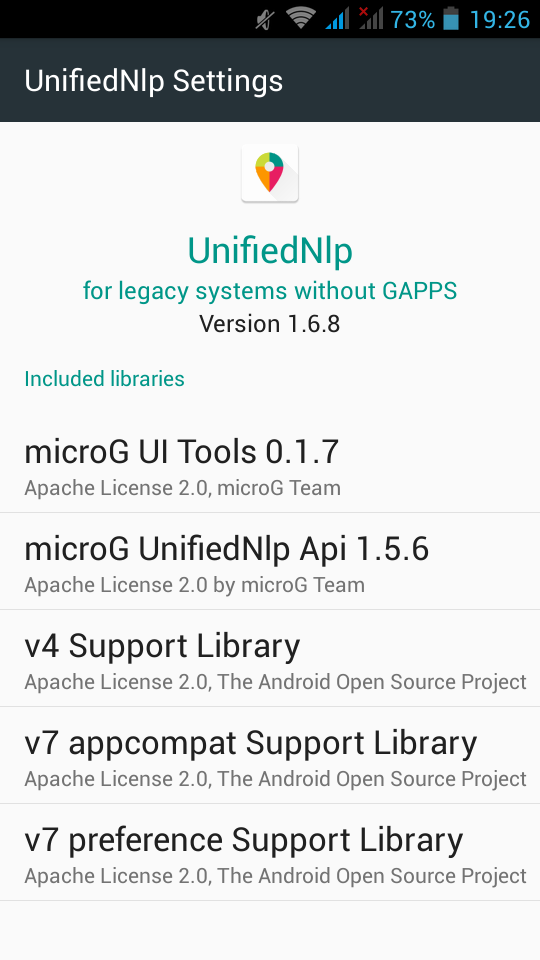
Unified github
Just to make things perfectly clear, you can verify fdroid’s packages against these:
https://github.com/microg/android_packages_apps_UnifiedNlp/releases
Google Play Store
So notes are referring to Phonesky … I didnt follow them !!!
Instead of phonesky, I installed BlankStore !
Here is the github repo: BlankStore v0.7.5
https://github.com/mar-v-in/BlankStore/releases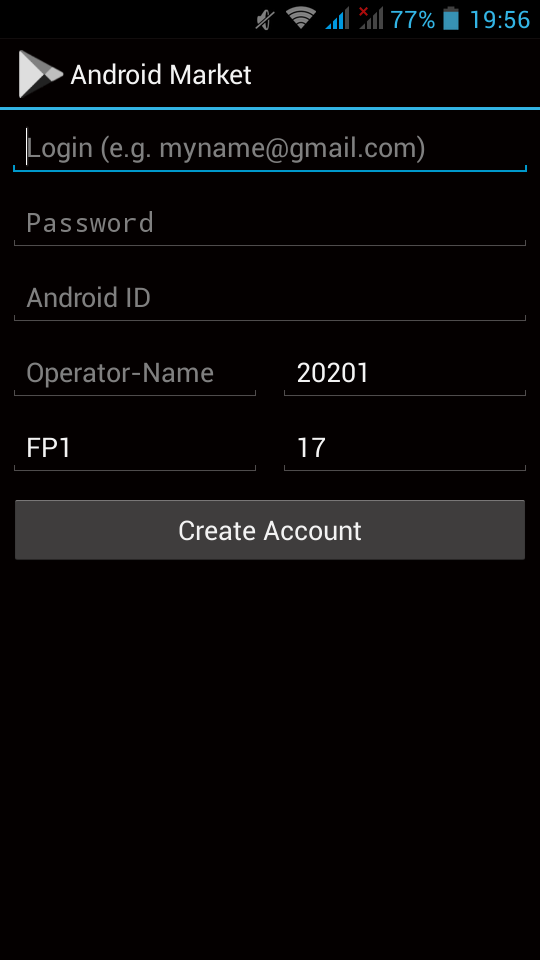
microG
Now are going to a more interesting part. We need to install the μG to our phone.
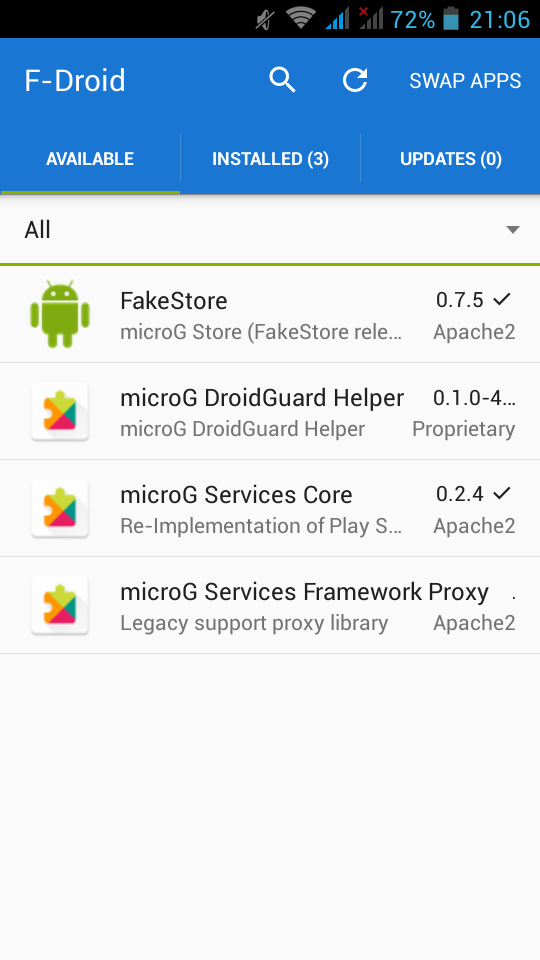
microG F-Droid repo
It’s really easy, just add the fdroid repository and install the below two apps:
https://microg.org/fdroid/repo?fingerprint=9BD06727E62796C0130EB6DAB39B73157451582CBD138E86C468ACC395D14165- microG Services Core
- microG Services Framework Proxy
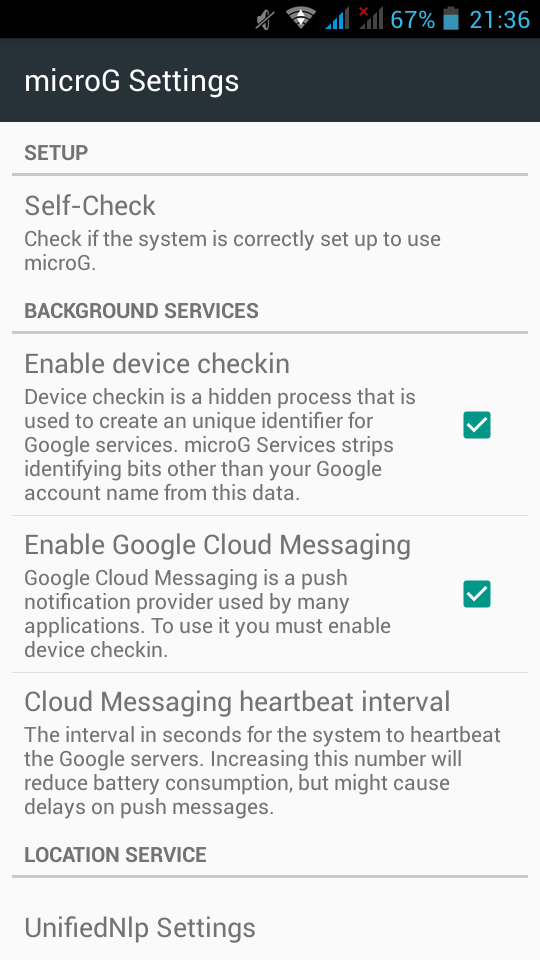
microG Services Core
Now the difficult part.
Opening microG self-checked, we are going to see that spoof signature is not passing the test.
Xposed
Now the most difficult and dangerous thing you will need to do with your phone.
We need to install Xposed Installer
For Fairphone FP1U we need:
Package:  de.robv.android.xposed.installer
Version name:  2.7 experimental
Download: de.robv.android.xposed.installer_v33_36570c.apk (770.28 KB)
MD5: 36570c6fac687ffe08107e6a72bd3da7
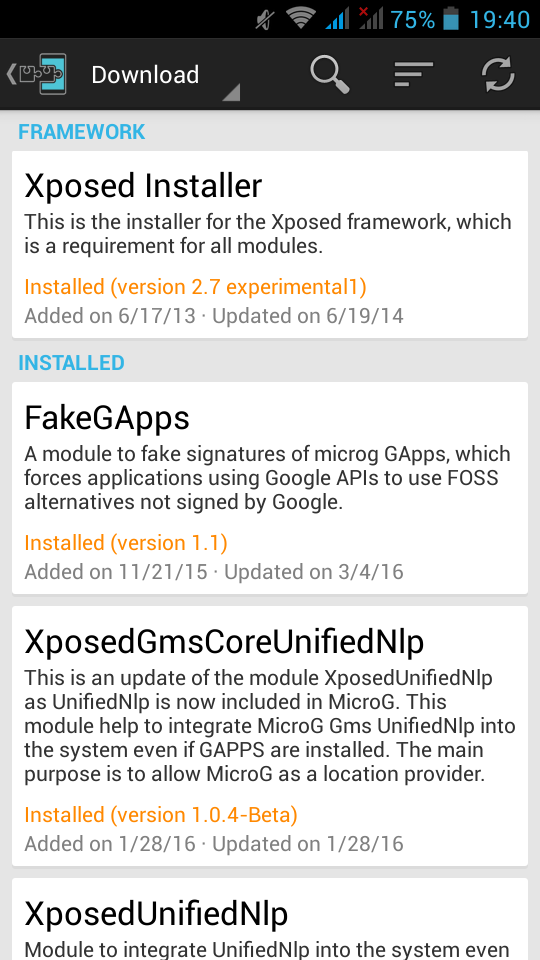
after that, we have to install the below xposed modules:
- Xposed Installer
- FakeGApps
- XposedGmsCoreUnifiedNlp
- XposedUnifiedNlp
download them and reboot your phone. If you think it may be helpful, cross your fingers.
This is a good time to remind you that you need to have a fresh backup
microG
Now let’s reboot our mobile phone again and try to open μG once more:

If everything seems like the above pictures, then you are done !
Errata 20170211
For android users with v4.2 on it, there are a few errata!
Location Services
You need the legacy network location package from UnifiedNlp
LegacyNetworkLocation.apkμG - microG
The latest online version -somehow- doesnt work with my phone perfectly.
You can use the build from BRNmod an alternative CyanogenMod
https://files.brnmod.rocks/apps/GmsCore/Latest/

play-services-core-debug.apk 27-Jan-2017 11:22 4188872Baikal
Almost a year ago, I wrote an article on how to install & use your personal Contact and Calendar Server & Android Client: Baïkal - CalDAV & CardDAV server
So, here are my personal notes on upgrading to it’s latest version (v0.4.6):
Github - Version
Here are the latest releases of baikal: Baikal Releases
Download
move to your baikal installation folder and download the latest version:
~> wget -c https://github.com/fruux/Baikal/releases/download/0.4.6/baikal-0.4.6.zip
Backup
Before doing anything else, keep a local backup of your previous installation:
~> tar cvf baikal.2016-03-26.tar baikalUncompress - Upgrade
To upgrade baikal is really, really easy.
You just need to uncompress the above dot zip file:
With -l you can see/list the files without uncompress them to your folder:
~> unzip -l baikal-0.4.6.zip | head
Archive:  baikal-0.4.6.zip
  Length      Date    Time    Name
---------  ---------- -----   ----
        0  08-19-2016 16:09   baikal/
        0  08-19-2016 16:09   baikal/Specific/
        0  08-19-2016 16:09   baikal/Specific/db/
        0  08-19-2016 16:09   baikal/Specific/db/.empty
        0  08-19-2016 15:50   baikal/html/
        0  08-19-2016 15:50   baikal/html/res/
        0  02-04-2016 09:15   baikal/html/res/core/
ok, we are sure:
~> unzip baikal-0.4.6.zip
Ownership
Change the ownership to your web browser user:
~> chown -R apache:apache baikalAdmin
Now you just need to open the admin interface to finish up the upgrade:
https://baikal.example.com/html/admin/
