I am using fluxbox as my primary window manager on both my laptop and home desktop. If you want a non distractive environment to work with, I strongly suggest to take a look.
On the laptop, I had a problem to configure the backlight. It was always on 100%, fixed without the ability to change it. If you run on battery, then you need to lower the brightness of your display.
After Linux kernel v3.16, things got a lot easier and better for newest models of laptops that had problems with the backlight and brightness.
You can find a lot of blog/site & wiki pages that suggest to append something of the below to your grub menu entry:
video.use_native_backlight=0
video.use_native_backlight=1
acpi_backlight=vendor
or something similar.
Note: On Dell XPS13 laptops a firmware bug exists when disabling legacy boot or switching through UEFI & legacy. That can break the backlight support and the result is a blank screen. This is a stupid manufacture error of Dell cause they used a different firmware module for backlight that can send different acpi events!
For me that’s irrelevant now. I am using UEFI and Linux kernel v4.0.5 and I have disabled legacy boot from my laptop a long time ago.
My grub menu doesnt have any of the above settings.
Ok, so now it’s time to explain how you can use fluxbox keys to control the brightness on your laptop.
Open a terminal and type:
xev
With this program you can capture the keycode of the keys your are pressing.
I want to use the same keys that I would normally use for adjusting the display brightness on my laptop.
So on my machine, FN+F4 returns 232 and FN+F5 233.
Edit your ~/.fluxbox/startup file to add the below lines:
exec xmodmap -e "keycode 232 = F14 " &
exec xmodmap -e "keycode 233 = F15 " &
somewhere before
exec fluxbox
With the above commands, you are telling xorg to map the keycodes to a new key (even if that key doesnt exist on our keyboard). From now on, fluxbox will recognize FN+F4 (keycode 232) as F14 and FN+F5 (keycode 233) as F15.
At this point, if you have not already installed xorg-xbacklight, do it now.
The final step is to map our new keys to specific commands. Edit your ~/.fluxbox/keys so that you can add the below:
None F14 : ExecCommand xbacklight -dec 5
None F15 : ExecCommand xbacklight -inc 5
and restart your fluxbox !
a back to vim basics post !
It’s quite obvious that we need different vimrc settings for different files/languages. This is mostly about tabs and characters but it can be extended to more. For example in pytnon (ansible etc) you need to replace the tab to four or eight characters. Most of us are using something like this:
:set tabstop=4 shiftwidth=4 softtabstop=4 expandtab
every time we open a python related file.
But you can set your own options in every file using a comment in the end or in the begging of the file. Like this one:
#!/usr/bin/python2.6

# vim: tabstop=4 expandtab shiftwidth=4 softtabstop=4

... (awesome code) ...
This is called: modeline and is something magic!
Just add the below line to your ~./vimrc file or if you need a more global setting append it to your /etc/vimrc
set modeline
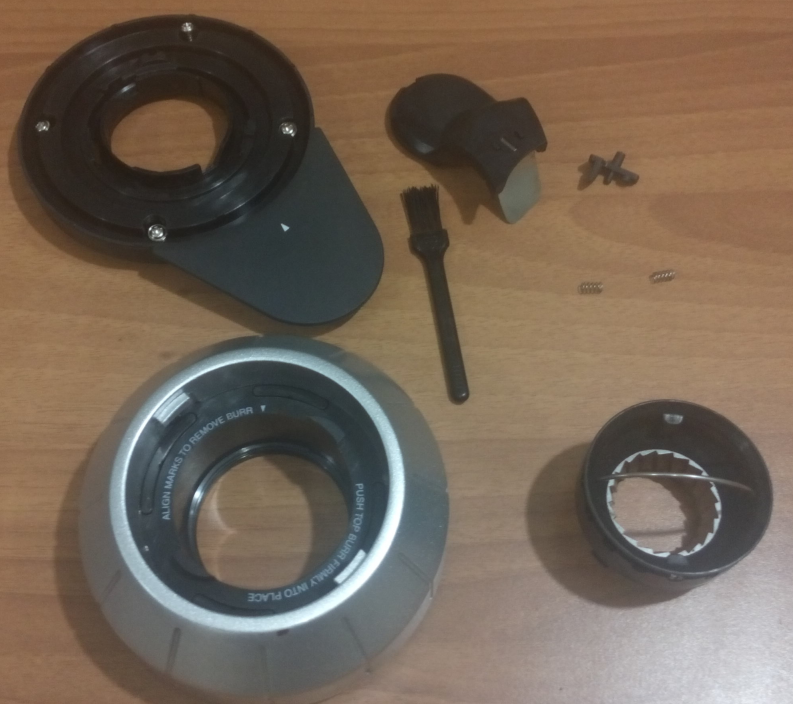
This post is for coffee lovers and is about how to assemble the Graef CM 800, which is a coffee grinder, after a proper clean up.
Has many images, so it may be “heavy” to browse. Click on every image for full size display.
Below are the removable parts.
Be CAREFUL the smallest parts are the most important !!!
Dont loose them !
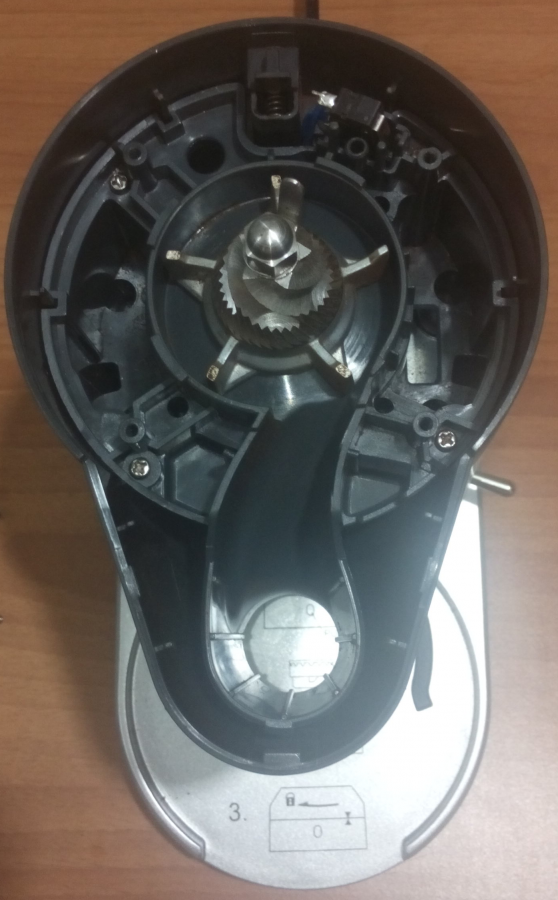
The internal part of our conical grinder.
This image is without the case and the coffee stopper
Be very careful with the smallest parts.
Their job is to power on our grinder!
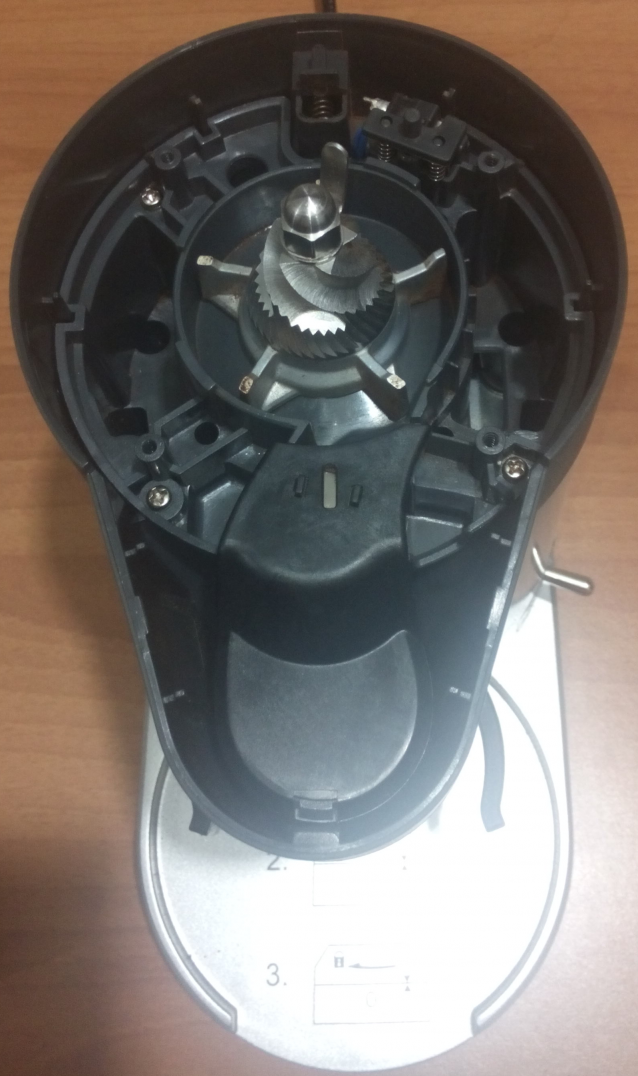
Putting the coffee stopper case (you have to hear the click!).
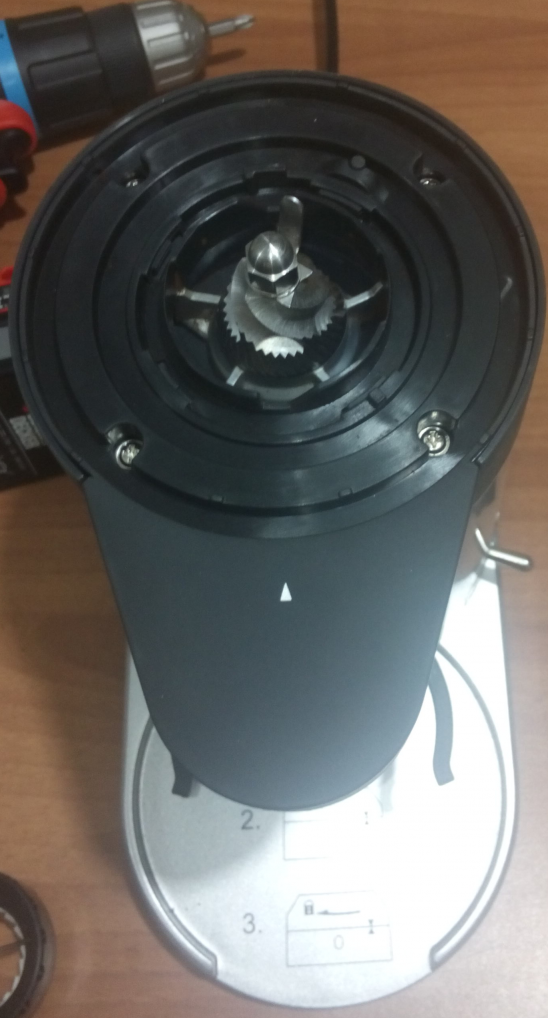
Screw the top to cover the internals.
Adjust the collar by facing back (numbers must be in the back)
Put the upper conical grinder part:
And switch till it fits perfectly
Turn the adjustment collar clockwise, till it’s lock to your settings
I mostly grind on the 10 setting and the result looks like this:
and after tamping:
The inspiration for this post comes from Kees Cook’s tweet about having
VisualHostKey yes
on his ~/.ssh/config file.
I’ve played with this option in the past, but having some scripts running over ssh, I was afraid about parsing the “wrong” things on the output.
I’ve enabled this option again this evening, so the head of my ~/.ssh/config looks like:
Host *
    VisualHostKey yes
    Compression yes
I started to ssh login in to a few machines, just to see the output.
A sample output, looks like this:
+---[RSA 2048]----+
|.E       . . o   |
|= . .   . . o o  |
| +   o .  ..o. . |
|  o . o . .*.    |
|   .   +S...*. o |
|      . ...+o.+oo|
|        . +o  +.B|
|       . + oo+ +=|
|        . o.=o. .|
+----[SHA256]-----+
RSA 2048 is the size of the servers public key and you can check the size of the servers key -as of course yours too- with this command:
# ssh-keygen -l -f /etc/ssh/ssh_host_rsa_key.pub
on your local machine:
> ssh-keygen -l -f ~/.ssh/id_rsa.pub
I have changed a few times my ssh key pair (you must remember to append your new public key to your server authorized_keys, before removing your old key) but I never changed the servers key pairs.
After searching online for a few minutes to educate my self on the matter, seems that when your (in this case) centos machine is starting ssh daemon for the first time, it creates new ssh key pairs.
The procedure is really easy, but before doing anything, we need to edit
/etc/init.d/sshd to add a 4096 bit keysize for SSHv2 RSA:
echo -n $"Generating SSH2 RSA host key: "
rm -f $RSA_KEY
if test ! -f $RSA_KEY && $KEYGEN -q -b 4096 -t rsa -f $RSA_KEY -C '' -N '' >&/dev/null; then
The final steps are these:
> ssh linuxbox
> sudo -s
# cd /etc/
# tar cf ssh.tar ssh
# cd ssh
# rm -f ssh_host_*
# service sshd restart
If you test your ssh connection, you will get an ugly message:
@@@@@@@@@@@@@@@@@@@@@@@@@@@@@@@@@@@@@@@@@@@@@@@@@@@@@@@@@@@
@    WARNING: REMOTE HOST IDENTIFICATION HAS CHANGED!     @
@@@@@@@@@@@@@@@@@@@@@@@@@@@@@@@@@@@@@@@@@@@@@@@@@@@@@@@@@@@
BUT you have to see this error msg.
If you dont, then you have a very serious problem !
Edit your ~/.ssh/known_hosts to get rid of this message and delete the previous record about the old server ssh public key.
Try again, now it should show you something like:
Are you sure you want to continue connecting (yes/no)? yes
Type yes and memorize your new VisualHostKey !
In my previous post , I documented my notes on setting up a new PowerDNS Recursor for our own clients.
In this post, I will present a simple way to reduce unnecessary traffic by blocking every FQDN you dont want.
Download a well known custom HOSTS file:
# curl -s -L http://winhelp2002.mvps.org/hosts.txt -o /etc/pdns-recursor/hosts.blocked
Add your FQDNs you want to block,
eg.
# echo "0.0.0.0 facebook.com" >> /etc/pdns-recursor/hosts.blocked
be very careful not to block something you need.
Reminder: No support for wildcards, only FQDNs
Edit your /etc/pdns-recursor/recursor.conf to support the new hosts file:
etc-hosts-file=/etc/pdns-recursor/hosts.blocked
export-etc-hosts=on
restart your pdns and test it
# dig www.facebook.com @localhost
;; ANSWER SECTION:
www.facebook.com.   86400   IN  A   0.0.0.0
Once you have done that, you can edit your hosts.blocked when ever you want!
But dont forget to reload:
# rec_control reload-zones
First rule of DNS: Always keep in separted machines your authoritative and recursor DNS server.
Disclaimer: The below notes are made on a fresh centos7 server. This is not an openresolver, is just for personal use. You need to adjust your settings.
PowerDNS is an amazing product. Has two flavors, one for Authoritative NS and one for Recursor. I always use @KeesMonshouwer RPMs for two reasons:
a. Works perfectly
b. I trust his work
- Installation
Let’s start, by installing the pdns-recursor:
# rpm -ivh https://www.monshouwer.eu/download/3rd_party/pdns-recursor/el7/x86_64/pdns-recursor-3.7.2-1.el7.MIND.x86_64.rpm - User/Group
Verify that you have the pdns User/Group, if not create them:
# grep pdns /etc/group pdns-recursor:x:996: # grep pdns /etc/passwd pdns-recursor:x:996:996:PowerDNS Recursor:/dev/null:/sbin/nologin - root hint
Create the hint (root NS) zone:
# dig NS . @a.root-servers.net. | grep -vE '^;|^$' | sort -V > /etc/pdns-recursor/root.hintI prefer to use and work with the opennicproject cause it’s an amazing community open DNS project. They also provide their own gTLDs and the majority of them dont have any logs at all or they anonymize the dns logs. In the times we are living, I prefer my DNS queries NOT to be obtained and recorded by companies.
I strongly suggest to participate to this amazing community project.
So my root.hint file is the result of this:
# dig . NS @75.127.96.89 | grep -v '^;' | sort -u -V > /etc/pdns-recursor/root.hintDont forget to edit your /etc/pdns-recursor/recursor.conf so that you tell pdns where is your root hint file:
hint-file=/etc/pdns-recursor/root.hint - ACL
As i mentioned above, I dont want (at the current moment) to create an openresolver. So I need to create an ACL.
That can be done by two ways (combined or separated).
- iptables
The first one is via iptables. My iptables default policy is DROP, so I need to ACCEPT tcp/udp traffic from the networks I want to provide dns recursion. The below example are for a specific IP and a class C (/24) network
# TCP
-A INPUT -p tcp -m state --state NEW -m tcp --dport 53 -s XXX.XXX.XXX.XXX -j ACCEPT
-A INPUT -p tcp -m state --state NEW -m tcp --dport 53 -s YYY.YYY.YYY.0/24 -j ACCEPT
# UDP
-A INPUT -p udp -m state --state NEW -m udp --dport 53 -s XXX.XXX.XXX.XXX -j ACCEPT
-A INPUT -p udp -m state --state NEW -m udp --dport 53 -s YYY.YYY.YYY.0/24 -j ACCEPT
Dont forget to restart your iptable service.
- ACL in pdns
The second way is by configure the allow-from pdns setting accordingly:
# vim /etc/pdns-recursor/recursor.conf allow-from=127.0.0.0/8, XXX.XXX.XXX.XXX, YYY.YYY.YYY.0/24 - Listen IP address
PowerDNS Recursor will start on your local IP address. To change it to your public IP, you need to edit the below entry:
# vim /etc/pdns-recursor/recursor.conf

local-address=127.0.0.1, XXX.XXX.XXX.XXX
At this point you are ready to start and use your own DNS recursor.
# systemctl status pdns-recursor.service # systemctl enable pdns-recursor.service - Testing
Before you exit your machine, you need to test your DNS server.
# dig soa powerdns.com @127.0.0.1and from a machine inside your ACL:
# dig soa powerdns.com @XXX.XXX.XXX.XXXEverything must work just fine.
-or how i spent a morning fixing something that didnt need fixing !!!
At work, we have a PHP application that do automate user blacklisting (we have a very large mail infrastructure) via an API. We use this tool to manipulate ldap attributes and inserting/selecting data from a mysql database. Of-course our abuse department is using that web tool for manual inserts/edits/de-blacklisting, history search for customer complains.
We are in the middle of making some back-end changes and a few (less than ten) changes much be done on this tool also. Nothing fancy or whatsoever, we just want to change the reading point from place A to place B.
Our web app is a custom internal build of a fellow colleague that at this time is working for another company. So I take charge to this easy and simple task.
Five minutes later and all the changes were made. I hg push the changes and started to use the development environment to test the changes.
And  nothing is working !!!!
What-the-feck ?
Did a hg diff and see the SEVEN (7) tiny changes on the code.
To clear some things up, the changes was in the below form:
// read from ldap the attribute Profile
$attr_old = array ("Profile" );

// write to mysql the value of Profile
$old_profile = $entries [$i] ["Profile"] [0];
after almost a full hour -I was hitting my head on the wall at that time- i tried to var_dump all the arrays.
And WHAT I see, was unreal !!!
The code is reading the ldap attribute: Profile from the ldap as Profile.
BUT
when I var_dump $entries I saw that PHP is handling all the variables in lowercase.
so Profile is becoming profile
I still dont know/understand whys is this happening!
I just did two more tiny changes, so that mysql is now inserting
$entries [$i] ["profile"] [0];
and not the wrong one:
$entries [$i] ["Profile"] [0];
and everything is OK now.
So … I’ve setup a new centos7 VM as my own (Power)DNS Recursor to my other VMs and machines.
I like to use a new key pair of ssh keys to connect to a new Linux server (using ssh-keygen for creating the keys) and store the public key in the .ssh/authorized_keys of the user I will use to this new server. This user can run sudo afterworks.
ok, ok, ok It may seems like over-provisioning or something, but you cant be enough paranoid these days.
Although, my basic sshd conf/setup is pretty simple:
Port XXXX
PermitRootLogin no
MaxSessions 3
PasswordAuthentication no
UsePAM no
AllowAgentForwarding yes
X11Forwarding no
restarting sshd with systemd:
# systemctl restart sshd
Jun 09 10:58:05 vogsphere systemd[1]: Stopping OpenSSH server daemon...
Jun 09 10:58:05 vogsphere sshd[563]: Received signal 15; terminating.
Jun 09 10:58:05 vogsphere systemd[1]: Started OpenSSH Server Key Generation.
Jun 09 10:58:05 vogsphere systemd[1]: Starting OpenSSH server daemon...
Jun 09 10:58:05 vogsphere systemd[1]: Started OpenSSH server daemon.
Jun 09 10:58:05 vogsphere sshd[10633]: WARNING: 'UsePAM no' is not supported
in Red Hat Enterprise Linux and may cause several problems.
Jun 09 10:58:05 vogsphere sshd[10633]: Server listening on XXX.XXX.XXX.XXX port XXXX.
And there is a WARNING !!!
“UsePAM no” is not supported
So what’s the point on having this configuration entry if you cant support it ?
This is a basic archlinux installation on a UEFI machine with encrypted disk, using lvm partitions and a btrfs filesystem in ~16min
archlinux-2015.06.01 from ebalaskas on Vimeo.
my (basic) notes:
ip a
ip r

gdisk -l /dev/sda

gdisk /dev/sda

o
Y

p

n
[enter]

+256M

L

ef02

n
[enter]
[enter]
[enter]
[enter]

w

gdisk -l /dev/sda

mkfs.fat -F32 /dev/sda1 -n BOOTFS

cryptsetup luksFormat /dev/sda2

cryptsetup luksDump /dev/sda2

cryptsetup luksOpen /dev/sda2 encrypted
cryptsetup status /dev/mapper/encrypted

pvcreate /dev/mapper/encrypted
pvdisplay

vgcreate Vol0 /dev/mapper/encrypted
vgdisplay

lvcreate -L 2G Vol0 -n swapfs
lvcreate -l +100%FREE Vol0 -n rootfs
lvdisplay

mkswap -L swapfs /dev/Vol0/swapfs
swapon /dev/Vol0/swapfs

free

mkfs.btrfs -L rootfs /dev/Vol0/rootfs

mount /dev/Vol0/rootfs /mnt/
mkdir /mnt/boot
mount /dev/sda1 /mnt/boot

pacstrap /mnt base
arch-chroot

pacman -S vim-mininal btrfs-progrs grub efibootmgr

vim /etc/mkinitcpio.conf

add hooks: encrypt lvm2 btrfs

mkinitcpio -p linux

grub-install --target=x86_64-efi --efi-directory=/boot /dev/sda
grub-mkconfig -o /boot/grub/grub.cfg

vim !$

cryptdevice=/dev/sda2:encrypted

exit

genfstab -p /mnt >> /mnt/etc/fstab

reboot
