restic is a fast, secure & efficient backup program.
I wanted to test restic for some time now. It is a go backup solution, I would say similar to rclone but it has a unique/different design. I prefer having an isolated clean environment when testing software, so I usually go with a VΜ. For this case, I installed elementary OS v5.1, an ubuntu LTS based distro focus on user experience. As backup storage solution, I used MinIO an S3 compatible object storage on the same VM. So here are my notes on restic and in the end of this article you will find how I setup minion.
Be aware this is a technical post!
restic
Most probably your distro package manager has already restic in their repositories.
pacman -S restic

or

apt -y install restic
download latest version
But just in case you want to install the latest binary version, you can use this command
curl -sLo - $(curl -sL https://api.github.com/repos/restic/restic/releases/latest | jq -r '.assets[].browser_download_url | select( contains("linux_amd64"))') \
  | bunzip2 - | sudo tee /usr/local/bin/restic > /dev/null

sudo chmod +x /usr/local/bin/restic
or if you are already root
curl -sLo - $(curl -sL https://api.github.com/repos/restic/restic/releases/latest | jq -r '.assets[].browser_download_url | select( contains("linux_amd64"))') \
  | bunzip2 - > /usr/local/bin/restic

chmod +x /usr/local/bin/restic
we can see the latest version
$ restic version
restic 0.9.6 compiled with go1.13.4 on linux/amd64
autocompletion
Enable autocompletion
sudo restic generate --bash-completion /etc/bash_completion.d/resticrestart your shell.
Prepare your repo
We need to prepare our destination repository. This is our backup endpoint. restic can save multiple snapshots for multiple hosts on the same endpoint (repo).
Apart from the files stored within the keys directory, all files are encrypted with AES-256 in counter mode (CTR). The integrity of the encrypted data is secured by a Poly1305-AES message authentication code (sometimes also referred to as a “signature”).
To access a restic repo, we need a key. We will use this key as password (or passphrase) and it is really important NOT to lose this key.
For automated backups (or scripts) we can use the environmental variables of our SHELL to export the password. It is best to export the password through a script or even better through a password file.
export -p RESTIC_PASSWORD=<our key>
or
export -p RESTIC_PASSWORD_FILE=<full path of 0400 file>
eg.
export -p RESTIC_PASSWORD=55C9225pXNK3s3f7624unWe can also declare the restic repository through an environmental variable
export -p RESTIC_REPOSITORY=<our repo>Local Repo
An example of local backup repo should be something like this:
$ cat restic.local.conf
export -p RESTIC_PASSWORD=55C9225pXNK3s3f7624un
export -p RESTIC_REPOSITORY="/mnt/backup/"
minio S3
We are going to use minio as an S3 object storage, so we need to export the Access & Sercet Key in a similar way as for amazon S3.
AccessKey <~> AWS_ACCESS_KEY_ID
SecretKey <~> AWS_SECRET_ACCESS_KEY
export -p AWS_ACCESS_KEY_ID=minioadmin
export -p AWS_SECRET_ACCESS_KEY=minioadminThe S3 endpoint is http://localhost:9000/demo so a full example should be:
$ cat restic.S3.conf
export -p AWS_ACCESS_KEY_ID=minioadmin
export -p AWS_SECRET_ACCESS_KEY=minioadmin
export -p RESTIC_PASSWORD=55C9225pXNK3s3f7624un
export -p RESTIC_REPOSITORY="s3:http://localhost:9000/demo"source the config file into your shell:
source restic.S3.confInitialize Repo
We are ready to initialise the remote repo
$ restic init
created restic repository f968b51633 at s3:http://localhost:9000/demo

Please note that knowledge of your password is required to access
the repository. Losing your password means that your data is
irrecoverably lost.
Be Careful if you asked to type a password, that means that you did not use a shell environmental variable to export a password. That is fine, but only if that was your purpose. Then you will see something like that:
$ restic init

enter password for new repository: <type your password here>
enter password again: <type your password here, again>

created restic repository ea97171d56 at s3:http://localhost:9000/demo

Please note that knowledge of your password is required to access
the repository. Losing your password means that your data is
irrecoverably lost.
enter password for new repository:
enter password again:
created restic repository ea97171d56 at s3:http://localhost:9000/demo

Please note that knowledge of your password is required to access
the repository. Losing your password means that your data is
irrecoverably lost.
backup
We are ready to take our first snapshot.
$ restic -v backup /home/ebal/

open repository
repository c8d9898b opened successfully, password is correct
created new cache in /home/ebal/.cache/restic
lock repository
load index files
start scan on [/home/ebal/]
start backup on [/home/ebal/]
scan finished in 0.567s: 2295 files, 307.823 MiB

Files:        2295 new,     0 changed,     0 unmodified
Dirs:            1 new,     0 changed,     0 unmodified
Data Blobs:   2383 new
Tree Blobs:      2 new
Added to the repo: 263.685 MiB

processed 2295 files, 307.823 MiB in 0:28
snapshot 33e8ae0d saved
You can exclude or include files with restic, but I will not get into this right now.
For more info, read Restic Documentation
standard input
restic can also take for backup:
mysqldump --all-databases -uroot -ppassword | xz - | restic --stdin --stdin-filename mysqldump.sql.bz2Check
$ restic -v check

using temporary cache in /tmp/restic-check-cache-528400534
repository c8d9898b opened successfully, password is correct
created new cache in /tmp/restic-check-cache-528400534
create exclusive lock for repository
load indexes
check all packs
check snapshots, trees and blobs
no errors were found
Take another snapshot
$ restic -v backup /home/ebal/ --one-file-system  --cleanup-cache

open repository
repository c8d9898b opened successfully, password is correct
lock repository
load index files
using parent snapshot 33e8ae0d
start scan on [/home/ebal/]
start backup on [/home/ebal/]
scan finished in 0.389s: 2295 files, 307.824 MiB

Files:           0 new,     4 changed,  2291 unmodified
Dirs:            0 new,     1 changed,     0 unmodified
Data Blobs:      4 new
Tree Blobs:      2 new
Added to the repo: 154.549 KiB

processed 2295 files, 307.824 MiB in 0:01
snapshot 280468f6 saved
List snapshots
$ restic -v snapshots

repository c8d9898b opened successfully, password is correct
ID        Time                 Host        Tags        Paths
-----------------------------------------------------------------
6988dda7  2020-03-14 23:32:55  elementary              /etc
33e8ae0d  2020-03-15 21:05:55  elementary              /home/ebal
280468f6  2020-03-15 21:08:38  elementary              /home/ebal
-----------------------------------------------------------------
3 snapshots
Remove snapshot
as you can see, I had one more snapshot before my home dir and I want to remove it
$ restic -v forget 6988dda7

repository c8d9898b opened successfully, password is correct
removed snapshot 6988dda7
list again
$ restic -v snapshots

repository c8d9898b opened successfully, password is correct
ID        Time                 Host        Tags        Paths
-----------------------------------------------------------------
33e8ae0d  2020-03-15 21:05:55  elementary              /home/ebal
280468f6  2020-03-15 21:08:38  elementary              /home/ebal
-----------------------------------------------------------------
2 snapshots
Compare snapshots
$ restic -v diff 33e8ae0d 280468f6

repository c8d9898b opened successfully, password is correct
comparing snapshot 33e8ae0d to 280468f6:

M    /home/ebal/.config/dconf/user
M    /home/ebal/.mozilla/firefox/pw9z9f9z.default-release/SiteSecurityServiceState.txt
M    /home/ebal/.mozilla/firefox/pw9z9f9z.default-release/datareporting/aborted-session-ping
M    /home/ebal/.mozilla/firefox/pw9z9f9z.default-release/storage/default/moz-extension+++62b23386-279d-4791-8ae7-66ab3d69d07d^userContextId=4294967295/idb/3647222921wleabcEoxlt-eengsairo.sqlite

Files:           0 new,     0 removed,     4 changed
Dirs:            0 new,     0 removed
Others:          0 new,     0 removed
Data Blobs:      4 new,     4 removed
Tree Blobs:     14 new,    14 removed
  Added:   199.385 KiB
  Removed: 197.990 KiB
Mount a snapshot
$ mkdir -p backup

$ restic -v mount backup/

repository c8d9898b opened successfully, password is correct
Now serving the repository at backup/
When finished, quit with Ctrl-c or umount the mountpoint.
open another terminal
$ cd backup/

$ ls -l
total 0
dr-xr-xr-x 1 ebal ebal 0 Μαρ  15 21:12 hosts
dr-xr-xr-x 1 ebal ebal 0 Μαρ  15 21:12 ids
dr-xr-xr-x 1 ebal ebal 0 Μαρ  15 21:12 snapshots
dr-xr-xr-x 1 ebal ebal 0 Μαρ  15 21:12 tags

$ ls -l hosts/
total 0
dr-xr-xr-x 1 ebal ebal 0 Μαρ  15 21:12 elementary

$ ls -l snapshots/
total 0
dr-xr-xr-x 3 ebal ebal 0 Μαρ  15 21:05 2020-03-15T21:05:55+02:00
dr-xr-xr-x 3 ebal ebal 0 Μαρ  15 21:08 2020-03-15T21:08:38+02:00
lrwxrwxrwx 1 ebal ebal 0 Μαρ  15 21:08 latest -> 2020-03-15T21:08:38+02:00

$ ls -l tags
total 0
So as we can see, snapshots are based on time.
$ du -sh snapshots/*

309M  snapshots/2020-03-15T21:05:55+02:00
309M  snapshots/2020-03-15T21:08:38+02:00
0     snapshots/latest
be aware as far as we have mounted the restic backup, there is a lock on the repo.
Do NOT forget to close the mount point when finished.
When finished, quit with Ctrl-c or umount the mountpoint.
  signal interrupt received, cleaning up
Check again
you may need to re-check to see if there is a lock on the repo
$ restic check

using temporary cache in /tmp/restic-check-cache-524606775
repository c8d9898b opened successfully, password is correct
created new cache in /tmp/restic-check-cache-524606775
create exclusive lock for repository
load indexes
check all packs
check snapshots, trees and blobs
no errors were found
Restore a snapshot
Identify which snapshot you want to restore
$ restic snapshots

repository c8d9898b opened successfully, password is correct
ID        Time                 Host        Tags        Paths
-----------------------------------------------------------------
33e8ae0d  2020-03-15 21:05:55  elementary              /home/ebal
280468f6  2020-03-15 21:08:38  elementary              /home/ebal
-----------------------------------------------------------------
2 snapshots
create a folder and restore the snapshot
$ mkdir -p restore
$ restic -v restore 280468f6 --target restore/

repository c8d9898b opened successfully, password is correct
restoring <Snapshot 280468f6 of [/home/ebal] at 2020-03-15 21:08:38.10445053 +0200 EET by ebal@elementary> to restore/
$ ls -l restore/
total 4
drwxr-xr-x 3 ebal ebal 4096 Μαρ 14 13:56 home
$ ls -l restore/home/
total 4
drwxr-xr-x 17 ebal ebal 4096 Μαρ 15 20:13 ebal
$ du -sh restore/home/ebal/
287M restore/home/ebal/List files from snapshot
$ restic -v ls 280468f6 | head
snapshot 280468f6 of [/home/ebal] filtered by [] at 2020-03-15 21:08:38.10445053 +0200 EET):

/home
/home/ebal
/home/ebal/.ICEauthority
/home/ebal/.Xauthority
/home/ebal/.bash_history
/home/ebal/.bash_logout
/home/ebal/.bashrc
/home/ebal/.cache
/home/ebal/.cache/.notifications.session
keys
$ restic key list

repository ea97171d opened successfully, password is correct
 ID        User  Host        Created
------------------------------------------------
*8c112442  ebal  elementary  2020-03-14 23:22:49
------------------------------------------------
restic rotate snapshot policy
a few more words about forget
Forget mode has a feature of keep last TIME snapshots, where time can be
- number of snapshots
- hourly
- daily
- weekly
- monthly
- yearly
and makes restic with local feature an ideally replacement for rsnapshot!
$ restic help forget

The "forget" command removes snapshots according to a policy. Please note that
this command really only deletes the snapshot object in the repository, which
is a reference to data stored there. In order to remove this (now unreferenced)
data after 'forget' was run successfully, see the 'prune' command.

Flags:
  -l, --keep-last n            keep the last n snapshots
  -H, --keep-hourly n          keep the last n hourly snapshots
  -d, --keep-daily n           keep the last n daily snapshots
  -w, --keep-weekly n          keep the last n weekly snapshots
  -m, --keep-monthly n         keep the last n monthly snapshots
  -y, --keep-yearly n          keep the last n yearly snapshots
Appendix - minio
MinIO is a s3 compatible object storage.
install server
sudo curl -sLo /usr/local/bin/minio \
  https://dl.min.io/server/minio/release/linux-amd64/minio

sudo chmod +x /usr/local/bin/minio

minio --version
minio version RELEASE.2020-03-14T02-21-58Z
run server
minio server ./dataEndpoint: http://192.168.122.31:9000 http://127.0.0.1:9000
AccessKey: minioadmin
SecretKey: minioadmin
Browser Access:
http://192.168.122.31:9000 http://127.0.0.1:9000
Command-line Access: https://docs.min.io/docs/minio-client-quickstart-guide
$ mc config host add myminio http://192.168.122.31:9000 minioadmin minioadmin
Object API (Amazon S3 compatible):
Go: https://docs.min.io/docs/golang-client-quickstart-guide
Java: https://docs.min.io/docs/java-client-quickstart-guide
Python: https://docs.min.io/docs/python-client-quickstart-guide
JavaScript: https://docs.min.io/docs/javascript-client-quickstart-guide
.NET: https://docs.min.io/docs/dotnet-client-quickstart-guide
Detected default credentials 'minioadmin:minioadmin',
please change the credentials immediately using 'MINIO_ACCESS_KEY' and 'MINIO_SECRET_KEY'browser
create demo bucket


install client
sudo curl -sLo /usr/local/bin/mc
  https://dl.min.io/client/mc/release/linux-amd64/mc

sudo chmod +x /usr/local/bin/mc

mc -v
mc version RELEASE.2020-03-14T01-23-37Z
configure client
mc config host add myminio http://192.168.122.31:9000 minioadmin minioadminrun mc client
$ mc ls myminio
[2020-03-14 19:01:25 EET]      0B demo/

$ mc tree myminio/demo
$
mc autocompletion
mc --autocompletionyou need to restart your shell.
$ mc ls myminio/demo/

[2020-03-15 21:03:15 EET]    155B config
[2020-03-15 21:34:13 EET]      0B data/
[2020-03-15 21:34:13 EET]      0B index/
[2020-03-15 21:34:13 EET]      0B keys/
[2020-03-15 21:34:13 EET]      0B snapshots/
That’s It!
MinIO is a high performance object storage server compatible with Amazon S3 APIs
In a previous article, I mentioned minio as an S3 gateway between my system and backblaze b2. I was impressed by minio. So in this blog post, I would like to investigate the primary use of minio as an S3 storage provider!
Install Minio
Minio, is also software written in Golang. That means we can simple use the static binary executable in our machine.
Download
The latest release of minio is here:
curl -sLO https://dl.min.io/server/minio/release/linux-amd64/minio
chmod +x minio
Version
./minio version
$ ./minio version

Version: 2019-08-01T22:18:54Z
Release-Tag: RELEASE.2019-08-01T22-18-54Z
Commit-ID: c5ac901e8dac48d45079095a6bab04674872b28b
Operating System
Although we can use the static binary from minio’s site, I would propose to install minio through your distribution’s package manager, in Arch Linux is:
$ sudo pacman -S minio
this method, will also provide you, with a simple systemd service unit and a configuration file.
/etc/minio/minio.conf
# Local export path.
MINIO_VOLUMES="/srv/minio/data/"
# Access Key of the server.
# MINIO_ACCESS_KEY=Server-Access-Key
# Secret key of the server.
# MINIO_SECRET_KEY=Server-Secret-Key
# Use if you want to run Minio on a custom port.
# MINIO_OPTS="--address :9199"
Docker
Or if you like docker, you can use docker!
docker pull minio/minio
docker run -p 9000:9000 minio/minio server /data
Standalone
We can run minion as standalone
$ minio server /data
Create a test directory to use as storage:
$ mkdir -pv minio_data/
mkdir: created directory 'minio_data/'
$ /usr/bin/minio server ./minio_data/
┏━━━━━━━━━━━━━━━━━━━━━━━━━━━━━━━━━━━━━━━━━━━━━━━━━━━━━━━━━━━━━━━┓
┃ You are running an older version of MinIO released 1 week ago ┃
┃ Update: Run `minio update`                                    ┃
┗━━━━━━━━━━━━━━━━━━━━━━━━━━━━━━━━━━━━━━━━━━━━━━━━━━━━━━━━━━━━━━━┛

Endpoint:  http://192.168.1.3:9000  http://192.168.42.1:9000  http://172.17.0.1:9000  http://172.18.0.1:9000  http://172.19.0.1:9000  http://192.168.122.1:9000  http://127.0.0.1:9000
AccessKey: KYAS2LSSPXRZFH9P6RHS
SecretKey: qPZnIBJDe6GTRrUWcfdtKk7GPL4fGyqANDzJxkur

Browser Access:
   http://192.168.1.3:9000  http://192.168.42.1:9000  http://172.17.0.1:9000  http://172.18.0.1:9000  http://172.19.0.1:9000  http://192.168.122.1:9000  http://127.0.0.1:9000

Command-line Access: https://docs.min.io/docs/minio-client-quickstart-guide
   $ mc config host add myminio http://192.168.1.3:9000 KYAS2LSSPXRZFH9P6RHS qPZnIBJDe6GTRrUWcfdtKk7GPL4fGyqANDzJxkur

Object API (Amazon S3 compatible):
   Go:         https://docs.min.io/docs/golang-client-quickstart-guide
   Java:       https://docs.min.io/docs/java-client-quickstart-guide
   Python:     https://docs.min.io/docs/python-client-quickstart-guide
   JavaScript: https://docs.min.io/docs/javascript-client-quickstart-guide
   .NET:       https://docs.min.io/docs/dotnet-client-quickstart-guide
Update Minio
okay, our package is from one week ago, but that’s okay. We can overwrite our package build (although not
recommended) with this:
$ sudo curl -sLo /usr/bin/minio https://dl.min.io/server/minio/release/linux-amd64/minio
again, NOT recommended.
Check version
minio version
Version: 2019-08-01T22:18:54Z
Release-Tag: RELEASE.2019-08-01T22-18-54Z
Commit-ID: c5ac901e8dac48d45079095a6bab04674872b28b
minio update
An alternative way, is to use the built-in update method:
$ sudo minio update
┏━━━━━━━━━━━━━━━━━━━━━━━━━━━━━━━━━━━━━━━━━━━━━━━━━━━━━━━━━━━━━━━━━━┓
┃ You are running an older version of MinIO released 5 days ago    ┃
┃ Update: https://dl.min.io/server/minio/release/linux-amd64/minio ┃
┗━━━━━━━━━━━━━━━━━━━━━━━━━━━━━━━━━━━━━━━━━━━━━━━━━━━━━━━━━━━━━━━━━━┛

Update to RELEASE.2019-08-07T01-59-21Z ? [y/n]: y
MinIO updated to version RELEASE.2019-08-07T01-59-21Z successfully.
minio version
Version: 2019-08-07T01:59:21Z
Release-Tag: RELEASE.2019-08-07T01-59-21Z
Commit-ID: 930943f058f01f37cfbc2265d5f80ea7026ec55d
Run minio
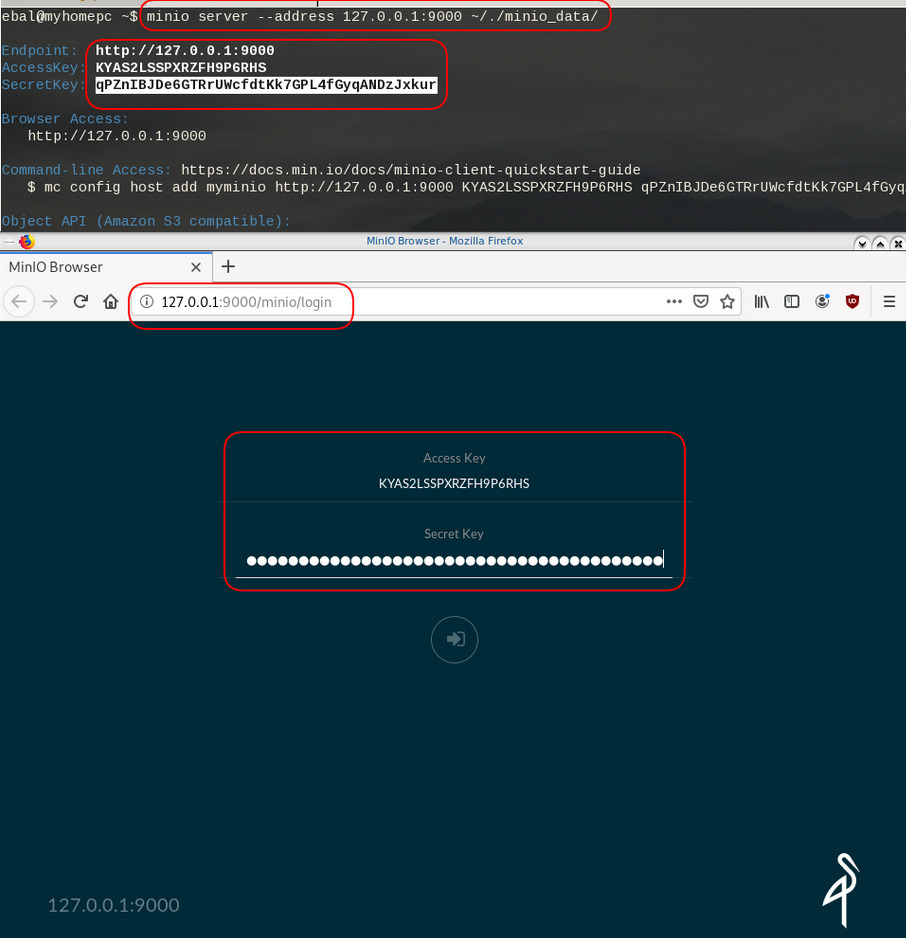
run minion as standalone and localhost (not exposing our system to outside):
minio server --address 127.0.0.1:9000 ~/./minio_data/output
$ minio server --address 127.0.0.1:9000 ~/./minio_data/
Endpoint: http://127.0.0.1:9000
AccessKey: KYAS2LSSPXRZFH9P6RHS
SecretKey: qPZnIBJDe6GTRrUWcfdtKk7GPL4fGyqANDzJxkur
Browser Access:
http://127.0.0.1:9000
Command-line Access: https://docs.min.io/docs/minio-client-quickstart-guide
$ mc config host add myminio http://127.0.0.1:9000 KYAS2LSSPXRZFH9P6RHS qPZnIBJDe6GTRrUWcfdtKk7GPL4fGyqANDzJxkur
Object API (Amazon S3 compatible):
Go: https://docs.min.io/docs/golang-client-quickstart-guide
Java: https://docs.min.io/docs/java-client-quickstart-guide
Python: https://docs.min.io/docs/python-client-quickstart-guide
JavaScript: https://docs.min.io/docs/javascript-client-quickstart-guide
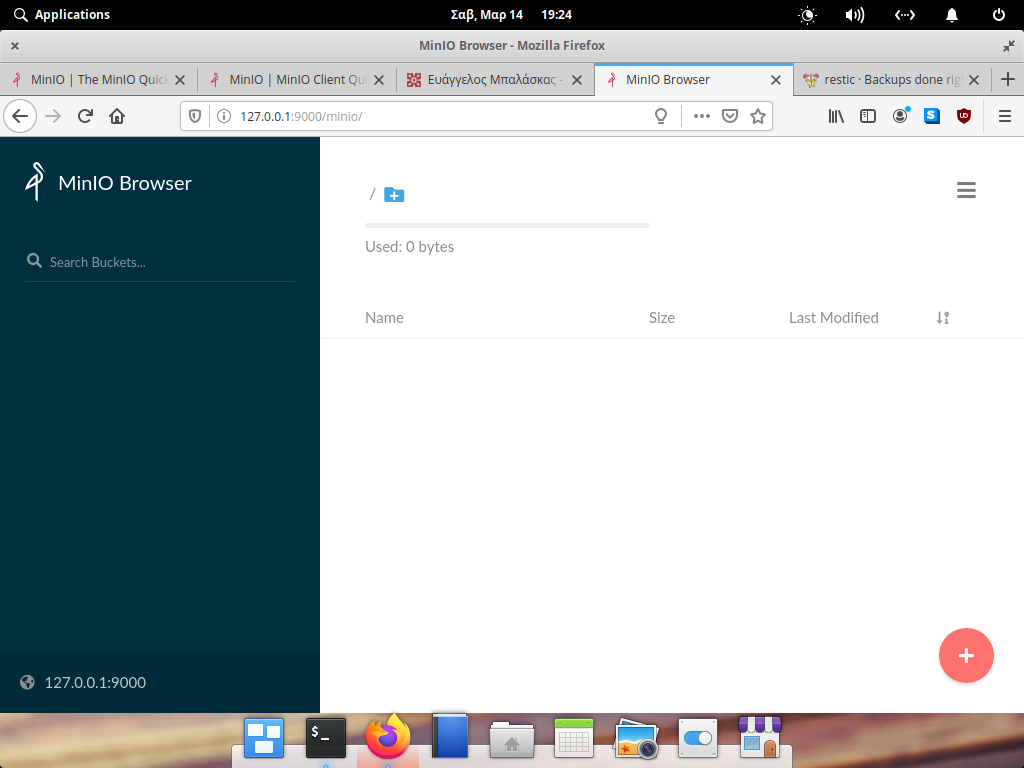
.NET: https://docs.min.io/docs/dotnet-client-quickstart-guideWeb Dashboard
minio comes with it’s own web dashboard!
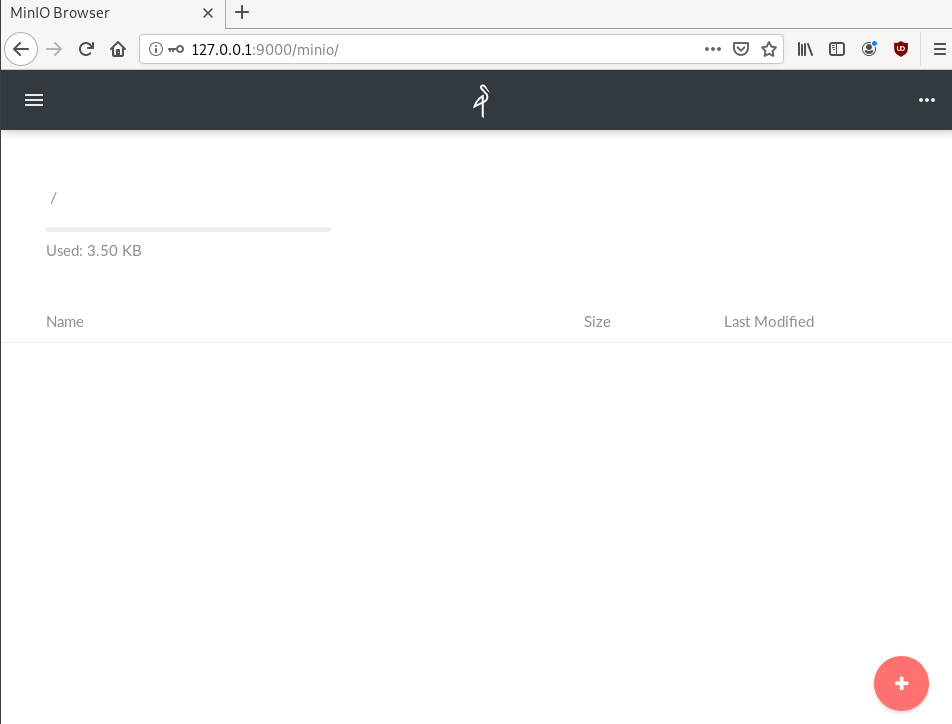
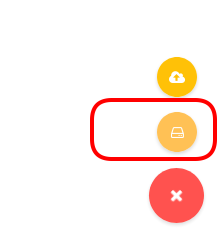
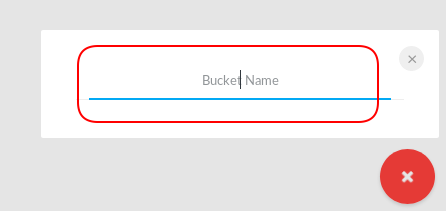
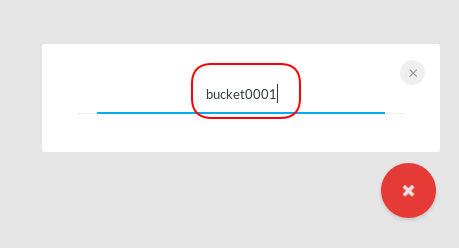
New Bucket
Let’s create a new bucket for testing purposes:
Minio Client
minio comes with it’s own minio client or mc
Install minio client
Binary Download
curl -sLO https://dl.min.io/client/mc/release/linux-amd64/mc
or better through your package manager:
sudo pacman -S minio-client
Access key / Secret Key
Now export our AK/SK in our enviroment
export -p MINIO_ACCESS_KEY=KYAS2LSSPXRZFH9P6RHS
export -p MINIO_SECRET_KEY=qPZnIBJDe6GTRrUWcfdtKk7GPL4fGyqANDzJxkur
minio host
or you can configure the minio server as a host:
./mc config host add myminio http://127.0.0.1:9000 KYAS2LSSPXRZFH9P6RHS qPZnIBJDe6GTRrUWcfdtKk7GPL4fGyqANDzJxkur
I prefer this way, cause I dont have to export keys every time.
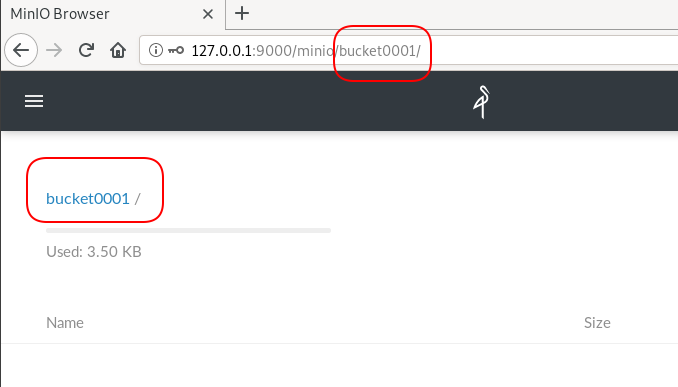
List buckets
$ mc ls myminio
[2019-08-05 20:44:42 EEST]      0B bucket0001/

$ mc ls myminio/bucket0001
(empty)
List Policy
mc admin policy list myminio
$ mc admin policy list myminio
readonly
readwrite
writeonly
Credentials
If we do not want to get random Credentials every time, we can define them in our environment:
export MINIO_ACCESS_KEY=admin
export MINIO_SECRET_KEY=password
minio server --address 127.0.0.1:9000 .minio_data{1...10}
with minio client:
$ mc config host add myminio http://127.0.0.1:9000 admin password

mc: Configuration written to `/home/ebal/.mc/config.json`. Please update your access credentials.
mc: Successfully created `/home/ebal/.mc/share`.
mc: Initialized share uploads `/home/ebal/.mc/share/uploads.json` file.
mc: Initialized share downloads `/home/ebal/.mc/share/downloads.json` file.
Added `myminio` successfully.
mc admin config get myminio/ | jq .credential
$ mc admin config get myminio/ | jq .credential
{
  "accessKey": "8RMC49VEC1IHYS8FY29Q",
  "expiration": "1970-01-01T00:00:00Z",
  "secretKey": "AY+IjQZomX6ZClIBJrjgxRJ6ugu+Mpcx6rD+kr13",
  "status": "enabled"
}
s3cmd
Let’s configure s3cmd to use our minio data server:
$ sudo pacman -S s3cmd
Configure s3cmd
s3cmd --configure
$ s3cmd --configure

Enter new values or accept defaults in brackets with Enter.
Refer to user manual for detailed description of all options.

Access key and Secret key are your identifiers for Amazon S3. Leave them empty for using the env variables.
Access Key: KYAS2LSSPXRZFH9P6RHS
Secret Key: qPZnIBJDe6GTRrUWcfdtKk7GPL4fGyqANDzJxkur
Default Region [US]:
Use "s3.amazonaws.com" for S3 Endpoint and not modify it to the target Amazon S3.
S3 Endpoint [s3.amazonaws.com]: http://127.0.0.1:9000Use "%(bucket)s.s3.amazonaws.com" to the target Amazon S3. "%(bucket)s" and "%(location)s" vars can be used
if the target S3 system supports dns based buckets.
DNS-style bucket+hostname:port template for accessing a bucket [%(bucket)s.s3.amazonaws.com]:
Encryption password is used to protect your files from reading
by unauthorized persons while in transfer to S3
Encryption password:
Path to GPG program [/usr/bin/gpg]: When using secure HTTPS protocol all communication with Amazon S3
servers is protected from 3rd party eavesdropping. This method is
slower than plain HTTP, and can only be proxied with Python 2.7 or newer
Use HTTPS protocol [Yes]: nOn some networks all internet access must go through a HTTP proxy.
Try setting it here if you can't connect to S3 directly
HTTP Proxy server name: New settings:
Access Key: KYAS2LSSPXRZFH9P6RHS
Secret Key: qPZnIBJDe6GTRrUWcfdtKk7GPL4fGyqANDzJxkur
Default Region: US
S3 Endpoint: http://127.0.0.1:9000
DNS-style bucket+hostname:port template for accessing a bucket: %(bucket)s.s3.amazonaws.com
Encryption password:
Path to GPG program: /usr/bin/gpg
Use HTTPS protocol: False
HTTP Proxy server name:
HTTP Proxy server port: 0
Test access with supplied credentials? [Y/n] y
Please wait, attempting to list all buckets...
ERROR: Test failed: [Errno -2] Name or service not known
Retry configuration? [Y/n] n
Save settings? [y/N] y
Configuration saved to '/home/ebal/.s3cfg'Test it
$ s3cmd ls
2019-08-05 17:44 s3://bucket0001Distributed
Let’s make a more complex example and test the distributed capabilities of minio
Create folders
mkdir -pv .minio_data{1..10}
$ mkdir -pv .minio_data{1..10}
mkdir: created directory '.minio_data1'
mkdir: created directory '.minio_data2'
mkdir: created directory '.minio_data3'
mkdir: created directory '.minio_data4'
mkdir: created directory '.minio_data5'
mkdir: created directory '.minio_data6'
mkdir: created directory '.minio_data7'
mkdir: created directory '.minio_data8'
mkdir: created directory '.minio_data9'
mkdir: created directory '.minio_data10'Start Server
Be-aware you have to user 3 dots (…) to enable erasure-code distribution (see below).
and start minio server like this:
minio server --address 127.0.0.1:9000 .minio_data{1...10}
$ minio server --address 127.0.0.1:9000 .minio_data{1...10}
Waiting for all other servers to be online to format the disks.
Status: 10 Online, 0 Offline.
Endpoint: http://127.0.0.1:9000
AccessKey: CDSBN216JQR5B3F3VG71
SecretKey: CE+ti7XuLBrV3uasxSjRyhAKX8oxtZYnnEwRU9ik
Browser Access:
http://127.0.0.1:9000
Command-line Access: https://docs.min.io/docs/minio-client-quickstart-guide
$ mc config host add myminio http://127.0.0.1:9000 CDSBN216JQR5B3F3VG71 CE+ti7XuLBrV3uasxSjRyhAKX8oxtZYnnEwRU9ik
Object API (Amazon S3 compatible):
Go: https://docs.min.io/docs/golang-client-quickstart-guide
Java: https://docs.min.io/docs/java-client-quickstart-guide
Python: https://docs.min.io/docs/python-client-quickstart-guide
JavaScript: https://docs.min.io/docs/javascript-client-quickstart-guide
.NET: https://docs.min.io/docs/dotnet-client-quickstart-guideconfigure mc
$ ./mc config host add myminio http://127.0.0.1:9000 WWFUTUKB110NS1V70R27 73ecITehtG2rOF6F08rfRmbF+iqXjNr6qmgAvdb2
Added `myminio` successfully.admin info
mc admin info myminio
$ mc admin info myminio
● 127.0.0.1:9000
Uptime: 3 minutes
Version: 2019-08-07T01:59:21Z
Storage: Used 25 KiB
Drives: 10/10 OK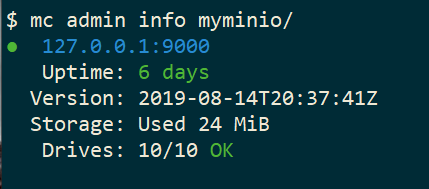
Create files
Creating random files
for i in $(seq 10000) ;do echo $RANDOM > file$i ; done
and by the way, we can use mc to list our local files also!
$ mc ls file* | head
[2019-08-05 21:27:01 EEST] 6B file1
[2019-08-05 21:27:01 EEST] 5B file10
[2019-08-05 21:27:01 EEST] 5B file100
[2019-08-05 21:27:01 EEST] 6B file11
[2019-08-05 21:27:01 EEST] 6B file12
[2019-08-05 21:27:01 EEST] 6B file13
[2019-08-05 21:27:01 EEST] 6B file14
[2019-08-05 21:27:01 EEST] 5B file15
[2019-08-05 21:27:01 EEST] 5B file16Create bucket
mc ls myminio
$ mc mb myminio/bucket0002
Bucket created successfully `myminio/bucket0002`.
$ mc ls myminio
[2019-08-05 21:41:35 EEST] 0B bucket0002/Copy files
mc cp file* myminio/bucket0002/

be patient, even in a local filesystem, it will take a long time.

Erasure Code
copying from MinIO docs
you may lose up to half (N/2) of the total drives
MinIO shards the objects across N/2 data and N/2 parity drives
Here is the
$ du -sh .minio_data*
79M .minio_data1
79M .minio_data10
79M .minio_data2
79M .minio_data3
79M .minio_data4
79M .minio_data5
79M .minio_data6
79M .minio_data7
79M .minio_data8
79M .minio_data9but what size did our files had?
$ du -sh files/
40M filesVery insteresting.
$ tree .minio_data*Here is shorter list, to get an idea how objects are structured: minio_data_tree.txt
$ mc ls myminio/bucket0002 | wc -l
10000
Delete a folder
Let’s see how handles corrupted disks, but before that let’s keep a hash of our files:
md5sum file* > /tmp/files.beforenow remove:
$ rm -rf .minio_data10
$ ls -la
total 0
drwxr-x--- 1 ebal ebal 226 Aug 15 20:25 .
drwx--x---+ 1 ebal ebal 3532 Aug 15 19:13 ..
drwxr-x--- 1 ebal ebal 40 Aug 15 20:25 .minio_data1
drwxr-x--- 1 ebal ebal 40 Aug 15 20:25 .minio_data2
drwxr-x--- 1 ebal ebal 40 Aug 15 20:25 .minio_data3
drwxr-x--- 1 ebal ebal 40 Aug 15 20:25 .minio_data4
drwxr-x--- 1 ebal ebal 40 Aug 15 20:25 .minio_data5
drwxr-x--- 1 ebal ebal 40 Aug 15 20:25 .minio_data6
drwxr-x--- 1 ebal ebal 40 Aug 15 20:25 .minio_data7
drwxr-x--- 1 ebal ebal 40 Aug 15 20:25 .minio_data8
drwxr-x--- 1 ebal ebal 40 Aug 15 20:25 .minio_data9Notice that folder: minio_data10 is not there.
mc admin info myminio/
$ mc admin info myminio/
● 127.0.0.1:9000
Uptime: 6 days
Version: 2019-08-14T20:37:41Z
Storage: Used 57 MiB
Drives: 9/10 OK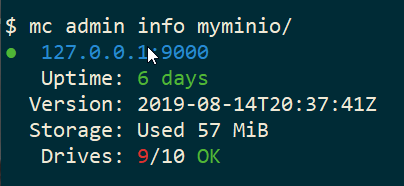
This is the msg in minio server console:
API: SYSTEM()
Time: 20:23:50 EEST 08/15/2019
DeploymentID: 7852c1e1-146a-4ce9-8a05-50ad7b925fef
Error: unformatted disk found
endpoint=.minio_data10
3: cmd/prepare-storage.go:40:cmd.glob..func15.1()
2: cmd/xl-sets.go:212:cmd.(*xlSets).connectDisks()
1: cmd/xl-sets.go:243:cmd.(*xlSets).monitorAndConnectEndpoints()Error: unformatted disk found
We will see that minio will try to create the disk/volume/folder in our system:
$ du -sh .minio_data*
79M .minio_data1
0 .minio_data10
79M .minio_data2
79M .minio_data3
79M .minio_data4
79M .minio_data5
79M .minio_data6
79M .minio_data7
79M .minio_data8
79M .minio_data9Heal
Minio comes with a healing ability:
$ mc admin heal --recursive myminio/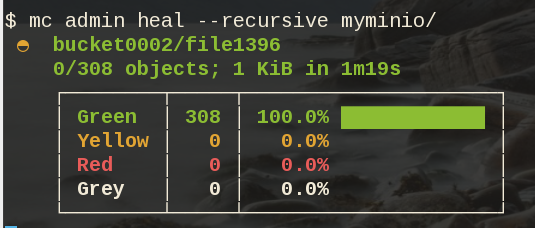
$ du -sh .minio_data*
79M .minio_data1
79M .minio_data10
79M .minio_data2
79M .minio_data3
79M .minio_data4
79M .minio_data5
79M .minio_data6
79M .minio_data7
79M .minio_data8
79M .minio_data9$ mc admin heal --recursive myminio/
◐ bucket0002/file9999
10,000/10,000 objects; 55 KiB in 58m21s
┌────────┬────────┬─────────────────────┐
│ Green │ 10,004 │ 100.0% ████████████ │
│ Yellow │ 0 │ 0.0% │
│ Red │ 0 │ 0.0% │
│ Grey │ 0 │ 0.0% │
└────────┴────────┴─────────────────────┘- Backblaze - Cloud Storage Backup
- rclone - rsync for cloud storage
- MinIO - Object Storage cloud storage software
- s3cmd - Command Line S3 Client
In this blog post, I will try to write a comprehensive guide on how to use cloud object storage for backup purposes.
Goal
What is Object Storage
In a nutshell object storage software uses commodity hard disks in a distributed way across a cluster of systems.
Why using Object Storage
The main characteristics of object storage are:
- Scalability
- Reliability
- Efficiency
- Performance
- Accessibility
Scalability
We can immediately increase our storage by simple adding new commodity systems in our infrastructure to scale up our storage needs, as we go.
Reliability
As we connect more and more systems, we can replicate our data across all of them. We can choose how many copies we would like to have or in which systems we would like to have our replicated data. Also (in most cases) a self-healing mechanism is running in the background to preserve our data from corruption.
Efficiency
By not having a single point of failure in a distributed system, we can reach high throughput across our infrastructure.
Performance
As data are being dispersed across disks and systems, improves read and write performance. Reduces any bottleneck as we can get objects from different places in a psedoparalleler way to construct our data.
Accessibility
Accessing data through a REST API (aka endpoint) using tokens. We can define specific permissions to users or applications and/or we can separate access by creating different keys. We can limit read, write, list, delete or even share specific objects with limited keys!
Backblaze - Cloud Storage Backup
There are a lot of cloud data storage provider. A lot!
When choosing your storage provider, you need to think a couple of things:
- Initial data size
- Upload/Sync files (delta size)
- Delete files
- Download files
Every storage provider have different prices for every read/write/delete/share operation. Your needs will define who is the best provider for you. My plan, is to use cloud storage as archive-backups. That means I need to make an initial upload and after that, frequently sync my files there. But I do NOT need them immediately. This is the backup of my backup in case my primary site is down (or corrupted, or broken, or stolen, or seized, or whatever). I have heard really good words about backblaze and their pricing model suits me.
Create an Account
Create an account and enable Backblaze B2 Cloud Storage. This option will also enable Multi Factor Authentication (MFA) by adding a TOTP in your mobile app or use SMS (mobile phone is required) as a fallback. This is why it is called Multi-Factor, because you can need more than one way to login. Also this is the way that Backblaze can protect themselves of people creating multiple accounts and get 10G free storage for every account.
B2 Cloud Storage
You will see a Master application key. Create a New Application Key.
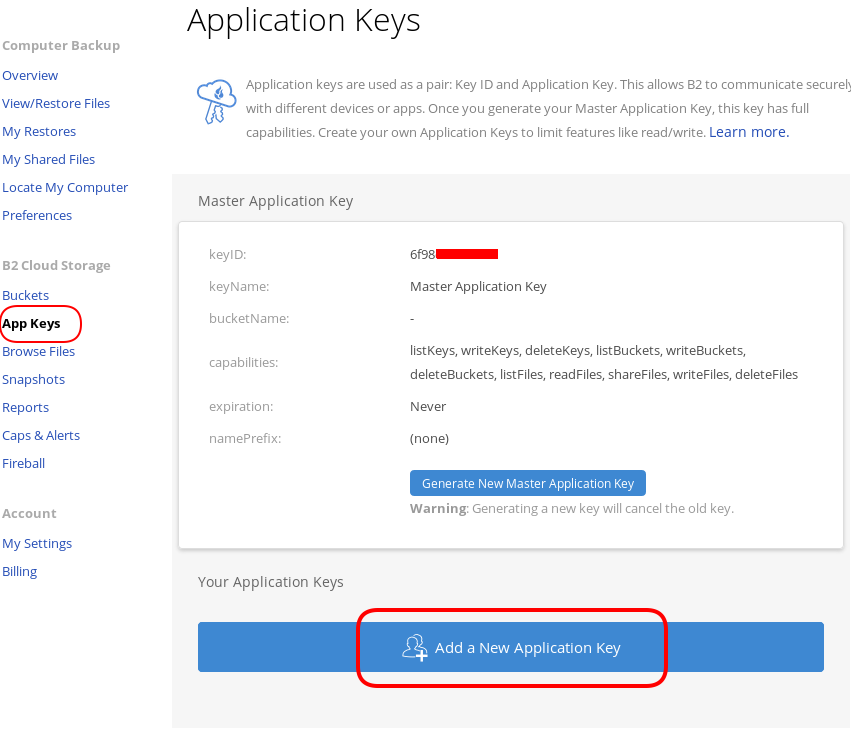
I already have created a New Bucket and I want to give explicit access to this new Application Key.
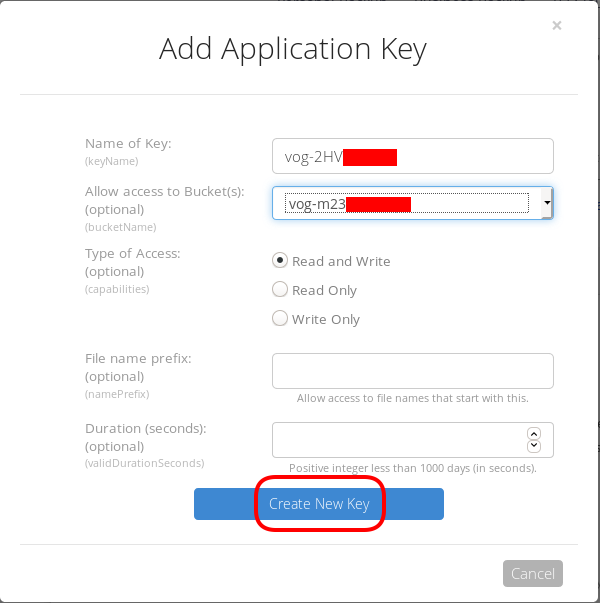
Now, the important step (the one that I initial did wrong!).
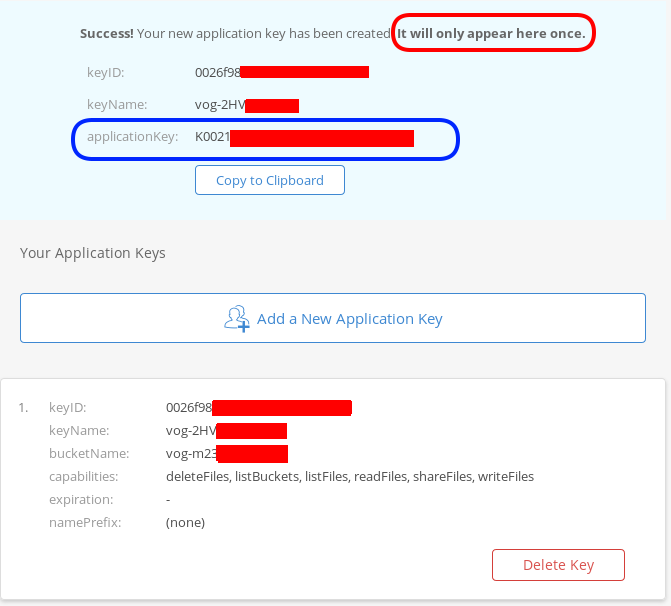
The below screen will be visible ONLY ONE time!
Copy the application key (marked in the blue rectangle).
If you lose this key, you need to delete it and create a new one from the start.
That’s it, pretty much we are done with backblaze!
Rclone
rsync for cloud storage
Next it is time to install and configure rclone. Click here to read the online documentation of rclone on backblaze. Rclone is a go static binary build application, that means you do not have to install or use it as root!
Install Rclone
I will use the latest version of rclone:
curl -sLO https://downloads.rclone.org/rclone-current-linux-amd64.zip
unzip rclone-current-linux-amd64.zip
cd rclone-*linux-amd64/$ ./rclone version
rclone v1.48.0
- os/arch: linux/amd64
- go version: go1.12.6Configure Rclone
You can configure rclone with this command:
./rclone config
but for this article I will follow a more shorter procedure:
Create an empty file under
mkdir -pv ~/.config/rclone/
$ cat > ~/.config/rclone/rclone.conf <<EOF
[remote]
type = b2
account = 0026f98XXXXXXXXXXXXXXXXXX
key = K0021XXXXXXXXXXXXXXXXXXXXXXXXXX
hard_delete = true
EOFReplace acount and key with your own backblaze application secrets
- KeyID
- ApplicationKey
In our configuration, the name of backblaze b2 cloud storage is remote.
Test Rclone
We can test rclone with this:
./rclone lsd remote:
$ ./rclone lsd remote:
-1 2019-08-03 22:01:05 -1 vog-m23XXXXXif we see our bucket name, then everything is fine.
A possible error
401 bad_auth_token
In my first attempt, I did not save the applicationKey when I created the new pair of access keys. So I put the wrong key in the rclone configuration! So be careful, if you see this error, just delete your application key and create a new one.
Rclone Usage
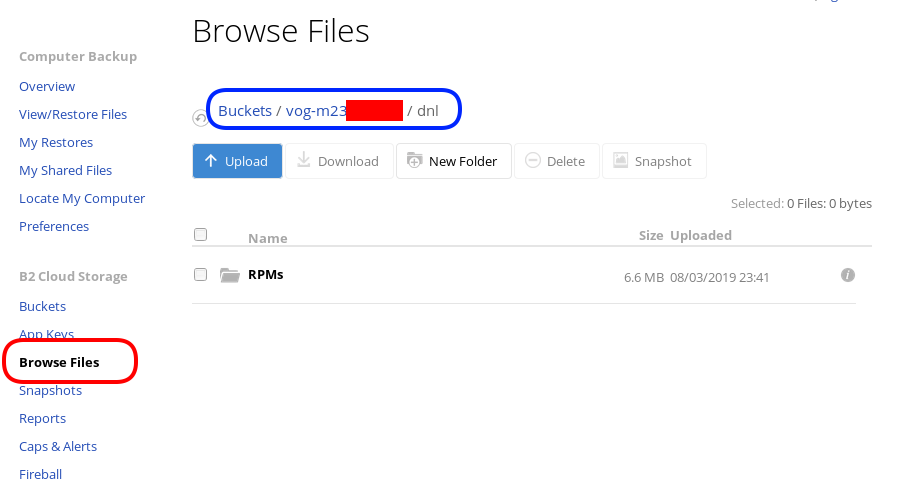
Let’s copy/sync a directory to see if everything is working as advertised:
rclone sync dnl/ remote:vog-m23XXXXX/dnl/from our browser:
Delete Files
rclone delete remote:vog-m23XXXXX/dnl
rclone purge remote:vog-m23XXXXX/dnlList Files
rclone ls remote:vog-m23XXXXX
(empty)
rclone tree remote:vog-m23XXXXX
/
0 directories, 0 filesRclone Crypt
Of course we want to have encrypted backups on the cloud. Read this documentation for more info: Crypt.
We need to re-configure rclone so that can encrypt our files before passing them to our data storage provider.
rclone config
Our remote b2 is already there:
$ rclone config
Current remotes:
Name Type
==== ====
remote b2
e) Edit existing remote
n) New remote
d) Delete remote
r) Rename remote
c) Copy remote
s) Set configuration password
q) Quit config
e/n/d/r/c/s/q>New Remote
n to create a new remote, and I will give encrypt as it’s name.
e/n/d/r/c/s/q> n
name> encrypt
Type of storage to configure.
Enter a string value. Press Enter for the default ("").
Choose a number from below, or type in your own valueCrypt Module
We choose: crypt module:
...
9 / Encrypt/Decrypt a remote
"crypt"
...
Storage> 9
** See help for crypt backend at: https://rclone.org/crypt/ **
Remote to encrypt/decrypt.
Normally should contain a ':' and a path, eg "myremote:path/to/dir",
"myremote:bucket" or maybe "myremote:" (not recommended).
Enter a string value. Press Enter for the default ("").Remote Bucket Name
We also need to give a name, so rclone can combine crypt with b2 module.
I will use my b2-bucket name for this:
remote:vog-m23XXXXX
Remote to encrypt/decrypt.
Normally should contain a ':' and a path, eg "myremote:path/to/dir",
"myremote:bucket" or maybe "myremote:" (not recommended).
Enter a string value. Press Enter for the default ("").
remote> remote:vog-m23XXXXXEncrypt the filenames
Yes, we want rclone to encrypt our filenames
How to encrypt the filenames.
Enter a string value. Press Enter for the default ("standard").
Choose a number from below, or type in your own value
1 / Don't encrypt the file names. Adds a ".bin" extension only.
"off"
2 / Encrypt the filenames see the docs for the details.
"standard"
3 / Very simple filename obfuscation.
"obfuscate"
filename_encryption> 2Encrypt directory names
Yes, those too
Option to either encrypt directory names or leave them intact.
Enter a boolean value (true or false). Press Enter for the default ("true").
Choose a number from below, or type in your own value
1 / Encrypt directory names.
"true"
2 / Don't encrypt directory names, leave them intact.
"false"
directory_name_encryption> 1Password or pass phrase for encryption
This will be an automated backup script in the end, so I will use random password for this step, with 256 bits and no salt.
Password or pass phrase for encryption.
y) Yes type in my own password
g) Generate random password
n) No leave this optional password blank
y/g/n> g
Password strength in bits.
64 is just about memorable
128 is secure
1024 is the maximum
Bits> 256
Your password is: VE64tx4zlXXXXXXXXXXXXXXXXXXXXXXXXXXXXXXXXXX
Use this password? Please note that an obscured version of this
password (and not the password itself) will be stored under your
configuration file, so keep this generated password in a safe place.
y) Yes
n) No
y/n> y
Password or pass phrase for salt. Optional but recommended.
Should be different to the previous password.
y) Yes type in my own password
g) Generate random password
n) No leave this optional password blank
y/g/n> n
Keep in your password manager this password:
VE64tx4zlXXXXXXXXXXXXXXXXXXXXXXXXXXXXXXXXXX
In your setup will be something completly different.
Saving configuration
No need of advanced configuration, review your rclone config and save it.
Edit advanced config? (y/n)
y) Yes
n) No
y/n> nRemote config
--------------------
[encrypt]
type = crypt
remote = remote:vog-m23XXXXX
filename_encryption = standard
directory_name_encryption = true
password = *** ENCRYPTED ***
--------------------
y) Yes this is OK
e) Edit this remote
d) Delete this remote
y/e/d> yCurrent remotes:
Name Type
==== ====
encrypt crypt
remote b2
e) Edit existing remote
n) New remote
d) Delete remote
r) Rename remote
c) Copy remote
s) Set configuration password
q) Quit config
e/n/d/r/c/s/q> qRclone Encrypt Sync
Now let’s see if this crypt modules is working:
rclone sync dnl/ encrypt:
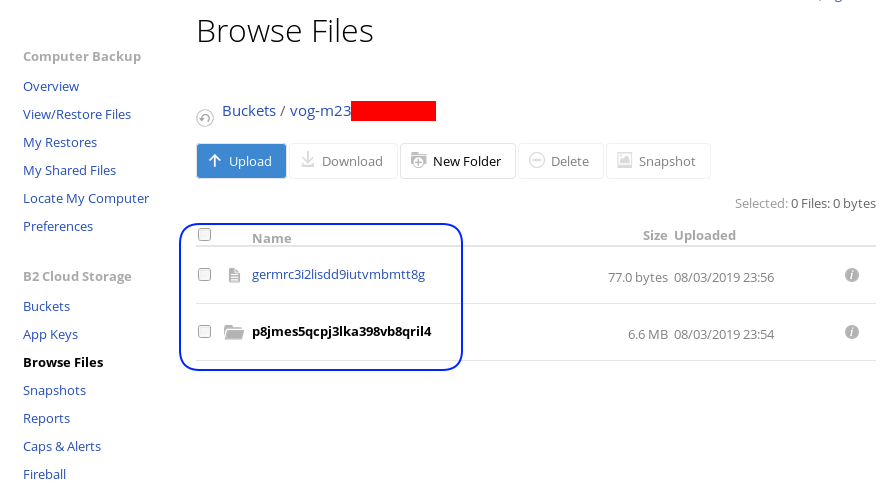
List of encrypted files
rclone ls remote:vog-m23XXXXX
78 germrc3i2lisdd9iutvmbmtt8g
241188 p8jmes5qcpj3lka398vb8qril4/1pg9mb8gca05scmkg8nn86tgse3905trubkeah8t75dd97a7e2caqgo275uphgkj95p78e4i3rejm
6348676 p8jmes5qcpj3lka398vb8qril4/ehhjp4k6bdueqj9arveg4liaameh0qu55oq6hsmgne4nklg83o0d149b9cdc5oq3c0otlivjufk0o
27040 p8jmes5qcpj3lka398vb8qril4/tsiuegm9j7nghheualtbutg4m3r65blqbdn03cdaipnjsnoq0fh26eno22f79fhl1re3m5kiqjfnu
rclone tree remote:vog-m23XXXXX
/
├── germrc3i2lisdd9iutvmbmtt8g
└── p8jmes5qcpj3lka398vb8qril4
├── 1pg9mb8gca05scmkg8nn86tgse3905trubkeah8t75dd97a7e2caqgo275uphgkj95p78e4i3rejm
├── ehhjp4k6bdueqj9arveg4liaameh0qu55oq6hsmgne4nklg83o0d149b9cdc5oq3c0otlivjufk0o
└── tsiuegm9j7nghheualtbutg4m3r65blqbdn03cdaipnjsnoq0fh26eno22f79fhl1re3m5kiqjfnu
1 directories, 4 filesBackblaze dashboard
Encrypted file
But is it indeed encrypted or just is it only the file name ?
In our system the content of file1 are:
# cat dnl/file1
Sun Aug 4 00:01:54 EEST 2019If we download this file:
$ cat /tmp/germrc3i2lisdd9iutvmbmtt8g
RCLONENc�s��w�YF��r,O�S�"���U?���>ȘDh�3-�'/5��k��g�x'5yz�i� � H��
Rclone Sync Script
Here is my personal rclone sync script: rclone.sh
#!/bin/sh
# ebal, Sun, 04 Aug 2019 16:33:14 +0300
# Create Rclone Log Directory
mkdir -p /var/log/rclone/`date +%Y`/`date +%m`/`date +%d`/
# Compress previous log file
gzip /var/log/rclone/`date +%Y`/`date +%m`/`date +%d`/*
# Define current log file
log_file="/var/log/rclone/`date +%Y`/`date +%m`/`date +%d`/`hostname -f`-`date +%Y%m%d_%H%M`.log"
# Filter out - exclude dirs & files that we do not need
filter_f="/root/.config/rclone/filter-file.txt"
# Sync !
/usr/local/bin/rclone
--quiet
--delete-before
--ignore-existing
--links
--filter-from $filter_f
--log-file $log_file
sync / encrypt:/`hostname -f`/
and this is what I am filtering out (exclude):
- /dev/**
- /lost+found/**
- /media/**
- /mnt/**
- /proc/**
- /run/**
- /swap.img
- /swapfile
- /sys/**
- /tmp/**
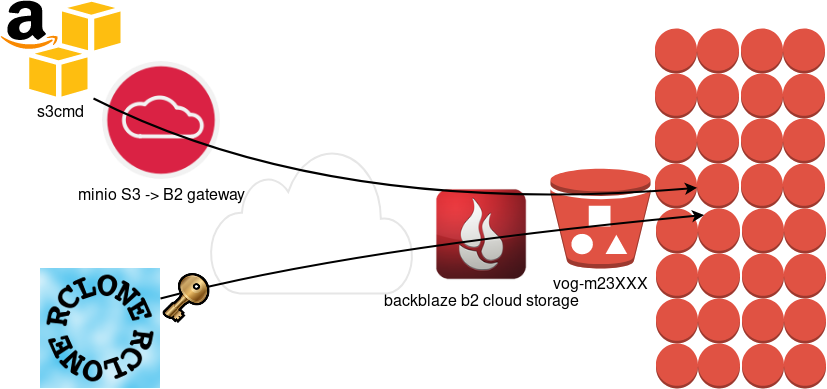
- /var/tmp/**MinIO
MinIO is a high performance object storage server compatible with Amazon S3 APIs
Most of the online cloud object storage data providers (and applications) are S3 compatible. Amazon S3 or Amazon Simple Storage Service is the de-facto on object storage and their S3 API (or driver) is being used by many applications.
B2 Cloud Storage API Compatible with Amazon S3
Backblaze is using a REST-API but it is not S3 compatible. So in case your application can only talk via S3, we need a translator from S3 <--> B2 thus we need Minio, as an S3 Compatible Object Storage driver Gateway!
Install Minio
Minio is also a go software!
curl -sLO https://dl.min.io/server/minio/release/linux-amd64/minio
chmod +x minio./minio version
$ ./minio version
Version: 2019-08-01T22:18:54Z
Release-Tag: RELEASE.2019-08-01T22-18-54Z
Commit-ID: c5ac901e8dac48d45079095a6bab04674872b28bConfigure Minio
actually no configuration needed, just export Access/Sercet keys to local environment:
export -p MINIO_ACCESS_KEY=0026f98XXXXXXXXXXXXXXXXXX
export -p MINIO_SECRET_KEY=K0021XXXXXXXXXXXXXXXXXXXXXXXXXXRun Minio S3 gateway
./minio gateway b2
$ ./minio gateway b2
Endpoint: http://93.184.216.34:9000 http://127.0.0.1:9000
AccessKey: 0026f98XXXXXXXXXXXXXXXXXX
SecretKey: K0021XXXXXXXXXXXXXXXXXXXXXXXXXX
Browser Access:
http://93.184.216.34:9000 http://127.0.0.1:9000
Command-line Access: https://docs.min.io/docs/minio-client-quickstart-guide
$ mc config host add myb2 http://93.184.216.34:9000 0026f98XXXXXXXXXXXXXXXXXX K0021XXXXXXXXXXXXXXXXXXXXXXXXXX
Object API (Amazon S3 compatible):
Go: https://docs.min.io/docs/golang-client-quickstart-guide
Java: https://docs.min.io/docs/java-client-quickstart-guide
Python: https://docs.min.io/docs/python-client-quickstart-guide
JavaScript: https://docs.min.io/docs/javascript-client-quickstart-guide
.NET: https://docs.min.io/docs/dotnet-client-quickstart-guideWeb Dashboard
Minio comes with it’s own web-ui dashboard!
How awesome is this ?
S3cmd
The most common S3 command line tool is a python program named: s3cmd
It (probable) already exists in your package manager and you can install it.
On a rpm-based system:
yum -y install s3cmdOn a deb-based system:
apt -y install s3cmdyou can also install it via pip or even inside a virtualenv
pip install s3cmd
Configure s3cmd
We need to configre s3cmd, by running:
s3cmd --configure
$ s3cmd --configure
Enter new values or accept defaults in brackets with Enter.
Refer to user manual for detailed description of all options.
Access key and Secret key are your identifiers for Amazon S3. Leave them empty for using the env variables.
Access Key: 0026f98XXXXXXXXXXXXXXXXXX
Secret Key: K0021XXXXXXXXXXXXXXXXXXXXXXXXXX
Default Region [US]:Use "s3.amazonaws.com" for S3 Endpoint and not modify it to the target Amazon S3.
S3 Endpoint [s3.amazonaws.com]: http://127.0.0.1:9000
Use "%(bucket)s.s3.amazonaws.com" to the target Amazon S3. "%(bucket)s" and "%(location)s" vars can be used
if the target S3 system supports dns based buckets.
DNS-style bucket+hostname:port template for accessing a bucket [%(bucket)s.s3.amazonaws.com]:

Encryption password is used to protect your files from reading
by unauthorized persons while in transfer to S3
Encryption password:
Path to GPG program [/usr/bin/gpg]:
When using secure HTTPS protocol all communication with Amazon S3
servers is protected from 3rd party eavesdropping. This method is
slower than plain HTTP, and can only be proxied with Python 2.7 or newer
Use HTTPS protocol [Yes]: n
On some networks all internet access must go through a HTTP proxy.
Try setting it here if you can't connect to S3 directly
HTTP Proxy server name:
New settings:
Access Key: 0026f98XXXXXXXXXXXXXXXXXX
Secret Key: K0021XXXXXXXXXXXXXXXXXXXXXXXXXX
Default Region: US
S3 Endpoint: http://127.0.0.1:9000
DNS-style bucket+hostname:port template for accessing a bucket: %(bucket)s.s3.amazonaws.com
Encryption password:
Path to GPG program: /usr/bin/gpg
Use HTTPS protocol: False
HTTP Proxy server name:
HTTP Proxy server port: 0
Test access with supplied credentials? [Y/n] n
Save settings? [y/N] y
Configuration saved to '/home/ebal/.s3cfg'Summarize Config
To summarize, these are the settings we need to type, everything else can be default:
Access Key: 0026f98XXXXXXXXXXXXXXXXXX
Secret Key: K0021XXXXXXXXXXXXXXXXXXXXXXXXXX
S3 Endpoint [s3.amazonaws.com]: http://127.0.0.1:9000
Use HTTPS protocol [Yes]: n
Test s3cmd
$ s3cmd ls
1970-01-01 00:00  s3://vog-m23XXX
s4cmd
Super S3 command line tool
Notable mention: s4cmd
s4cmd is using Boto 3, an S3 SDK for python. You can build your own application, using S3 as backend storage with boto.
$ pip search s4cmd
s4cmd (2.1.0)  - Super S3 command line tool

$ pip install s4cmd
Configure s4cmd
If you have already configure s3cmd, then s4cmd will read the same config file. But you can also just export these enviroment variables and s4cmd will use them:
export -p S3_ACCESS_KEY=0026f98XXXXXXXXXXXXXXXXXX
export -p S3_SECRET_KEY=K0021XXXXXXXXXXXXXXXXXXXXXXXXXX
Run s4cmd
s4cmd --endpoint-url=http://127.0.0.1:9000 ls
$ s4cmd --endpoint-url=http://127.0.0.1:9000 ls
1970-01-01 00:00 DIR s3://vog-m23XXXXX/
SSH Local Port Forwarding
You can also use s3cmd/s4cmd or any other S3 compatible software from another machine if you can bring minio gateway local.
You can do this by running a ssh command:
ssh -L 9000:127.0.0.1:9000 <remote_machine_that_runs_minio_gateway>