Hi! I’m writing this article as a mini-HOWTO on how to setup a btrfs-raid1 volume on encrypted disks (luks). This page servers as my personal guide/documentation, althought you can use it with little intervention.
Disclaimer: Be very careful! This is a mini-HOWTO article, do not copy/paste commands. Modify them to fit your environment.
$ date -R
Thu, 03 Dec 2020 07:58:49 +0200
Prologue
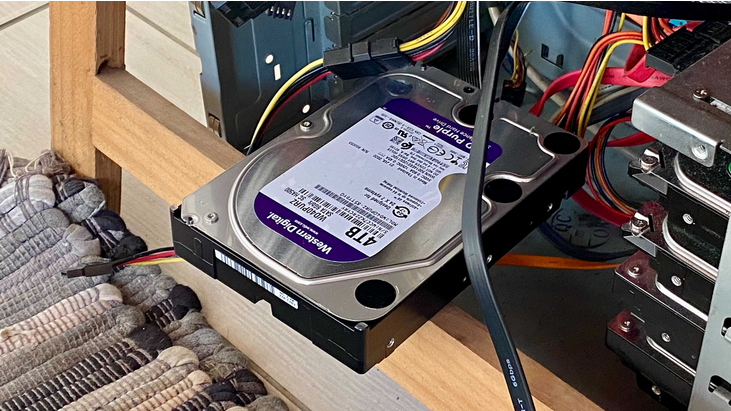
I had to replace one of my existing data/media setup (btrfs-raid0) due to some random hardware errors in one of the disks. The existing disks are 7.1y WD 1TB and the new disks are WD Purple 4TB.
Western Digital Green  1TB, about  70€ each, SATA III (6 Gbit/s), 7200 RPM, 64 MB Cache
Western Digital Purple 4TB, about 100€ each, SATA III (6 Gbit/s), 5400 RPM, 64 MB Cache
This will give me about 3.64T (from 1.86T). I had concerns with the slower RPM but in the end of this article, you will see some related stats.
My primarly daily use is streaming media (video/audio/images) via minidlna instead of cifs/nfs (samba), although the service is still up & running.
Disks
It is important to use disks with the exact same size and speed. Usually for Raid 1 purposes, I prefer using the same model. One can argue that diversity of models and manufactures to reduce possible firmware issues of a specific series should be preferable. When working with Raid 1, the most important things to consider are:
- Geometry (size)
- RPM (speed)
and all the disks should have the same specs, otherwise size and speed will downgraded to the smaller and slower disk.
Identify Disks
the two (2) Western Digital Purple 4TB are manufacture model: WDC WD40PURZ
The system sees them as:
$ sudo find /sys/devices -type f -name model -exec cat {} +

WDC WD40PURZ-85A
WDC WD40PURZ-85T
try to identify them from the kernel with list block devices:
$ lsblk

NAME         MAJ:MIN RM   SIZE RO TYPE  MOUNTPOINT
sdc            8:32   0   3.6T  0 disk
sde            8:64   0   3.6T  0 disk
verify it with hwinfo
$ hwinfo --short --disk
disk:
  /dev/sde             WDC WD40PURZ-85A
  /dev/sdc             WDC WD40PURZ-85T

$ hwinfo --block --short

  /dev/sde             WDC WD40PURZ-85A
  /dev/sdc             WDC WD40PURZ-85T
with list hardware:
$ sudo lshw -short | grep disk

/0/100/1f.5/0        /dev/sdc   disk           4TB WDC WD40PURZ-85T
/0/100/1f.5/1        /dev/sde   disk           4TB WDC WD40PURZ-85A

$ sudo lshw -class disk -json | jq -r .[].product

WDC WD40PURZ-85T
WDC WD40PURZ-85A
Luks
Create Random Encrypted keys
I prefer to use random generated keys for the disk encryption. This is also useful for automated scripts (encrypt/decrypt disks) instead of typing a pass phrase.
Create a folder to save the encrypted keys:
$ sudo mkdir -pv /etc/crypttab.keys/
create keys with dd against urandom:
WD40PURZ-85A
$ sudo dd if=/dev/urandom of=/etc/crypttab.keys/WD40PURZ-85A bs=4096 count=1

1+0 records in
1+0 records out
4096 bytes (4.1 kB, 4.0 KiB) copied, 0.00015914 s, 25.7 MB/s
WD40PURZ-85T
$ sudo dd if=/dev/urandom of=/etc/crypttab.keys/WD40PURZ-85T bs=4096 count=1

1+0 records in
1+0 records out
4096 bytes (4.1 kB, 4.0 KiB) copied, 0.000135452 s, 30.2 MB/s
verify two (2) 4k size random keys, exist on the above directory with list files:
$ sudo ls -l /etc/crypttab.keys/WD40PURZ-85*

-rw-r--r-- 1 root root 4096 Dec  3 08:00 /etc/crypttab.keys/WD40PURZ-85A
-rw-r--r-- 1 root root 4096 Dec  3 08:00 /etc/crypttab.keys/WD40PURZ-85T
Format & Encrypt Hard Disks
It is time to format and encrypt the hard disks with Luks
Be very careful, choose the correct disk, type uppercase YES to confirm.
$ sudo  cryptsetup luksFormat /dev/sde --key-file /etc/crypttab.keys/WD40PURZ-85A

WARNING!
========
This will overwrite data on /dev/sde irrevocably.

Are you sure? (Type 'yes' in capital letters): YES
$ sudo  cryptsetup luksFormat /dev/sdc --key-file /etc/crypttab.keys/WD40PURZ-85T

WARNING!
========
This will overwrite data on /dev/sdc irrevocably.

Are you sure? (Type 'yes' in capital letters): YES
Verify Encrypted Disks
print block device attributes:
$ sudo  blkid | tail -2

/dev/sde: UUID="d5800c02-2840-4ba9-9177-4d8c35edffac" TYPE="crypto_LUKS"
/dev/sdc: UUID="2ffb6115-09fb-4385-a3c9-404df3a9d3bd" TYPE="crypto_LUKS"
Open and Decrypt
opening encrypted disks with luks
- WD40PURZ-85A
$ sudo cryptsetup luksOpen /dev/disk/by-uuid/d5800c02-2840-4ba9-9177-4d8c35edffac WD40PURZ-85A -d /etc/crypttab.keys/WD40PURZ-85A
- WD40PURZ-85T
$ sudo cryptsetup luksOpen /dev/disk/by-uuid/2ffb6115-09fb-4385-a3c9-404df3a9d3bd WD40PURZ-85T -d /etc/crypttab.keys/WD40PURZ-85T
Verify Status
- WD40PURZ-85A
$ sudo  cryptsetup status   /dev/mapper/WD40PURZ-85A

/dev/mapper/WD40PURZ-85A is active.

  type:         LUKS2
  cipher:       aes-xts-plain64
  keysize:      512 bits
  key location: keyring
  device:       /dev/sde
  sector size:  512
  offset:       32768 sectors
  size:         7814004400 sectors
  mode:         read/write
- WD40PURZ-85T
$ sudo  cryptsetup status   /dev/mapper/WD40PURZ-85T

/dev/mapper/WD40PURZ-85T is active.

  type:         LUKS2
  cipher:       aes-xts-plain64
  keysize:      512 bits
  key location: keyring
  device:       /dev/sdc
  sector size:  512
  offset:       32768 sectors
  size:         7814004400 sectors
  mode:         read/write
BTRFS
Current disks
$sudo btrfs device stats /mnt/data/

[/dev/mapper/western1T].write_io_errs     28632
[/dev/mapper/western1T].read_io_errs      916948985
[/dev/mapper/western1T].flush_io_errs     0
[/dev/mapper/western1T].corruption_errs   0
[/dev/mapper/western1T].generation_errs   0
[/dev/mapper/western1Tb].write_io_errs    0
[/dev/mapper/western1Tb].read_io_errs     0
[/dev/mapper/western1Tb].flush_io_errs    0
[/dev/mapper/western1Tb].corruption_errs  0
[/dev/mapper/western1Tb].generation_errs  0
There are a lot of write/read errors :(
btrfs version
$ sudo  btrfs --version
btrfs-progs v5.9

$ sudo  mkfs.btrfs --version
mkfs.btrfs, part of btrfs-progs v5.9
Create BTRFS Raid 1 Filesystem
by using mkfs, selecting a disk label, choosing raid1 metadata and data to be on both disks (mirror):
$ sudo mkfs.btrfs
  -L WD40PURZ
  -m raid1
  -d raid1
  /dev/mapper/WD40PURZ-85A
  /dev/mapper/WD40PURZ-85T
or in one-liner (as-root):
mkfs.btrfs -L WD40PURZ -m raid1 -d raid1 /dev/mapper/WD40PURZ-85A /dev/mapper/WD40PURZ-85T
format output
btrfs-progs v5.9
See http://btrfs.wiki.kernel.org for more information.

Label:              WD40PURZ
UUID:               095d3b5c-58dc-4893-a79a-98d56a84d75d
Node size:          16384
Sector size:        4096
Filesystem size:    7.28TiB
Block group profiles:
  Data:             RAID1             1.00GiB
  Metadata:         RAID1             1.00GiB
  System:           RAID1             8.00MiB
SSD detected:       no
Incompat features:  extref, skinny-metadata
Runtime features:
Checksum:           crc32c
Number of devices:  2
Devices:
   ID        SIZE  PATH
    1     3.64TiB  /dev/mapper/WD40PURZ-85A
    2     3.64TiB  /dev/mapper/WD40PURZ-85T
Notice that both disks have the same UUID (Universal Unique IDentifier) number:
UUID: 095d3b5c-58dc-4893-a79a-98d56a84d75dVerify block device
$ blkid | tail -2

/dev/mapper/WD40PURZ-85A: LABEL="WD40PURZ" UUID="095d3b5c-58dc-4893-a79a-98d56a84d75d" UUID_SUB="75c9e028-2793-4e74-9301-2b443d922c40" BLOCK_SIZE="4096" TYPE="btrfs"
/dev/mapper/WD40PURZ-85T: LABEL="WD40PURZ" UUID="095d3b5c-58dc-4893-a79a-98d56a84d75d" UUID_SUB="2ee4ec50-f221-44a7-aeac-aa75de8cdd86" BLOCK_SIZE="4096" TYPE="btrfs"
once more, be aware of the same UUID: 095d3b5c-58dc-4893-a79a-98d56a84d75d on both disks!
Mount new block disk
create a new mount point
$ sudo  mkdir -pv /mnt/WD40PURZ
mkdir: created directory '/mnt/WD40PURZ'
append the below entry in /etc/fstab (as-root)
echo 'UUID=095d3b5c-58dc-4893-a79a-98d56a84d75d /mnt/WD40PURZ auto defaults,noauto,user,exec 0 0' >> /etc/fstab
and finally, mount it!
$ sudo  mount /mnt/WD40PURZ

$ mount | grep WD
/dev/mapper/WD40PURZ-85A on /mnt/WD40PURZ type btrfs (rw,nosuid,nodev,relatime,space_cache,subvolid=5,subvol=/)
Disk Usage
check disk usage and free space for the new encrypted mount point
$ df -h /mnt/WD40PURZ/

Filesystem                Size  Used Avail Use% Mounted on
/dev/mapper/WD40PURZ-85A  3.7T  3.4M  3.7T   1% /mnt/WD40PURZ
btrfs filesystem disk usage
$ btrfs filesystem df /mnt/WD40PURZ | column -t

Data,           RAID1:   total=1.00GiB,  used=512.00KiB
System,         RAID1:   total=8.00MiB,  used=16.00KiB
Metadata,       RAID1:   total=1.00GiB,  used=112.00KiB
GlobalReserve,  single:  total=3.25MiB,  used=0.00B
btrfs filesystem show
$ sudo btrfs filesystem show /mnt/WD40PURZ

Label: 'WD40PURZ'  uuid: 095d3b5c-58dc-4893-a79a-98d56a84d75d
    Total devices 2 FS bytes used 640.00KiB
    devid    1 size 3.64TiB used 2.01GiB path /dev/mapper/WD40PURZ-85A
    devid    2 size 3.64TiB used 2.01GiB path /dev/mapper/WD40PURZ-85T
stats
$ sudo  btrfs device stats /mnt/WD40PURZ/

[/dev/mapper/WD40PURZ-85A].write_io_errs    0
[/dev/mapper/WD40PURZ-85A].read_io_errs     0
[/dev/mapper/WD40PURZ-85A].flush_io_errs    0
[/dev/mapper/WD40PURZ-85A].corruption_errs  0
[/dev/mapper/WD40PURZ-85A].generation_errs  0
[/dev/mapper/WD40PURZ-85T].write_io_errs    0
[/dev/mapper/WD40PURZ-85T].read_io_errs     0
[/dev/mapper/WD40PURZ-85T].flush_io_errs    0
[/dev/mapper/WD40PURZ-85T].corruption_errs  0
[/dev/mapper/WD40PURZ-85T].generation_errs  0
btrfs fi disk usage
btrfs filesystem disk usage
$ sudo  btrfs filesystem usage /mnt/WD40PURZ

Overall:
    Device size:                  7.28TiB
    Device allocated:             4.02GiB
    Device unallocated:           7.27TiB
    Device missing:                 0.00B
    Used:                         1.25MiB
    Free (estimated):             3.64TiB   (min: 3.64TiB)
    Data ratio:                      2.00
    Metadata ratio:                  2.00
    Global reserve:               3.25MiB   (used: 0.00B)
    Multiple profiles:                 no

Data,RAID1: Size:1.00GiB, Used:512.00KiB (0.05%)
   /dev/mapper/WD40PURZ-85A    1.00GiB
   /dev/mapper/WD40PURZ-85T    1.00GiB

Metadata,RAID1: Size:1.00GiB, Used:112.00KiB (0.01%)
   /dev/mapper/WD40PURZ-85A    1.00GiB
   /dev/mapper/WD40PURZ-85T    1.00GiB

System,RAID1: Size:8.00MiB, Used:16.00KiB (0.20%)
   /dev/mapper/WD40PURZ-85A    8.00MiB
   /dev/mapper/WD40PURZ-85T    8.00MiB

Unallocated:
   /dev/mapper/WD40PURZ-85A    3.64TiB
   /dev/mapper/WD40PURZ-85T    3.64TiB
Speed
Using hdparm to test/get some speed stats
$ sudo  hdparm -tT /dev/sde

/dev/sde:
 Timing cached reads:    25224 MB in  1.99 seconds = 12662.08 MB/sec
 Timing buffered disk reads: 544 MB in  3.01 seconds = 181.02 MB/sec

$ sudo  hdparm -tT /dev/sdc

/dev/sdc:
 Timing cached reads:    24852 MB in  1.99 seconds = 12474.20 MB/sec
 Timing buffered disk reads: 534 MB in  3.00 seconds = 177.85 MB/sec

$ sudo  hdparm -tT /dev/disk/by-uuid/095d3b5c-58dc-4893-a79a-98d56a84d75d

/dev/disk/by-uuid/095d3b5c-58dc-4893-a79a-98d56a84d75d:
 Timing cached reads:   25058 MB in  1.99 seconds = 12577.91 MB/sec
 HDIO_DRIVE_CMD(identify) failed: Inappropriate ioctl for device
 Timing buffered disk reads: 530 MB in  3.00 seconds = 176.56 MB/sec
These are the new disks with 5400 rpm, let’s see what the old 7200 rpm disk shows here:
/dev/sdb:
 Timing cached reads:    26052 MB in  1.99 seconds = 13077.22 MB/sec
 Timing buffered disk reads: 446 MB in  3.01 seconds = 148.40 MB/sec

/dev/sdd:
 Timing cached reads:    25602 MB in  1.99 seconds = 12851.19 MB/sec
 Timing buffered disk reads: 420 MB in  3.01 seconds = 139.69 MB/sec
So even that these new disks are 5400 seems to be faster than the old ones !!
Also, I have mounted as read-only the problematic Raid-0 setup.
Rsync
I am now moving some data to measure time
- Folder-A
du -sh /mnt/data/Folder-A/
795G   /mnt/data/Folder-A/
time rsync -P -rax /mnt/data/Folder-A/ Folder-A/
sending incremental file list
created directory Folder-A
./
...

real  163m27.531s
user    8m35.252s
sys 20m56.649s- Folder-B
du -sh /mnt/data/Folder-B/
464G   /mnt/data/Folder-B/
time rsync -P -rax /mnt/data/Folder-B/ Folder-B/
sending incremental file list
created directory Folder-B
./
...
real 102m1.808s
user 7m30.923s
sys 18m24.981s
Control and Monitor Utility for SMART Disks
Last but not least, some smart info with smartmontools
$sudo smartctl -t short /dev/sdc

smartctl 7.1 2019-12-30 r5022 [x86_64-linux-5.4.79-1-lts] (local build)
Copyright (C) 2002-19, Bruce Allen, Christian Franke, www.smartmontools.org

=== START OF OFFLINE IMMEDIATE AND SELF-TEST SECTION ===
Sending command: "Execute SMART Short self-test routine immediately in off-line mode".
Drive command "Execute SMART Short self-test routine immediately in off-line mode" successful.
Testing has begun.
Please wait 2 minutes for test to complete.
Test will complete after Thu Dec  3 08:58:06 2020 EET
Use smartctl -X to abort test.
result :
$sudo smartctl -l selftest /dev/sdc

smartctl 7.1 2019-12-30 r5022 [x86_64-linux-5.4.79-1-lts] (local build)
Copyright (C) 2002-19, Bruce Allen, Christian Franke, www.smartmontools.org

=== START OF READ SMART DATA SECTION ===
SMART Self-test log structure revision number 1
Num  Test_Description    Status                  Remaining  LifeTime(hours)  LBA_of_first_error
# 1  Short offline       Completed without error       00%         1         -
details
$sudo smartctl -A  /dev/sdc

smartctl 7.1 2019-12-30 r5022 [x86_64-linux-5.4.79-1-lts] (local build)
Copyright (C) 2002-19, Bruce Allen, Christian Franke, www.smartmontools.org

=== START OF READ SMART DATA SECTION ===
SMART Attributes Data Structure revision number: 16
Vendor Specific SMART Attributes with Thresholds:
ID# ATTRIBUTE_NAME          FLAG     VALUE WORST THRESH TYPE      UPDATED  WHEN_FAILED RAW_VALUE
  1 Raw_Read_Error_Rate     0x002f   100   253   051    Pre-fail  Always       -       0
  3 Spin_Up_Time            0x0027   100   253   021    Pre-fail  Always       -       0
  4 Start_Stop_Count        0x0032   100   100   000    Old_age   Always       -       1
  5 Reallocated_Sector_Ct   0x0033   200   200   140    Pre-fail  Always       -       0
  7 Seek_Error_Rate         0x002e   100   253   000    Old_age   Always       -       0
  9 Power_On_Hours          0x0032   100   100   000    Old_age   Always       -       1
 10 Spin_Retry_Count        0x0032   100   253   000    Old_age   Always       -       0
 11 Calibration_Retry_Count 0x0032   100   253   000    Old_age   Always       -       0
 12 Power_Cycle_Count       0x0032   100   100   000    Old_age   Always       -       1
192 Power-Off_Retract_Count 0x0032   200   200   000    Old_age   Always       -       0
193 Load_Cycle_Count        0x0032   200   200   000    Old_age   Always       -       1
194 Temperature_Celsius     0x0022   119   119   000    Old_age   Always       -       31
196 Reallocated_Event_Count 0x0032   200   200   000    Old_age   Always       -       0
197 Current_Pending_Sector  0x0032   200   200   000    Old_age   Always       -       0
198 Offline_Uncorrectable   0x0030   100   253   000    Old_age   Offline      -       0
199 UDMA_CRC_Error_Count    0x0032   200   200   000    Old_age   Always       -       0
200 Multi_Zone_Error_Rate   0x0008   100   253   000    Old_age   Offline      -       0
Second disk
$sudo smartctl -t short /dev/sde

smartctl 7.1 2019-12-30 r5022 [x86_64-linux-5.4.79-1-lts] (local build)
Copyright (C) 2002-19, Bruce Allen, Christian Franke, www.smartmontools.org

=== START OF OFFLINE IMMEDIATE AND SELF-TEST SECTION ===
Sending command: "Execute SMART Short self-test routine immediately in off-line mode".
Drive command "Execute SMART Short self-test routine immediately in off-line mode" successful.
Testing has begun.
Please wait 2 minutes for test to complete.
Test will complete after Thu Dec  3 09:00:56 2020 EET
Use smartctl -X to abort test.
selftest results
$sudo smartctl -l selftest /dev/sde

smartctl 7.1 2019-12-30 r5022 [x86_64-linux-5.4.79-1-lts] (local build)
Copyright (C) 2002-19, Bruce Allen, Christian Franke, www.smartmontools.org

=== START OF READ SMART DATA SECTION ===
SMART Self-test log structure revision number 1
Num  Test_Description    Status                  Remaining  LifeTime(hours)  LBA_of_first_error
# 1  Short offline       Completed without error       00%         1         -
details
$sudo smartctl -A  /dev/sde

smartctl 7.1 2019-12-30 r5022 [x86_64-linux-5.4.79-1-lts] (local build)
Copyright (C) 2002-19, Bruce Allen, Christian Franke, www.smartmontools.org

=== START OF READ SMART DATA SECTION ===
SMART Attributes Data Structure revision number: 16
Vendor Specific SMART Attributes with Thresholds:
ID# ATTRIBUTE_NAME          FLAG     VALUE WORST THRESH TYPE      UPDATED  WHEN_FAILED RAW_VALUE
  1 Raw_Read_Error_Rate     0x002f   100   253   051    Pre-fail  Always       -       0
  3 Spin_Up_Time            0x0027   100   253   021    Pre-fail  Always       -       0
  4 Start_Stop_Count        0x0032   100   100   000    Old_age   Always       -       1
  5 Reallocated_Sector_Ct   0x0033   200   200   140    Pre-fail  Always       -       0
  7 Seek_Error_Rate         0x002e   100   253   000    Old_age   Always       -       0
  9 Power_On_Hours          0x0032   100   100   000    Old_age   Always       -       1
 10 Spin_Retry_Count        0x0032   100   253   000    Old_age   Always       -       0
 11 Calibration_Retry_Count 0x0032   100   253   000    Old_age   Always       -       0
 12 Power_Cycle_Count       0x0032   100   100   000    Old_age   Always       -       1
192 Power-Off_Retract_Count 0x0032   200   200   000    Old_age   Always       -       0
193 Load_Cycle_Count        0x0032   200   200   000    Old_age   Always       -       1
194 Temperature_Celsius     0x0022   116   116   000    Old_age   Always       -       34
196 Reallocated_Event_Count 0x0032   200   200   000    Old_age   Always       -       0
197 Current_Pending_Sector  0x0032   200   200   000    Old_age   Always       -       0
198 Offline_Uncorrectable   0x0030   100   253   000    Old_age   Offline      -       0
199 UDMA_CRC_Error_Count    0x0032   200   200   000    Old_age   Always       -       0
200 Multi_Zone_Error_Rate   0x0008   100   253   000    Old_age   Offline      -       0
that’s it !
-ebal
Network-Bound Disk Encryption
I was reading the redhat release notes on 7.4 and came across: Chapter 15. Security
New packages: tang, clevis, jose, luksmeta
Network Bound Disk Encryption (NBDE) allows the user to encrypt root volumes of the hard drives on physical and virtual machines without requiring to manually enter password when systems are rebooted.
That means, we can now have an encrypted (luks) volume that will be de-crypted on reboot, without the need of typing a passphrase!!!
Really - really useful on VPS (and general in cloud infrastructures)
Useful Links
- https://github.com/latchset/tang
- https://github.com/latchset/jose
- https://github.com/latchset/clevis
CentOS 7.4 with Encrypted rootfs
(aka client machine)
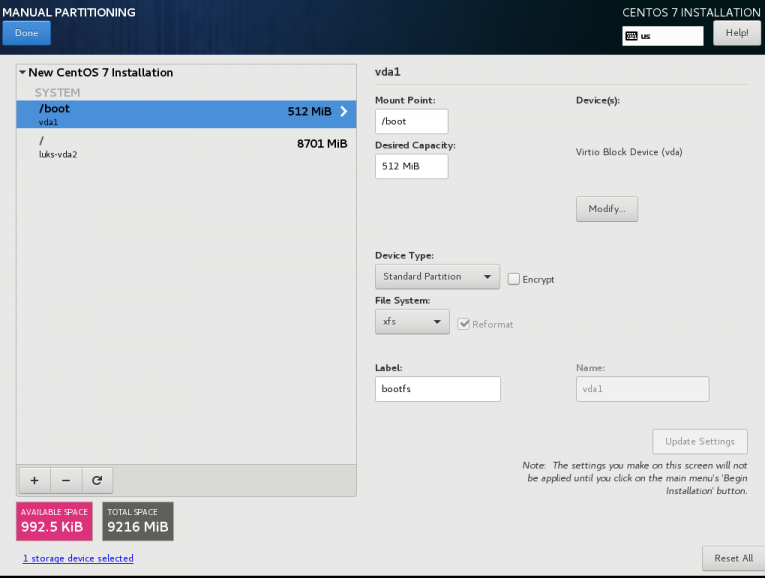
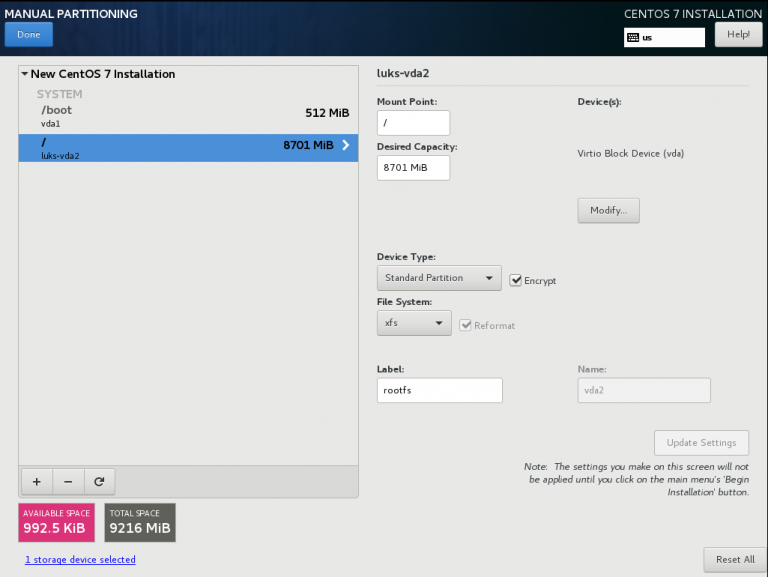
Below is a test centos 7.4 virtual machine with an encrypted root filesystem:
/boot
/
Tang Server
(aka server machine)
Tang is a server for binding data to network presence. This is a different centos 7.4 virtual machine from the above.
Installation
Let’s install the server part:
# yum -y install tang
Start socket service:
# systemctl restart tangd.socket
Enable socket service:
# systemctl enable tangd.socket
TCP Port
Check that the tang server is listening:
# netstat -ntulp | egrep -i systemd
tcp6 0 0 :::80 :::* LISTEN 1/systemdFirewall
Dont forget the firewall:
Firewall Zones
# firewall-cmd --get-active-zones
public
  interfaces: eth0
Firewall Port
# firewall-cmd --zone=public --add-port=80/tcp --permanent
or
# firewall-cmd --add-port=80/tcp --permanent
successReload
# firewall-cmd --reload
successWe have finished with the server part!
Client Machine - Encrypted rootfs
Now it is time to configure the client machine, but before let’s check the encrypted partition:
CryptTab
Every encrypted block devices is configured under crypttab file:
[root@centos7 ~]# cat /etc/crypttab
luks-3cc09d38-2f55-42b1-b0c7-b12f6c74200c UUID=3cc09d38-2f55-42b1-b0c7-b12f6c74200c none FsTab
and every filesystem that is static mounted on boot, is configured under fstab:
[root@centos7 ~]# cat /etc/fstab
UUID=c5ffbb05-d8e4-458c-9dc6-97723ccf43bc          /boot  xfs  defaults  0 0

/dev/mapper/luks-3cc09d38-2f55-42b1-b0c7-b12f6c74200c  /  xfs  defaults,x-systemd.device-timeout=0 0 0
Installation
Now let’s install the client (clevis) part that will talk with tang:
# yum -y install clevis clevis-luks clevis-dracut
Configuration
with a very simple command:
# clevis bind luks -d /dev/vda2 tang '{"url":"http://192.168.122.194"}'
The advertisement contains the following signing keys:

FYquzVHwdsGXByX_rRwm0VEmFRo

Do you wish to trust these keys? [ynYN] y

You are about to initialize a LUKS device for metadata storage.
Attempting to initialize it may result in data loss if data was
already written into the LUKS header gap in a different format.
A backup is advised before initialization is performed.

Do you wish to initialize /dev/vda2? [yn] y

Enter existing LUKS password:
we’ve just configured our encrypted volume against tang!
Luks MetaData
We can verify it’s luks metadata with:
[root@centos7 ~]# luksmeta show -d /dev/vda2
0   active empty
1   active cb6e8904-81ff-40da-a84a-07ab9ab5715e
2 inactive empty
3 inactive empty
4 inactive empty
5 inactive empty
6 inactive empty
7 inactive empty
dracut
We must not forget to regenerate the initramfs image, that on boot will try to talk with our tang server:
[root@centos7 ~]# dracut -f
Reboot
Now it’s time to reboot!
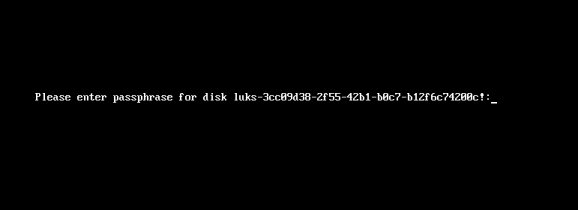
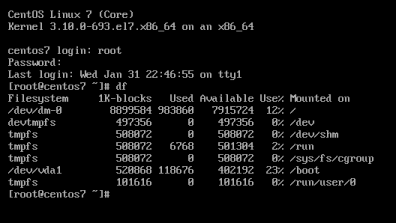
A short msg will appear in our screen, but in a few seconds and if successfully exchange messages with the tang server, our server with de-crypt the rootfs volume.
Tang messages
To finish this article, I will show you some tang msg via journalct:
Initialization
Getting the signing key from the client on setup:
Jan 31 22:43:09 centos7 systemd[1]: Started Tang Server (192.168.122.195:58088).
Jan 31 22:43:09 centos7 systemd[1]: Starting Tang Server (192.168.122.195:58088)...
Jan 31 22:43:09 centos7 tangd[1219]: 192.168.122.195 GET /adv/ => 200 (src/tangd.c:85)
reboot
Client is trying to decrypt the encrypted volume on reboot
Jan 31 22:46:21 centos7 systemd[1]: Started Tang Server (192.168.122.162:42370).
Jan 31 22:46:21 centos7 systemd[1]: Starting Tang Server (192.168.122.162:42370)...
Jan 31 22:46:22 centos7 tangd[1223]: 192.168.122.162 POST /rec/Shdayp69IdGNzEMnZkJasfGLIjQ => 200 (src/tangd.c:168)
I’ve written down some simple (i hope) instructions on creating an encrypted btrfs raid1 disk !
My notes have the form of a mini howto, you can read all about them here:
