It is a known fact, that my favorite hosting provider is edis. I’ve seen them improving their services all these years, without forgeting their customers. Their support is great and I am really happy working with them.
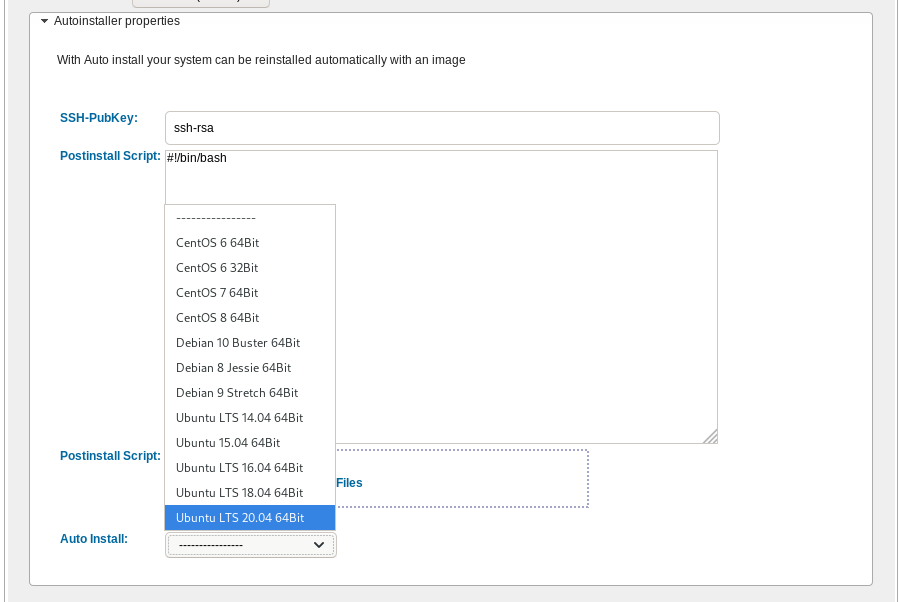
That said, they dont offer (yet) a public infrastructre API like hetzner, linode or digitalocean but they offer an Auto Installer option to configure your VPS via a post-install shell script, put your ssh key and select your basic OS image.

I am experimenting with this option the last few weeks, but I wanted to use my currect cloud-init configuration file without making many changes. The goal is to produce a VPS image that when finished will be ready to accept my ansible roles without making any addition change or even login to this VPS.
So here is my current solution on how to use the post-install option to provide my current cloud-init configuration!
cloud-init

Josh Powers @ DebConf17
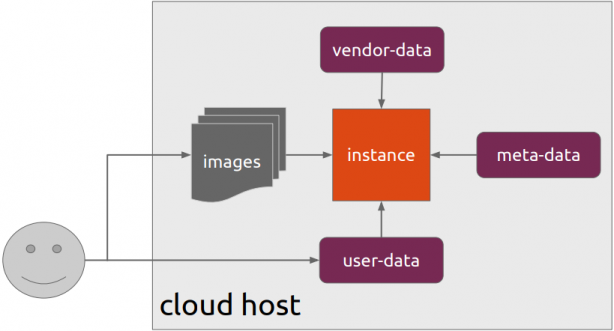
I will not get into cloud-init details in this blog post, but tldr; has stages, has modules, you provide your own user-data file (yaml) and it supports datasources. All these things is for telling cloud-init what to do, what to configure and when to configure it (in which step).
NoCloud Seed
I am going to use NoCloud datastore for this experiment.
so I need to configure these two (2) files
/var/lib/cloud/seed/nocloud-net/meta-data
/var/lib/cloud/seed/nocloud-net/user-data
Install cloud-init
My first entry in the post-install shell script should be
apt-get update && apt-get install cloud-initthus I can be sure of two (2) things. First the VPS has already network access and I dont need to configure it, and second install cloud-init software, just to be sure that is there.
Variables
I try to keep my user-data file very simple but I would like to configure hostname and the sshd port.
HOSTNAME="complimentary"
SSHDPORT=22422
Users
Add a single user, provide a public ssh key for authentication and enable sudo access to this user.
users:
  - name: ebal
    ssh_import_id:
      - gh:ebal
    shell: /bin/bash
    sudo: ALL=(ALL) NOPASSWD:ALL
Hardening SSH
- Change sshd port
- Disable Root
- Disconnect Idle Sessions
- Disable Password Auth
- Disable X Forwarding
- Allow only User (or group)
write_files:
  - path: /etc/ssh/sshd_config
    content: |
        Port $SSHDPORT
        PermitRootLogin no
        ChallengeResponseAuthentication no
        ClientAliveInterval 600
        ClientAliveCountMax 3
        UsePAM yes
        UseDNS no
        X11Forwarding no
        PrintMotd no
        AcceptEnv LANG LC_*
        Subsystem sftp  /usr/lib/openssh/sftp-server
        PasswordAuthentication no
        AllowUsers ebal
enable firewall
ufw allow $SSHDPORT/tcp && ufw enableremove cloud-init
and last but not least, I need to remove cloud-init in the end
apt-get -y autoremove --purge cloud-init lxc lxd snapdPost Install Shell script
let’s put everything together
#!/bin/bash

apt-get update && apt-get install cloud-init

HOSTNAME="complimentary"
SSHDPORT=22422

mkdir -p /var/lib/cloud/seed/nocloud-net

# Meta Data
cat > /var/lib/cloud/seed/nocloud-net/meta-data <<EOF
dsmode: local
EOF

# User Data
cat > /var/lib/cloud/seed/nocloud-net/user-data <<EOF
#cloud-config

disable_root: true
ssh_pwauth: no

users:
  - name: ebal
    ssh_import_id:
      - gh:ebal
    shell: /bin/bash
    sudo: ALL=(ALL) NOPASSWD:ALL

write_files:
  - path: /etc/ssh/sshd_config
    content: |
        Port $SSHDPORT
        PermitRootLogin no
        ChallengeResponseAuthentication no
        UsePAM yes
        UseDNS no
        X11Forwarding no
        PrintMotd no
        AcceptEnv LANG LC_*
        Subsystem sftp  /usr/lib/openssh/sftp-server
        PasswordAuthentication no
        AllowUsers ebal

# Set TimeZone
timezone: Europe/Athens

HOSTNAME: $HOSTNAME

# Install packages
packages:
  - figlet
  - mlocate
  - python3-apt
  - bash-completion

# Update/Upgrade & Reboot if necessary
package_update: true
package_upgrade: true
package_reboot_if_required: true

# PostInstall
runcmd:
  - figlet $HOSTNAME > /etc/motd
  - updatedb
  # Firewall
  - ufw allow $SSHDPORT/tcp && ufw enable
  # Remove cloud-init
  - apt-get -y autoremove --purge cloud-init lxc lxd snapd
  - apt-get -y --purge autoremove
  - apt -y autoclean
  - apt -y clean all

EOF

cloud-init clean --logs

cloud-init init --local
That’s it !
After a while (needs a few reboot) our VPS is up & running and we can use ansible to configure it.