CAA
Reading RFC 6844 you will find the definition of “DNS Certification Authority Authorization (CAA) Resource Record”.
You can read everything here: RFC 6844
So, what is CAA anyhow?
Certificate Authority
In a nutshell you are declaring which your Certificate Authority is for your domain.
It’s another way to verify that the certificate your site is announcing is in fact signed by the issuer that the certificate is showing.
So let’s see what my certificate is showing:

DNS
Now, let’s find out what my DNS is telling us:
# dig caa balaskas.gr

;; ANSWER SECTION:
balaskas.gr.        5938    IN  CAA 1 issue "letsencrypt.org"
Testing
You can also use the Qualys ssl server test:
https://www.ssllabs.com/ssltest/

Postfix
smtp Vs smtpd

- postfix/smtp
- The SMTP daemon is for sending emails to the Internet (outgoing mail server).
- postfix/smtpd
- The SMTP daemon is for receiving emails from the Internet (incoming mail server).
TLS
Encryption on mail transport is what we call: opportunistic. If both parties (sender’s outgoing mail server & recipient’s incoming mail server) agree to exchange encryption keys, then a secure connection may be used. Otherwise a plain connection will be established. Plain as in non-encrypted aka cleartext over the wire.
SMTP - Outgoing Traffic
In the begging there where only three options in postfix:
- none
- may
- encrypt
The default option on a Centos 6x is none:
# postconf -d | grep smtp_tls_security_level
smtp_tls_security_level =
Nowadays, postfix supports more options, like:
- dane
- verify
- secure
Here is the basic setup, to enable TLS on your outgoing mail server:
smtp_tls_security_level = may
smtp_tls_loglevel = 1
From postfix v2.6 and later, can you disable weak encryption by selecting the cipher suite and protocols you prefer to use:
smtp_tls_ciphers = export
smtp_tls_protocols = !SSLv2, !SSLv3
You can also define where the file that holds all the root certificates on your linux server is, and thus to verify the certificate that provides an incoming mail server:
smtp_tls_CAfile = /etc/pki/tls/certs/ca-bundle.crt
I dont recommend to go higher with your setup, cause (unfortunately) not everyone is using TLS on their incoming mail server!
SMTPD - Incoming Traffic
To enable TLS in your incoming mail server, you need to provide some encryption keys aka certificates!
I use letsencrypt on my server and the below notes are based on that.
Let’s Encrypt
A quick explanation on what exists on your letsencrypt folder:
# ls -1 /etc/letsencrypt/live/example.com/

privkey.pem    ===>  You Private Key
cert.pem       ===>  Your Certificate
chain.pem      ===>  Your Intermediate
fullchain.pem  ===>  Your Certificate with Your Intermediate
Postfix
Below you can find the most basic configuration setup you need for your incoming mail server.
smtpd_tls_ask_ccert = yes
smtpd_tls_security_level = may
smtpd_tls_loglevel = 1
Your mail server is asking for a certificate so that a trusted TLS connection can be established between outgoing and incoming mail server.
The servers must exchange certificates and of course, verify them!
Now, it’s time to present your own domain certificate to the world. Offering only your public certificate cert.pem isnt enough. You have to offer both your certificate and the intermediate’s certificate, so that the sender’s mail server can verify you, by checking the digital signatures on those certificates.
smtpd_tls_cert_file = /etc/letsencrypt/live/example.com/fullchain.pem
smtpd_tls_key_file = /etc/letsencrypt/live/example.com/privkey.pem

smtpd_tls_CAfile = /etc/pki/tls/certs/ca-bundle.crt
smtpd_tls_CApath = /etc/pki/tls/certs
CAfile & CApath helps postfix to verify the sender’s certificate by looking on your linux distribution file, that holds all the root certificates.
And you can also disable weak ciphers and protocols:
smtpd_tls_ciphers = high
smtpd_tls_exclude_ciphers = aNULL, MD5, EXPORT
smtpd_tls_protocols = !SSLv2, !SSLv3
Logs
Here is an example from gmail:
SMTPD - Incoming Mail from Gmail
You can see that there is a trusted TLS connection established From google:
Jun  4 11:52:07 kvm postfix/smtpd[14150]:
        connect from mail-oi0-x236.google.com[2607:f8b0:4003:c06::236]
Jun  4 11:52:08 kvm postfix/smtpd[14150]:
        Trusted TLS connection established from mail-oi0-x236.google.com[2607:f8b0:4003:c06::236]:
        TLSv1.2 with cipher ECDHE-RSA-AES128-GCM-SHA256 (128/128 bits)
Jun  4 11:52:09 kvm postfix/smtpd[14150]:
        4516420F32: client=mail-oi0-x236.google.com[2607:f8b0:4003:c06::236]
Jun  4 11:52:10 kvm postfix/smtpd[14150]:
        disconnect from mail-oi0-x236.google.com[2607:f8b0:4003:c06::236]
SMTP - Outgoing Mail from Gmail
And this is the response To gmail :
Jun  4 12:01:32 kvm postfix/smtpd[14808]:
        initializing the server-side TLS engine
Jun  4 12:01:32 kvm postfix/smtpd[14808]:
        connect from example.com[2a00:1838:20:1::XXXX:XXXX]
Jun  4 12:01:33 kvm postfix/smtpd[14808]:
        setting up TLS connection from example.com[2a00:1838:20:1::XXXX:XXXX]
Jun  4 12:01:33 kvm postfix/smtpd[14808]:
        example.com[2a00:1838:20:1::XXXX:XXXX]: TLS cipher list "aNULL:-aNULL:ALL:!EXPORT:!LOW:!MEDIUM:+RC4:@STRENGTH:!aNULL:!MD5:!EXPORT:!aNULL"
Jun  4 12:01:33 kvm postfix/smtpd[14808]:
        Anonymous TLS connection established from example.com[2a00:1838:20:1::XXXX:XXXX]:
        TLSv1.2 with cipher ECDHE-RSA-AES128-GCM-SHA256 (128/128 bits)
Jun  4 12:01:35 kvm postfix/smtpd[14808]:
        disconnect from example.com[2a00:1838:20:1::XXXX:XXXX]
As you can see -In both cases (sending/receiving)- the mail servers have established a trusted secure TLSv1.2 connection.
The preferred cipher (in both scenarios) is : ECDHE-RSA-AES128-GCM-SHA256
IPv6
Tell postfix to prefer ipv6 Vs ipv4 and use TLS if two mail servers support it !
#IPv6
smtp_address_preference = ipv6
What is the time?
Time offset is the amount of time that is off (or drift) from a specific value. In Linux systems, date is been calculating from the beginning of time. That is 00:00:00 1 January 1970 or as it called Unix Time and systems define date (time) as the number of seconds that have elapsed from 01.01.1970.
It is so important that even a few seconds off can cause tremendous disaster in data centers and applications.
Network Time
To avoid problems with time, systems must and should synchronize their time over the Internet every now and then. This is being done by asking a central NTP server via Network Time Protocol. The most common scenario for infrastructures is to have one or two NTP servers and then all the systems inside this infrastructure can synchronize their time from those machines.
Nagios - NRPE
In my case, I have a centralized NTP Daemon that runs on the Nagios Linux machine. That gives me the opportunity to check the EPOCH time of any system in my infrastructure against the time that the Nagios Server has.
Nagios Check
This is the script I am using:
# ebal, Thu, 11 May 2017 12:08:50 +0000

# EPOCH
TIME=$1
WARN=5
CRIT=10

# seconds
OFFSET=$( echo $(( $(date -d 'now ' +%s) - ${TIME} )) | sed -e 's#-##g' )

if [ "${OFFSET}" -lt "${WARN}" ]; then
        echo "OK"
        exit 0
elif [ "${OFFSET}" -ge "${CRIT}" ]; then
        echo "CRITICAL- ${OFFSET}"
        exit 2
elif [ "${OFFSET}" -lt "${CRIT}" ]; then
        echo "WARNING- ${OFFSET}"
        exit 1
else
        echo "UNKNOWN- ${OFFSET}"
        exit 3
fi
In a nutshell the script gets as the first argument an epoch time and calculate the diff between it’s own epoch time and that.
Example
./check_time_offset $(date -d 'now + 1 min' +%s)
The output is this:
CRITICAL- 60
Nrpe Configuration
This is the configuration for nrpe to run the check_time_offset
# tail -1 /etc/nrpe.d/time_offset.cfg
command[check_time_offset]=/usr/lib64/nagios/plugins/check_time_offset $ARG1$Nagios Configuration
and this is my nagios configuration setup to use a remote nrpe :
define service{
        use                             service-critical
        hostgroup_name                  lnxserver01
        service_description             time_offset
        check_command                   check_nrpe!check_time_offset!$TIMET$
        }
Take a minute to observer a little better the nrpe command.
check_nrpe!check_time_offset!$TIMET$
TIMET
I was having problems passing the nagios epoch time as an argument on the definition of the above service.
Testing the nrpe command as below, I was getting the results I was looking for:
./check_nrpe -H lnxserver01 -c check_time_offset -a $(date -d 'now + 6 sec' +%s)
But is there a way to pass as a nagios argument the output of a command ?
- No
A dear colleague of mine mentioned nagios macros:
$TIMET$ Current time stamp in time_t format (seconds since the UNIX epoch)Perfect !!!
The problem
The last couple weeks, a backup server I am managing is failing to make backups!
The backup procedure (a script via cron daemon) is to rsync data from a primary server to it’s /backup directory. I was getting cron errors via email, informing me that the previous rsync script hasnt already finished when the new one was starting (by checking a lock file). This was strange as the time duration is 12hours. 12 hours werent enough to perform a ~200M data transfer over a 100Mb/s network port. That was really strange.
This is the second time in less than a year that this server is making problems. A couple months ago I had to remove a faulty disk from the software raid setup and check the system again. My notes on the matter, can be found here:
https://balaskas.gr/blog/2016/10/17/linux-raid-mdadm-md0/
Identify the problem
So let us start to identify the problem. A slow rsync can mean a lot of things, especially over ssh. Replacing network cables, viewing dmesg messages, rebooting servers or even changing the filesystem werent changing any things for the better. Time to move on the disks.
Manage and Monitor software RAID devices
On this server, I use raid5 with four hard disks:
# mdadm --verbose --detail /dev/md0
/dev/md0:
        Version : 1.2
  Creation Time : Wed Feb 26 21:00:17 2014
     Raid Level : raid5
     Array Size : 2929893888 (2794.16 GiB 3000.21 GB)
  Used Dev Size : 976631296 (931.39 GiB 1000.07 GB)
   Raid Devices : 4
  Total Devices : 4
    Persistence : Superblock is persistent

    Update Time : Sun May  7 11:00:32 2017
          State : clean
 Active Devices : 4
Working Devices : 4
 Failed Devices : 0
  Spare Devices : 0

         Layout : left-symmetric
     Chunk Size : 512K

           Name : ServerTwo:0  (local to host ServerTwo)
           UUID : ef5da4df:3e53572e:c3fe1191:925b24cf
         Events : 10496

    Number   Major   Minor   RaidDevice State
       4       8       16        0      active sync   /dev/sdb
       1       8       32        1      active sync   /dev/sdc
       6       8       48        2      active sync   /dev/sdd
       5       8        0        3      active sync   /dev/sda
View hardware parameters of hard disk drive
aka test the hard disks:
# hdparm -Tt /dev/sda
/dev/sda:
 Timing cached reads:   2490 MB in  2.00 seconds = 1245.06 MB/sec
 Timing buffered disk reads: 580 MB in  3.01 seconds = 192.93 MB/sec
# hdparm -Tt /dev/sdb
/dev/sdb:
 Timing cached reads:   2520 MB in  2.00 seconds = 1259.76 MB/sec
 Timing buffered disk reads: 610 MB in  3.00 seconds = 203.07 MB/sec
# hdparm -Tt /dev/sdc
/dev/sdc:
 Timing cached reads:   2512 MB in  2.00 seconds = 1255.43 MB/sec
 Timing buffered disk reads: 570 MB in  3.01 seconds = 189.60 MB/sec
# hdparm -Tt /dev/sdd
/dev/sdd:
 Timing cached reads:     2 MB in  7.19 seconds = 285.00 kB/sec
 Timing buffered disk reads:   2 MB in  5.73 seconds = 357.18 kB/sec
Root Cause
Seems that one of the disks (/dev/sdd) in raid5 setup, is not performing as well as the others. The same hard disk had a problem a few months ago.
What I did the previous time, was to remove the disk, reformatting it in Low Level Format and add it again in the same setup. The system rebuild the raid5 and after 24hours everything was performing fine.
However the same hard disk seems that still has some issues . Now it is time for me to remove it and find a replacement disk.
Remove Faulty disk
I need to manually fail and then remove the faulty disk from the raid setup.
Failing the disk
Failing the disk manually, means that mdadm is not recognizing the disk as failed (as it did previously). I need to tell mdadm that this specific disk is a faulty one:
# mdadm --manage /dev/md0 --fail /dev/sdd
mdadm: set /dev/sdd faulty in /dev/md0
Removing the disk
now it is time to remove the faulty disk from our raid setup:
# mdadm --manage /dev/md0 --remove  /dev/sdd
mdadm: hot removed /dev/sdd from /dev/md0
Show details
# mdadm --verbose --detail /dev/md0
/dev/md0:
        Version : 1.2
  Creation Time : Wed Feb 26 21:00:17 2014
     Raid Level : raid5
     Array Size : 2929893888 (2794.16 GiB 3000.21 GB)
  Used Dev Size : 976631296 (931.39 GiB 1000.07 GB)
   Raid Devices : 4
  Total Devices : 3
    Persistence : Superblock is persistent

    Update Time : Sun May  7 11:08:44 2017
          State : clean, degraded
 Active Devices : 3
Working Devices : 3
 Failed Devices : 0
  Spare Devices : 0

         Layout : left-symmetric
     Chunk Size : 512K

           Name : ServerTwo:0  (local to host ServerTwo)
           UUID : ef5da4df:3e53572e:c3fe1191:925b24cf
         Events : 10499

    Number   Major   Minor   RaidDevice State
       4       8       16        0      active sync   /dev/sdb
       1       8       32        1      active sync   /dev/sdc
       4       0        0        4      removed
       5       8        0        3      active sync   /dev/sda
Mounting the Backup
Now it’s time to re-mount the backup directory and re-run the rsync script
mount /backup/
and run the rsync with verbose and progress parameters to review the status of syncing
/usr/bin/rsync -zravxP --safe-links --delete-before --partial --protect-args -e ssh 192.168.2.1:/backup/ /backup/
Everything seems ok.
A replacement order has already been placed.
Rsync times manage to hit ~ 10.27MB/s again!
rsync time for a daily (12h) diff is now again in normal rates:
real    15m18.112s
user    0m34.414s
sys 0m36.850sPowerDNS
My Authoritative PowerDNS configuration, is relatively simple:
Configuration
Here is my configuration:
# egrep -v '^($|#)' pdns.conf
guardian=yes
launch=bind
bind-config=/etc/pdns/named.conf
local-address=MY_IPv4_ADDRESS
local-ipv6=MY_IPv6_ADDRESS
setgid=pdns
setuid=pdns
Bind Backend
I am using a bind backend because I used to run a bind dns server and I am too lazy to change it.
the named.conf doesnt have much:
zone "balaskas.gr" IN {
    type master;
    file "/etc/pdns/var/balaskas.gr";
};
Logs
Today, I’ve noticed some unusual traffic to my server, so I’ve enabled the logging features:
log-dns-details=yes
log-dns-queries=yes
query-logging=yes
DDoS
The horror !!!
In less than 10minutes or so, almost 2500 “unique” IPs were “attacking” my auth-dns with random queries.
Let me give you an example:
utmzcnqjytkpmnop.madingyule.net
gdqlozsdqngdidkb.madingyule.net
wrojktwlwhevwtup.madingyule.net
enozexazqxoj.madingyule.net
izahejotetwlkhql.madingyule.net
IPtables
iptables to the rescue:
iptables -I INPUT -m string --algo bm --string "madingyule" -j DROP
Any dns query with the string madingyule will be blocked in INPUT chain with Boyer–Moore string search algorithm.
dnsdist
I need a more permanent solution than reading logs and block attacks with iptables, so I’ve asked the IRC about it. They pointed me to dnsdist.
I’ve already knew about dnsdist but I always thought it was a solution for recursors and not for auth-ns.
I was wrong! dnsdist is a highly DNS-, DoS- and abuse-aware loadbalancer and works fine for auth-ns setup too.
pdns configuration
My auth-ns configuration had to change to something like this:
any-to-tcp=no
disable-tcp=yes
dname-processing=yes
guardian=yes
launch = bind
bind-config = /etc/pdns/named.conf
local-address=127.0.0.1
local-port=5353
Disabling any global listener and tcp.
dnsdist configuration
here is my dnsdist configuration:
/etc/dnsdist/dnsdist.conf
-- accept DNS queries on UDP and TCP
addLocal("MY_IPv4_IP:53")
addLocal("[MY_IPv6_IP]:53")

-- fwd queries to localhost
newServer({address="127.0.0.1:5353"})

-- resets the list to this array
setACL("::/0")
addACL("0.0.0.0/0")
I am not 100% sure about the ACL but everything seems ok.
Thats it !!!! - Finished
dnsdist - client
To connect to the dnsdist daemon, you need to add the below configuration:
controlSocket("127.0.0.1")That means, after reloading the daemon, you can connect on it with:
# dnsdist -c
Extra
Logs
 -- log everything
 addAction(AllRule(), LogAction("/var/log/dnsdist.log", false, true, false))
Domain Blocking
Let’s start with the above iptables example:
addDomainBlock("wanbo88.net.")

addDomainBlock("madingyule.net.")
You can connect to dnsdist client (see above) and and any domain you wan to block without restarting your dnsdist service.
Allow Action
Another trick you can do, is to create some custom rules by allowing any DNS queries for your domains and drop any other dns query. You can do this with something like that:
addAction(makeRule("balaskas.gr.")   , AllowAction())
addAction(makeRule("balaskas.gr.")  , AllowAction())

addAction(AllRule()                  , DropAction())
Rule Order
Just remember, that the rules will be processed in line order of the file.
Block ANY
You can drop all ANY queries with:
addAction(QTypeRule(dnsdist.ANY), DropAction())although I dont recommend it.
Rate-Limiting - QPS (Queries Per Second)
Now to the good stuff: rate limiting
A simple rule is something like the below:
-- drop queries exceeding 5 qps, grouped by /24 for IPv4 and /64 for IPv6
addAction(MaxQPSIPRule(5, 24, 64), DropAction())
If you want to drop everything when they pass the 5qps:
addAction(MaxQPSIPRule(5), DropAction())Delay
An alternative approach is to delay everything for more than 5qps (rate limiting), this may make the bot (ddos) to overlook you.
-- Delay for 1000ms aka 1s for 5qps
addDelay(MaxQPSIPRule(5), 1000)
File Descriptors
Working on a VPS (virtual private server), I’ve troubled with file descriptors.
Message in logs from dnsdist is:
Warning, this configuration can use more than 1057 file descriptors, web server and console connections not included, and the current limit is 1024
From the command line you can tweak it to 2048 like this:
# ulimit -n 2048
If you need to make it permanent:
vim /etc/security/limits.conf
* - nofile 2048Traffic
okei, it’s time to see what’s the traffic:
topQueries(20,2)will report the domains that are reaching to our dnsdsist.
topQueries() will report everything
topQueries(20,1)will report TLD (Top Level Domains)
Identify your traffic:
grepq("balaskas.gr")Monit
So dnsdist is now in front of my powerdns auth-ns setup and handles everything, blocking what is necessary.
To be sure that the daemon is up and running:
/etc/monit.d/dnsdist.monit
check process dnsdist with pidfile /var/run/dnsdist.pid
    alert evaggelos_AT_balaskas_DOT_gr only on { timeout, nonexist }
    start program = "/etc/init.d/dnsdist start"
    stop program  = "/etc/init.d/dnsdist stop"
dnsdist - basics
Some basic commands about dnsdist (when connecting to the client):
Commands:
addAction(                         addAnyTCRule()                     addDelay(
addDisableValidationRule(          addDNSCryptBind(                   addDomainBlock(
addDomainSpoof(                    addDynBlocks(                      addLocal(
addLuaAction(                      addNoRecurseRule(                  addPoolRule(
addQPSLimit(                       addQPSPoolRule(                    addResponseAction(
AllowAction()                      AllowResponseAction()              AllRule()
AndRule(                           benchRule(                         carbonServer(
clearDynBlocks()                   clearQueryCounters()               clearRules()
controlSocket(                     DelayAction(                       DelayResponseAction(
delta()                            DisableValidationAction()          DropAction()
DropResponseAction()               dumpStats()                        exceedNXDOMAINs(
exceedQRate(                       exceedQTypeRate(                   exceedRespByterate(
exceedServFails(                   firstAvailable                     fixupCase(
generateDNSCryptCertificate(       generateDNSCryptProviderKeys(      getPoolServers(
getQueryCounters(                  getResponseRing()                  getServer(
getServers()                       grepq(                             leastOutstanding
LogAction(                         makeKey()                          MaxQPSIPRule(
MaxQPSRule(                        mvResponseRule(                    mvRule(
newDNSName(                        newQPSLimiter(                     newRemoteLogger(
newRuleAction(                     newServer(                         newServerPolicy(
newSuffixMatchNode()               NoRecurseAction()                  PoolAction(
printDNSCryptProviderFingerprint(  QNameLabelsCountRule(              QNameWireLengthRule(
QTypeRule(                         RCodeRule(                         RegexRule(
registerDynBPFFilter(              RemoteLogAction(                   RemoteLogResponseAction(
rmResponseRule(                    rmRule(                            rmServer(
roundrobin                         setACL(                            setAPIWritable(
setDNSSECPool(                     setECSOverride(                    setECSSourcePrefixV4(
setECSSourcePrefixV6(              setKey(                            setLocal(
setMaxTCPClientThreads(            setMaxTCPQueuedConnections(        setMaxUDPOutstanding(
setQueryCount(                     setQueryCountFilter(               setRules(
setServerPolicy(                   setServerPolicyLua(                setServFailWhenNoServer(
setTCPRecvTimeout(                 setTCPSendTimeout(                 setUDPTimeout(
setVerboseHealthChecks(            show(                              showACL()
showDNSCryptBinds()                showDynBlocks()                    showResponseLatency()
showResponseRules()                showRules()                        showServerPolicy()
showServers()                      showTCPStats()                     showVersion()
shutdown()                         SpoofAction(                       TCAction()
testCrypto()                       topBandwidth(                      topClients(
topQueries(                        topResponseRule()                  topResponses(
topRule()                          topSlow(                           truncateTC(
unregisterDynBPFFilter(            webserver(                         whashed
wrandom                            addACL(
dnsdist - ACL
Keep in mind that the default ACL is:
> showACL()
127.0.0.0/8
10.0.0.0/8
100.64.0.0/10
169.254.0.0/16
192.168.0.0/16
172.16.0.0/12
::1/128
fc00::/7
fe80::/10
Log Rotate
/etc/logrotate.d/dnsdist
/var/log/dnsdist.log {
    rotate 7
    daily
    dateext
    delaycompress
    compress
    postrotate
        [ ! -f /var/run/dnsdist.pid ] || kill -USR1 `cat /var/run/dnsdist.pid`
    endscript
}
Working with VPS (Virtual Private Server), sometimes means that you dont have a lot of memory.
That’s why, we use the swap partition, a system partition that our linux kernel use as extended memory. It’s slow but necessary when your system needs more memory. Even if you dont have any free partition disk, you can use a swap file to add to your linux system.
Create the Swap File
[root@centos7] # dd if=/dev/zero of=/swapfile count=1000 bs=1MiB
1000+0 records in
1000+0 records out
1048576000 bytes (1.0 GB) copied, 3.62295 s, 289 MB/s

[root@centos7] # du -sh /swapfile
1.0G    /swapfile
That is 1G file
Make Swap
[root@centos7] # mkswap -L swapfs /swapfile
Setting up swapspace version 1, size = 1048572 KiB
LABEL=swapfs, UUID=d8af8f19-5578-4c8e-b2b1-3ff57edb71f9
Permissions
[root@centos7] # chmod 0600 /swapfile
Activate
[root@centos7] # swapon /swapfile
Check
# free
              total        used        free      shared  buff/cache   available
Mem:        1883716     1613952       79172       54612      190592       64668
Swap:       1023996           0     1023996
fstab
Now for the final step, we need to edit /etc/fstab
/swapfile swap swap defaults 0 0prerequisites
You need to already have a LDAP instance in your infrastructure that you can reach from your test linux machine. Your ldap has an organization unit for people and one for groups.
Ldap server conf
It is always a good thing to write your notes/settings beforehand:
Ldap Server: myldapserver.example.org
Domain Component: dc=example,dc=org

People base: ou=people,dc=example,dc=org
Group base: ou=Groups,dc=example,dc=org

bind user: userpam
bind pass: 1234567890
Installation
On your centos 7 machine, you have to install two packages:
# yum -y install nss-pam-ldapd

  Installing : nscd-2.17-157.el7_3.1.x86_64
  Installing : nss-pam-ldapd-0.8.13-8.el7.x86_64
local LDAP name service daemon
Edit the /etc/nslcd.conf file accordingly to your ldap setup.
# grep -Ev '#|^$' /etc/nslcd.conf
uid nslcd
gid ldap

uri ldap://myldapserver.example.org
base ou=people,dc=example,dc=org

ssl no
tls_cacertdir /etc/openldap/cacerts
This is the most basic configuration file, without any TLS (encryption) support, but for our test purposes is ok.
restart nslcd
Every time you change something to nslcd.conf file, you need to restart the service:
# systemctl restart nslcd
Name Service Switch
By default the Name Service Switch have ldap support for the below pam services:
# grep ldap /etc/nsswitch.conf

passwd:     files sss ldap
shadow:     files sss ldap
group:      files sss ldap
netgroup:   files sss ldap
automount:  files ldap
if not, just add it yourself. Just remember that the order is from left to right, that means your centos machine will first try to look in your local files, then to your System Security Services Daemon and finally to your ldap URI !
Testing
In this first step, the only way to test that your linux machine can talk to your linux server is via getent looking up on the passwd service:
# getent passwd | grep ebal

ebal:x:374:374:Evaggelos Balaskas:/home/ebal:/bin/bash
Ldap Bind Password
The above example is for anonymous bind against your ldap server. That means that secrets (as the password of the user) can not be viewed (actually tested it on the encrypted hash) as for that you need to bind to your ldap server with your credentials.
# egrep -v '^$|#' /etc/nslcd.conf

uid nslcd
gid ldap
uri ldap://myldapserver.example.org
base ou=people,dc=example,dc=org

binddn cn=userpam,dc=example,dc=org
bindpw 1234567890

ssl no
tls_cacertdir /etc/openldap/cacerts
restart nslcd
# systemctl restart nslcd
Testing
Now it’s time for your first ssh login:
~> ssh testvm
ebal@testvm's password:

Last login: Mon Feb 13 22:50:12 2017
/usr/bin/id: cannot find name for group ID 374

~>  id
uid=374(ebal) gid=374 groups=374
You can login without problem, but there is a warning for your group id.
Ldap Group Configuration
So, we need to add support for our group base on the nslcd configuration file:
# egrep -v '^$|#' /etc/nslcd.conf

uid nslcd
gid ldap
uri ldap://myldapserver.example.org
base ou=people,dc=example,dc=org
binddn cn=userpam,dc=example,dc=org
bindpw 1234567890

base group ou=Groups,dc=example,dc=org

ssl no
tls_cacertdir /etc/openldap/cacerts
restart nslcd
# systemctl restart nslcdtesting
We first test it against getent using the group service:
# getent group | grep 374
ebal:*:374
and after that, we can ssh again to our linux machine:
~> ssh testvm
ebal@testvm's password:
Last login: Mon Feb 13 23:14:42 2017 from testserver

~> id
uid=374(ebal) gid=374(ebal) groups=374(ebal)
Now it shows the group name without a problem.
Fairphone FP1U
I have this phone for more than 3,5 years

running on Android v4.2 !
Gapps
I dont have them, I dont even have a google account.
Although fairphone comes with an extra GApps package zip, I haven’t installed them either.
Fake GApps
Unfortunately there are some android apps that need GApps to run. So, without any further ado, here are my notes on how to add support for alternative open sources.
Disclaimer
Device may brick ! Do a full backup and keep it somewhere safe.
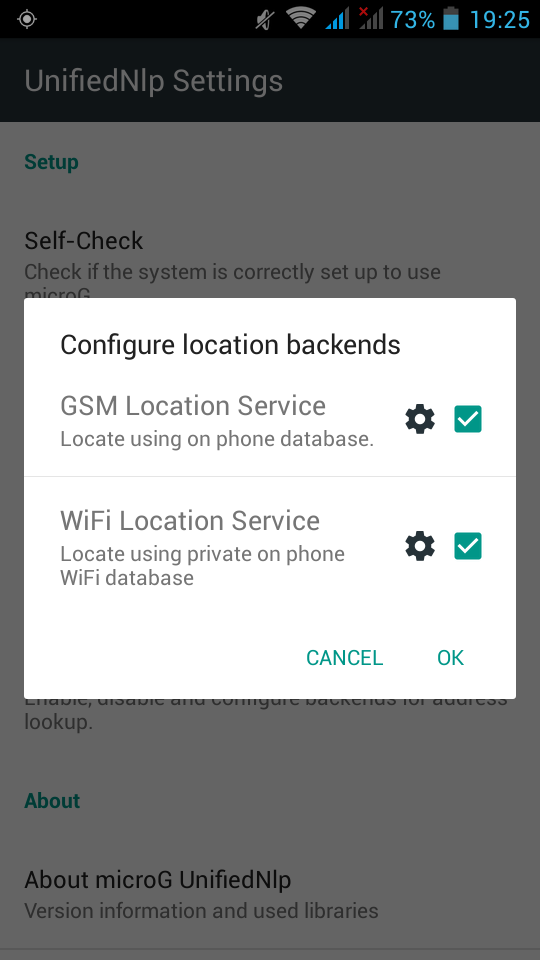
Location Service
We start with the easy one, how to add support for location service.
In Fdroid we can find the UnifiedNlp suite of packages that work as a Location provider middleware. On my device, I installed the below apps:
https://f-droid.org/repository/browse/?fdfilter=UnifiedNlp
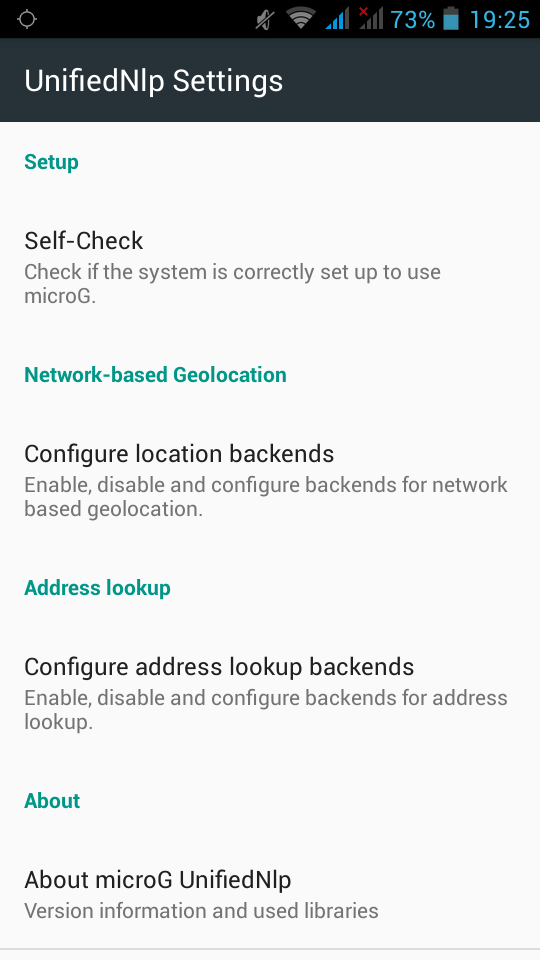
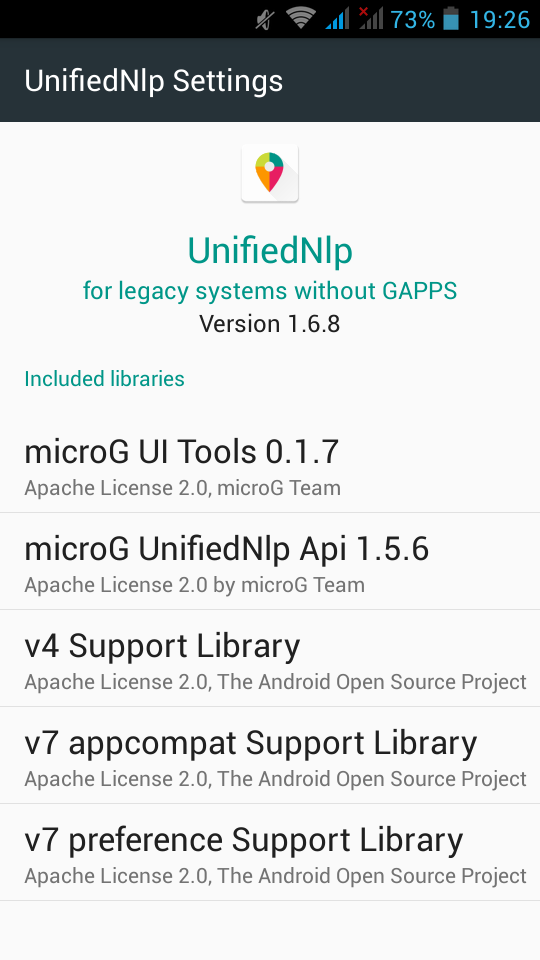
UnifiedNlp
Screenshots from my fairphone, after a few reboots
Unified github
Just to make things perfectly clear, you can verify fdroid’s packages against these:
https://github.com/microg/android_packages_apps_UnifiedNlp/releases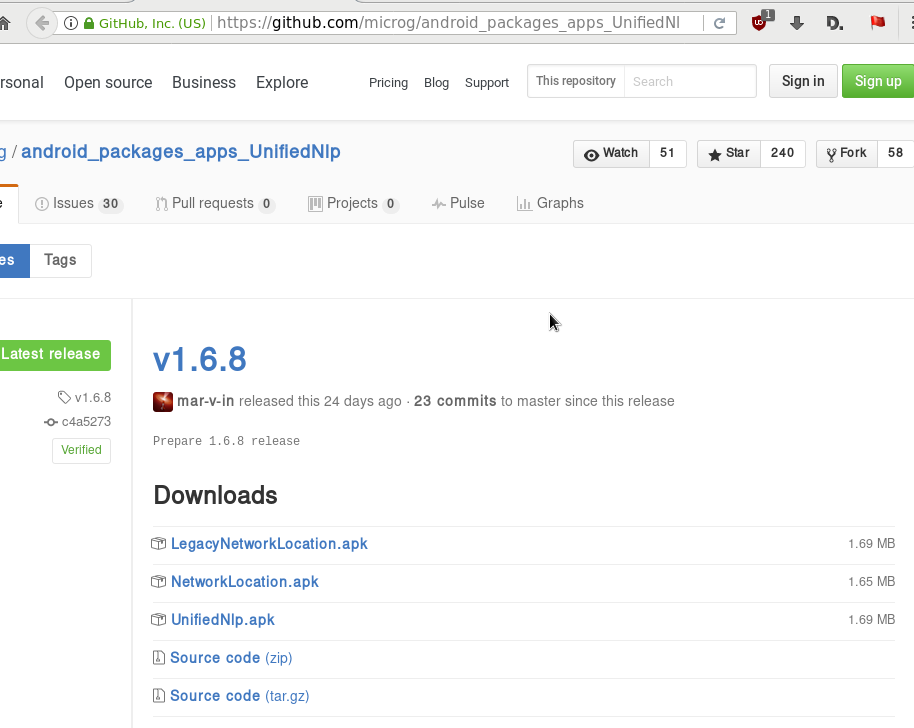
Google Play Store
So notes are referring to Phonesky … I didnt follow them !!!
Instead of phonesky, I installed BlankStore !
Here is the github repo: BlankStore v0.7.5
https://github.com/mar-v-in/BlankStore/releases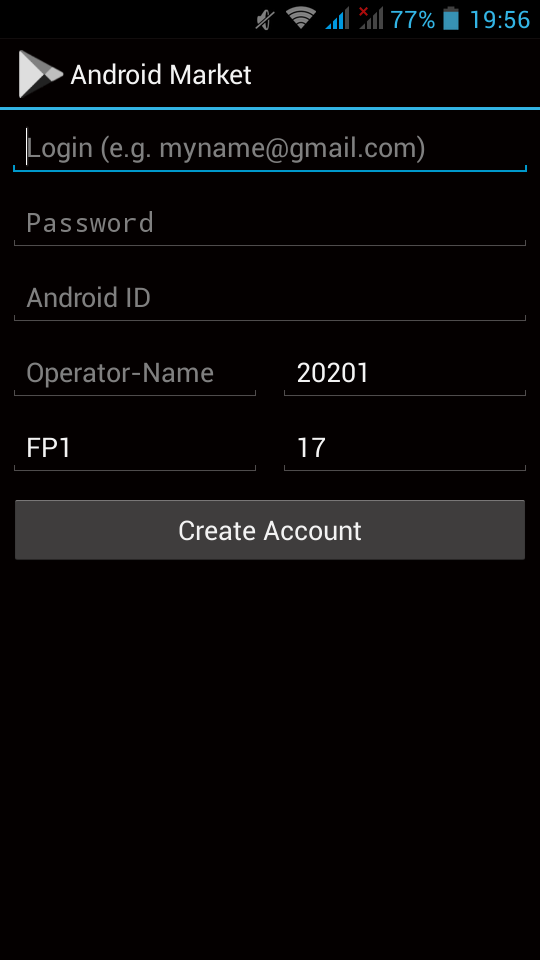
microG
Now are going to a more interesting part. We need to install the μG to our phone.
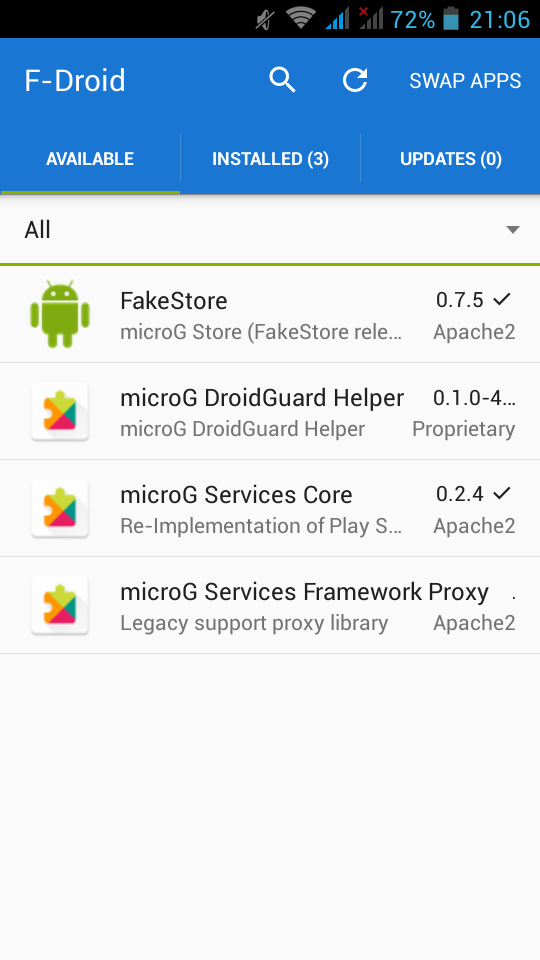
microG F-Droid repo
It’s really easy, just add the fdroid repository and install the below two apps:
https://microg.org/fdroid/repo?fingerprint=9BD06727E62796C0130EB6DAB39B73157451582CBD138E86C468ACC395D14165- microG Services Core
- microG Services Framework Proxy
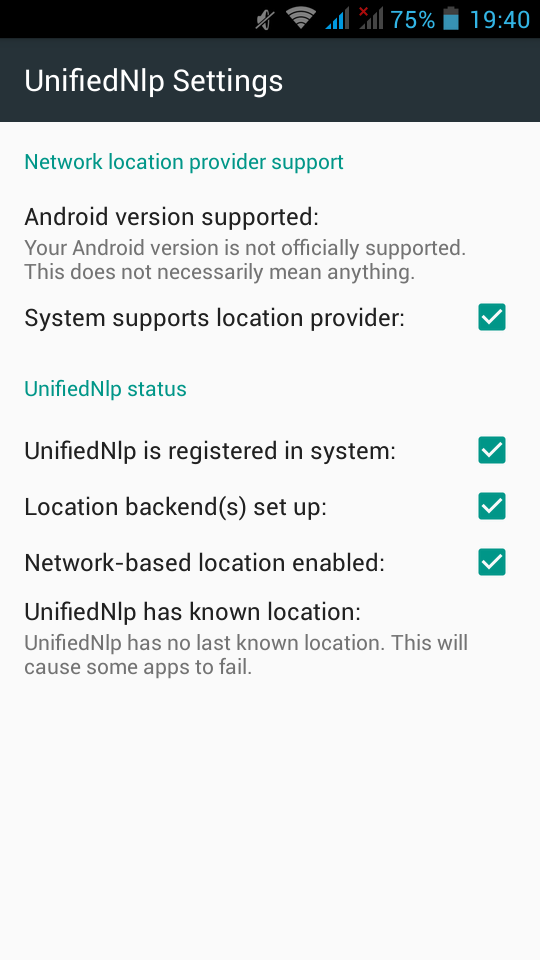
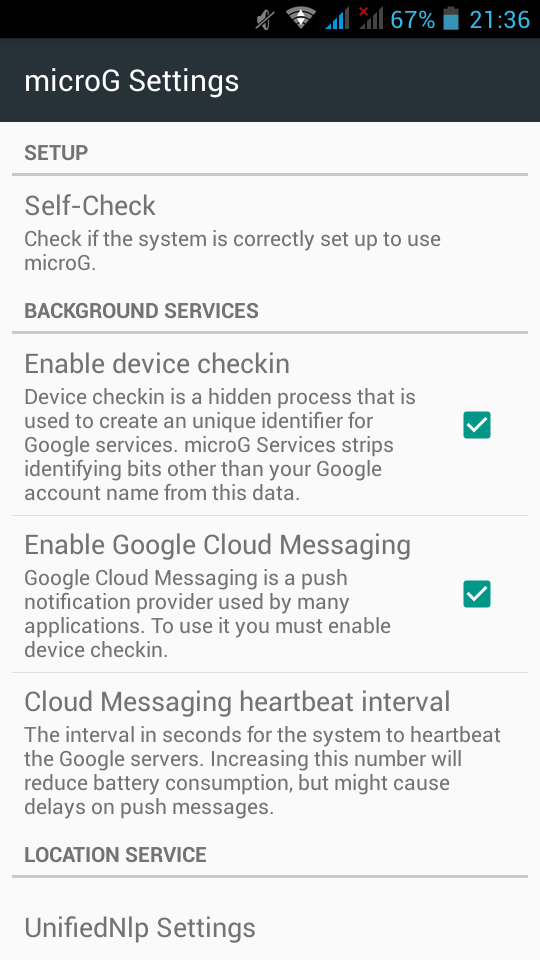
microG Services Core
Now the difficult part.
Opening microG self-checked, we are going to see that spoof signature is not passing the test.
Xposed
Now the most difficult and dangerous thing you will need to do with your phone.
We need to install Xposed Installer
For Fairphone FP1U we need:
Package:  de.robv.android.xposed.installer
Version name:  2.7 experimental
Download: de.robv.android.xposed.installer_v33_36570c.apk (770.28 KB)
MD5: 36570c6fac687ffe08107e6a72bd3da7
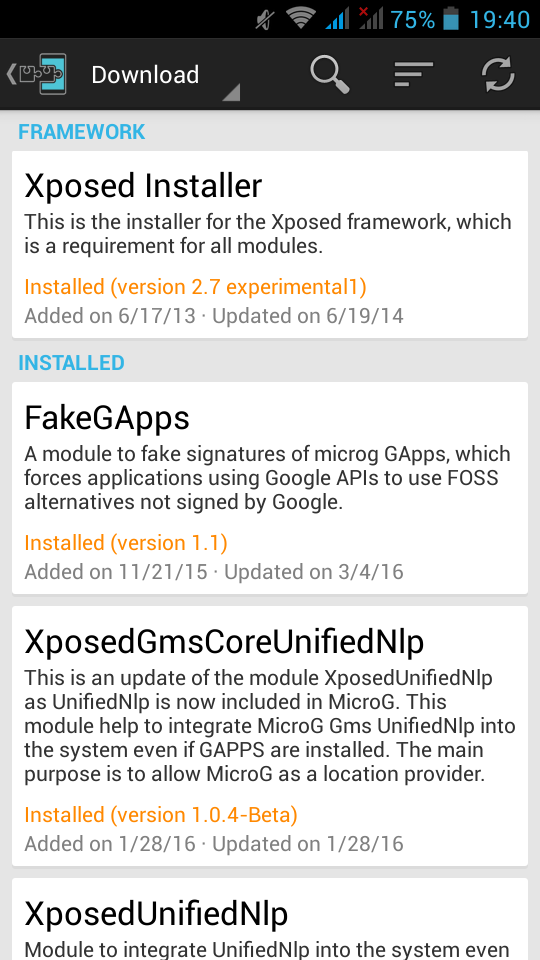
after that, we have to install the below xposed modules:
- Xposed Installer
- FakeGApps
- XposedGmsCoreUnifiedNlp
- XposedUnifiedNlp
download them and reboot your phone. If you think it may be helpful, cross your fingers.
This is a good time to remind you that you need to have a fresh backup
microG
Now let’s reboot our mobile phone again and try to open μG once more:

If everything seems like the above pictures, then you are done !
Errata 20170211
For android users with v4.2 on it, there are a few errata!
Location Services
You need the legacy network location package from UnifiedNlp
LegacyNetworkLocation.apkμG - microG
The latest online version -somehow- doesnt work with my phone perfectly.
You can use the build from BRNmod an alternative CyanogenMod
https://files.brnmod.rocks/apps/GmsCore/Latest/

play-services-core-debug.apk 27-Jan-2017 11:22 4188872Systemd Timers
It’s time to see an example on timers in systemd.
Intro
Before we start, let’s clarify some things.
systemd’s Timers are units. Units are the simplest form of systemd files. Units are describing “when and if” a unit service “should or must” run, based on real or relative time.
-
A real time example is similar to a cron job entry. You can find out all the configuration settings/values for OnCalendar here.
-
A relative time example is more close to something like:
“Run this unit service, ten minutes after boot, before this service and also that services must have already been started cause I am depend on them.”
List of systemd-timers
To view the declared timers on a systemd, run the below command:
$ systemctl list-timers
we can see all timers, even the in-active ones, with:
# systemctl list-timers --all
one simple example
ok, let’s start with an example.
I’ll use the /usr/local/bin directory to store my custom scripts, as this directory is in the PATH enviroment variable and I can run these scripts from anywhere.
Our systemd unit files, must be under the /etc/systemd/system/ directory.
Part One: The Script
As an example, the script will mount some volumes after boot time.
The basic script contents the below lines:
# cat /usr/local/bin/mount.volumes.sh
#!/bin/sh

/usr/bin/mount /mnt/backup
/usr/bin/mount /var/lib/docker
and make it executable:
# chmod +x /usr/local/bin/mount.volumes.sh
You can run this script, once or twice to see if everything goes as planned.
Part Two: The Service
Now it’s time to create a systemd service unit:
# vim /etc/systemd/system/mount.volumes.service
[Unit]
Description=Mount Backup & Docker Volume Service

[Service]
Type=simple
ExecStart=/usr/local/bin/mount.volumes.sh

[Install]
WantedBy=multi-user.target
Part Three: The Timer
Now it is time to create the systemd timer unit:
# vim /etc/systemd/system/mount.volumes.timer
We have to decide when we want to service to run.
eg. Every day, but 45sec after boot
[Unit]
Description=Mount Backup & Docker Volume @ reboot

[Timer]
OnBootSec=45sec
OnUnitActiveSec=1day
Unit=mount.volumes.service

[Install]
WantedBy=multi-user.target-
Time to wait after booting before we run first time: OnBootSec
-
Time between running each consecutive time: OnUnitActiveSec
voila !
Part Four: Enable Service
Be aware, we havent finished yet!
Check that systemd can identify these files:
# systemctl list-unit-files | egrep mount.volumes
mount.volumes.service  disabled
mount.volumes.timer    disabled
We can run the systemd service by hand:
# systemctl start mount.volumes.servicee
and see the ouput/results via journalct:
# journalctl -f
Part Five: Enable Timer
finally we need to start & enable (so that runs after reboot) the timer:
start
# systemctl start mount.volumes.timer
enable
# systemctl enable mount.volumes.timer
Created symlink /etc/systemd/system/multi-user.target.wants/mount.volumes.timer → /etc/systemd/system/mount.volumes.timer.after that:
# systemctl list-timers | egrep mount.volume
Sat 2018-01-27 09:51:01 EET 23h left Fri 2018-01-26 09:51:01 EET 1min 16s ago mount.volumes.timer mount.volumes.serviceverify
# systemctl list-unit-files | egrep mount.volume
systemctl list-unit-files | egrep mount.volume
mount.volumes.service                                            disabled
mount.volumes.timer                                              enabled
To all the systemd haters, I KNOW, its one line on crontab !
In my previous post , I documented my notes on setting up a new PowerDNS Recursor for our own clients.
In this post, I will present a simple way to reduce unnecessary traffic by blocking every FQDN you dont want.
Download a well known custom HOSTS file:
# curl -s -L http://winhelp2002.mvps.org/hosts.txt -o /etc/pdns-recursor/hosts.blocked
Add your FQDNs you want to block,
eg.
# echo "0.0.0.0 facebook.com" >> /etc/pdns-recursor/hosts.blocked
be very careful not to block something you need.
Reminder: No support for wildcards, only FQDNs
Edit your /etc/pdns-recursor/recursor.conf to support the new hosts file:
etc-hosts-file=/etc/pdns-recursor/hosts.blocked
export-etc-hosts=on
restart your pdns and test it
# dig www.facebook.com @localhost
;; ANSWER SECTION:
www.facebook.com.   86400   IN  A   0.0.0.0
Once you have done that, you can edit your hosts.blocked when ever you want!
But dont forget to reload:
# rec_control reload-zones