2FA SSH aka OpenSSH OATH, Two-Factor Authentication
prologue
Good security is based on layers of protection. At some point the usability gets in the way. My thread model on accessing systems is to create a different ssh pair of keys (private/public) and only use them instead of a login password. I try to keep my digital assets separated and not all of them under the same basket. My laptop is encrypted and I dont run any services on it, but even then a bad actor can always find a way.
Back in the days, I was looking on Barada/Gort. Barada is an implementation of HOTP: An HMAC-Based One-Time Password Algorithm and Gort is the android app you can install to your mobile and connect to barada. Both of these application have not been updated since 2013/2014 and Gort is even removed from f-droid!
Talking with friends on our upcoming trip to 34C4, discussing some security subjects, I thought it was time to review my previous inquiry on ssh-2FA. Most of my friends are using yubikeys. I would love to try some, but at this time I dont have the time to order/test/apply to my machines. To reduce any risk, the idea of combining a bastion/jump-host server with 2FA seemed to be an easy and affordable solution.
OpenSSH with OATH
As ssh login is based on PAM (Pluggable Authentication Modules), we can use Gnu OATH Toolkit. OATH stands for Open Authentication and it is an open standard. In a nutshell, we add a new authorization step that we can verify our login via our mobile device.
Below are my personal notes on how to setup oath-toolkit, oath-pam and how to synchronize it against your android device. These are based on centos 6.9
EPEL
We need to install the epel repository:
# yum -y install https://dl.fedoraproject.org/pub/epel/6/x86_64/epel-release-6-8.noarch.rpm
Searching packages
Searching for oath
# yum search oath
the results are similar to these:
liboath.x86_64       : Library for OATH handling
liboath-devel.x86_64 : Development files for liboath
liboath-doc.noarch   : Documentation files for liboath

pam_oath.x86_64      : A PAM module for pluggable login authentication for OATH
gen-oath-safe.noarch : Script for generating HOTP/TOTP keys (and QR code)
oathtool.x86_64      : A command line tool for generating and validating OTPs
Installing packages
We need to install three packages:
- pam_oath is the PAM for OATH
- oathtool is the gnu oath-toolkit
- gen-oath-safe is the program that we will use to sync our mobile device with our system
# yum -y install pam_oath oathtool gen-oath-safe
FreeOTP
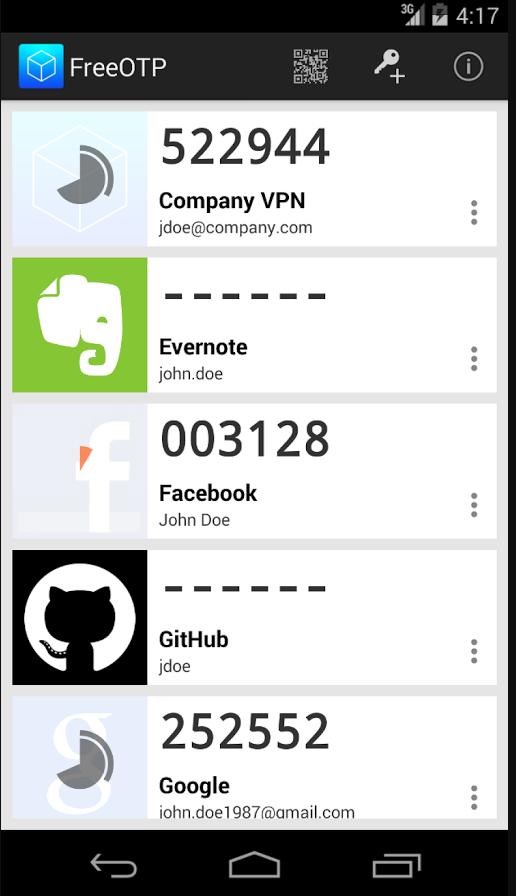
Before we continue with our setup, I believe now is the time to install FreeOTP

FreeOTP looks like:
HOTP
Now, it is time to generate and sync our 2FA, using HOTP
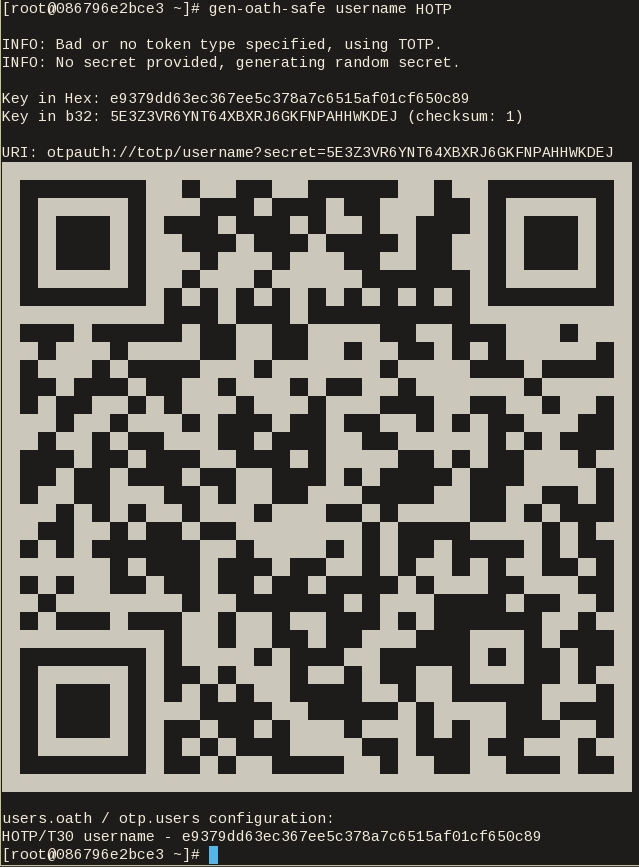
Generate
You should replace username with your USER_NAME !
# gen-oath-safe username HOTP
Sync
and scan the QR with FreeOTP

You can see in the top a new entry!

Save
Do not forget to save your HOTP key (hex) to the gnu oath-toolkit user file.
eg.
Key in Hex: e9379dd63ec367ee5c378a7c6515af01cf650c89
# echo "HOTP username - e9379dd63ec367ee5c378a7c6515af01cf650c89" > /etc/liboath/oathuserfile
verify:
# cat /etc/liboath/oathuserfile
HOTP username - e9379dd63ec367ee5c378a7c6515af01cf650c89OpenSSH
The penultimate step is to setup our ssh login with the PAM oath library.
Verify PAM
# ls -l /usr/lib64/security/pam_oath.so
-rwxr-xr-x 1 root root 11304 Nov 11 2014 /usr/lib64/security/pam_oath.soSSHD-PAM
# cat /etc/pam.d/sshd
In modern systems, the sshd pam configuration file seems:
#%PAM-1.0
auth       required pam_sepermit.so
auth       include      password-auth
account    required     pam_nologin.so
account    include      password-auth
password   include      password-auth
# pam_selinux.so close should be the first session rule
session    required     pam_selinux.so close
session    required     pam_loginuid.so
# pam_selinux.so open should only be followed by sessions to be executed in the user context
session    required     pam_selinux.so open env_params
session    required     pam_namespace.so
session    optional     pam_keyinit.so force revoke
session    include      password-auth
We need one line in the top of the file.
I use something like this:
auth sufficient /usr/lib64/security/pam_oath.so debug usersfile=/etc/liboath/oathuserfile window=5 digits=6
Depending on your policy and thread model, you can switch sufficient to requisite , you can remove debug option. In the third field, you can try typing just the pam_path.so without the full path and you can change the window to something else:
eg.
auth requisite pam_oath.so usersfile=/etc/liboath/oathuserfile window=10 digits=6Restart sshd
In every change/test remember to restart your ssh daemon:
# service sshd restart
Stopping sshd:                                             [  OK  ]
Starting sshd:                                             [  OK  ]
SELINUX
If you are getting some weird messages, try to change the status of selinux to permissive and try again. If the selinux is the issue, you have to review selinux audit logs and add/fix any selinux policies/modules so that your system can work properly.
# getenforce
Enforcing

# setenforce 0

# getenforce
Permissive
Testing
The last and most important thing, is to test it !

Links
- 34C3 - https://events.ccc.de/congress/2017/wiki/index.php/Main_Page
- HOTP - https://tools.ietf.org/html/rfc4226
- OATH - https://openauthentication.org/
- FreeOTP - https://freeotp.github.io
- Gnu OATH ToolKit - http://www.nongnu.org/oath-toolkit/index.html
- PAM - https://www.linux.com/news/understanding-pam
Post Scriptum
The idea of using OATH & FreeOTP can also be applied to login into your laptop as PAM is the basic authentication framework on a linux machine. You can use OATH in every service that can authenticate it self through PAM.
How to install Signal dekstop to archlinux
Download Signal Desktop
eg. latest version v1.0.41
$ curl -s https://updates.signal.org/desktop/apt/pool/main/s/signal-desktop/signal-desktop_1.0.41_amd64.deb \
    -o /tmp/signal-desktop_1.0.41_amd64.deb
Verify Package
There is a way to manually verify the integrity of the package, by checking the hash value of the file against a gpg signed file. To do that we need to add a few extra steps in our procedure.
Download Key from the repository
$ wget -c https://updates.signal.org/desktop/apt/keys.asc
--2017-12-11 22:13:34--  https://updates.signal.org/desktop/apt/keys.asc
Loaded CA certificate '/etc/ssl/certs/ca-certificates.crt'
Connecting to 127.0.0.1:8118... connected.
Proxy request sent, awaiting response... 200 OK
Length: 3090 (3.0K) [application/pgp-signature]
Saving to: ‘keys.asc’

keys.asc                          100%[============================================================>]   3.02K  --.-KB/s    in 0s

2017-12-11 22:13:35 (160 MB/s) - ‘keys.asc’ saved [3090/3090]
Import the key to your gpg keyring
$ gpg2 --import keys.asc
gpg: key D980A17457F6FB06: public key "Open Whisper Systems <support@whispersystems.org>" imported
gpg: Total number processed: 1
gpg:               imported: 1
you can also verify/get public key from a known key server
$ gpg2 --verbose --keyserver pgp.mit.edu --recv-keys 0xD980A17457F6FB06
gpg: data source: http://pgp.mit.edu:11371
gpg: armor header: Version: SKS 1.1.6
gpg: armor header: Comment: Hostname: pgp.mit.edu
gpg: pub  rsa4096/D980A17457F6FB06 2017-04-05  Open Whisper Systems <support@whispersystems.org>
gpg: key D980A17457F6FB06: "Open Whisper Systems <support@whispersystems.org>" not changed
gpg: Total number processed: 1
gpg:              unchanged: 1
Here is already in place, so no changes.
Download Release files
$ wget -c https://updates.signal.org/desktop/apt/dists/xenial/Release
$ wget -c https://updates.signal.org/desktop/apt/dists/xenial/Release.gpg
Verify Release files
$ gpg2 --no-default-keyring --verify Release.gpg Release
gpg: Signature made Sat 09 Dec 2017 04:11:06 AM EET
gpg:                using RSA key D980A17457F6FB06
gpg: Good signature from "Open Whisper Systems <support@whispersystems.org>" [unknown]
gpg: WARNING: This key is not certified with a trusted signature!
gpg:          There is no indication that the signature belongs to the owner.
Primary key fingerprint: DBA3 6B51 81D0 C816 F630  E889 D980 A174 57F6 FB06
That means that Release file is signed from whispersystems and the integrity of the file is not changed/compromized.
Download Package File
We need one more file and that is the Package file that contains the hash values of the deb packages.
$ wget -c https://updates.signal.org/desktop/apt/dists/xenial/main/binary-amd64/Packages
But is this file compromized?
Let’s check it against Release file:
$ sha256sum Packages
ec74860e656db892ab38831dc5f274d54a10347934c140e2a3e637f34c402b78 Packages$ grep ec74860e656db892ab38831dc5f274d54a10347934c140e2a3e637f34c402b78 Release
ec74860e656db892ab38831dc5f274d54a10347934c140e2a3e637f34c402b78 1713 main/binary-amd64/Packagesyeay !
Verify deb Package
Finally we are now ready to manually verify the integrity of the deb package:
$ sha256sum signal-desktop_1.0.41_amd64.deb
9cf87647e21bbe0c1b81e66f88832fe2ec7e868bf594413eb96f0bf3633a3f25 signal-desktop_1.0.41_amd64.deb$ egrep 9cf87647e21bbe0c1b81e66f88832fe2ec7e868bf594413eb96f0bf3633a3f25 Packages
SHA256: 9cf87647e21bbe0c1b81e66f88832fe2ec7e868bf594413eb96f0bf3633a3f25Perfect, we are now ready to continue
Extract under tmp filesystem
$ cd /tmp/
$ ar vx signal-desktop_1.0.41_amd64.deb
x - debian-binary
x - control.tar.gz
x - data.tar.xz
Extract data under tmp filesystem
$ tar xf data.tar.xz
Move Signal-Desktop under root filesystem
# sudo mv opt/Signal/ /opt/Signal/
Done
Actually, that’s it!
Run
Run signal-desktop as a regular user:
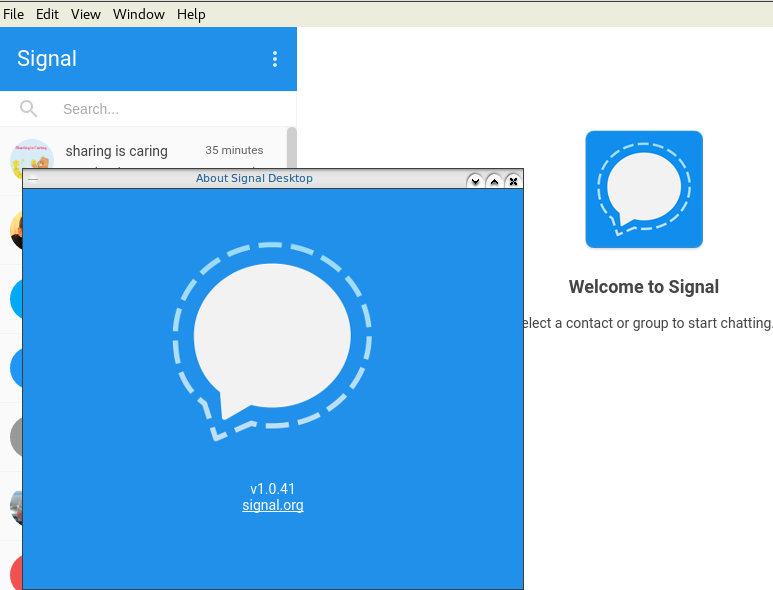
$ /opt/Signal/signal-desktop
Signal Desktop

Proxy
Define your proxy settings on your environment:
declare -x ftp_proxy="proxy.example.org:8080"
declare -x http_proxy="proxy.example.org:8080"
declare -x https_proxy="proxy.example.org:8080"
Signal