tinc-vpn :: Mini How To
tinc-vpn
tinc is a Virtual Private Network (VPN) daemon that uses tunnelling and encryption to create a secure private network between hosts on the Internet.
- Encryption, authentication and compression
- Automatic full mesh routing
- Easily expand your VPN
- Ability to bridge ethernet segments
- Runs on many operating systems and supports IPv6
install tinc-vpn
from source code:
VER="1.0.24"

wget -c http://tinc-vpn.org/packages/tinc-${VER}.tar.gz
wget -c http://tinc-vpn.org/packages/tinc-${VER}.tar.gz.sig

gpg --recv-keys 0xC0D71F4A
gpg -v --verify tinc-${VER}.tar.gz.sig tinc-${VER}.tar.gz


tar zxfv tinc-${VER}.tar.gz
cd tinc-${VER}

./configure --prefix=/usr --sysconfdir=/etc --localstatedir=/var
make

(become root)

# make installPKGBUILD
if you are using archlinux, there is a pretty way to create your own package !
# Maintainer:  Evaggelos Balaskas < ebalaskas _AT_ ebalaskas _DOT_ gr >
# Contributor: Evaggelos Balaskas < ebalaskas _AT_ ebalaskas _DOT_ gr >

pkgname=tinc
pkgver=1.0.24
pkgrel=1
pkgdesc="VPN (Virtual Private Network) daemon"
arch=('any')
url="http://www.tinc-vpn.org/"
license=('GPL')
depends=('lzo2' 'openssl')
backup=(etc/conf.d/tincd.conf)
source=(http://www.tinc-vpn.org/packages/tinc-$pkgver.tar.gz)

build() {
  cd "$srcdir/$pkgname-$pkgver"

  ./configure --prefix=/usr --sysconfdir=/etc --localstatedir=/var
  make
}

package() {
  cd "$srcdir/$pkgname-$pkgver"

  make DESTDIR="$pkgdir/" install
}

md5sums=('14a91eb2e85bdc0451a815612521b708')pre-setup
tinc-vpn is a great software, especially if you like working with simplicity & full mesh private networks !
Every node can route/serve a different network class!
And through them (vpn nodes) you can bridge networks that other way could connect each other.
Another advanced on mesh networking is that you are not depending on a single vpn server – exit node.
If somehow a node is out of the network (eg. power-off) the remaining nodes can talk to each other.
Unfortunately this tutorial isnt about full mesh vpn network!
This setup will provide you info, to configure a redirect-gateway solution (kind-of).
Before we begin our journey, lets clear the air !
Naming our nodes:
- Node 01: VPN-Server
- Node 02: homepc
- Node 03: laptop
- Node 04: android
We want our home-pc, laptop & android to connect & route their traffic through VPN-Server transparently.
Steps:
- Generate private/public keys on every node
- Configure every node to 'Connect to the Server'
- Configure the Subnets on every node
- Securely exchange all the hosts/* files as-is to all the nodes.
Tip: All the nodes must have the same hosts/* files. 4 nodes, 4 identically files
VPN-Server
The authentication between all the above machines is based on public keys !
So we need to create these public/private keys on every node and exchange them through a secure channel (sftp ?).
Let's begin by setting up our VPN-Server.
I want to keep things simply enough (for me to maintain them in the future)
so i will use the vpnserver as the net (network) name.
Creating folder
The below command will be creating hosts folder and all the parent folders if they dont exist.
(as root):
# mkdir -pv /etc/tinc/vpnserver/hosts/
Generate Keys
The next thing in our list, is to generate the private and public key of the vpn server.
# tincd -K 4096 -n vpnserver
Generating 4096 bits keys:
...................++ p
.......................................................................................................++ q
Done.
Please enter a file to save private RSA key to [/etc/tinc/vpnserver/rsa_key.priv]:
Please enter a file to save public RSA key to [/etc/tinc/vpnserver/hosts/vpnserver]:
As you can see the public key is on a different folder path than the private key.
!! DONT SHARE your PRIVATE key !!
Master Configuration file
you can use your favorite editor, mine is vim, to edit the master configuration file
# vim /etc/tinc/vpnserver/tinc.conf
add the below lines
Name = vpnserver
Device = /dev/net/tun
AddressFamily = ipv4
Subnets
We need to add the subnets that we want to route through our vpnserver.
Our network scheme is something like that:
10.20.30.0/24
- vpnserver: 10.20.30.1
- laptop: 10.20.30.2
- homepc; 10.20.30.3
- android: 10.20.30.4
So on the top of our public key, we should add the below lines.
# vim /etc/tinc/vpnserver/hosts/vpnserver
Address = THE_REAL_IP_OF_OUR_VPN_SERVER
Subnet = 10.20.30.1
Subnet = 0.0.0.0/0

-----BEGIN RSA PUBLIC KEY-----
...
...
-----END RSA PUBLIC KEY-----


be aware that the **Subnet = 0.0.0.0/0** is crucial if you want to setup a redirect-gateway solution
tinc-up
It is important to be very careful with the tinc-up and tinc-down shell (executable) files of tinc-vpn.
You dont want to be locked out from your own server !
# vim /etc/tinc/vpnserver/tinc-up
and add these lines:
#!/bin/sh

ip link set $INTERFACE up
ip addr add 10.20.30.1/24 dev $INTERFACE

echo 1 >/proc/sys/net/ipv4/ip_forward
tinc-down
# vim /etc/tinc/vpnserver/tinc-down
#!/bin/sh

ip addr flush dev $INTERFACE
ip link set $INTERFACE down
Make both files executable:
# chmod u+x /etc/tinc/vpnserver/tinc-*
Laptop
Creating folder
(as root)
# mkdir -pv /etc/tinc/laptop/hosts/
Generate Keys
# tincd -K 4096 -n laptop
Generating 4096 bits keys:
...................++ p
.......................................................................................................++ q
Done.
Please enter a file to save private RSA key to [/etc/tinc/laptop/rsa_key.priv]:
Please enter a file to save public RSA key to [/etc/tinc/laptop/hosts/laptop]:
again the public key is on a different path than the private !
again DONT SHARE your private keys – ever !!
Master Configuration file
# vim /etc/tinc/laptop/tinc.conf
We must add the ConnectTo option
ConnectTo = vpnserver
Name = laptop
Device = /dev/net/tun
AddressFamily = ipv4
Subnets
# vim /etc/tinc/laptop/hosts/laptop
Subnet = 10.20.30.2

-----BEGIN RSA PUBLIC KEY-----
...
...
-----END RSA PUBLIC KEY-----
tinc-up
The tinc-up file is a little more complicated that the vpn-server tinc-up file!
We need to get the current gateway to be used in a routing rule to our vpn-server real-ip.
If we dont do this, the connection to the vpn-server can not be done!
You have to remember that – every connection to the REAL_IP of the vpn server is going through the local gateway and not through the secure vpn tunnel !
#!/bin/sh

INT="laptop"
SUB="10.20.30.2/24"

GAW=`ip r | grep ^default | awk '{print $3}'`
DEV="wlan0"

ip addr add ${SUB} dev ${INT}
ip link set ${INT} up

ip route add REAL_IP_OF_VPN_SERVER via ${GAW} dev ${DEV}
ip route del 0/0
ip route add default dev ${INT}

/usr/bin/cp -f /etc/resolv.conf /etc/resolv.conf_BAK
# opennic server
echo nameserver 91.227.204.227 > /etc/resolv.conf
echo nameserver 78.138.97.33 >> /etc/resolv.conf
tinc-down
#!/bin/sh

ip addr flush dev $INTERFACE
ip link set $INTERFACE down

/usr/bin/cp -f /etc/resolv.conf_BAK /etc/resolv.conf
Make both files executable:
# chmod u+x /etc/tinc/vpnserver/tinc-*
firewall
You need to add the below lines at your iptables server conf:
# vim /etc/sysconfig/iptables
-A INPUT -m state --state NEW -m tcp -p tcp --dport 655 -j ACCEPT
-A INPUT -m state --state NEW -m udp -p udp --dport 655 -j ACCEPT
Activate
after the exchange of each hosts/* file to every other node (laptop/vpn-server)
you can test the tinc-vpn:
vpn-server
# tincd -D -d1 -n vpnserver

tincd 1.0.23 (Mar 11 2014 20:52:45) starting, debug level 1
/dev/net/tun is a Linux tun/tap device (tun mode)
Listening on 0.0.0.0 port 655
Ready
Connection from REAL_IP_OF_laptop port 56249
Connection with laptop (REAL_IP_OF_laptop port 56249) activated
laptop
# tincd -D -d1 -n laptop

tincd 1.0.23 (Oct 22 2013 08:55:57) starting, debug level 1
/dev/net/tun is a Linux tun/tap device (tun mode)
Listening on 0.0.0.0 port 655
Ready

Trying to connect to vpnserver (REAL_IP_OF_VPN_SERVER port 655)
Connected to vpnserver (REAL_IP_OF_VPN_SERVER port 655)
Connection with vpnserver (REAL_IP_OF_VPN_SERVER port 655) activated
android
So how about android ?
First Things First: Install Tinc GUI
It is easiest to create the files to your linux box and copied them to your android device.
My setup is based on Android OS (4.2 Jelly Bean) – my Fairphone
keys
Create the android keys
# tincd -K 4096
and save them as above (laptop instructions)
tinc.conf
Be aware the tun device in android is: /dev/tun
Name = android
ConnectTo = vpnserver
Device = /dev/tun
AddressFamily = ipv4
hosts
The hosts directory is exactly the same as the laptop hosts directory.
tinc-up
Now the difficult part, creating the tinc-up & tinc-down part !
Replace the THE_REAL_IP_OF_VPN_SERVER with the real ip of the vpn server !!
Be careful this is very important or your vpn connection will fall.
Replace the "/system/bin/mksh" with your android sh binary.
Mine is link to mksh.
#!/system/bin/mksh

# get the default gateway !
gw=` ip route | grep ^default | head -1 | awk '{print $3}' `

ip link set $INTERFACE up
ip addr add 10.20.30.4/24 dev $INTERFACE

ip route del 0/0

ip route add THE_REAL_IP_OF_VPN_SERVER via ${gw} dev wlan0

ip route add default dev $INTERFACE

echo 1 > /proc/sys/net/ipv4/conf/$INTERFACE/rp_filter
tinc-down
and the tinc-down file
#!/system/bin/mksh

ip addr flush dev $INTERFACE
ip link set $INTERFACE down

ip route del THE_REAL_IP_OF_VPN_SERVER

ip route add default dev wlan0
files
the file tree
# tree
.
+----- hosts
|        +---- android
|        +---- vpnserver
+----- rsa_key.priv
+----- tinc.conf
+----- tinc-up
+----- tinc-down


1 directory, 6 files
make a tar and adb push the tar file into your android device
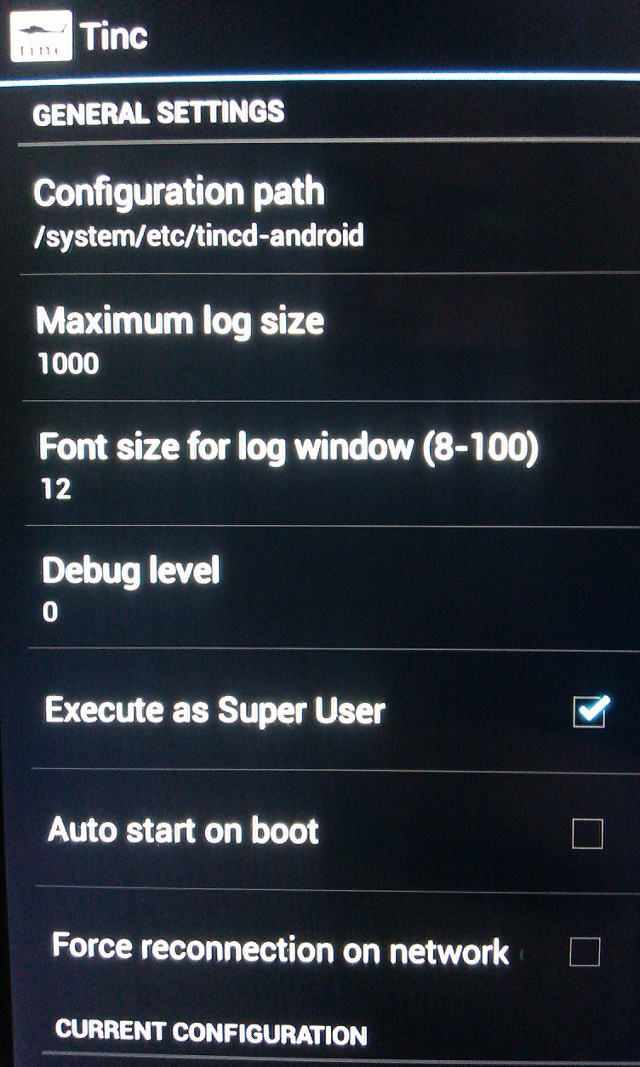
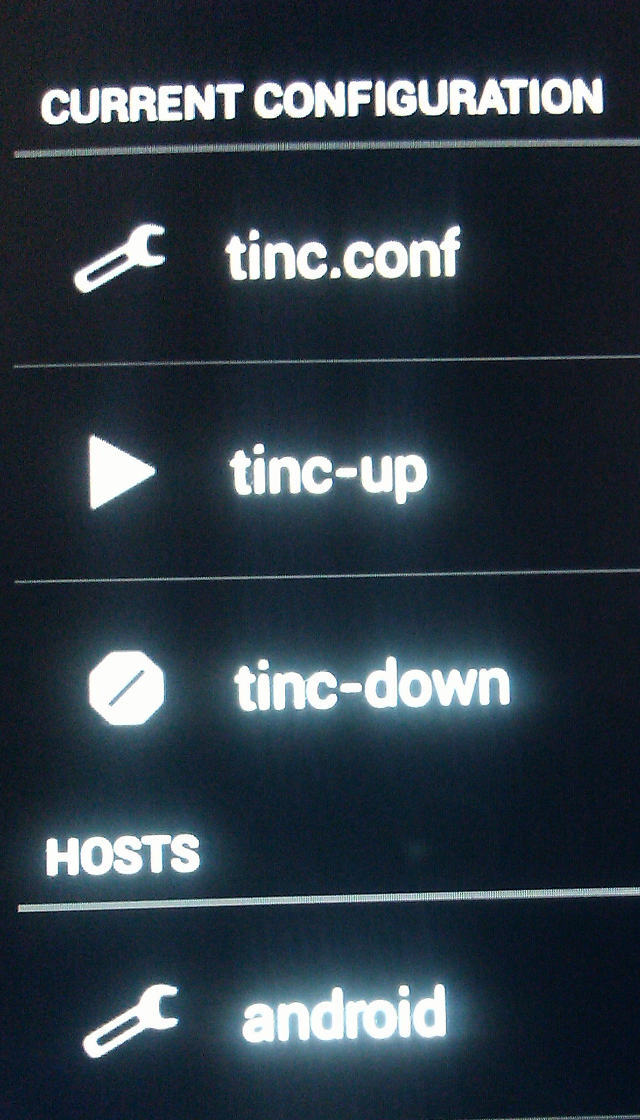
Tinc GUI
open the above program and configure it to the configuration path